
In this article we will learn about How to Setup Android Emulator. The Android Emulator can be run in a variety of configurations to simulate different devices. Each configuration is called a virtual device. When you deploy and test your app on the emulator, you select a pre-configured or custom virtual device that simulates a physical Android device such as a Nexus or Pixel phone. Please read my previous article Setting up the Android SDK for Xamarin.Android.
Hardware Acceleration for Emulator Performance
Here we discuss how your computer’s hardware acceleration features to maximize Android Emulator performance.
Visual Studio makes it easier for developers to test and debug their Xamarin. Android applications by using the Android emulator in situations where an Android device is unavailable or impractical. However, the Android emulator runs too slowly if hardware acceleration is not available on the computer that runs it. You can drastically improve the performance of the Android emulator by using special x86 virtual device images in conjunction with the virtualization features of your computer.
Accelerating Android emulators on Windows
The following virtualization technologies are available for accelerating the Android emulator:
- Microsoft’s Hyper-V and the Windows Hypervisor Platform (WHPX). Hyper-V is a virtualization feature of Windows that makes it possible to run virtualized computer systems on a physical host computer.
- Intel’s Hardware Accelerated Execution Manager (HAXM). HAXM is a virtualization engine for computers running Intel CPUs.
Enabling Hyper-V acceleration
If your computer meets the above criteria, use the following steps to accelerate the Android emulator with Hyper-V:
- Enter windows features in the Windows search box and select Turn Windows features on or off in the search results. In the Windows Features dialog, enable both Hyper-V and Windows Hypervisor Platform
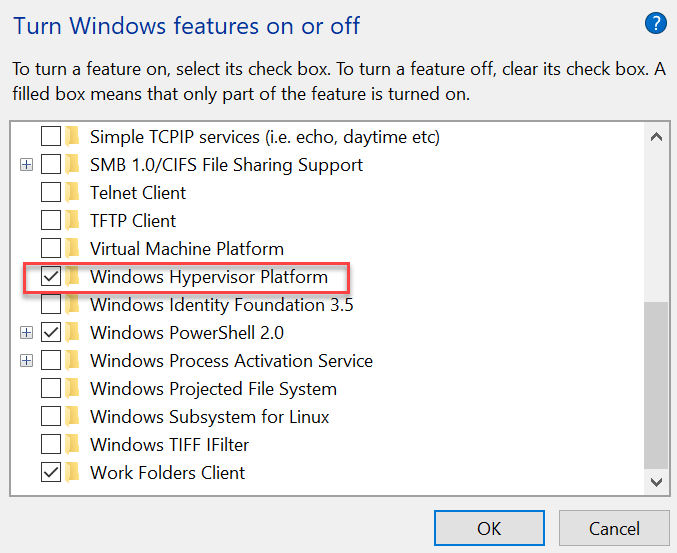
After making these changes, reboot your computer.
- Install Visual Studio 15.8 or later (this version of Visual Studio provides IDE support for running the Android emulator with Hyper-V).
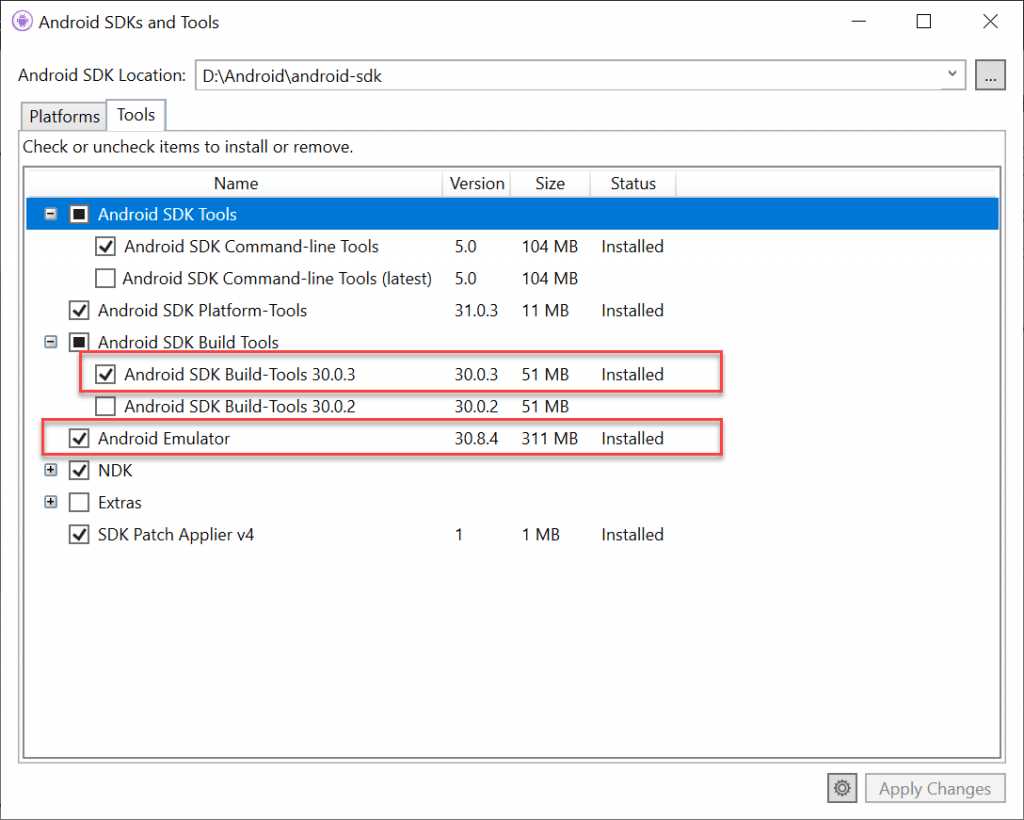
- Install the Android Emulator package 27.2.7 or later. To install this package, navigate to Tools > Android > Android SDK Manager in Visual Studio. Select the Tools tab and ensure that the Android emulator version is at least 27.2.7. Also ensure that the Android SDK Tools version is 26.1.1 or later:
Accelerating with HAXM
If your computer does not support Hyper-V, you may use HAXM to accelerate the Android emulator. You must disable Device Guard if you want to use HAXM.
HAXM install packages for Windows are available from the Intel Hardware Accelerated Execution Manager.
Android Device Manager on Windows
After you have verified that hardware acceleration is enabled (as described in Hardware Acceleration for Emulator Performance), the next step is to use the Android Device Manager (also referred to as the Xamarin Android Device Manager) to create virtual devices that you can use to test and debug your app.
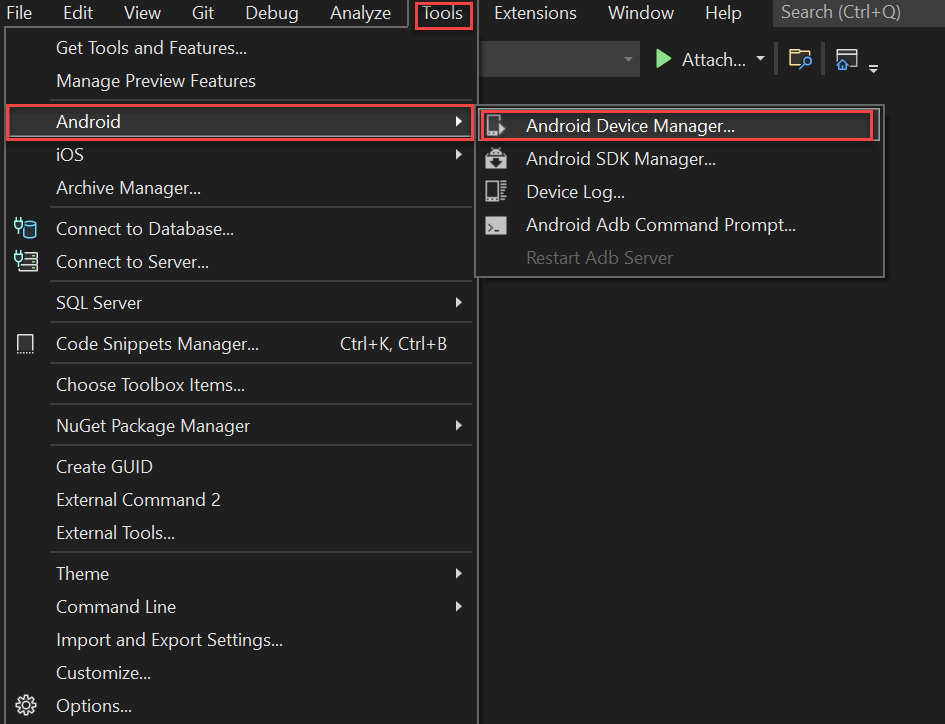
Tools > Android > Android Device Manager
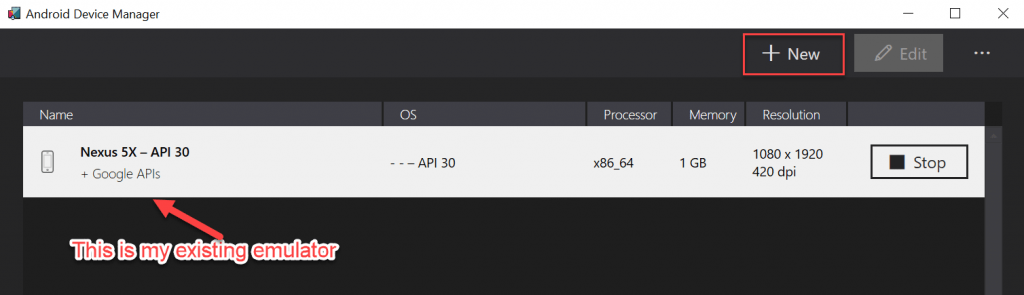
It open the below emulator screen, on below you can see my existing emulator. You can create the New button to set new emulator.

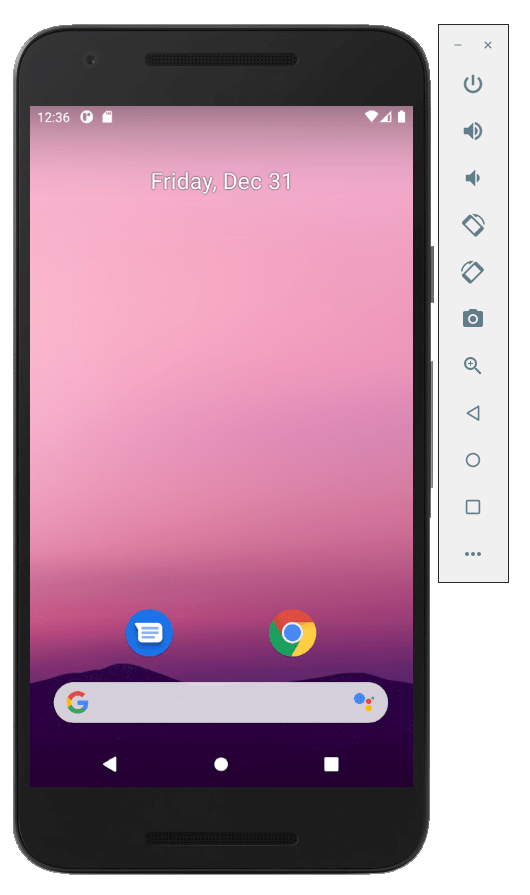
Click on create button and create the emulator. And then start the emulator, you can see the emulator open like below
You can Edit, Update and Delete Emulator device at any time on your system.
Conclusion
This guide introduced the Android Device Manager available in Visual Studio Tools for Xamarin and Visual Studio for Mac. It explained essential features such as starting and stopping the Android emulator, selecting an Android virtual device (AVD) to run, creating new virtual devices, and how to edit a virtual device.
Related Links
- Xamarin Project Structure
- Create a cross-platform Xamarin App
- My first Xamarin App- Hello world
- How to Setup Android Emulator
- Setting up the Android SDK for Xamarin.Android
Jayant Tripathy
Coder, Blogger, YouTuberA passionate developer keep focus on learning and working on new technology.