
In this article we will learn about Setting up the Android SDK for Xamarin.Android. Visual Studio includes an Android SDK Manager that you use to download Android SDK tools, platforms, and other components that you need for developing Xamarin.Android apps. Please read my previous article Windows Configuration in Xamarin.
The Xamarin Android SDK Manager helps you download the latest Android components that you need for developing your Xamarin.Android app. It replaces Google’s standalone SDK Manager, which has been deprecated.
Requirements
To use the Xamarin Android SDK Manager, you will need the following:
- Visual Studio 2019/2022 Community, Professional, or Enterprise.
- Visual Studio Tools for Xamarin version 4.10.0 or later (installed as part of the Mobile development with .NET workload).
The Xamarin Android SDK Manager also requires the Java Development Kit (which is automatically installed with Xamarin.Android). There are several JDK alternatives to choose from:
- By default, Xamarin.Android uses JDK 8, which is required if you are developing for API level 24 or greater (JDK 8 also supports API levels earlier than 24).
- You can continue to use JDK 7 if you are developing specifically for API level 23 or earlier.
- If you are using Visual Studio 15.8 Preview 5 or later, you can try using Microsoft’s Mobile OpenJDK Distribution rather than JDK 8.
Setting up SDK Manager
To start the SDK Manager in Visual Studio, click Tools > Android > Android SDK Manager
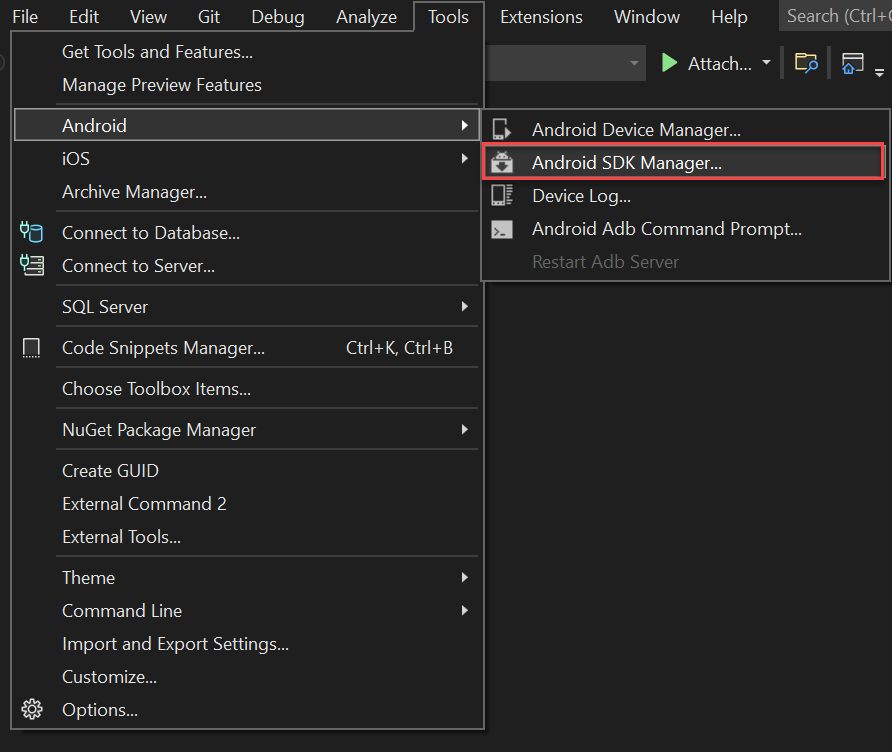
The Android SDK Manager opens in the Android SDKs and Tools screen. This screen has two tabs – Platforms and Tools
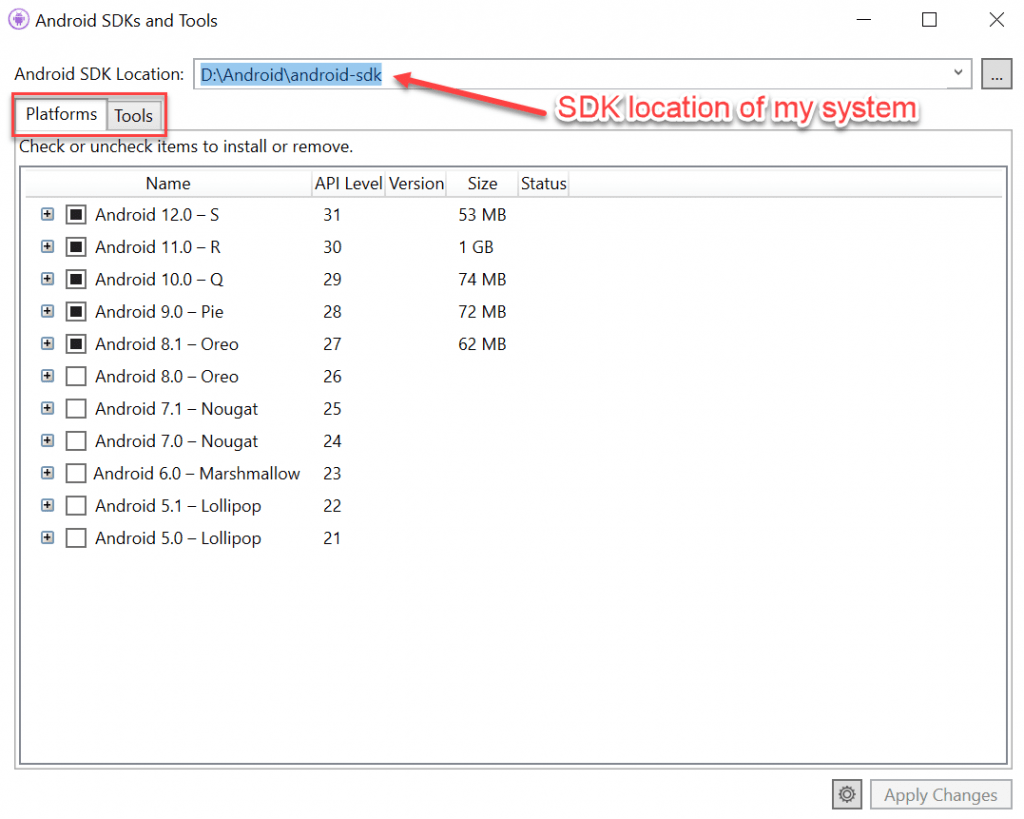
Android SDK location
The Android SDK location is configured at the top of the Android SDKs and Tools screen, as seen in the previous screenshot. This location must be configured correctly before the Platforms and Tools tabs will function properly.
To set the location of the Android SDK, click the ellipsis (…) button to the far right of Android SDK Location. This opens the Browse For Folder dialog to use for navigating to the location of the Android SDK. In the following screenshot, the Android SDK under Program Files (x86)\Android is being selected:
Generally, the Android SDK are stored depending upon your installation path, default is C drive, but in my case I installed Visual studio in D drive so the android-sdk are under D drive.
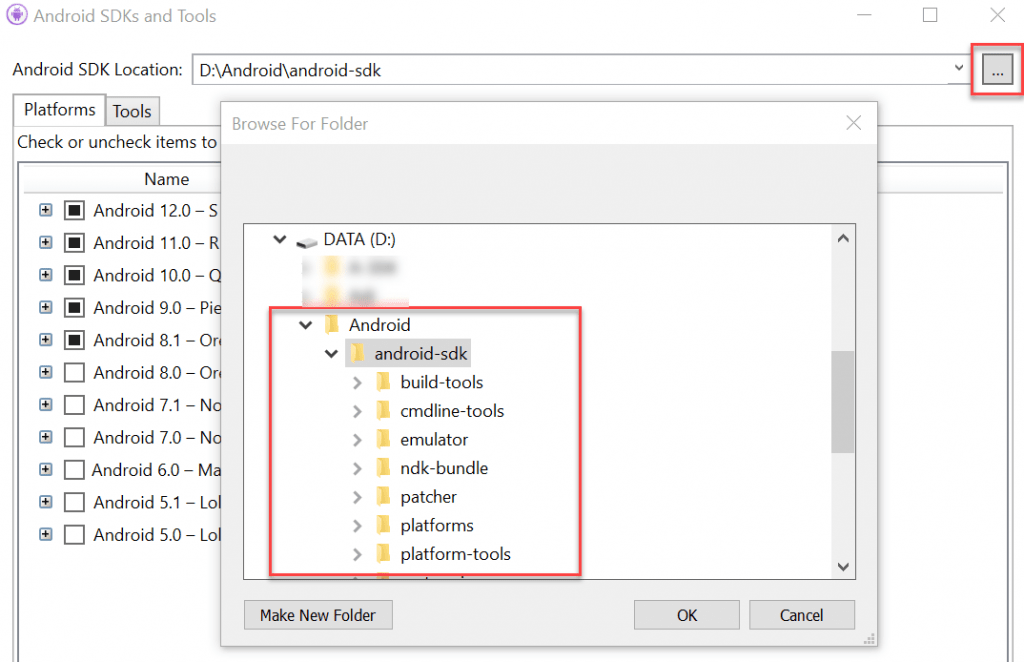
When you click OK, the SDK Manager will manage the Android SDK that is installed at the selected location.
Tools tab
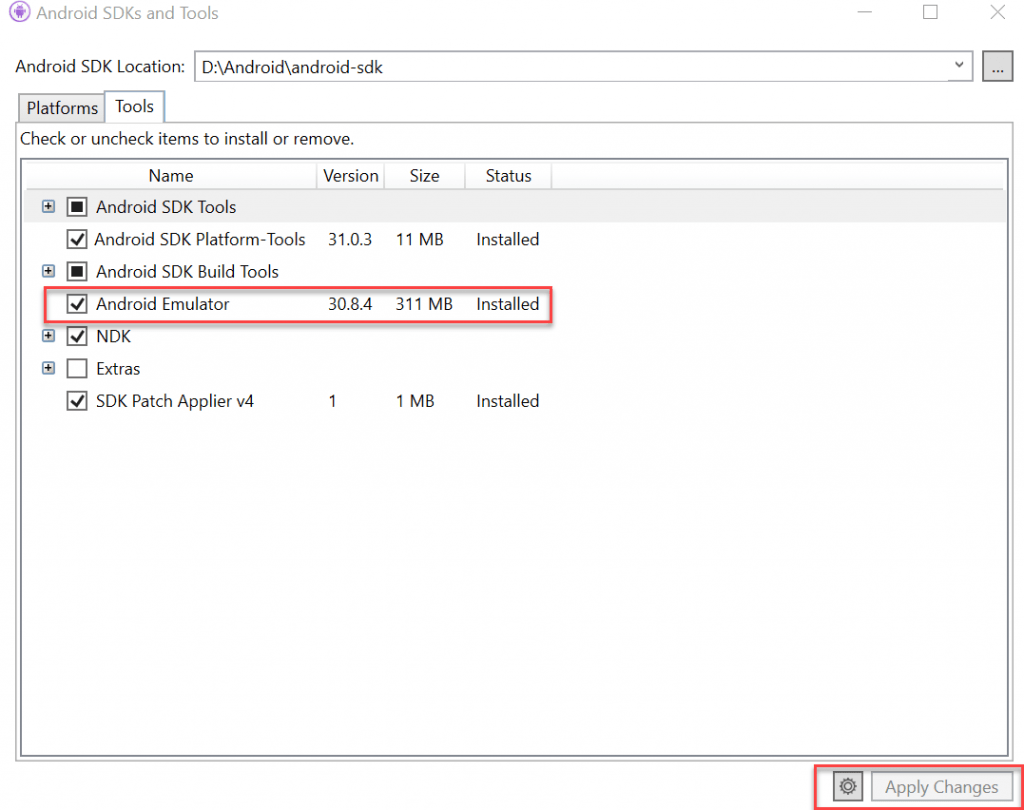
The Tools tab displays a list of tools and extras. Use this tab to install the Android SDK tools, platform tools, and build tools. Also, you can install the Android Emulator, the low-level debugger (LLDB), the NDK, HAXM acceleration, and Google Play libraries.
For example, to download the Google Android Emulator package, click the check mark next to Android Emulator and click the Apply Changes button
Platforms tab
The Platforms tab displays a list of platform SDK versions along with other resources (like system images) for each platform
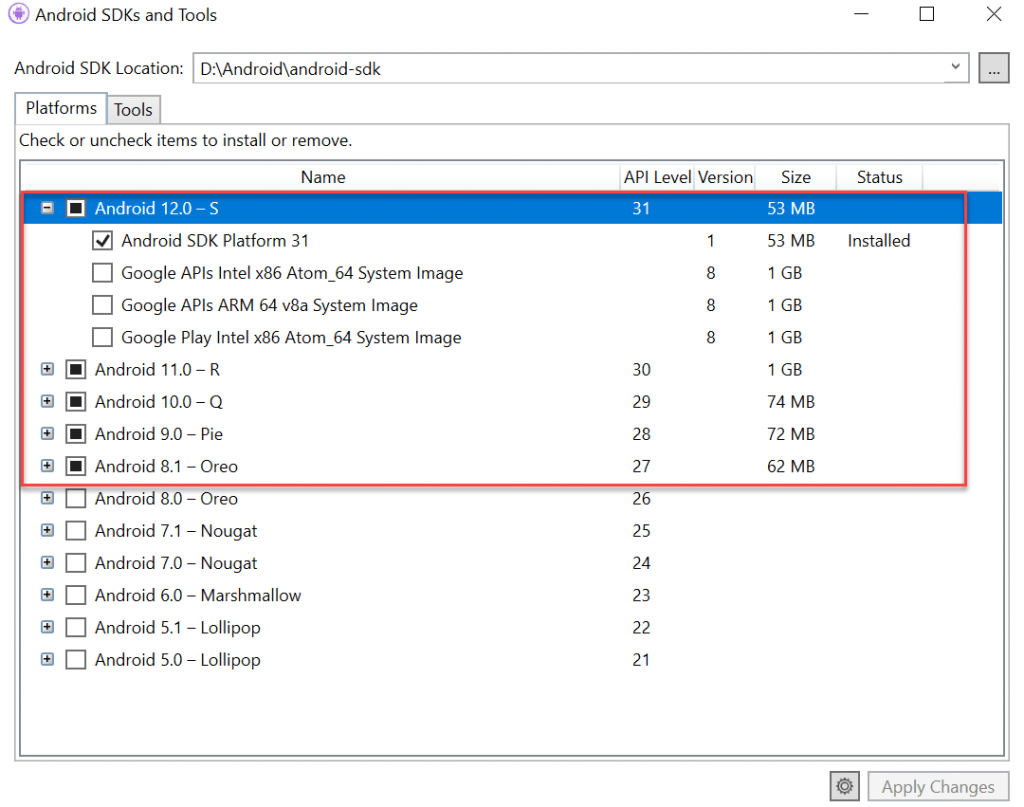
This screen lists the Android version (such as Android 8.1 to Android 12.0-S). It depends upon you which platform of android you want to target for, according to the requirement you can install it.
Notice that the number of components to install appears next to the Apply Changes button. After you click the Apply Changes button, you will see the License Acceptance screen as shown earlier. Click Accept if you accept the Terms and Conditions. You may see this dialog more than one time when there are multiple components to install. At the bottom of the window, a progress bar will indicate download and installation progress. When the download and installation process completes (this can take many minutes, depending on how many components need to be downloaded), the added components are marked with a checkmark and listed as Installed.
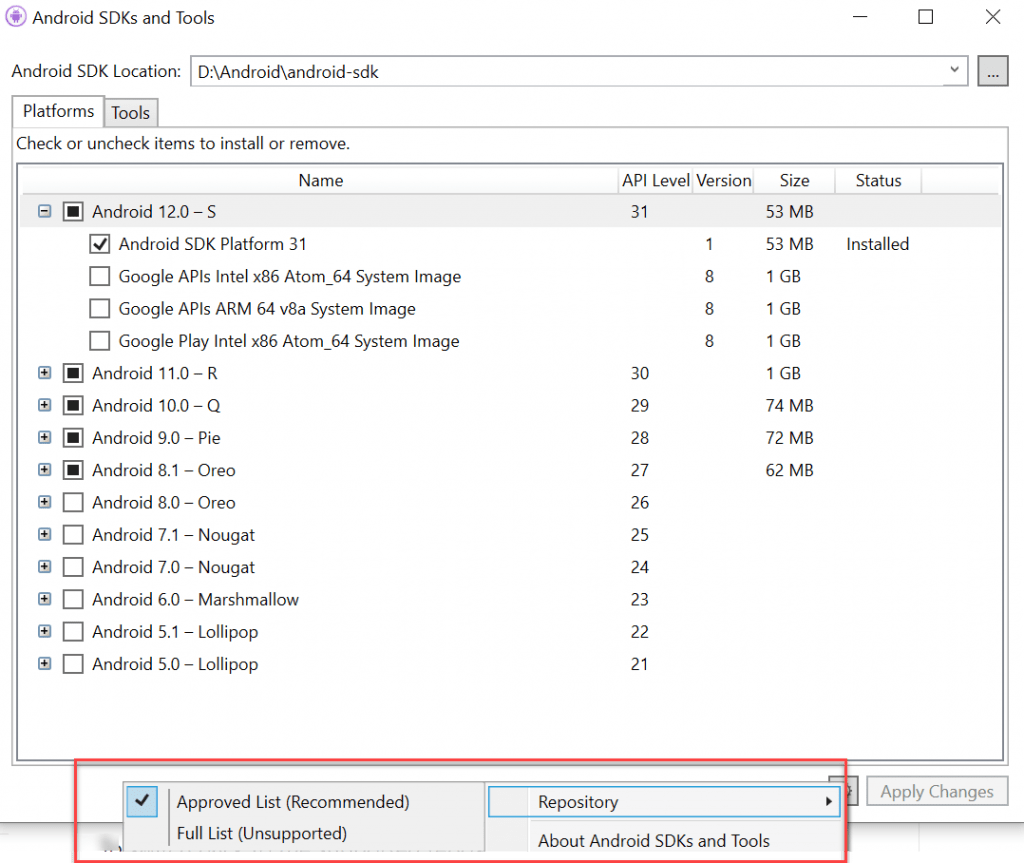
Repository selection
By default, the Android SDK Manager downloads platform components and tools from a Microsoft-managed repository. If you need access to experimental alpha/beta platforms and tools that are not yet available in the Microsoft repository, you can switch the SDK Manager to use Google’s repository. To make this switch, click the gear icon in the lower right-hand corner and select Repository > Full list (Unsupported)
References
https://docs.microsoft.com/en-us/xamarin/android/get-started/installation/android-sdk?tabs=windows
Conclusion
This guide explained how to install and use the Xamarin Android SDK Manager tool in Visual Studio.
Related Links
- Xamarin Project Structure
- Create a cross-platform Xamarin App
- My first Xamarin App- Hello world
- How to Setup Android Emulator
- Setting up the Android SDK for Xamarin.Android
Jayant Tripathy
Coder, Blogger, YouTuberA passionate developer keep focus on learning and working on new technology.