
In this article, we will learn about React Installation and Environment Setup. Here we will learn how to set up an environment for the successful development of ReactJS application. Please read my previous article Intro to ReactJS Application.
Pre-requisite for ReactJS
- NodeJS and NPM
- React and React DOM
- Webpack
- Babel
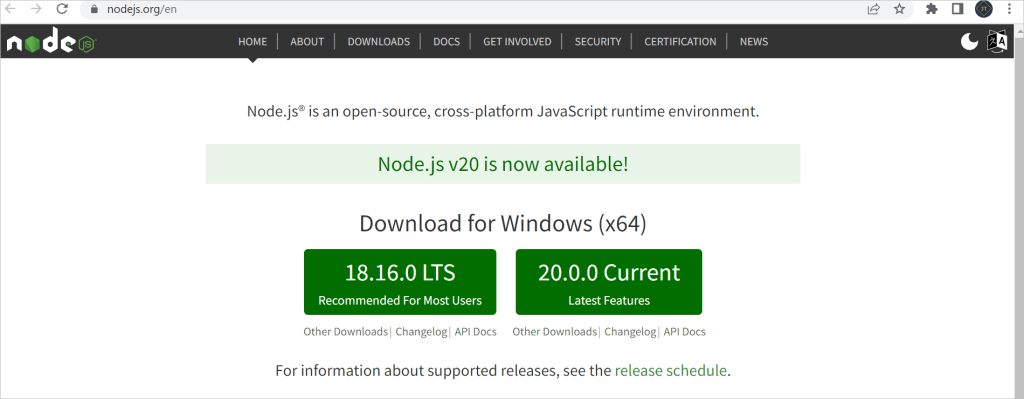
Step 1: Install Node.js installer for windows. Click on this link. Here install the LTS version (the one present on the left). Once downloaded open NodeJS without disturbing other settings, click on the Next button until it’s completely installed.
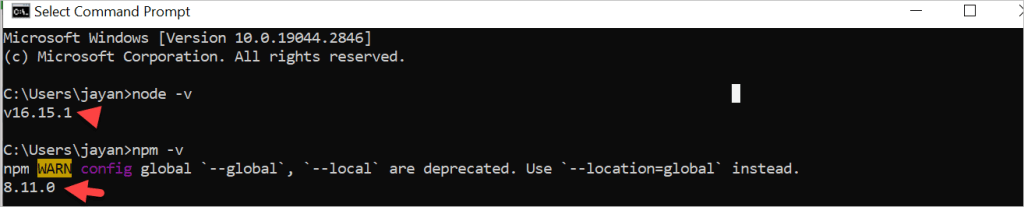
Step 2: Open command prompt to check whether it is completely installed or not type the command
node -v
npm-v
Installing ReactJS using webpack and babel
Webpack is a module bundler (manages and loads independent modules). It takes dependent modules and compiles them to a single (file) bundle. You can use this bundle while developing apps using command line or, by configuring it using webpack.config file.
Babel is a JavaScript compiler and transpiler. It is used to convert one source code to other. Using this you will be able to use the new ES6 features in your code where, babel converts it into plain old ES5 which can be run on all browsers. Plinko website
Step 1 – Create the Root Folder
Create a folder with name ReactJS on the desktop to install all the required files, using the mkdir command.
D:\JT\JayantTripathy.com> mkdir ReactJs
D:\JT\JayantTripathy.com> cd ReactJs
To create any module, it is required to generate the package.json file. Therefore, after Creating the folder, we need to create a package.json file. To do so you need to run the npm init command from the command prompt.
D:\JT\JayantTripathy.com\ReactJs> npm initStep 2 – install React and react dom
Since our main task is to install ReactJS, install it, and its dom packages, using install react and react-dom commands of npm respectively. You can add the packages we install, to package.json file using the –save option.
D:\JT\JayantTripathy.com\ReactJs>npm install react --save
D:\JT\JayantTripathy.com\ReactJs>npm install react-dom --save
Or, you can install all of them in single command as
D:\JT\JayantTripathy.com\ReactJs>npm install react react-dom --saveStep 3 – Install webpack
Since we are using webpack to generate bundler install webpack, webpack-dev-server and webpack-cli.
D:\JT\JayantTripathy.com\ReactJs>npm install webpack --save
D:\JT\JayantTripathy.com\ReactJs>npm install webpack-dev-server --save
D:\JT\JayantTripathy.com\ReactJs>npm install webpack-cli --save
Or, you can install all of them in single command as −
D:\JT\JayantTripathy.com\ReactJs>npm install webpack webpack-dev-server webpack-cli --saveStep 4 – Install babel
Install babel, and its plugins babel-core, babel-loader, babel-preset-env, babel-preset-react and, html-webpack-plugin
D:\JT\JayantTripathy.com\ReactJs>npm install babel-core --save-dev
D:\JT\JayantTripathy.com\ReactJs>npm install babel-loader --save-dev
D:\JT\JayantTripathy.com\ReactJs>npm install babel-preset-env --save-dev
D:\JT\JayantTripathy.com\ReactJs>npm install babel-preset-react --save-dev
D:\JT\JayantTripathy.com\ReactJs>npm install html-webpack-plugin --save-dev
Or, you can install all of them in single command as −
D:\JT\JayantTripathy.com\ReactJs>npm install babel-core babel-loader babel-preset-env
   babel-preset-react html-webpack-plugin --save-dev
Step 5 – Create the Files
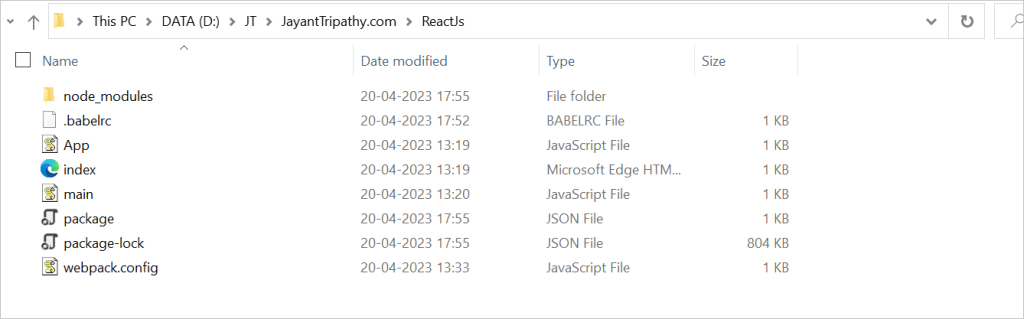
To complete the installation, we need to create certain files namely, index.html, App.js, main.js, webpack.config.js and, .babelrc. You can create these files manually or, using command prompt.
D:\JT\JayantTripathy.com\ReactJs>type nul > index.html
D:\JT\JayantTripathy.com\ReactJs>type nul > App.js
D:\JT\JayantTripathy.com\ReactJs>type nul > main.js
D:\JT\JayantTripathy.com\ReactJs>type nul > webpack.config.js
D:\JT\JayantTripathy.com\ReactJs>type nul > .babelrc
After all the installation, you can see the files are like below.
Set Compiler, Loader, and Server for React Application
Configure webpack
You can configure webpack in the webpack.config.js file by adding the following code. It defines your app entry point, build output and the extension which will resolve automatically. It also set the development server to 8080 port. It defines the loaders for processing various file types used within your app and wrap up by adding plugins needed during our development.
webpack.config.json
const path = require('path');
const HtmlWebpackPlugin = require('html-webpack-plugin');

module.exports = {
   entry: './main.js',
   output: {
      path: path.join(__dirname, '/bundle'),
      filename: 'index_bundle.js'
   },
   devServer: {
      //inline: true,
      port: 8080
   },
   module: {
      rules: [
         {
            test: /\.jsx?$/,
            exclude: /node_modules/,
        use: {
              loader: "babel-loader",
            }
         }
      ]
   },
   plugins:[
      new HtmlWebpackPlugin({
         template: './index.html'
      })
   ]
}
package.json
Modify the package.json file and delete “test” “echo \”Error: no test specified\” && exit 1″ inside “scripts” object. We are deleting this line since we will not do any testing in this tutorial. Let’s add the start and build commands instead.
"start": "webpack-dev-server --mode development --open --hot",
"build": "webpack --mode production"
HTML webpack template for index.html
We can add a custom template to generate index.html using the HtmlWeb-packPlugin plugin. This enables us to add a viewport tag to support mobile responsive scaling of our app. It also set the div id = “app” as a root element for your app and adding the index_bundle.js script, which is our bundled app file.
<!DOCTYPE html>
<html lang = "en">
   <head>
      <meta charset = "UTF-8">
      <title>React App</title>
   </head>
   <body>
      <div id = "app"></div>
      <script src = 'index_bundle.js'></script>
   </body>
</html>
App.jsx and main.js
This is the first React component. We will explain React components in depth in a subsequent chapter. This component will render Hello World.
App.js
import React, { Component } from 'react';
class App extends Component{
   render(){
      return(
         <div>
            <h1>Hello World</h1>
         </div>
      );
   }
}
export default App;
Main.js
import React from 'react';
import ReactDOM from 'react-dom';
import App from './App.js';

ReactDOM.render(<App />, document.getElementById('app'));
.babelrc
{
  "presets": ["@babel/preset-react"]
}
Running the Server
After completing the installation process and setting up the app, you can start the server by running the following command.
D:\JT\JayantTripathy.com\ReactJs> npm start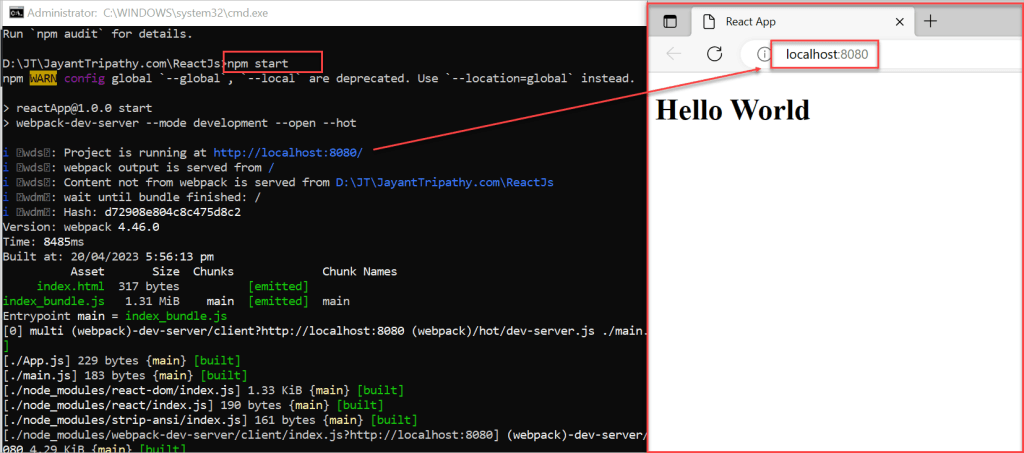
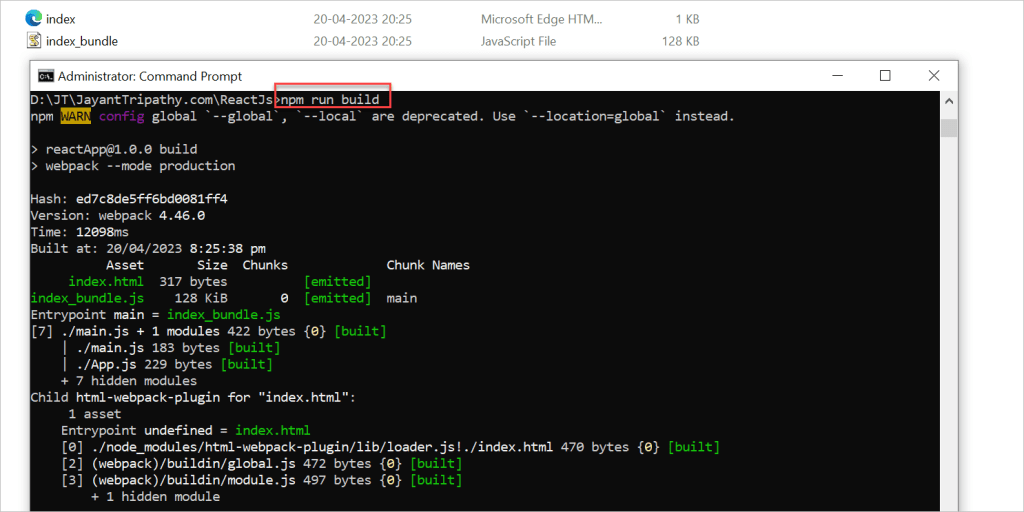
Generate the Bundle
Now, generate the bundle for your app. Bundling is the process of following imported files and merging them into a single file: a “bundle.” This bundle can then be included on a webpage to load an entire app at once. To generate this, you need to run the build command in command prompt which can be shown below.
Conclusion
In this article we discussed about React Installation and Environment Setup. Here we will learn how to set up an environment for the successful development of ReactJS application.
Leave behind your valuable queries and suggestions in the comment section below. Also, if you think this article helps you, do not forget to share this with your developer community. Happy Coding 🙂
SUPPORT ME