In this article we will learn about My first Xamarin App- Hello world. Here we discuss how to create the Xamarin app using visual studio. Please read all of my Xamarin articles on this link.
Creating new Xamarin project using Visual Studio
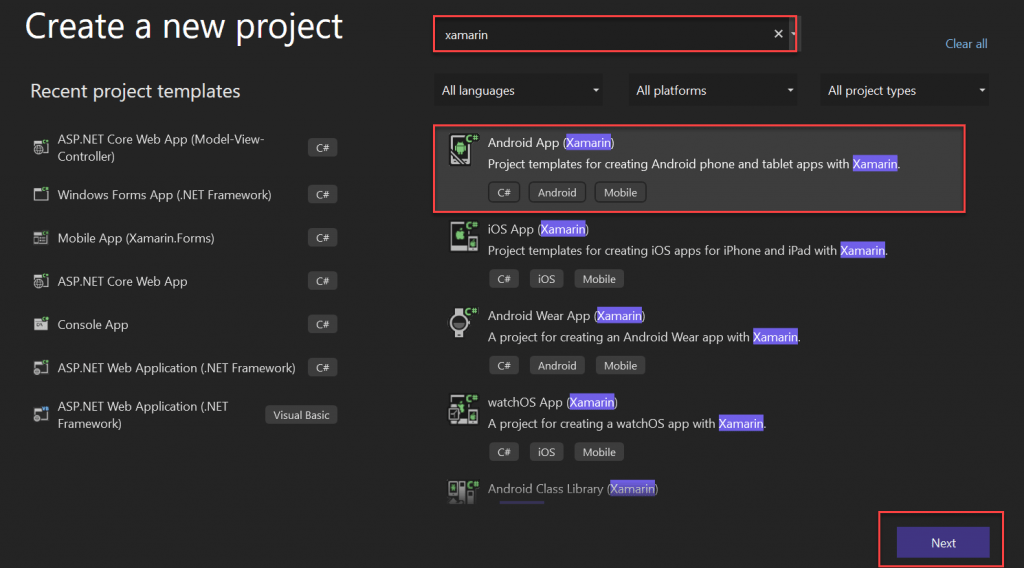
Open visual studio and create the New project and filter like below Xamarin. You can see various templets are showing like Android App, iOS App, Android wear App, watchOS App etc. We selected Android App(Xamarin)
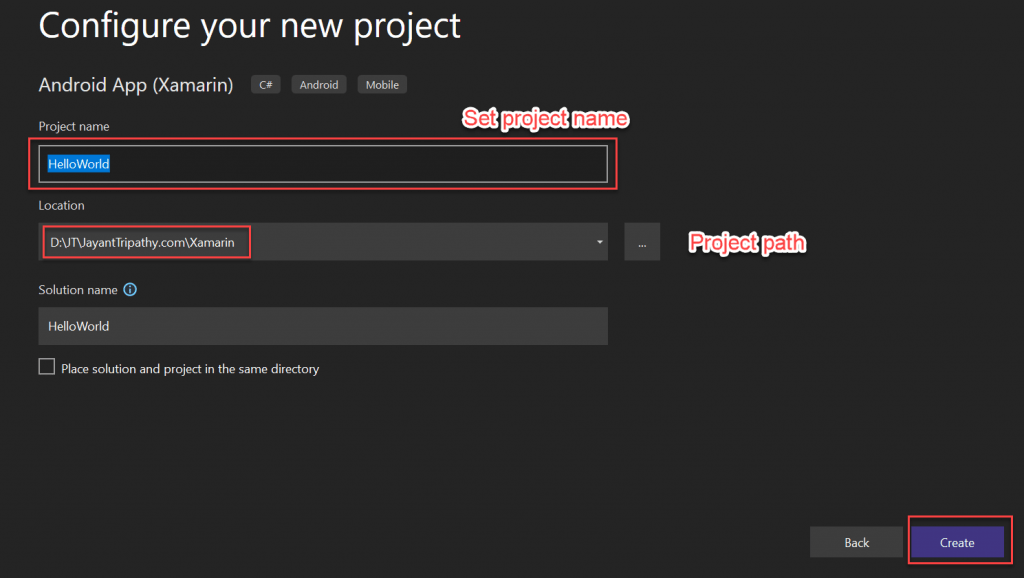
Set the project name and project path of the project. Here we set our project name as Hello world then click on create
Then it show the below template as like below, here we set Android 9.0 (pie) version, you can select according to your targeting version. We select the Single view App template.
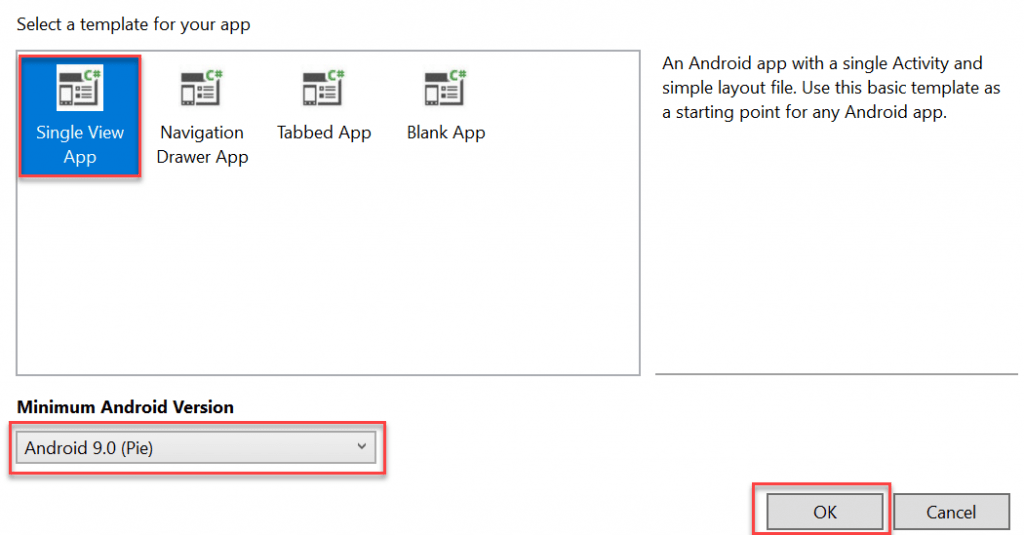
Single View App
If you want a quick development cycle avoid using blank apps, single view application has the benefit of shared code across all the projects and UI is created once and used across all the platforms.
Navigation Drawer App
The Xamarin.Android Navigation Drawer or Navigation Bar control is an interactive panel that emerges from the edge of the window and allows you to store content in a hidden panel.
Tabbed App
The Xamarin.Forms TabbedPage consists of a list of tabs and a larger detail area, with each tab loading content into the detail area. The following screenshots show a TabbedPage on iOS and Android:
Blank App
Use blank app if you want to design custom views using the native layouts for different platforms. Use single view application if you want your view to be shared across different platforms. You have the flexibility to use both approach in your project anyway. For example you can use Xamarin.forms for some data driven views and combine that with some native views for platform specific interactions.
Xamarin Project
Below are the structure of Xamarin project.
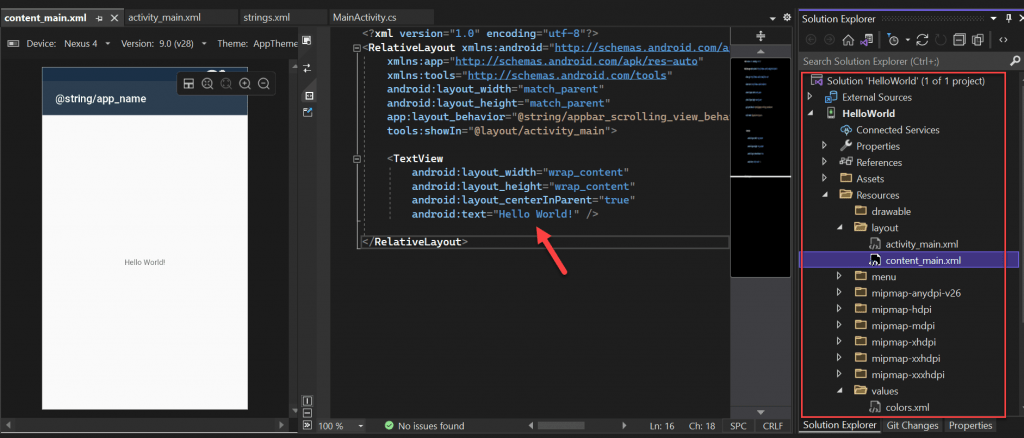
<?xml version="1.0" encoding="utf-8"?>
<RelativeLayout xmlns:android="http://schemas.android.com/apk/res/android"
    xmlns:app="http://schemas.android.com/apk/res-auto"
    xmlns:tools="http://schemas.android.com/tools"
    android:layout_width="match_parent"
    android:layout_height="match_parent"
    app:layout_behavior="@string/appbar_scrolling_view_behavior"
    tools:showIn="@layout/activity_main">

    <TextView
        android:layout_width="wrap_content"
        android:layout_height="wrap_content"
        android:layout_centerInParent="true"
        android:text="Hello World!" />

</RelativeLayout>
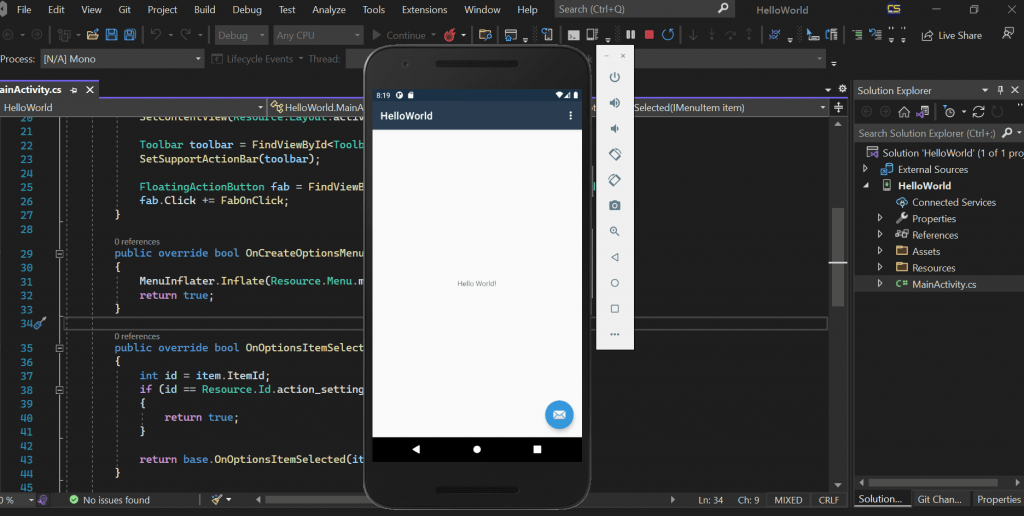
Finally, run the application and we can see the output like below that are display in Android emulator. If you want to learn how to configure Android Emulator please follow this, How to Setup Android Emulator.
Conclusion
This guide gave idea how to do My first Xamarin App- Hello world in Visual Studio Tools for Xamarin and run the application in android emulator.
Related Links
- Xamarin Project Structure
- Create a cross-platform Xamarin App
- My first Xamarin App- Hello world
- How to Setup Android Emulator
- Setting up the Android SDK for Xamarin.Android
Jayant Tripathy
Coder, Blogger, YouTuberA passionate developer keep focus on learning and working on new technology.
