
In this article we will learn about Event binding in Angular. Event binding is one way to bind from view to component. We use it to perform an action in the component when the user performs an action like clicking on a button, changing the input etc. in the view. Please read my previous article Style binding in Angular.
What is Event Binding in Angular?
When a user interacts with an application via keyboard movement, button click, mouse over, selecting from a drop-down list, typing in a textbox, and so on, an event is generated. These events must be handled in order to take action. This is where event binding comes into play, and we can use event binding in Angular Application to be notified when these events occur.
Syntax
The Angular event binding consists of two parts.
- We enclose the target event name in parentheses on the left side
- Assign it to a template statement within a quote on the right side
(target-event)="EventMethod"Angular event binding syntax consists of a target event name within parentheses on the left of an equal sign, and a quoted template statement on the right.
For example, the following event binding watches for button click events and calls the component’s onSave() method whenever one occurs.
<button (click)="onSave()">Save Me</button>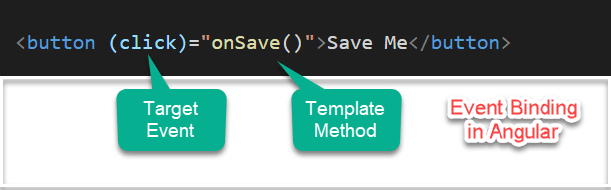
Angular Event Binding Example
Here on the below example we create clickMe() method when it click it increment the count by one.
export class AppComponent {
  clickCount=0;
  clickMe() {
    this.clickCount++;
  }
}
<button (click)="clickMe()">Click Me</button>
<p>You have clicked {{clickCount}}</p>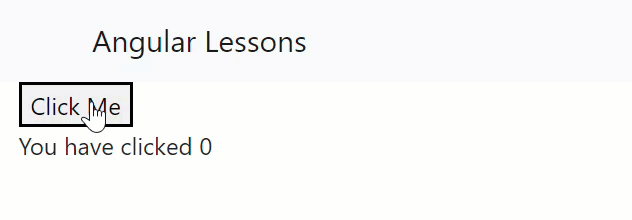
You can see the output like below, when we click it increment the value by 1.
Multiple event handlers
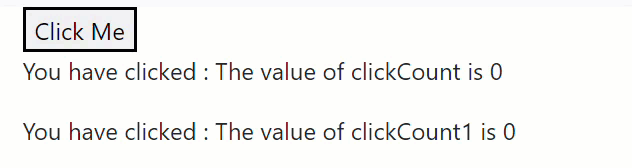
You can also bind an unlimited number of event handlers on the same event by separating them with a semicolon. And in the template, call clickMe() method and then an assignment clickCount1=clickCount it assign the values from clickCount to clickCount1.
export class AppComponent {
  clickCount=0;
  clickCount1=0;
  clickMe() {
    this.clickCount++;
  }
}
<button (click)="clickMe(); clickCount1=clickCount;">Click Me</button>
<p>You have clicked : The value of clickCount is {{clickCount}}</p>
<p>You have clicked : The value of clickCount1 is {{clickCount1}}</p>The output can display like below,
Toggle Event Handlers
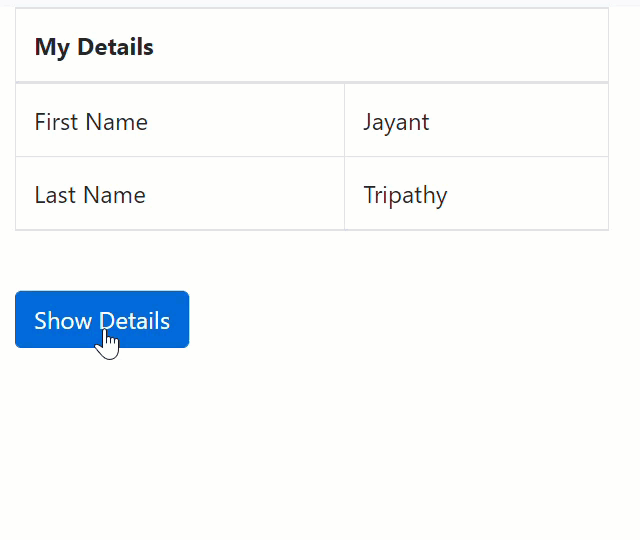
In this example we can see how we can use buttons to show() or hide() details using toggle logic.
export class AppComponent {
  ColumnSpan: number = 2;
  FirstName: string = 'Jayant';
  LastName: string = 'Tripathy';
  Gender: string = 'Male';
  Country: string = 'India';
  ShowDetails: boolean = false;
  ToggleDetails(): void {
      this.ShowDetails = !this.ShowDetails;
  }
}
<table class="table table-bordered">
<thead>
<tr>
<th attr.colspan="{{ColumnSpan}}">
My Details
</th>
</tr>
</thead>
<tbody>
<tr>
<td>First Name</td>
<td>{{FirstName}}</td>
</tr>
<tr>
<td>Last Name</td>
<td>{{LastName}}</td>
</tr>
<tr *ngIf='ShowDetails'>
<td>Gender</td>
<td>{{Gender}}</td>
</tr>
<tr *ngIf='ShowDetails'>
<td>Country</td>
<td>{{Country}}</td>
</tr>
</tbody>
</table>
<br />
<button (click)='ToggleDetails()' class="btn btn-primary">
{{ShowDetails ? 'Hide' : 'Show'}} Details
</button>The ngIf directive adds or removes content from the DOM conditionally based on whether an expression is true or false. If “ShowDetails” is set to true, the “Gender” and “Country” are added in<tr> elements are added to the DOM, otherwise they are removed.
$event Payload
DOM Events carries the event payload. i.e the information about the event. We can access the event payload by using $event as an argument to the handler function.
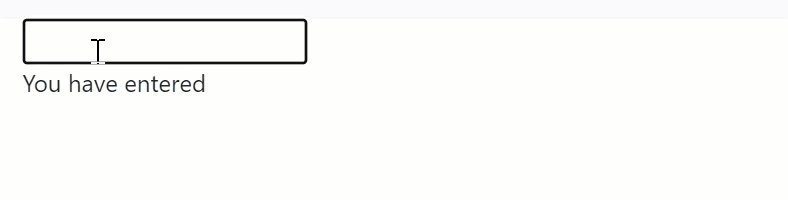
<input (input)="handleInput($event)">
<p>You have entered {{value}}</p>
The properties of a $event object vary depending on the type of DOM event. For example, a mouse event includes different information than an input box editing event.
export class AppComponent {
  value=""
  handleInput(event : any) {
    this.value = (event.target as HTMLInputElement).value;
  }
}
Template reference variable
We can also make use of the template reference variable to pass the value instead of $event.
<input #el (input)="handleInput1(el)">
<p>You have entered {{val}}</p>
val="";
handleInput1(element) {
this.val=element.value;
}Key event filtering (with key.enter)
We use keyup/keydown events to listen for keystrokes.
<input (keyup)="value1= $any($event.target).value" />
<p>You entered {{value1}}</p>
But Angular also offers a feature, where it helps to filter out certain keys. For Example, if you want to listen only to the enter keys you can do it easily.
<input (keyup.enter)="value2=$any($event.target).value">
<p>You entered {{value2}}</p>
That’s it for this article. I hope you are in good shape now to understand event binding in Angular.
Conclusion
Here we discussed about Event binding in Angular. Event binding is one way to bind from view to component. We use it to perform an action in the component when the user performs an action like clicking on a button, changing the input etc. in the view.
Leave behind your valuable queries and suggestions in the comment section below. Also, if you think this article helps you, do not forget to share this with your developer community. Happy Coding 🙂
Related Post
- Deploying Angular apps in Azure Blob Storage with CI/CD Integration 🚀
- Building a Chatbot in Angular using Gemini API
- Create a responsive sidebar with Angular Material- Angular 18 Example Series
- How to Deploy Angular 17/18 App in GitHub Pages
- How to convert Text To Speech With Azure Cognitive Services using Angular and .Net Core
Jayant Tripathy
Coder, Blogger, YouTuberA passionate developer keep focus on learning and working on new technology.
Thanks for finally talking about >Event binding in Angular
– Jayant Tripathy <Loved it!