
In this article, we will learn How to use Policy-based Authorization using JWT in .Net Core 7 and Angular. Here We will use JWT to implement authentication and policy-based authorization in the application. The web application will have two user roles: administrator and user. Each role will have role-based access to the application. We’ll go over how to set up and validate a JWT. Please read my previous article on How to use Azure Key Vault in ASP.Net Core.
Please find Source Code on this GitHub link.
Prerequisites
- Install the .NET Core 7.0 SDK from https://dotnet.microsoft.com/download
- Install the latest version of Visual Studio 2022 from https://visualstudio.microsoft.com/downloads/
- Basic knowledge of Angular
What is JWT?
JWT stands for JSON Web Token. It is an open standard that defines a compact and self-contained way to securely transfer data between two parties. JWT is digitally signed hence it can be verified and trusted. JWT is recommended to be used in a scenario when we need to implement Authorization or information exchange. To explore JWT in-depth please refer to the official website of JWT. Please read my previous article about JWT on JWT Authentication And Authorization With Identity Framework in .NET Core 6.0.
Creating an ASP.Net Core Angular Application to use Policy-based Authorization
Using the below steps we can create an ASP.Net Core Angular Application.
- Launch the Visual Studio IDE and click on “Create new project”.
- In the “Create new project” window, select “ASP.NET Core With Angular” from the list of templates displayed.
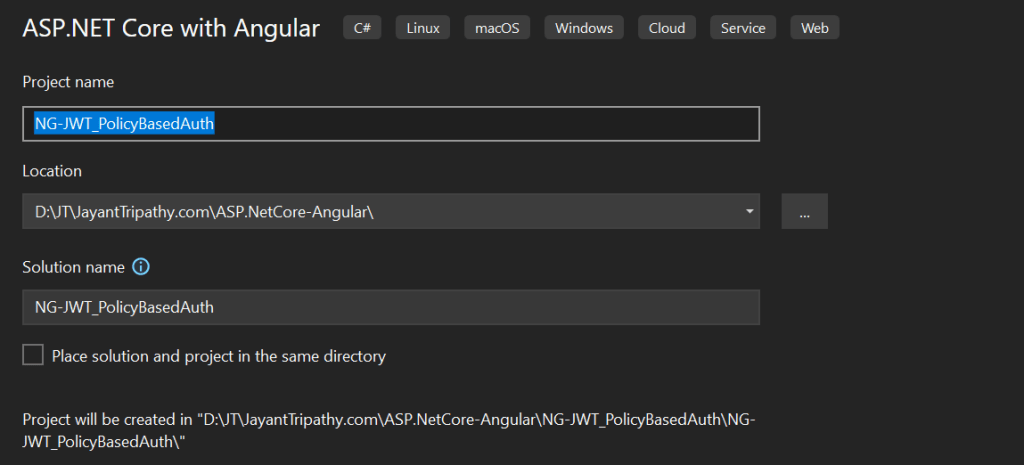
- Click Next. In the “Configure your new project” window, specify the name and location for the new project and then click Create.
- In the “Create New ASP.NET Core with Angular” window shown next, select .NET Core as the runtime and .NET 7.0 from the drop-down list at the top. Select “API” as the project template to create a new ASP.NET Core API application.
- Ensure that the checkboxes “Enable Docker Support” is disabled s we won’t be using the default feature we will add it manually later and “Configure for HTTPS” are checked.
- Ensure that Authentication is set as “No Authentication” as we won’t be using authentication either and Click Create.
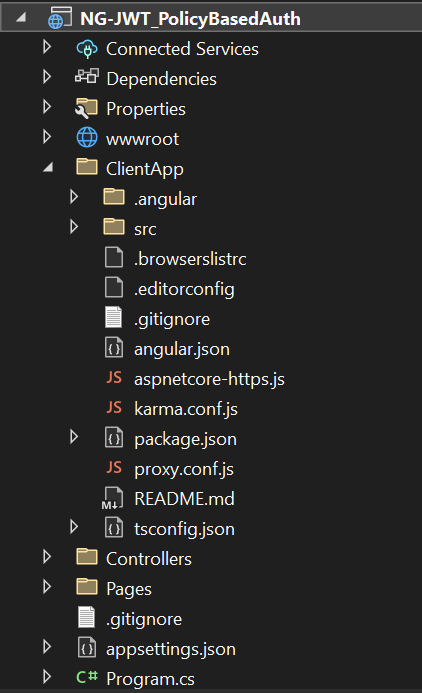
- The
ClientAppfolder contains the Angular code for our application. The Controllers folders will contain our API controllers. The angular components are present inside theClientApp\src\appfolder. The default template contains a few Angular components. These components won’t affect our application, but for the sake of simplicity, we will delete fetch data and counter folders from ClientApp/app/components folder. Also, remove the reference for these two components from theapp.module.tsfile. - Here the controller handles the APIs and ClientApp handles the UI
Adding the required Models
Right-click the Models folder and choose Add >> class. User.cs is the name of the class file. The User model will be stored in this file. Put the code below in this class.
 public class User
    {
        public string UserName { get; set; }
        public string? FirstName { get; set; }
        public string Password { get; set; }
        public string? UserType { get; set; }
}- Similarly, create a new class called
Policies.cs. The policies for role-based authorization will be defined in this class. We have created two policies for authorization. TheAdminPolicymethod will check for the “Admin” role while validating a request. Similarly, theUserPolicymethod will check for the “User” role while validating the request. We will register both of these policies in theProgram.csfile later in this article.
 public static class Policies
    {
        public const string Admin = "Admin";
        public const string User = "User";
        public static AuthorizationPolicy AdminPolicy()
        {
            return new AuthorizationPolicyBuilder().RequireAuthenticatedUser().RequireRole(Admin).Build();
        }
        public static AuthorizationPolicy UserPolicy()
        {
            return new AuthorizationPolicyBuilder().RequireAuthenticatedUser().RequireRole(User).Build();
        }
    }
Configure the appsettings.json file
Here we have added the SecretKey, Issuer and Audience for JWT Authentications.
"JWTAuth": {
    "SecretKey": "YrrP$3rtYW@8YYEEDREhhHRT$YuiOP",
    "Issuer": "https://localhost:4200/",
    "Audience": "https://localhost:4200/"
  }
For JWT, we will use the HmacSha256 encryption technique. This algorithm necessitates a 128-bit or 16-byte key. As a result, ensure that your key meets this condition, otherwise you will receive a run time error.
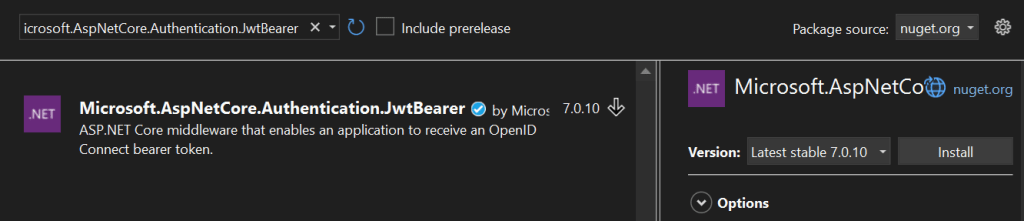
Install the Nuget Package
To configure ASP.NET Core middleware for JWT authentication and authorization, we will install the AspNetCore.Authentication.JwtBearer NuGet package.
Adding the Login Controller
We will add a Login Controller to our application which will handle the Login request from the user. Right-click on the Controllers folder and select Add >> New Item. An “Add New Item” dialog box will open. Select Web from the left panel, then select “API Controller Class” from templates panel and put the name as LoginController.cs
namespace NG_JWT_PolicyBasedAuth.Controllers
{
    [Produces("application/json")]
    [Route("api/[controller]")]
    [ApiController]
    public class LoginController : ControllerBase
    {
        private readonly AuthService _authservice;

        public LoginController(AuthService authservice)
        {
            _authservice = authservice;
        }
        [HttpGet]
        public IActionResult Login()
        {
            return Ok("Hello");
        }

        [HttpPost]
        [AllowAnonymous]
        public IActionResult Login([FromBody] User login)
        {
            IActionResult response = Unauthorized();
            User user = _authservice.AuthenticateUser(login);
            if (user != null)
            {
                var tokenString = _authservice.GenerateJWT(user);
                response = Ok(new
                {
                    token = tokenString,
                    userDetails = user,
                });
            }
            return response;
        }
    }
}- We’ve made a list of users named
appUsershere. This list will be used to validate user credentials. To keep things simple, we’re utilizing a hard-coded list. Ideally, we should save the user credentials in the database and then make a DB call to validate the information. The Login function will accept the user’s login information and then validate it by calling the AuthenticateUser method. - The AuthenticateUser function will check to see if the user details are in the appUsers user list. If the user information exists, the method will return an object of type User; otherwise, it will return null. If the user information is properly confirmed, we will call the GenerateJWT function.
 public class AuthService
    {
        private readonly IConfiguration _config;
        public AuthService(IConfiguration config)
        {
            _config = config;
        }
        public List<User> appUsers = new List<User>
        {
            new User {  FirstName = "Admin",  UserName = "admin", Password = "1234", UserType = "Admin" },
            new User {  FirstName = "Jayant",  UserName = "jayant", Password = "1234", UserType = "User" }
        };
        public User AuthenticateUser(User loginCredentials)
        {
            User user = appUsers.SingleOrDefault(x => x.UserName == loginCredentials.UserName && x.Password == loginCredentials.Password);
            return user;
        }
        public string GenerateJWT(User userInfo)
        {
            var securityKey = new SymmetricSecurityKey(Encoding.UTF8.GetBytes(_config["JWTAuth:SecretKey"]));
            var credentials = new SigningCredentials(securityKey, SecurityAlgorithms.HmacSha256);
            var claims = new[]
            {
                new Claim(JwtRegisteredClaimNames.Sub, userInfo.UserName),
                new Claim("firstName", userInfo.FirstName.ToString()),
                new Claim("role",userInfo.UserType),
                new Claim(JwtRegisteredClaimNames.Jti, Guid.NewGuid().ToString()),
            };
            var token = new JwtSecurityToken(
                issuer: _config["JWTAuth:Issuer"],
                audience: _config["JWTAuth:Audience"],
                claims: claims,
                expires: DateTime.Now.AddMinutes(30),
                signingCredentials: credentials
            );
            return new JwtSecurityTokenHandler().WriteToken(token);
        }
}- The JWT will be configured for our application using the
GenerateJWTfunction. As an encryption algorithm, we use HmacSha256. We will also generate claims that will be transmitted as payload along with our JWT. The claims will include user information such as UserName, FirstName, and UserType. This data will be used in the client app. Finally, we will generate the JWT by providing information such as issuer, audience, claims, expiry, andsigningCredentials. We have set the token’s expiry duration to 30 minutes from the moment it was created. With an OK response, we will return the JWT token to the client. If the user information is incorrect, we will send an Unauthorized answer.
Configuring the Program.cs file
var builder = WebApplication.CreateBuilder(args);

// Add services to the container.

builder.Services.AddAuthentication(JwtBearerDefaults.AuthenticationScheme)
  .AddJwtBearer(options =>
  {
      options.RequireHttpsMetadata = false;
      options.SaveToken = true;
      options.TokenValidationParameters = new TokenValidationParameters
      {
          ValidateIssuer = true,
          ValidateAudience = true,
          ValidateLifetime = true,
          ValidateIssuerSigningKey = true,
          ValidIssuer = builder.Configuration["JWTAuth:Issuer"],
          ValidAudience = builder.Configuration["JWTAuth:Audience"],
          IssuerSigningKey = new SymmetricSecurityKey(Encoding.UTF8.GetBytes(builder.Configuration["JWTAuth:SecretKey"])),
          ClockSkew = TimeSpan.Zero
      };
  });
builder.Services.AddAuthorization(config =>
{
    config.AddPolicy(Policies.Admin, Policies.AdminPolicy());
    config.AddPolicy(Policies.User, Policies.UserPolicy());
});

builder.Services.AddSingleton<AuthService>();
builder.Services.AddControllersWithViews();
builder.Services.AddCors(opt =>
{
    opt.AddDefaultPolicy(builder =>
    {
        builder.AllowAnyOrigin()
            .AllowAnyHeader()
            .AllowAnyMethod();
    });
});
var app = builder.Build();

// Configure the HTTP request pipeline.
if (!app.Environment.IsDevelopment())
{
    // The default HSTS value is 30 days. You may want to change this for production scenarios, see https://aka.ms/aspnetcore-hsts.
    app.UseHsts();
}

app.UseHttpsRedirection();
app.UseStaticFiles();
app.UseRouting();
app.UseCors();
app.UseAuthentication();
app.UseAuthorization();

app.MapControllerRoute(
    name: "default",
    pattern: "{controller}/{action=Index}/{id?}");

app.MapFallbackToFile("index.html");

app.Run();
We are adding the JWT authentication scheme using the AddAuthentication method. We have provided the parameters to validate the JWT. The description for each parameter is as shown below:
- ValidateIssuer = true: It will verify if the issuer data available in JWT is valid.
- ValidateAudience = true: It will verify if the audience data available in JWT is valid.
- ValidateLifetime = true: It will verify if the token has expired or not
- ValidateIssuerSigningKey = true: It will verify if the signing key is valid and trusted by the server.
- ValidIssuer: A string value that represents a valid issuer that will be used to check against the token’s issuer We will use the same value as we used while generating JWT.
- ValidAudience: A string value that represents a valid audience that will be used to check against the token’s audience. We will use the same value which we used while generating JWT.
- IssuerSigningKey: The secure key used to sign the JWT.
- ClockSkew: It will set the clock skew to apply when validating the expiry time.
Line #5-21: Here we have configured the JWT Authentication with the assigned keys.
Line #22-26, to registered the Policies according to our user portal.
Line #30-38: To enable the CORS origin request.
Line #51-53: Added to register the middleware for CORS, Authentication and Authorization.
Adding the User Controller
A user controller will be added to handle all user-specific requests. UserController.cs is a new API controller class.
- Here, we’ve introduced two methods that return whether a user is an administrator or an end user, also it validate the policies according to the users.
[Route("api/[controller]")]
    [ApiController]
    public class UserController : ControllerBase
    {
        [HttpGet]
        [Route("GetUserData")]
        [Authorize(Policy = Policies.User)]
        public IActionResult GetUserData()
        {
            return Ok("This is end user");
        }

        [HttpGet]
        [Route("GetAdminData")]
        [Authorize(Policy = Policies.Admin)]
        public IActionResult GetAdminData()
        {
            return Ok("This is an Admin user");
        }
    }
Working on the Client side of the application
The code for the client-side is available in the ClientApp folder. We will use VS Code to work with the client code.
Install Angular CLI
If you already have Angular CLI installed on your machine, you can skip this step. To install angular CLI on your PC, open a command window and run the following line.
npm install -g @angular/CLICreate the models
Create a folder called models inside the ClientApp\src\app folder. Now we will create a file user.ts in the models folder.
export class User {
    userName: string = '';
    firstName: string = '';
    isLoggedIn: boolean = false;
    role: string = '';
}
Similarly, create another file inside the models folder called roles.ts. This file will contain an enum, which will define roles for our application. Put the following code in it.
export enum UserRole {
    Admin = 'Admin',
    User = 'User'
}
Create the User Service
We will create an Angular service that will convert the Web API response to JSON and pass it to our component. Run the following command.
ng g s services\userimport { Injectable } from '@angular/core';
import { HttpClient } from '@angular/common/http';
import { map } from 'rxjs/operators';
@Injectable({
providedIn: 'root'
})
export class UserService {
myAppUrl = '';
constructor(private http: HttpClient) {
}
getUserData() {
return this.http.get('/api/user/GetUserData').pipe(map(result => result));
}
getAdminData() {
return this.http.get('/api/user/GetAdminData').pipe(map(result => result));
}
}We have defined two methods here to invoke our API endpoints. The method getUserData will invoke the GetUserData method from the User Controller to fetch the user data. The getAdminData method will invoke the GetAdminData method from the User Controller to fetch the Admin data.
Create the Auth Service
Run the following command to create the auth service class.
ng g s services\authimport { Injectable } from '@angular/core';
import { HttpClient } from '@angular/common/http';
import { BehaviorSubject } from 'rxjs';
import { map } from 'rxjs/operators';
import { Router } from '@angular/router';
import { User } from '../models/User';
@Injectable({
providedIn: 'root'
})
export class AuthService {
decodeUserDetails: any;
url: string = 'https://localhost:7245';
userData = new BehaviorSubject<User>(new User());
constructor(private http: HttpClient, private router: Router) { }
login(userDetails: any) {
return this.http.post<any>(this.url + '/api/login', userDetails)
.pipe(map(response => {
localStorage.setItem('authToken', response.token);
this.setUserDetails();
return response;
}));
}
setUserDetails() {
if (localStorage.getItem('authToken')) {
const userDetails = new User();
var localStoragevalue = localStorage.getItem('authToken');
if(localStoragevalue){
this.decodeUserDetails = JSON.parse(window.atob(localStoragevalue.split('.')[1]));
}
userDetails.userName = this.decodeUserDetails.sub;
userDetails.firstName = this.decodeUserDetails.firstName;
userDetails.isLoggedIn = true;
userDetails.role = this.decodeUserDetails.role;
this.userData.next(userDetails);
}
}
logout() {
localStorage.removeItem('authToken');
this.router.navigate(['/login']);
this.userData.next(new User());
}
}The login method will invoke the Login API method to validate the user details. If we get an OK response from the API, we will store the JWT in the local storage. The setUserDetails method will extract the payload data from JWT and store it in the BehaviorSubject object called userData. The logout method will clear the local storage and navigate the user back to the login page. It will also reset the userData object.
The Login Component
Run the following command in the command prompt to create the Login component. The --module flag will ensure that this component will get registered at app.module.ts
ng g c components/login --module appimport { Component, OnInit } from '@angular/core';
import { FormGroup, FormBuilder, Validators } from '@angular/forms';
import { ActivatedRoute, Router } from '@angular/router';
import { first } from 'rxjs/operators';
import { AuthService } from '../../services/AuthService';
@Component({
selector: 'app-login',
templateUrl: './login.component.html',
styleUrls: ['./login.component.css']
})
export class LoginComponent implements OnInit {
loading = false;
loginForm!: FormGroup;
submitted = false;
returnUrl: string = "";
constructor(private formBuilder: FormBuilder,
private route: ActivatedRoute,
private router: Router,
private authService: AuthService) { }
ngOnInit() {
this.loginForm = this.formBuilder.group({
username: ['', Validators.required],
password: ['', Validators.required]
});
}
get loginFormControl() { return this.loginForm.controls; }
onSubmit() {
this.submitted = true;
if (this.loginForm.invalid) {
return;
}
this.loading = true;
const returnUrl = this.route.snapshot.queryParamMap.get('returnUrl') || '/';
this.authService.login(this.loginForm.value)
.pipe(first())
.subscribe(
() => {
this.router.navigate([returnUrl]);
},
() => {
this.loading = false;
this.loginForm.reset();
this.loginForm.setErrors({
invalidLogin: true
});
});
}
}
<div class="col-md-6 offset-md-3 mt-5">
    <div *ngIf="loginForm.errors?.invalidLogin" class="alert alert-danger mt-3 mb-0">
      Username or Password is incorrect.
    </div>
    <div class="card">
      <h5 class="card-header">JWT Policy-based Authentication</h5>
      <div class="card-body">
        <form [formGroup]="loginForm" (ngSubmit)="onSubmit()">
          <div class="form-group">
            <label for="username">Username</label>
            <input type="text" formControlName="username" class="form-control" tabindex="1" autofocus
              [ngClass]="{ 'is-invalid': submitted && loginFormControl.username.errors }" />
            <div *ngIf="submitted && loginFormControl.username.errors" class="invalid-feedback">
              <div *ngIf="loginFormControl.username.errors.required">Username is required</div>
            </div>
          </div>
          <div class="form-group">
            <label for="password">Password</label>
            <input type="password" formControlName="password" class="form-control" tabindex="2"
              [ngClass]="{ 'is-invalid': submitted && loginFormControl.password.errors }" />
            <div *ngIf="submitted && loginFormControl.password.errors" class="invalid-feedback">
              <div *ngIf="loginFormControl.password.errors.required">Password is required</div>
            </div>
          </div>
          <button [disabled]="loading" class="btn btn-primary mt-3">
            <span *ngIf="loading" class="spinner-border spinner-border-sm mr-1"></span>
            Login
          </button>
        </form>
      </div>
    </div>
  </div>
We are creating a login form having two fields – Username and Password. Both the fields of the form are required fields. The onSubmit method will be called when we click on the Login button. We are using formControlName attribute to bind the input field to the loginForm controls. If the loginForm has invalidLogin error we will display an error message on the screen. We are using Bootstrap for styling the form.
User-home Component
The UserHomeComponent is accessible to the login with roles defined as “user”. Run the command mentioned below to create this component.
ng g c user-home --module appimport { Component, OnInit } from '@angular/core';
import { UserService } from 'src/app/services/UserService';
@Component({
selector: 'app-user-home',
templateUrl: './user-home.component.html',
styleUrls: ['./user-home.component.css']
})
export class UserHomeComponent implements OnInit {
userData: string = '';
constructor(private userService: UserService) { }
ngOnInit(): void {
}
fetchUserData() {
this.userService.getUserData().subscribe(
(result: any) => {
this.userData = result;
}
);
}
}
<h2>This is User home page</h2>
<hr />
<button class="btn btn-primary" (click)=fetchUserData()>Fetch Data</button>
<br />
<br />
<div>
    <h4>
        {{userData}}
    </h4>
</div>
We have defined a method fetchUserData which will invoke the getUserData method of the UserService class. This will return a string and we will store the result in a variable userData of type string.
Admin-home Component
The AdminHomeComponent is accessible to the login with roles defined as “admin”. Run the command mentioned below to create this component.
ng g c admin-home --module appimport { Component, OnInit } from '@angular/core';
import { UserService } from 'src/app/services/UserService';
@Component({
selector: 'app-admin-home',
templateUrl: './admin-home.component.html',
styleUrls: ['./admin-home.component.css']
})
export class AdminHomeComponent implements OnInit {
adminData: string = '';
constructor(private userService: UserService) { }
ngOnInit(): void {
}
fetchAdminData() {
this.userService.getAdminData().subscribe(
(result: any) => {
this.adminData = result;
}
);
}
}
<h2>This is Admin home page</h2>
<hr />
<button class="btn btn-primary" (click)=fetchAdminData()>Fetch Data</button>
<br />
<br />
<div>
    <h4>
        {{adminData}}
    </h4>
</div>
We have defined a method fetchAdminData which will invoke the getAdminData method of the UserService class. This will return a string and we will store the result in a variable adminData of type string.
We have defined a button and invoking the fetchAdminData on the button click. We are displaying the string value fetched from the API inside a <h4> tag.
Adding the links in Nav Menu
Open nav-menu.component.ts and update the NavMenuComponent class as shown below.
import { Component } from '@angular/core';
import { User } from '../models/User';
import { UserRole } from '../models/UserRole';
import { AuthService } from '../services/AuthService';

@Component({
  selector: 'app-nav-menu',
  templateUrl: './nav-menu.component.html',
  styleUrls: ['./nav-menu.component.css']
})
export class NavMenuComponent {
  isExpanded = false;
  userDataSubscription: any;
  userData = new User();
  userRole = UserRole;
  constructor(private authService: AuthService) {
    this.userDataSubscription = this.authService.userData.asObservable().subscribe(data => {
      this.userData = data;
    });
  }
  collapse() {
    this.isExpanded = false;
  }

  toggle() {
    this.isExpanded = !this.isExpanded;
  }
  logout() {
    this.authService.logout();
  }
}
We are subscribing to the userData subject of the AuthService class in the constructor and setting the value of a local variable userData. We will use the properties of userData object to toggle the nav-menu links in the template file. The logout method will call the logout method of the AuthService class.
<ul class="navbar-nav flex-grow">
<li
class="nav-item"
[routerLinkActive]="['link-active']"
[routerLinkActiveOptions]="{ exact: true }"
>
<a class="nav-link text-dark" [routerLink]="['/']">Home</a>
</li>
<li class="nav-item" [routerLinkActive]='["link-active"]'>
<a class="nav-link text-dark" *ngIf="!userData.isLoggedIn" [routerLink]='["/login"]'>Login</a>
</li>
<li class="nav-item" [routerLinkActive]='["link-active"]'>
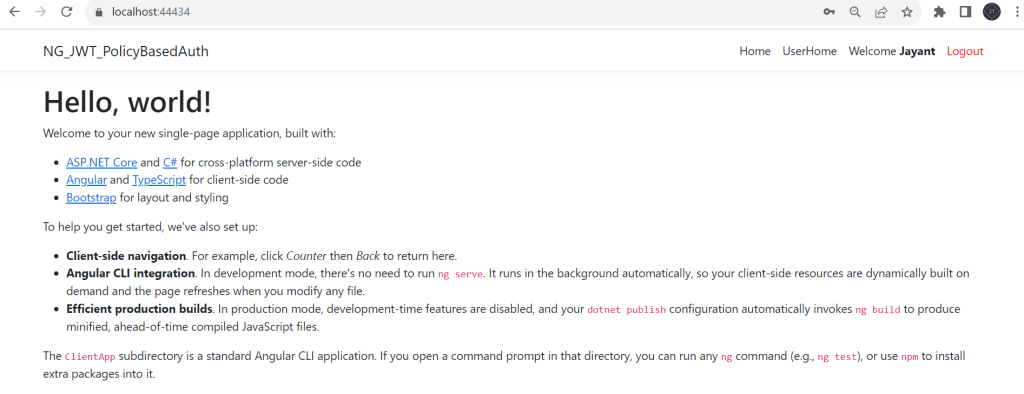
<a class="nav-link text-dark" *ngIf="userData.isLoggedIn && userData.role==userRole.User" [routerLink]='["/user-home"]' [routerLink]=''>UserHome</a>
</li>
<li class="nav-item" [routerLinkActive]='["link-active"]'>
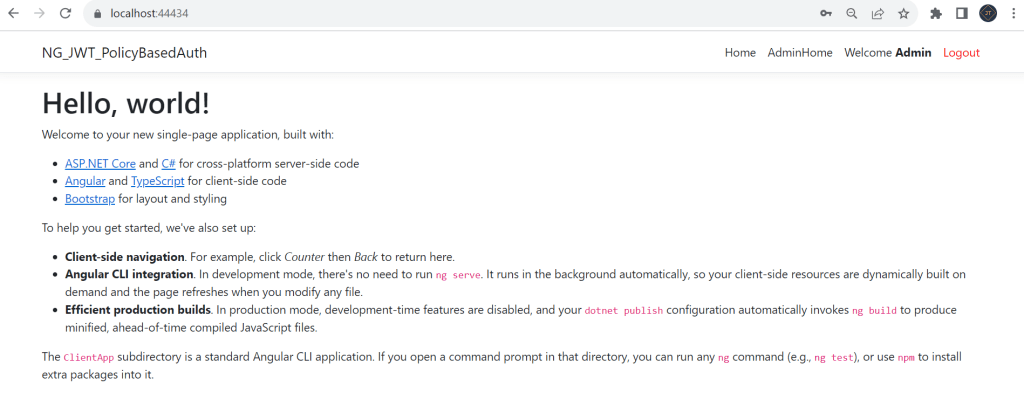
<a class="nav-link text-dark" *ngIf="userData.isLoggedIn && userData.role==userRole.Admin" [routerLink]='["/admin-home"]' [routerLink]=''>AdminHome</a>
</li>
<li class="nav-item" [routerLinkActive]='["link-active"]' *ngIf="userData.isLoggedIn">
<a class="nav-link text-dark">Welcome <b>{{userData.firstName}}</b> </a>
</li>
<li class="nav-item" [routerLinkActive]='["link-active"]'>
<a class="nav-link" *ngIf="userData.isLoggedIn" (click)=logout() [routerLink]='' style="color: red; cursor: pointer;"> Logout</a>
</li>
</ul>Here we are displaying the links for UserHome and AdminHome based on the role of the user. We are also toggling between the Login and Logout button based on the isLoggedIn property of userData object. Clicking on the Login button will navigate the user to the login page whereas clicking on the logout button will invoke the logout method. We will also display the firstName of the user along with a welcome message once the user is authenticated.
Securing the routes with route guards
To protect URL routes from unauthorized access we will create route guards. We will create two guards for protecting user routes and admin routes. Run the following commands to create an admin guard.
ng g g guards/admin --implements CanActivateimport { Injectable } from '@angular/core';
import { ActivatedRouteSnapshot, CanActivate, Router, RouterStateSnapshot, UrlTree } from '@angular/router';
import { Observable } from 'rxjs';
import { User } from '../models/User';
import { AuthService } from '../services/AuthService';
import { UserRole } from '../models/UserRole';
@Injectable({
providedIn: 'root'
})
export class AdminGuard implements CanActivate {
userDataSubscription: any;
userData = new User();
constructor(private router: Router, private authService: AuthService) {
this.userDataSubscription = this.authService.userData.asObservable().subscribe(data => {
this.userData = data;
});
}
canActivate(
next: ActivatedRouteSnapshot,
state: RouterStateSnapshot): Observable<boolean | UrlTree> | Promise<boolean | UrlTree> | boolean | UrlTree {
if (this.userData.role === UserRole.Admin) {
return true;
}
this.router.navigate(['/login'], { queryParams: { returnUrl: state.url } });
return false;
}
}
We will subscribe to userData subject in the constructor of the AdminGuard class. We will override the canActivate method of the interface CanActivate. This method will return true if the user role is Admin otherwise it will set the returnUrl and navigate to the login page.
Similarly, we will create another guard to protect user routes. Run the command shown below.
ng g g guards/auth --implements CanActivateimport { Injectable } from '@angular/core';
import { ActivatedRouteSnapshot, CanActivate, Router, RouterStateSnapshot, UrlTree } from '@angular/router';
import { Observable } from 'rxjs';
import { User } from '../models/User';
import { AuthService } from '../services/AuthService';
import { UserRole } from '../models/UserRole';
@Injectable({
providedIn: 'root'
})
export class AuthGuard implements CanActivate {
userDataSubscription: any;
userData = new User();
constructor(private router: Router, private authService: AuthService) {
this.userDataSubscription = this.authService.userData.asObservable().subscribe(data => {
this.userData = data;
});
}
canActivate(
next: ActivatedRouteSnapshot,
state: RouterStateSnapshot): Observable<boolean | UrlTree> | Promise<boolean | UrlTree> | boolean | UrlTree {
if (this.userData.role == UserRole.User) {
return true;
}
this.router.navigate(['/login'], { queryParams: { returnUrl: state.url } });
return false;
}
}This guard is similar to the AdminGuard. We will verify if the user role is User then return true else set the returnUrl and navigate to the login page.
Add Http Interceptor
We will create an HTTP interceptor service to send the authorization token in the header of each API request. This will make sure that only the authorized user can access a particular API. Run the command shown below to create HttpInterceptorService class.
ng g s services/http-interceptorimport { HttpEvent, HttpHandler, HttpInterceptor, HttpRequest } from '@angular/common/http';
import { Injectable } from '@angular/core';
import { Observable } from 'rxjs';
@Injectable({
providedIn: 'root'
})
export class HttpInterceptorService implements HttpInterceptor {
intercept(request: HttpRequest<any>, next: HttpHandler): Observable<HttpEvent<any>> {
const token = localStorage.getItem('authToken');
if (token) {
request = request.clone({
setHeaders: {
Authorization: `Bearer ${token}`,
}
});
}
return next.handle(request)
}
}The HttpInterceptorService class will implement the HttpInterceptor interface and override the intercept method. Inside this method, we will fetch the JWT from the localStorage. If the token exists we will modify the request header of the API call by assigning the token value to the Authorization property of headers.
Add Error Interceptor
We will add an error interceptor to intercept and handle the errors gracefully. This will make sure that the user experience is not hampered in case of any error from the server.
Run the command shown below to create ErrorInterceptorService.
ng g s services\error-interceptorimport { Injectable } from '@angular/core';
import { AuthService } from './AuthService';
import { HttpEvent, HttpHandler, HttpInterceptor, HttpRequest } from '@angular/common/http';
import { Observable, catchError, throwError } from 'rxjs';
@Injectable({
providedIn: 'root'
})
export class ErrorInterceptorService implements HttpInterceptor {
constructor(private authService: AuthService) { }
intercept(request: HttpRequest<any>, next: HttpHandler): Observable<HttpEvent<any>> {
return next.handle(request).pipe(catchError(err => {
if (err.status === 401) {
this.authService.logout();
}
return throwError(err.status);
}));
}
}
This is similar to HttpInterceptorService. We will implement the HttpInterceptor interface and inside the intercept method, we will catch the error from HttpRequest. If we get error code as 401 i.e. unauthorized from the server, we will invoke the logout method for that user.
Update App component
Open app.component.ts file and update the AppComponent class as shown below. This will make sure that the logged-in user data won’t be lost on page reload.
import { Component } from '@angular/core';
import { AuthService } from './services/AuthService';

@Component({
  selector: 'app-root',
  templateUrl: './app.component.html'
})
export class AppComponent {
  title = 'app';
  constructor(private authService: AuthService) {
    if (localStorage.getItem('authToken')) {
      this.authService.setUserDetails();
    }
  }
}
Update App module
At last, we will update the app.module.ts file by adding routes for our components and applying auth guards to the routes. We will also add our interceptors in the providers array.
imports: [
    BrowserModule.withServerTransition({ appId: 'ng-cli-universal' }),
    HttpClientModule,
    FormsModule,
    ReactiveFormsModule,
    RouterModule.forRoot([
      { path: '', component: HomeComponent, pathMatch: 'full' },
      { path: 'counter', component: CounterComponent },
      { path: 'fetch-data', component: FetchDataComponent },
      { path: 'login', component: LoginComponent },
      { path: 'user-home', component: UserHomeComponent, canActivate: [AuthGuard] },
      { path: 'admin-home', component: AdminHomeComponent, canActivate: [AdminGuard]}
    ])
  ],
  providers: [{ provide: HTTP_INTERCEPTORS, useClass: HttpInterceptorService, multi: true },
    { provide: HTTP_INTERCEPTORS, useClass: ErrorInterceptorService, multi: true },
    ],
    bootstrap: [AppComponent]
That’s it the change of Policy-based Authorization using JWT in .Net Core 7 and Angular. Run the application and you can see the output like below.
Please find Source Code on this GitHub link.
Conclusion
In this article, we discussed How to use Policy-based Authorization using JWT in .Net Core 7 and Angular. We built an ASP.NET Core application and enabled JWT authentication for it. We discovered how JWT is set up and validated on the server. Policy-based authorization is also available in the application. For our application, we defined two roles and gave role-based access for each. The client app is built with Angular. We also built interceptors for our client to transmit authorization tokens in the headers and handle any server problem responses.
Leave behind your valuable queries and suggestions in the comment section below. Also, if you think this article helps you, do not forget to share this with your developer community. Happy Coding 🙂
Related Articles
- Step-by-Step Guide to Using Azure Redis Cache in ASP.NET Core 9 Web API
- .NET 8 Authentication with Identity in a Web API using Bearer Tokens and Cookies
- How to convert Text To Speech With Azure Cognitive Services using Angular and .Net Core
- CRUD operation using the repository pattern with .Net 8, Ef-Core, and MySQL
- How to use Response Compression in .NET Core
- How to Integrate GraphQL in .Net Core
- Upload Download and Delete files in Azure Blob Storage using ASP.NET Core and Angular
- How to upload files to Azure Blob Storage using Asp.Net Core Web API
- How to store app secrets in ASP.NET Core using Secret Manager
- Logging into Azure App Service with ASP.Net Core
SUPPORT ME