
In this article we will learn about Introduction to Angular Components. Here we discuss the building blocks of the components and the important metadata properties of Angular Components like selector, template, styleURL, etc. We also show you how to create a simple component in Angular. Please read full angular course here.
What is an Angular Component
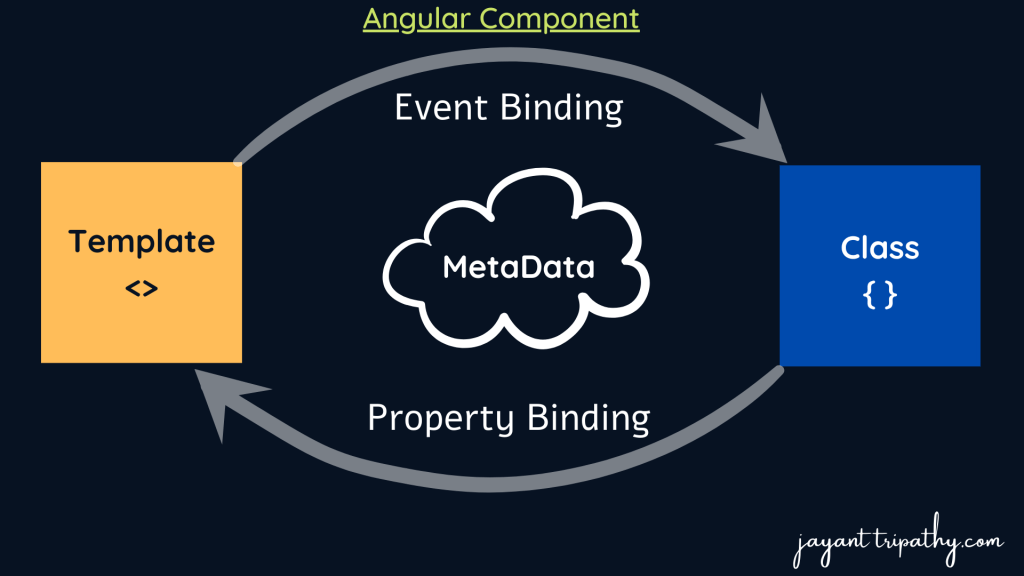
The Component is the main building block of an Angular Application. The Component contains the data & user interaction logic that defines how the View looks and behaves. A view in Angular refers to a template (HTML).
This means an angular application can be viewed as a collection of components and one component is responsible for handling one view or part of the view. An Angular Component encapsulates the data, the HTML Mark-up, and the logic required for a view. You can create as many components as required for your application.
The Angular Components are plain JavaScript classes and defined using @Component Decorator. This Decorator provides the component with the View to display & Metadata about the Component
The Component is responsible to provide the data to the view. The Angular does this by using data binding to get the data from the Component to the View. This is done using the special HTML markup knows as the Angular Template Syntax. The Component can also get notified when the View Changes. Real free porn movies https://exporntoons.net online porn USA, UK, AU, Europe.
The Angular applications will have lots of components. Each component handles a small part of UI. These components work together to produce the complete user interface of the application
Every Angular application has at least one component that is used to display the data on the view. Technically, a component is nothing but a simple typescript class and composed of three things as follows:
- Class (Typescript class)
- Template (HTML Template or Template URL)
- Decorator (@Component Decorator)
Template(View):
The template is used to define an interface with which the user can interact. As part of that template, you can define HTML Mark-up; you can also define the directives, and bindings, etc. So in simple words, we can say that the template renders the view of the application with which the end-user can interact i.e. user interface.
There are two ways you can specify the Template in Angular.
- Template Inline
- External Template(HTML)
Class:
The Class is the most important part of a component in which we can write the code which is required for a template to render in the browser. You can compare this class with any object-oriented programming language classes such as C++, C# or Java. The angular component class can also contain methods, variables, and properties like other programming languages. The angular class properties and variables contain the data which will be used by a template to render on the view. Similarly, the method in an angular class is used to implement the business logic like the method does in other programming languages.
export class AppComponent
{
    title : string ="myAngularApp"
}
Decorator:
In order to make an angular class as a component, we need to decorate the class with the @Component decorator. There are so many other decorators are available that we will discuss in our upcoming articles. The point that you need to remember is decorators are basically used to add metadata.
@NgModule.Metadata
Metadata Provides additional information about the component to the Angular. Angular uses this information to process the class. We use the @Component decorator to provide the Metadata to the Component.
Understanding Angular Component with an Example
By default one component app.component.ts file is created when we create a new angular project. You can find this file within the app folder which is present inside the src folder.
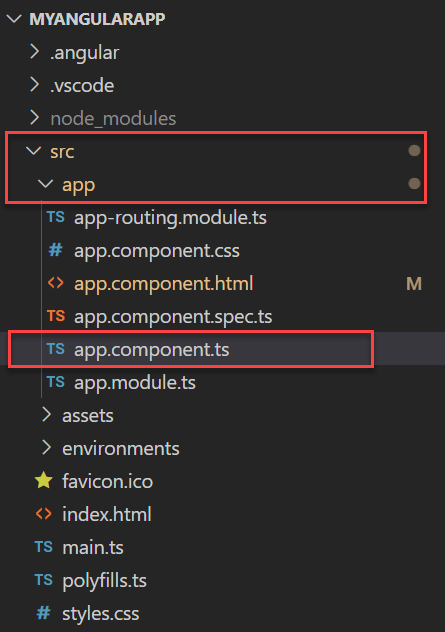
This app.component.ts file contains a component with the name AppComponent and it is the root component of your angular application. If you open the app.component.ts file, you will find the following code.
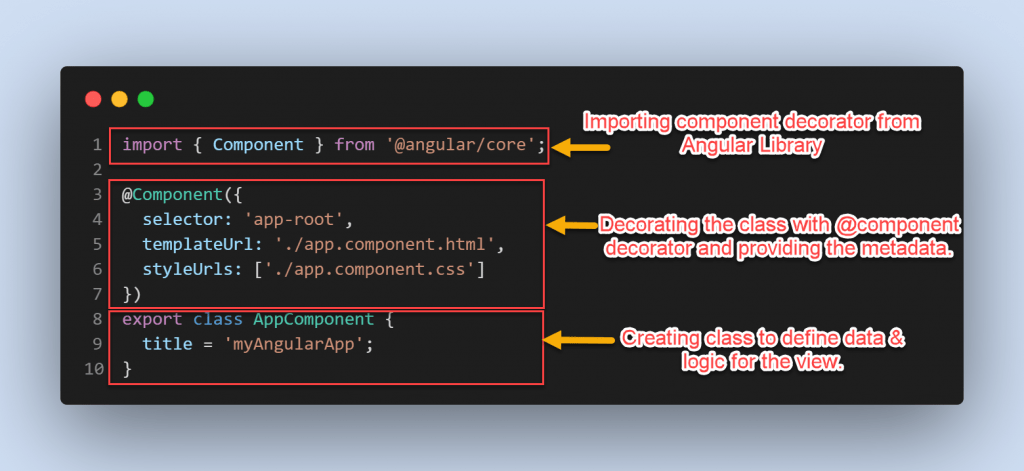
Import Component Decorator:
We need to import the Component decorator as shown in the below image. That means before using the @Component decorator, you must have to import it as we are importing the namespaces before using the classes and methods in the C# application.

Applying the component decorator to the class:
The next step is to decorate the class with the @Component decorator. As we already discussed in angular, a class will only become a component when it is decorated with the @Component decorator as shown in the below image.

Creating a class
If you want to create a class using Typescript language, then you need to use the keyword class followed by the class name as shown in the below image.
The export keyword in typescript language is very much similar to the public keyword in C# or java applications which allows this class (i.e. AppComponent) to be used by the other components within the application. The title here is a property and the data type is a string by default. This property is initialized with a default value of “MyAngularApp“.

How to create a new component in Angular?
Using below command we can create new component in angular. In order to create a component using Angular CLI, you need to use the following command.
ng g c employee

- ng stands for angular and it will call the angular CLI.
- g is the abbreviation of generating (you can also use the whole word generate).
- c is the abbreviation of component (you can also use the whole word component). Here, the component is the type of element that is going to be generated (you can also create a directive, service, pipelines, class, security, interface, enumeration, and module).
- Here, the component name is the name of the component
As you can see in the above output, it will create four files i.e. along with the ts file, it also creates HTML, spec, and CSS files. In your project, it will create a folder with the name employee inside your app folder and within that employee folder, it will place the above four files as shown in the below image.

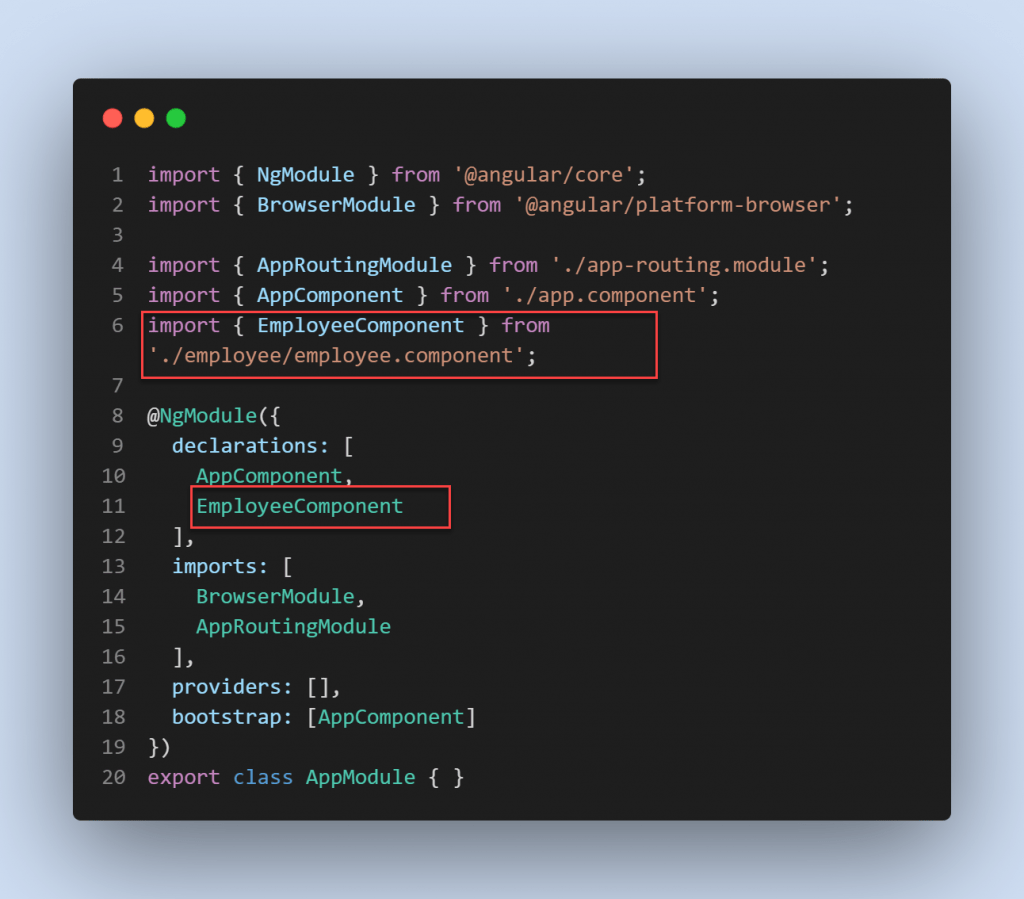
In order to use one component, we must include its reference in the root module i.e. AppModule. You can find this root module within the app.module.ts file. Now, if you open the app.module.ts file, then automatically the angular framework includes the reference of our newly created employee component in the declarations array as shown in the below image.
Component Decorator Selector Property:
If you want to use a component on any HTML page in your angular application, then you must have to specify the selector property of the Component decorator. This selector property of the component decorator will become a directive i.e. in this case the directive will be on the HTML page. But when you run the application, this directive in the HTML page is replaced with the content specified by the templateUrl properties of the component decorator.
If you look at the templateUrl property value, it is holding one HTML Page i.e. app.component.html and you can find this file in the app folder of your project. So, finally, this app.component.html file content will be display in the browser. If you open the index.html file, then you will find this selector as shown in the below image.
<link rel="stylesheet" href="https://cdn.jsdelivr.net/npm/bootstrap@4.3.1/dist/css/bootstrap.min.css" integrity="sha384-ggOyR0iXCbMQv3Xipma34MD+dH/1fQ784/j6cY/iJTQUOhcWr7x9JvoRxT2MZw1T" crossorigin="anonymous">
<script src="https://code.jquery.com/jquery-3.3.1.slim.min.js" integrity="sha384-q8i/X+965DzO0rT7abK41JStQIAqVgRVzpbzo5smXKp4YfRvH+8abtTE1Pi6jizo" crossorigin="anonymous"></script>
<script src="https://cdn.jsdelivr.net/npm/popper.js@1.14.7/dist/umd/popper.min.js" integrity="sha384-UO2eT0CpHqdSJQ6hJty5KVphtPhzWj9WO1clHTMGa3JDZwrnQq4sF86dIHNDz0W1" crossorigin="anonymous"></script>
<script src="https://cdn.jsdelivr.net/npm/bootstrap@4.3.1/dist/js/bootstrap.min.js" integrity="sha384-JjSmVgyd0p3pXB1rRibZUAYoIIy6OrQ6VrjIEaFf/nJGzIxFDsf4x0xIM+B07jRM" crossorigin="anonymous"></script>
<nav class="navbar navbar-expand-lg navbar-light bg-light">
<a class="navbar-brand ml-5" href="#">Angular Lessons</a>
<button class="navbar-toggler" type="button" data-toggle="collapse" data-target="#navbarNav" aria-controls="navbarNav" aria-expanded="false" aria-label="Toggle navigation">
<span class="navbar-toggler-icon"></span>
</button>
<div class="collapse navbar-collapse" id="navbarNav">
<ul class="navbar-nav">
<li class="nav-item active">
<a class="nav-link" href="#">Home <span class="sr-only">(current)</span></a>
</li>
</ul>
</div>
</nav>
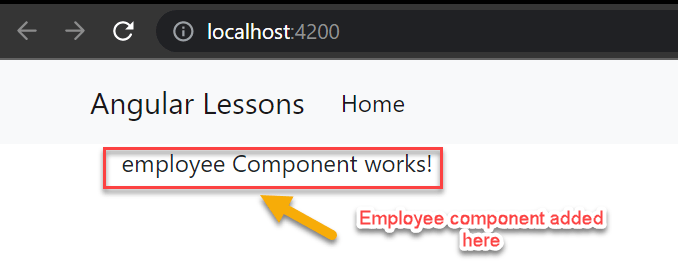
<app-employee></app-employee>Here, on below you can see we inject the employee component in the app.component.html. When you run the application we can see the output like below.
Conclusion
In this article we will discussed about Introduction to Angular Components. Here we discuss the building blocks of the components and the important metadata properties of Angular Components like selector, template, styleURL, etc. We also show you how to create a simple component in Angular.
Leave behind your valuable queries and suggestions in the comment section below. Also, if you think this article helps you, do not forget to share this with your developer community. Happy Coding 🙂
Jayant Tripathy
Coder, Blogger, YouTuberA passionate developer keep focus on learning and working on new technology.