In this article we will learn about how to Setting Up the AWS Toolkit for Visual Studio. We will be discuss here how to install and adding AWS toolkit information in Visual Studio. Please read my previous article about AWS – Create An Amazon AWS Free Tier Account.
Prerequisites
To install and configure the Toolkit for Visual Studio, you must:
- Have an AWS account. This account enables you to use AWS services. To get an AWS account, on the AWS home page, choose Create an AWS Account.
- Run a supported operating system: Windows 10, Windows 8, or Windows 7.We recommend that you install the latest service packs and updates for the Windows version you’re using.
- Visual Studio 2017 or later (including Community editions).We recommend that you install the latest service packs and updates.
Installing AWS Toolkit for Visual Studio
The Toolkit for Visual Studio for Visual Studio 2022 is distributed in the Visual Studio Marketplace. You can also install and update the toolkit within Visual Studio by using the main menu to navigate.
Step-1
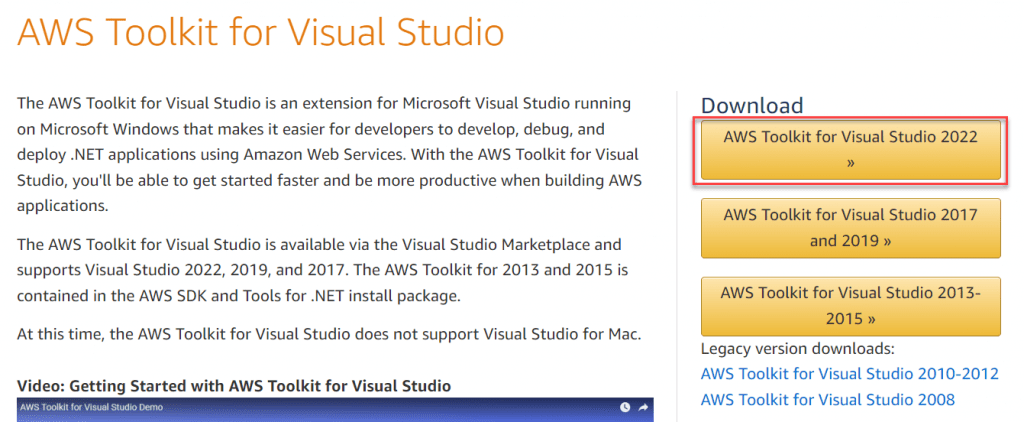
https://aws.amazon.com/visualstudio/
- (Visual Studio 2022) Extensions ≫ Manage Extensions
- In the upper-right search box, search for
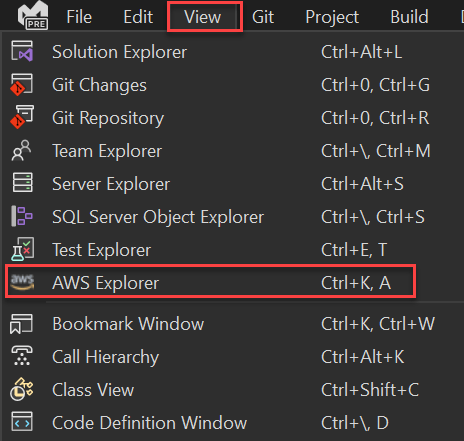
AWSand choose Download for the “AWS Toolkit for Visual Studio 2022”. Choose Close. - After the toolkit has been installed, open it by choosing AWS Explorer from the View heading in the main menu.
Step-2
After clicking the above highlighted button it navigate to Visual Studio Marketplace, download the file.

Step-3
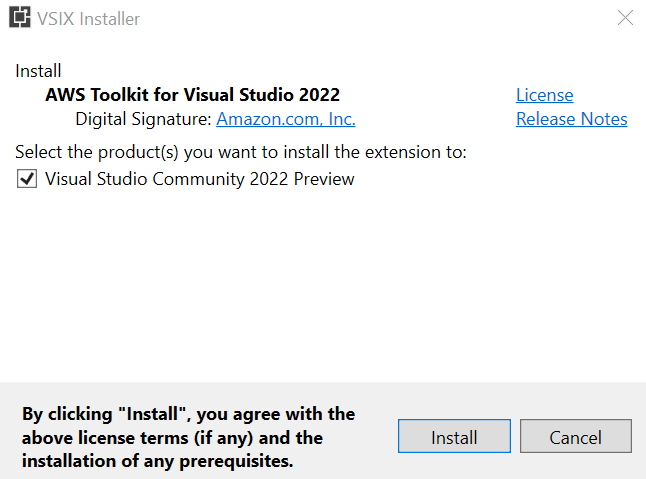
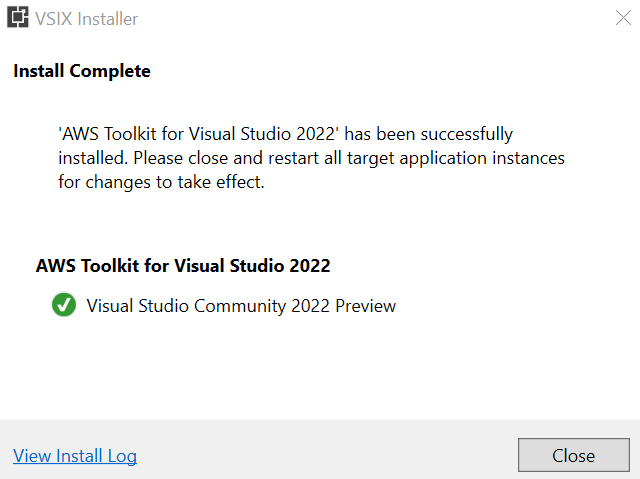
After downloading the button follow the ongoing instruction to install the AWS Toolkit.
How to Integrate Visual Studio With AWS
As the AWS Toolkit is installed on the above, our next work is how we can integrate visual studio with AWS.
Step-1
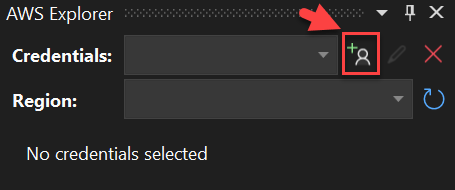
Open the AWS explorer, by clicking the Visual studio Menu ≫ View ≫ AWS Explorer and on the right side you can see the credentials is require to access the AWS on next.
Creating AWS Credentials
Following below steps we can create the credentials that can be access to the features of AWS Kit on visual studio itself
Step-1
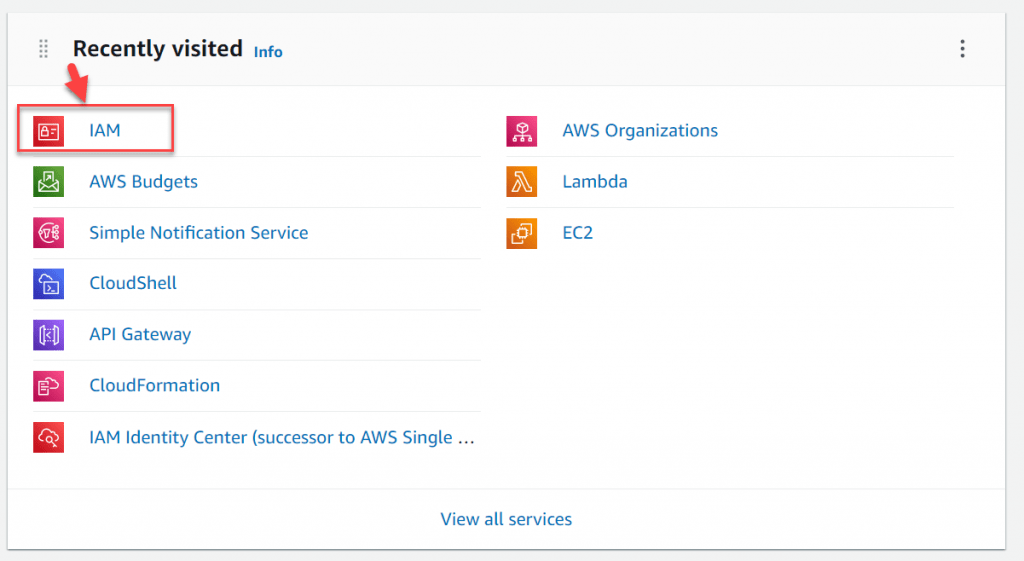
Logged in your AWS Console and search for IAM(Identity and Access Management) service like below.
Step-2
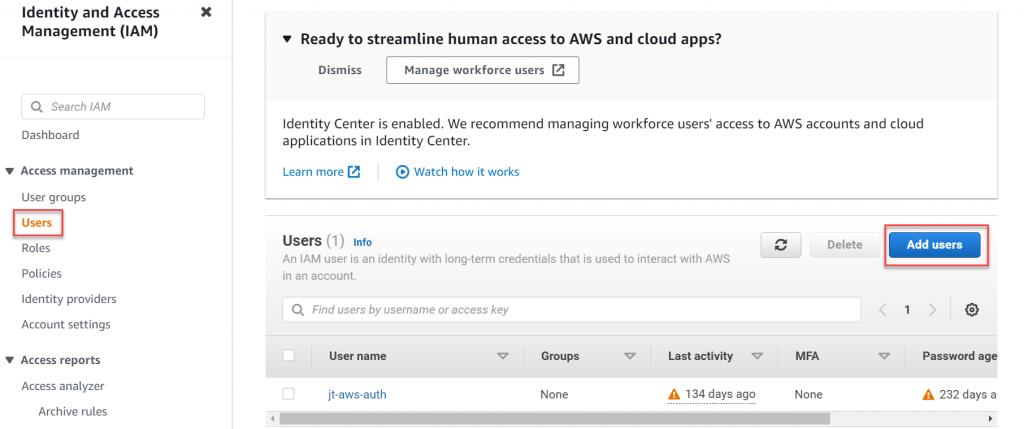
After clicking the above button, it prompt the below screen, and select on the Users on the left and click on the Add Users.
Step-3
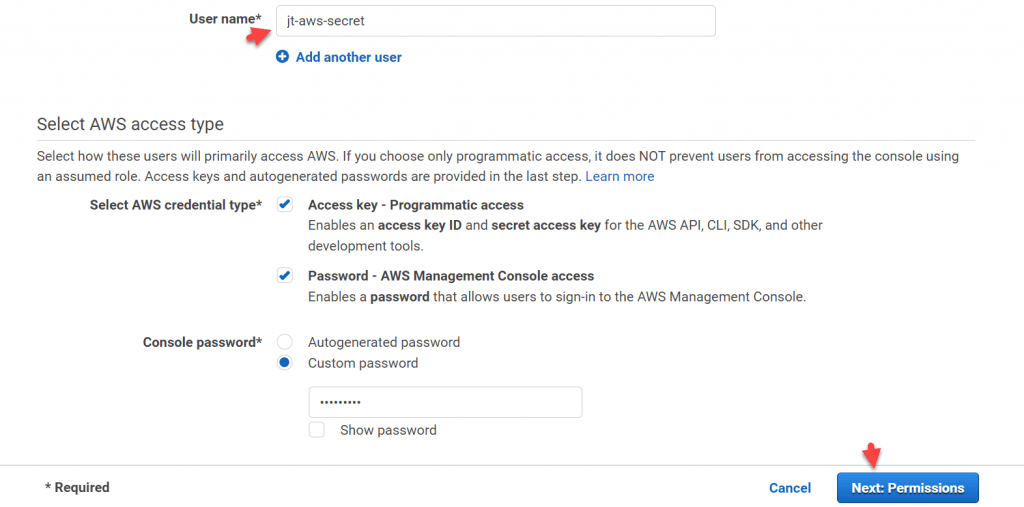
- Set the user name according to your choice.
- Enable checkbox Access Key-Programmatic access and Password – AWS Management Console.
- Generate custom password and then click Next Permissions button.
Step-4
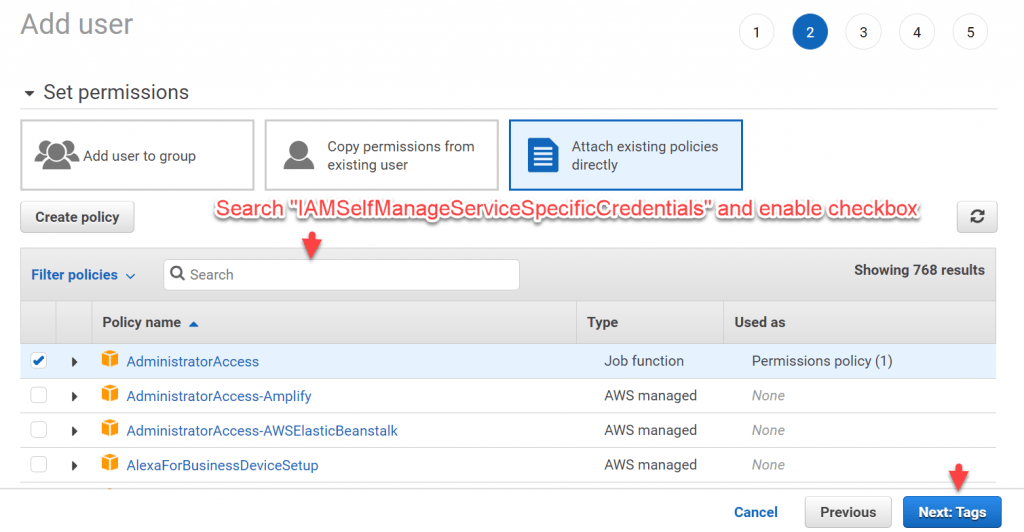
Set two permissions for the created user, select Attach existing policies directly.
- AdministratorAccess
- IAMSelfManageServiceSpecificCredentials and click the next Tags.
Step-5
Step-6
Step-7
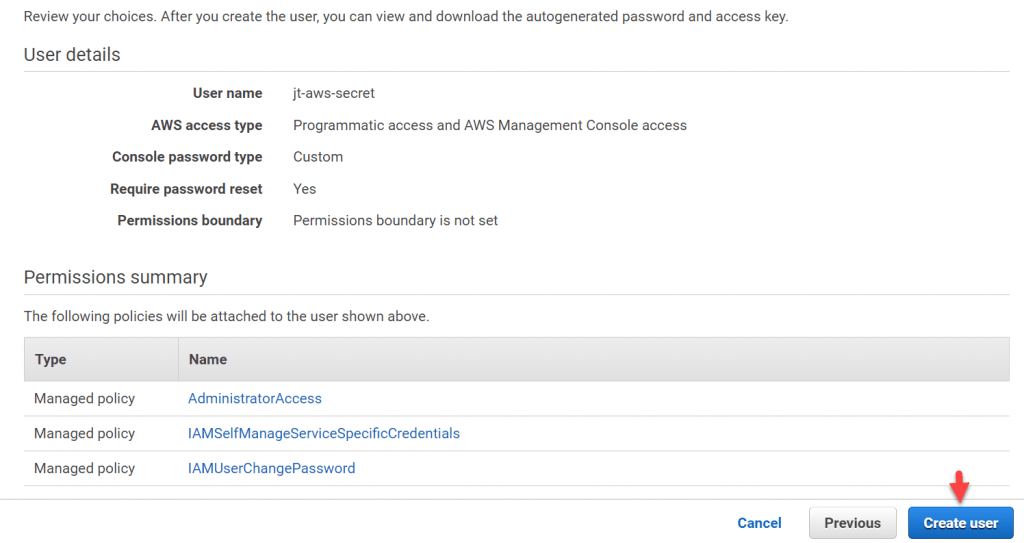
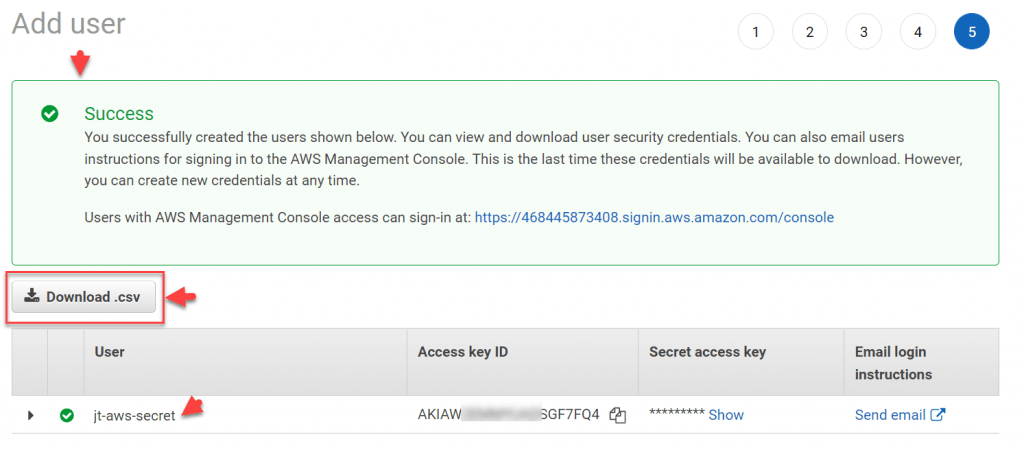
After the above step the user creation is success and we can download the file Download.csv for further use.
Step-8
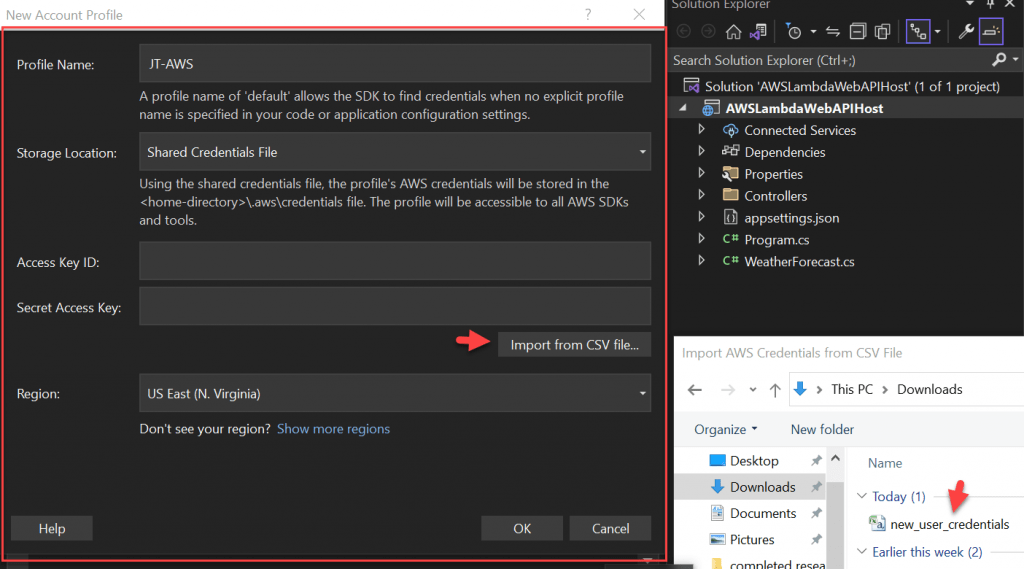
Open the AWS explorer, by clicking the Visual studio Menu ≫ View ≫ AWS Explorer and click on the User icon it will prompt to add the created credentials.

Here we need to set the Profile name, and then select the Import csv file and upload the downloaded CSV file.
Step-9
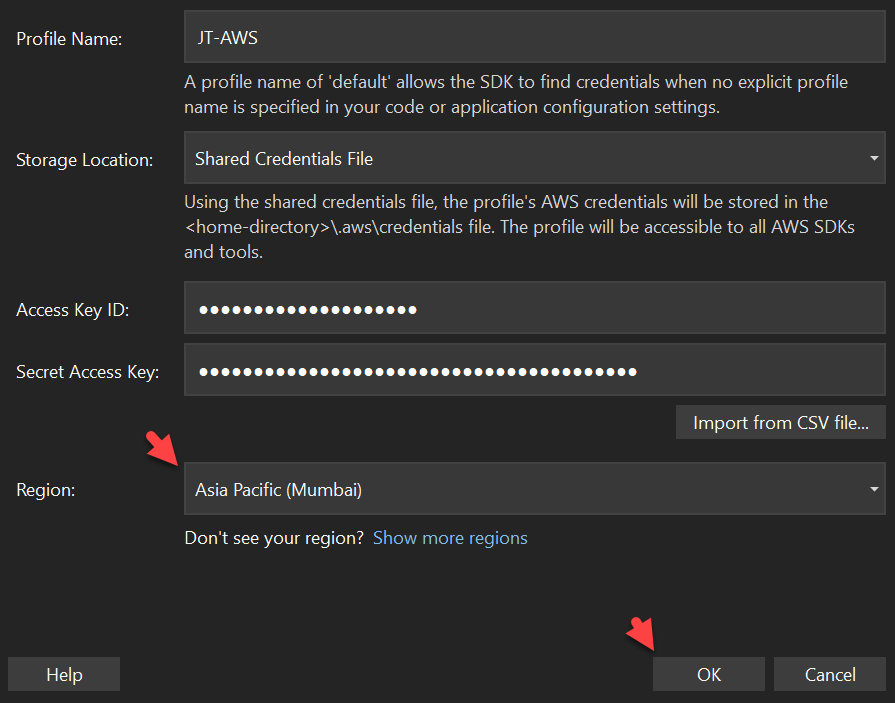
After uploading the CSV file, we need to change the region to your neared server.
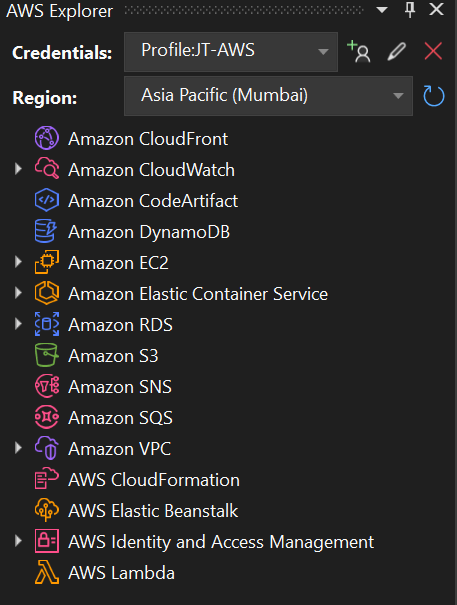
That’s it, Now we can see AWS related features are available in Visual studio.
Conclusion
In this article we discussed about how to Setting Up the AWS Toolkit for Visual Studio. Here we learnt about how to install and adding AWS toolkit information in Visual Studio.
Leave behind your valuable queries and suggestions in the comment section below. Also, if you think this article helps you, do not forget to share this with your developer community. Happy Coding 🙂
Related Articles
- How to Set up an Amazon CloudFront Distribution for Amazon S3 Bucket 🚀
- How to install and configure AWS Toolkit for VS Code
- How to send SMS using Amazon Simple Notification Services(SNS)
- Send Emails from ASP.NET Core using Amazon SES
- How to Deploy Blazor WebAssembly to AWS Amplify
Jayant Tripathy
Coder, Blogger, YouTuberA passionate developer keep focus on learning and working on new technology.

