
In this article we will learn about How to Deploy ASP.Net Core apps to Azure App Service. Microsoft Azure provides many services for hosting web applications, and Azure App Service is a major type. It is an HTTP-based service that we can use to host web applications, REST APIs, and mobile apps. Please read my previous article about Deploy ASP.NET Core Web App in Azure Virtual Machine.
What is Azure App Services?
Azure App Service is an HTTP-based service for hosting web applications, Rest APIs and mobile back ends, you can develop in your known language using .Net, .Net core, Java, Ruby, Node.JS, PHP, and Python. Asp.net core applications run and scale with both Windows and Linux-based environments. In this article, you will learn more about how to create web apps using asp.net core and publish applications into Azure.
Prerequisites
– Create new Account / Login Azure.
– Visual Studio 2019/2022
Signing up with the Azure Portal
We need to have an active Azure subscription to start using the Azure services. However, we can sign up for a free account after navigating to the Azure Portal (https://portal.azure.com/) if we do not have an account. A free account will come with an essential subscription, which gives us access to many services. Some of the Azure services are free for life, while some others are free for a limited time.
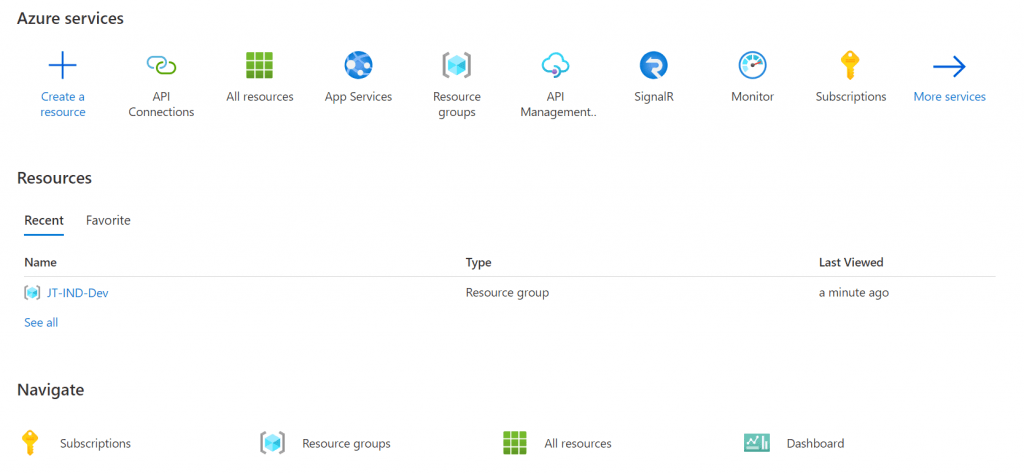
The Azure portal is a web-based, unified console using which we can build, manage, and monitor the Azure resources. Once we log into the Azure portal, we can see the Home page like below:
Creating an App Service
There are different types of App Services and we can choose the appropriate one based on our need.
- Web App is the best choice for hosting websites and web applications.
- We can use API App for hosting RESTful APIs. If we need to host mobile app back ends, we have Mobile App.
We can create an App Service from the Azure portal, or we can do it from Visual Studio while deploying our application. In this article, we are going to learn how to create an App Service directly from Visual Studio while we publish a web application.
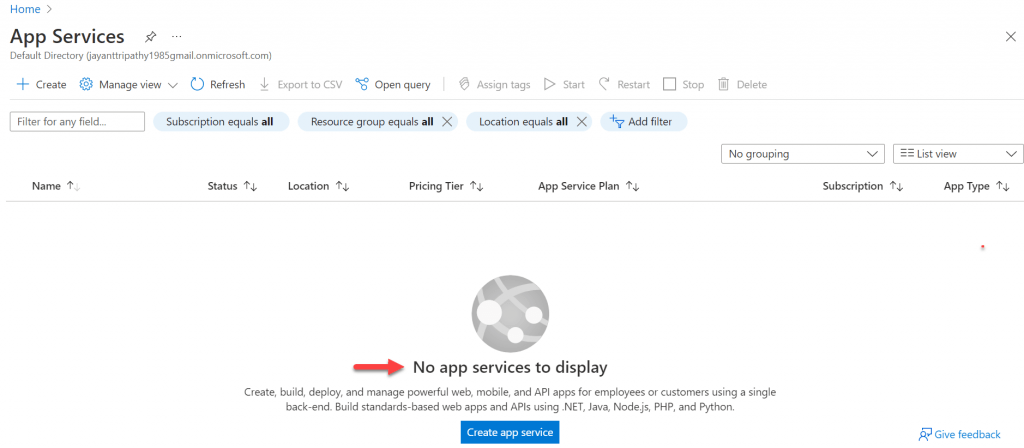
When navigating to Azure App Service we can see there is no App service is hosted till yet in my account.
Creating ASP.NET Core Web App
Using below steps we can create an ASP.Net Core Web App
- Open Visual Studio and Click on Create New Project
- Choose ASP.Net Core Web Template, and set the project location
- Here I have choose .NET 6 project
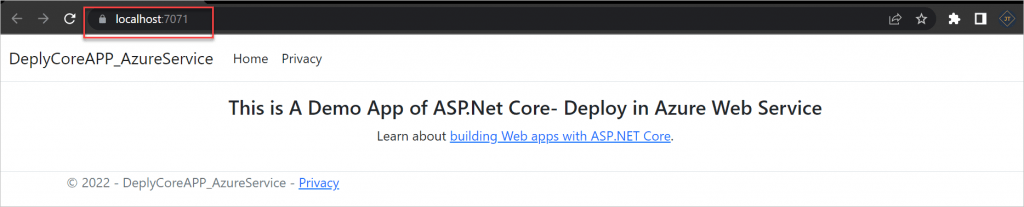
Run the sample project, you can see below project running in localhost.
Deploying the ASP.NET Core App to Azure App Service Using Visual Studio
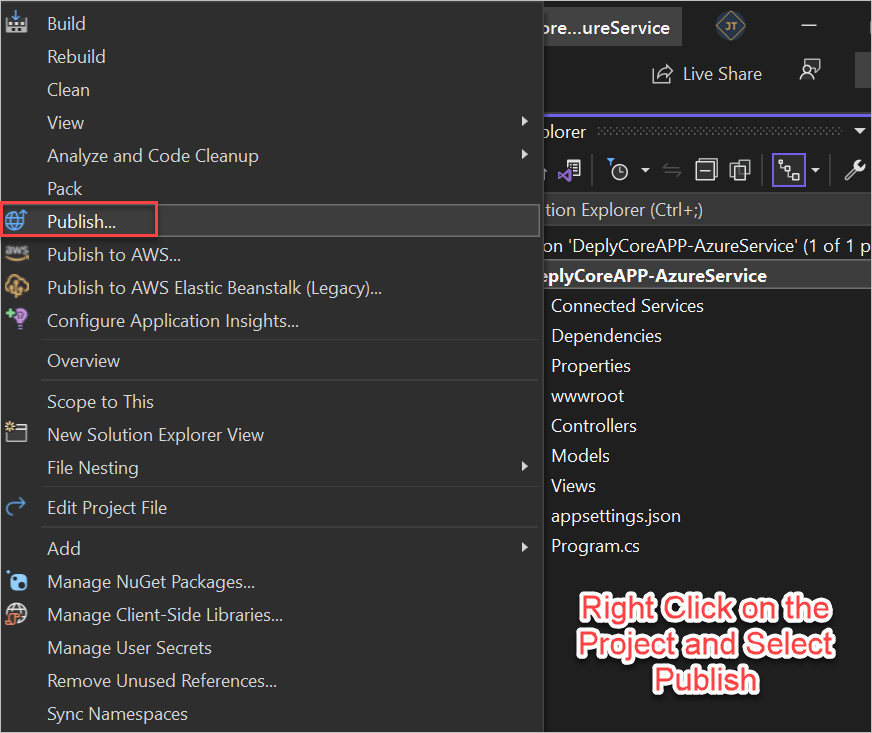
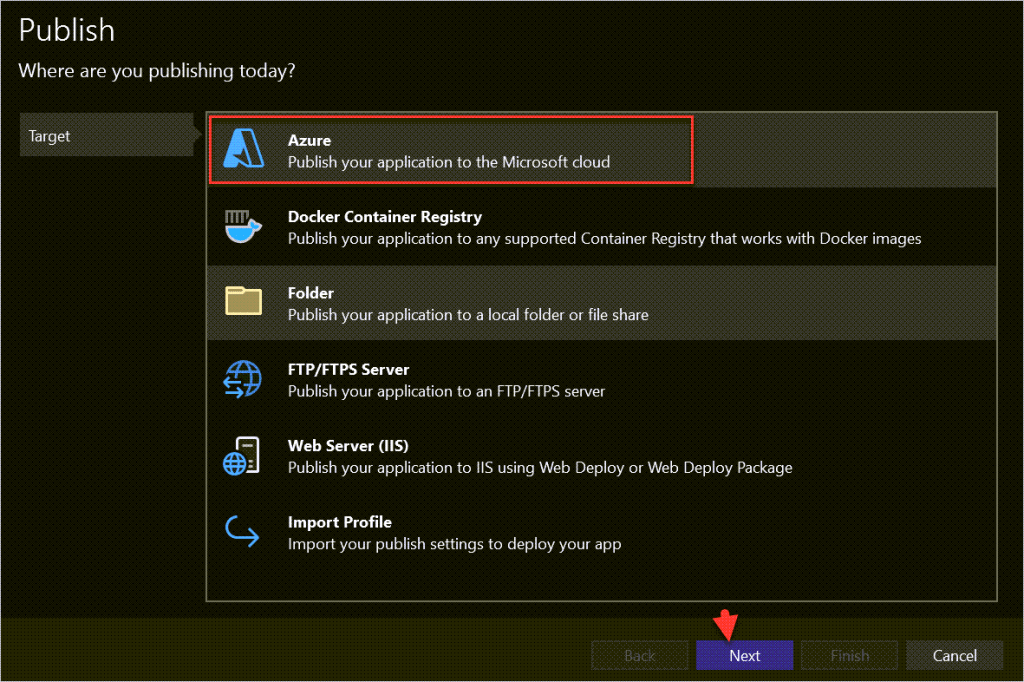
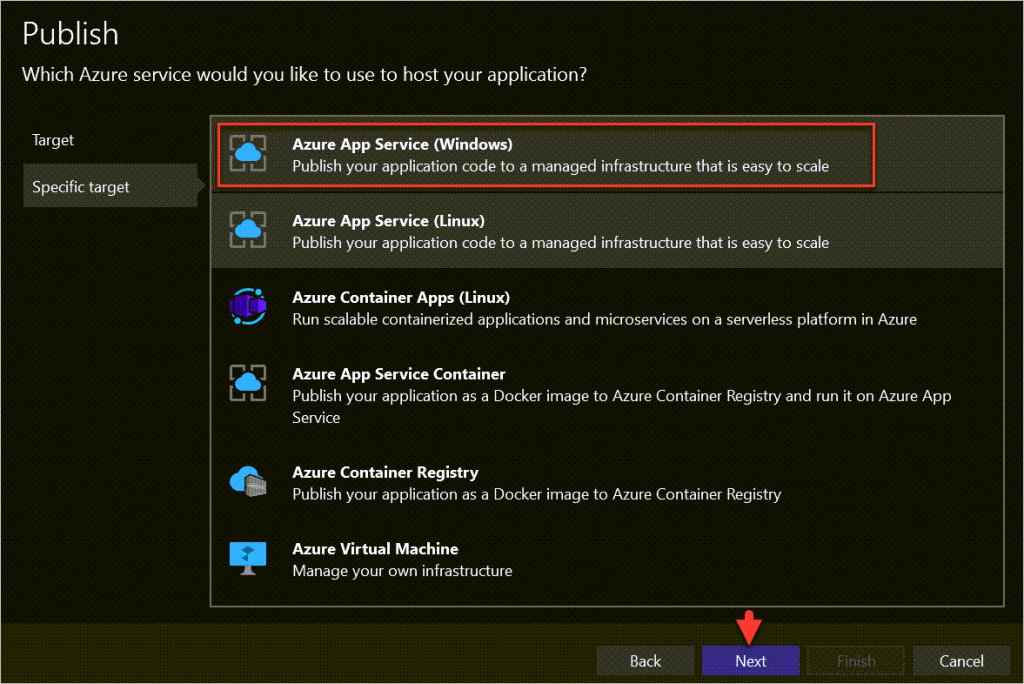
For deploying our app from Visual Studio, we can right-click on the project in Solution Explorer and select the the Publish option. Since we are planning to deploy our app to Azure App Service, let’s choose Target as Azure. Next, in the Specific Target option, we need to decide whether we want to go with an Azure App Service in Windows, Linux, Container, Azure Virtual Machine, etc. For now, let’s choose the Azure App Service with Windows:
- On the Target we select
Azurepublish option.
- After click the next it open the below window, select the Azure App Service.
- Here I choose Azure App Service Windows and click next.
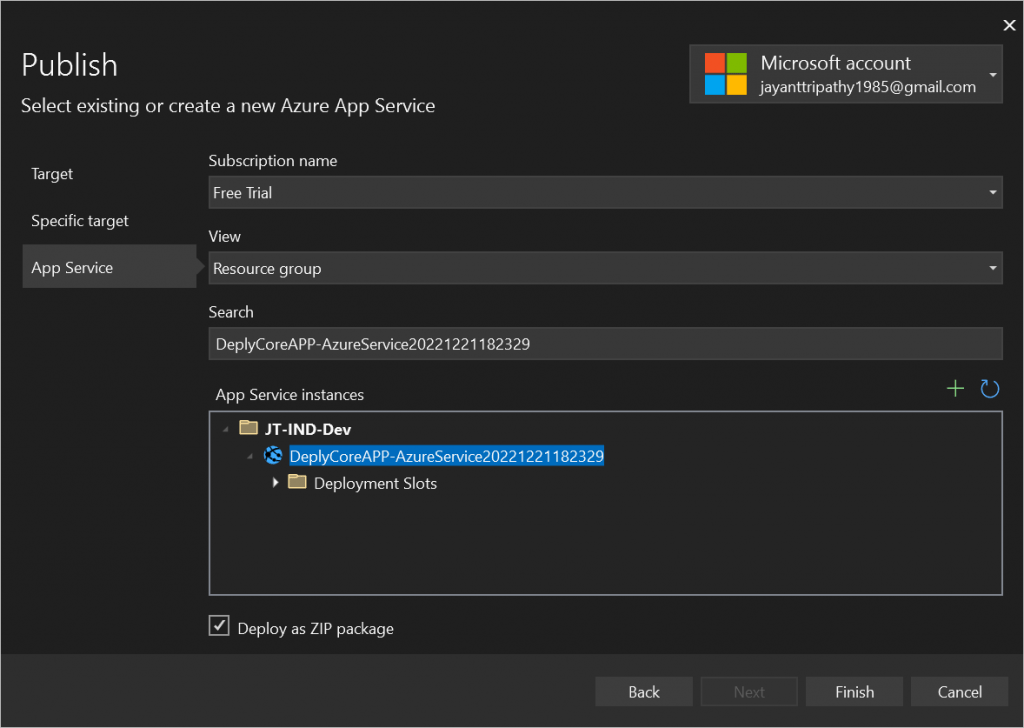
- Here My current subscription is Free, The resource group need to check.
- Click on the plus(+) icon, it will add provides the window to add the existing Resource Group.
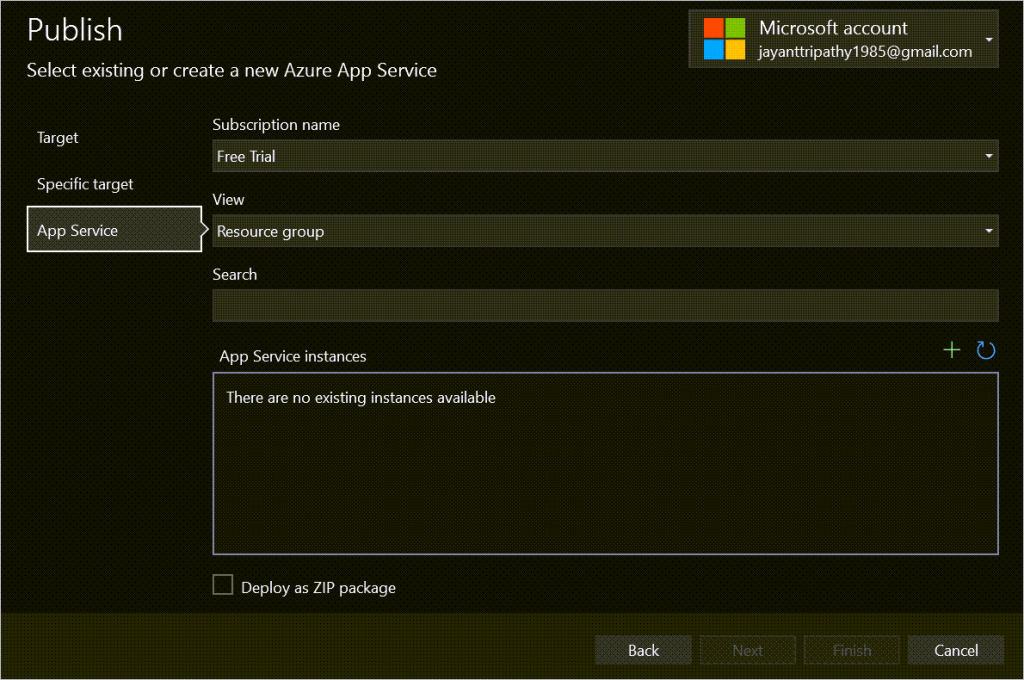
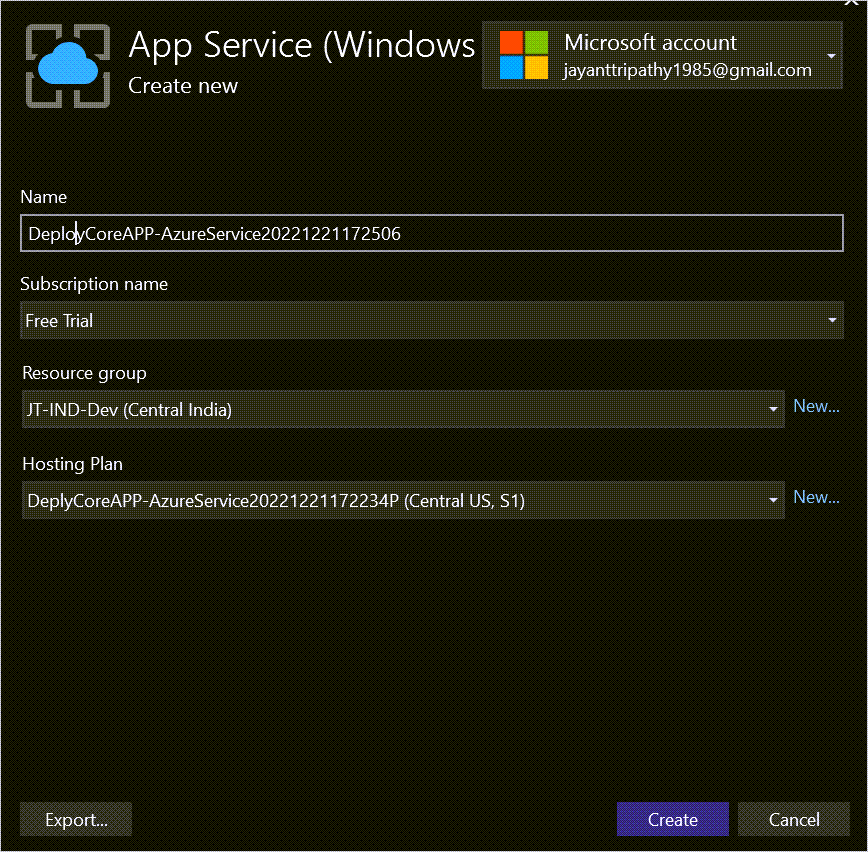
- Here you can see we selected my Resource Group (JT-IND-Dev) and the rest is automatically selected.
- You can change the Name according to your choice.
- Click on the Create button.
- After click on the create button, you can see it filled up the Azure App Instances.
- Enable checkbox as “Deploy as ZIP package”. It deploy the app in zip format.
- And finally click on finish button.
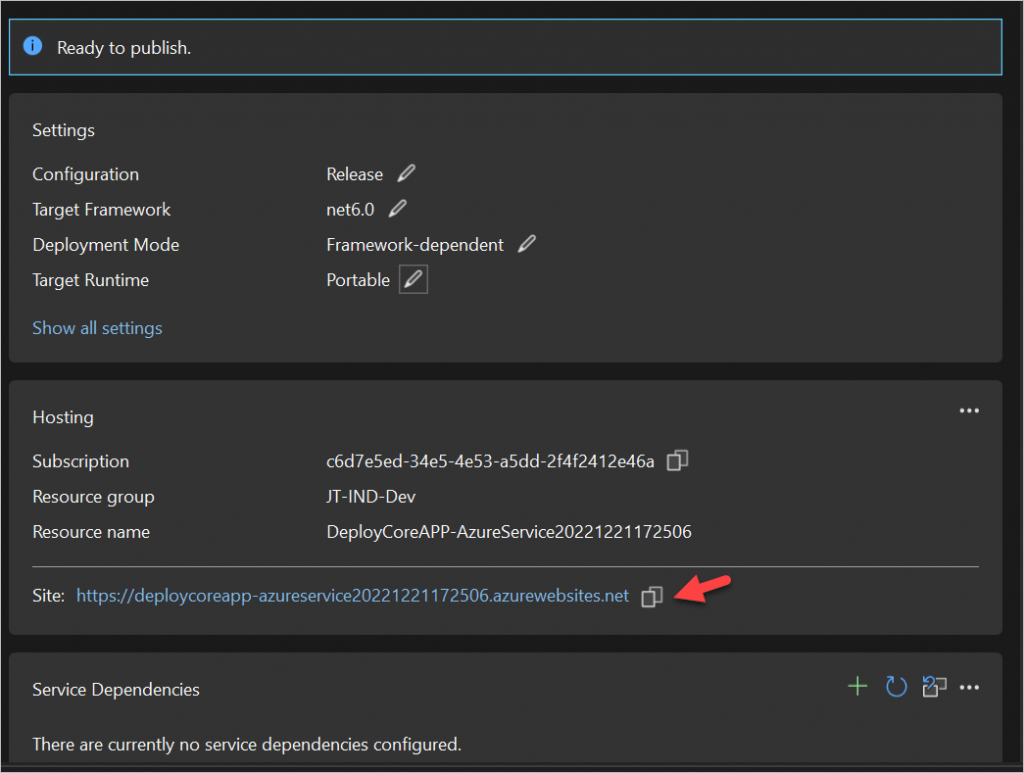
- After finishing this, you can see it is published in the Azure App services.
- You can see on the highlighted it create one URL of Azure App Services.
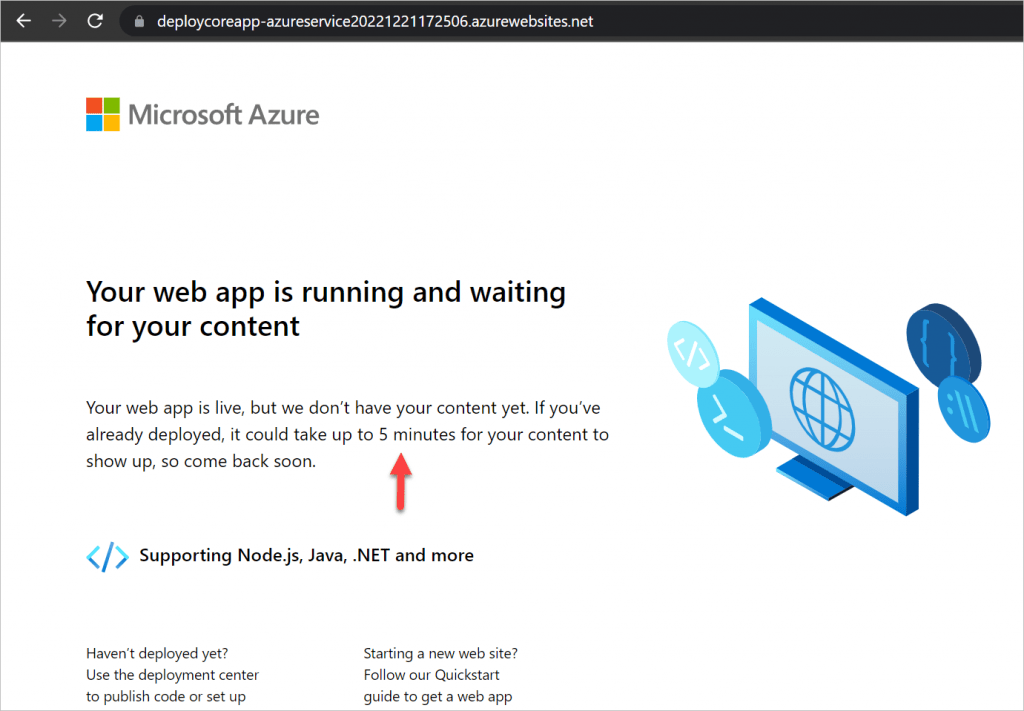
- After clicking the above link it open the URL, but we can see it is showing App is running and waiting to upload our content. Wait for sometime
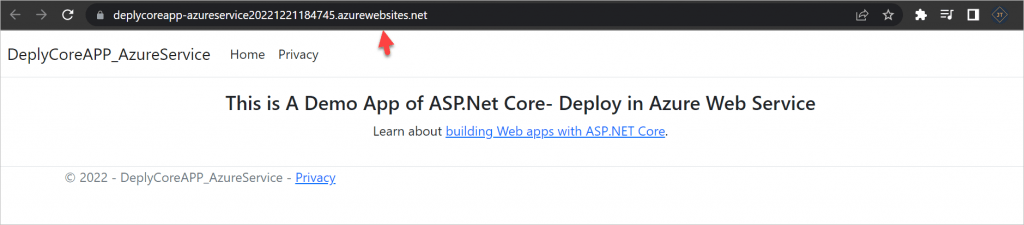
- Refresh after sometime, we can see the below URL, now we can access our ASP.Net Core Web App is available on the Internet.
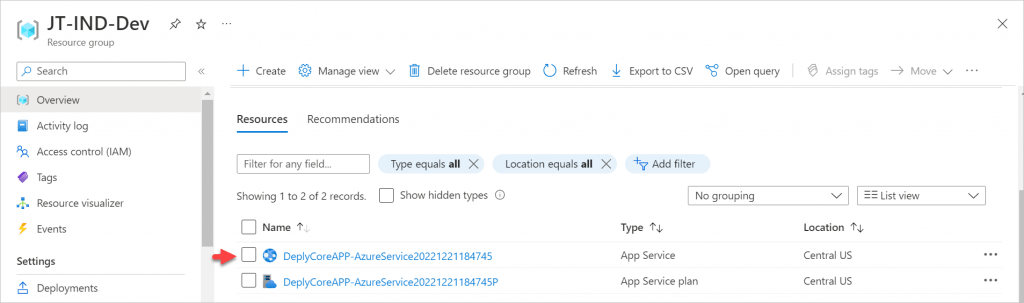
- We can see the ASP.Net Core App are hosted under my Resource Group
Conclusion
In this article we discussed about How to Deploy ASP.Net Core apps to Azure App Service. Here we explained about Azure App service and step by step process to host the application into Azure App Service.
Leave behind your valuable queries and suggestions in the comment section below. Also, if you think this article helps you, do not forget to share this with your developer community. Happy Coding 🙂
Related Articles
- Building an AI Knowledge Base Search with Azure AI Foundry: Step-by-Step Guide
- How to Secure React.js application with Azure AD Authentication Using MSAL Library
- 🔐 Securing .NET Core Web Apps with Azure AD/Intra and MSAL
- Step-by-Step Guide to Using Azure Redis Cache in ASP.NET Core 9 Web API
- 🤖 Build a Full-Stack AI App with React, Node.js & Azure OpenAI
Jayant Tripathy
Coder, Blogger, YouTuberA passionate developer keep focus on learning and working on new technology.