
In this article we will learn about Two-Factor Authentication Using Google Authenticator in Asp.Net MVC. We discuss here how to implement 2FA authentication in your ASP.NET web application using Google Authenticator app. We need to install the Google Authenticator app on our mobile phone from the respective play store or app store, and using the QR code generated in the web application we will verify the user. Please read my previous article How to detect whether page is load on Mobile or Desktop browser in ASP.Net Core.
When a user signs in to the web application, they need to enter a six-digit passcode that will be generated in the mobile app to finish two-factor authentication process. The passcode generated in the mobile app will be unique to the User Identifier and is a time-based one-time password (TOTP); i.e., it will expire after a certain interval of time.
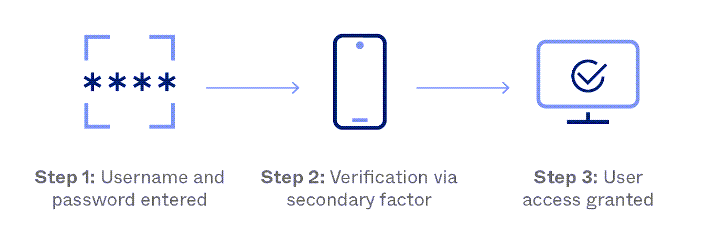
As it authenticates users using two possible authentication factors, two-factor authentication is a wonderful technique to help secure user accounts.
What is two-factor authentication and why is it used?
Two-factor authentication (2FA), referred as two-step verification or dual-factor authentication, is a security process in which users provide two different authentication factors to verify themselves.
Two-factor(2FA) authentication provides a higher level of security than authentication methods that depend on single-factor authentication (SFA), in which the user provides only one factor — typically, a password or passcode. Two-factor authentication methods rely on a user providing a password as the first factor and a second, different factor, usually either a security token or a biometric factor, such as a fingerprint or facial scan.
Two-factor authentication adds an additional layer of security to the authentication process by making it harder for attackers to gain access to a person’s devices or online accounts because, even if the victim’s password is hacked, a password alone is not enough to pass the authentication check.
What is Google Authenticator?
Google Authenticator is a software-based authenticator by Google that implements two-step verification services using the Time-based One-time Password Algorithm and HMAC-based One-time Password algorithm. You can get more information on Google link.
Features of Google Authenticator
- Highly Secure, No need of internet to get OTP Code.
- No cost for OTP code unlike SMS, No need to wait long to get a code.
- Both IOS and Android are supported.
- 30 Days cookie so no need to authenticate daily [Can be changed].
- The session cookie is Encrypted for security purpose
Creating ASP.Net MVC Application
Let’s create an ASP.Net MVC Application and here we can implement the 2FA authentication using below steps.
- Open Visual Studio (I’m using VS 2022) and select ASP.NET Web Application (.Net Framework).
- On Next, Give the project name, select the save location folder, and click on the Create button.
- Choose MVC Option for project type and click on the Create button. Now your project is created.
Adding Google.Authenticator package from NuGet
Go to Tools Menu – NuGet Package Manager – Manage NuGetPackages For Solution – Search for Google.Authenticator > Install OR we can use Nuget Package manager console to install the package.

dotnet add package GoogleAuthenticator --version 3.0.0Adding Google Auth key in Web.config
<add key="GoogleAuthKey" value="Yd$3#8uYTz!63eRz" />Creating a Authentication Controller
Create a new controller name named as AuthController and then create the action method as Login. The Loin Action method return the Login view and we use initialize sessions as null.
[HttpGet]
public ActionResult Login()
 {
   Session["UserName"] = null;
   Session["IsValidTwoFactorAuthentication"] = null;
   return View();
 }
Adding View Page of Login
- Here we have impose Login models.
- We have create the Login Page with user name and password and after authenticate, it will open the Bar code image where we need to put the authenticate code and validate.
- Line no. 56 – We have set the input name as “JayantTripathy” here and on the controller it get the request value.
@model _2FAAuth_ASPNetMVC.Models.Login
@{
    Layout = null;
}
<!DOCTYPE html>
<html>
<head>
    <meta name="viewport" content="width=device-width" />
    <title>Login</title>
    <!-- CSS only -->
    <link href="https://cdn.jsdelivr.net/npm/bootstrap@5.2.3/dist/css/bootstrap.min.css" rel="stylesheet" integrity="sha384-rbsA2VBKQhggwzxH7pPCaAqO46MgnOM80zW1RWuH61DGLwZJEdK2Kadq2F9CUG65" crossorigin="anonymous">
</head>
<body>
    <nav class="navbar bg-light">
        <div class="container">
            <a class="navbar-brand" href="#">
                Two-Factor Authentication Using Google Authenticator in Asp.Net MVC
            </a>
        </div>
    </nav>
    <div class="col-sm-5 container">
        <center>
            <h2>Login Page</h2>
            @if (ViewBag.Status == null || !ViewBag.Status)
            {
                <div>@ViewBag.Message</div>
                <div class="shadow p-3 mb-5 bg-body rounded">
                    <div>
                        @using (Html.BeginForm())
                        {
                            <div class="form-group">
                                @Html.TextBoxFor(a => a.UserName, new { @class = "form-control", @PlaceHolder = "Please enter User Name", autocomplete = "off" })
                            </div>
                            <div class="form-group mt-2 mb-2">
                                @Html.TextBoxFor(a => a.Password, new { @class = "form-control", @PlaceHolder = "Please enter Password", type = "password", autocomplete = "off" })
                            </div>
                            <input type="submit" value="Login" class="btn btn-primary" />
                        }
                    </div>
                </div>
            }
            else
            {

                <div>@ViewBag.Message</div>
                <div>
                    <img src="@ViewBag.BarcodeImageUrl" width="300" height="300" />

                </div>
                <div>
                    Manual Setup Code : @ViewBag.SetupCode
                </div>
                <div>
                    @using (Html.BeginForm("TwoFactorAuthenticate", "Auth", FormMethod.Post))
                    {
                        <input type="text" name="JayantTripathy" />
                        <input type="submit" class="btn btn-success" />
                    }
                </div>
            }
        </center>
    </div>
</body>
</html>
Post Login Action method
- Here we have got the Google Auth key that are added in
Web.config. - Two factor authentication configured for me as “jayanttripathy.com” and with using the credentials it created the bar image.
  [HttpPost]
        public ActionResult Login(_2FAAuth_ASPNetMVC.Models.Login login)
        {
            bool status = false;
            if (Session["Username"] == null || Session["IsValidTwoFactorAuthentication"] == null || !(bool)Session["IsValidTwoFactorAuthentication"])
            {
                string googleAuthKey = WebConfigurationManager.AppSettings["GoogleAuthKey"];
                string UserUniqueKey = (login.UserName + googleAuthKey);
                //Takeing UserName And Password As Static here
                if (login.UserName == "admin" && login.Password == "admin123")
                {
                    Session["UserName"] = login.UserName;

                    //Two Factor Authentication Setup
                    TwoFactorAuthenticator TwoFacAuth = new TwoFactorAuthenticator();
                    var setupInfo = TwoFacAuth.GenerateSetupCode("jayanttripathy.com", login.UserName, ConvertSecretToBytes(UserUniqueKey, false), 300);
                    Session["UserUniqueKey"] = UserUniqueKey;
                    ViewBag.BarcodeImageUrl = setupInfo.QrCodeSetupImageUrl;
                    ViewBag.SetupCode = setupInfo.ManualEntryKey;
                    status = true;
                }
            }
            else
            {
                return RedirectToRoute("Index");
            }
            ViewBag.Status = status;
            return View();
        }
 private static byte[] ConvertSecretToBytes(string secret, bool secretIsBase32) =>
           secretIsBase32 ? Base32Encoding.ToBytes(secret) : Encoding.UTF8.GetBytes(secret);
TwoFactorAuthenticate Action method
- We have got the token value
Request["JayantTripathy"]. - We have matched the two factor auth with the session Auth, when it valid then it redirect to Home Controller.
[HttpPost]
        public ActionResult TwoFactorAuthenticate()
        {
            var token = Request["JayantTripathy"];
            TwoFactorAuthenticator TwoFacAuth = new TwoFactorAuthenticator();
            string UserUniqueKey = Session["UserUniqueKey"].ToString();
            bool isValid = TwoFacAuth.ValidateTwoFactorPIN(UserUniqueKey, token, false);
            if (isValid)
            {
                HttpCookie TwoFCookie = new HttpCookie("TwoFCookie");
                string UserCode = Convert.ToBase64String(MachineKey.Protect(Encoding.UTF8.GetBytes(UserUniqueKey)));

                Session["IsValidTwoFactorAuthentication"] = true;
                return RedirectToAction("Index", "Home");
            }

            ViewBag.Message = "Google Two Factor PIN is expired or wrong";
            return RedirectToAction("Login");
        }
Let’s run your project and see the output like below.
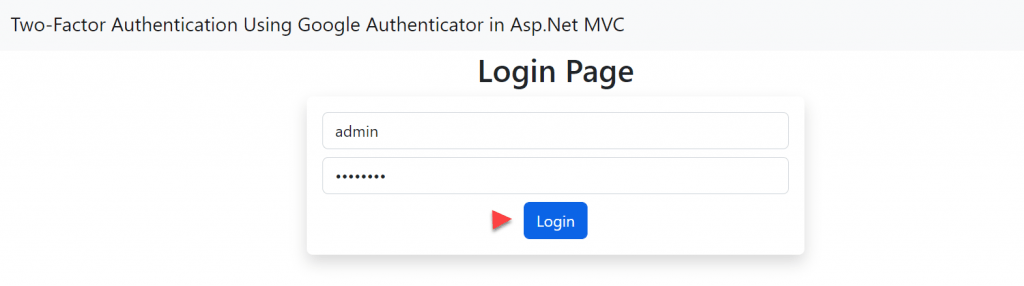
- Here we have added the static credentials, I have added the username as admin and password as admin123.
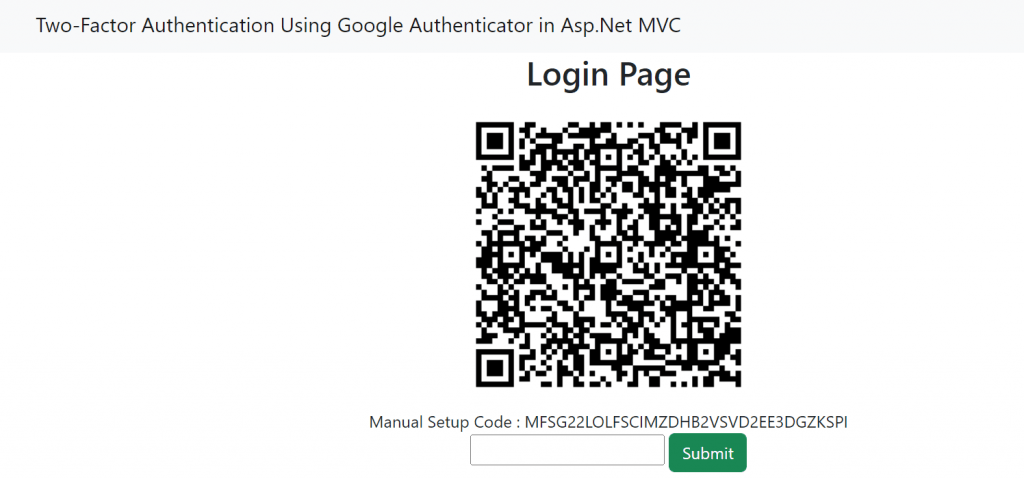
- After clicking the login button, a QR code and the setup key for two-factor authentication were generated, which will be used later on the mobile app for code generation.
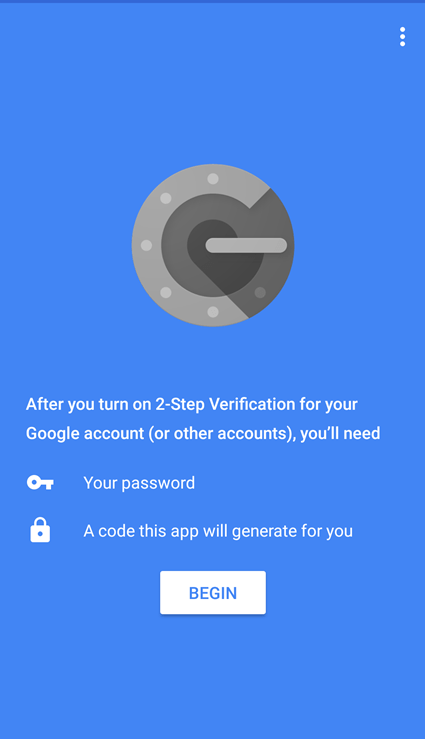
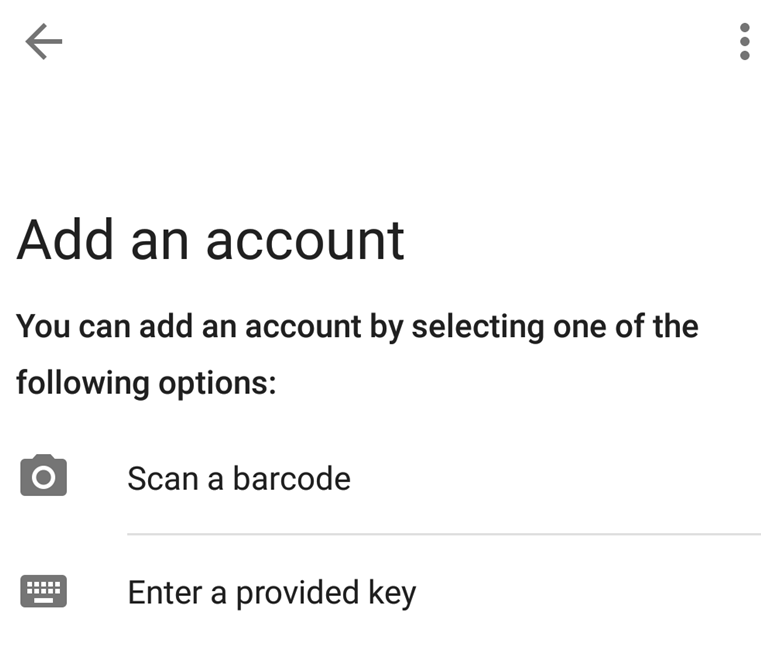
- Install the Google Authenticator app from the Play Store on your mobile device, and open it; you have two options: scan a QR code or enter a setup key.
After QR Code scan input the code on the Login page and input the code it will match the code then it redirect to home page.
Modifying Layout.cshtml to display logged user
  @if (@HttpContext.Current.Session["UserName"] != null && @HttpContext.Current.Session["IsValidTwoFactorAuthentication"] != null)
                {
                    if (bool.Parse(@HttpContext.Current.Session["IsValidTwoFactorAuthentication"].ToString()) == true)
                    {
                        <ul class="nav navbar-nav navbar-right">
                            <li style="color:
White; font-size: 15px; margin-top: 10px; margin-right: 100px;">
                                Logged User: @HttpContext.Current.Session["UserName"].ToString()
                            </li>
                            <li>

                                @Html.ActionLink("Log Out", "Logoff", "Home", new { style = "color:White; font-size: 15px" })
                            </li>
                        </ul>
                    }
                }
The Logoff code added in the HomeController
public ActionResult Logoff()
        {
            Session["UserName"] = null;
            Session["IsValidTwoFactorAuthentication"] = null;
            return RedirectToAction("Login", "Auth");
        }
Modifying Index.cshtml to display logged user
<center><h2> Welcome <span style="text-decoration: underline">
@HttpContext.Current.Session["UserName"].ToString()</span>
</h2></center>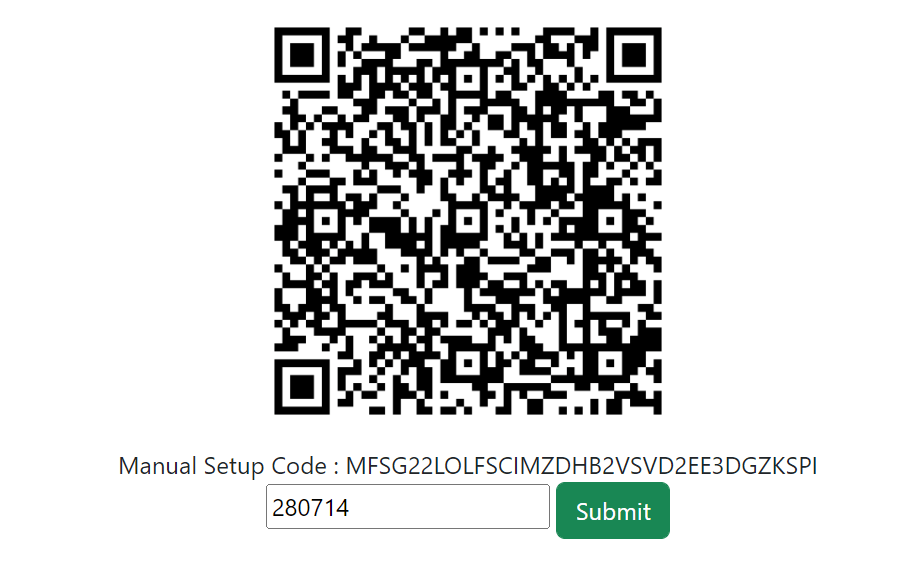
After submitting code scanned from Google Authenticator app, it redirect to the application page.

Conclusion
So far this article we discussed how to use Two-Factor Authentication Using Google Authenticator in Asp.Net MVC. Here we discussed how to create two factor using ASP.Net MVC.
Leave behind your valuable queries and suggestions in the comment section below. Also, if you think this article helps you, do not forget to share this with your developer community. Happy Coding 🙂
Related Articles
- Two-Factor Authentication Using Google Authenticator in Asp.Net MVC
- Export data into PDF in ASP.NET MVC
- Export data into Excel in ASP.NET MVC
- Autocomplete Using JQuery, Ajax & WCF in MVC
- Translate Language Using Google Translate API in ASP.Net MVC
Jayant Tripathy
Coder, Blogger, YouTuberA passionate developer keep focus on learning and working on new technology.