
In this article we will learn about Deploy ASP.Net Core Web App in Azure Virtual Machine. We discuss here more about Azure Virtual machine and learn how to create virtual machine in Azure step by step. After creation of Virtual machine(VM) we deploy the ASP.NET Core Web App in Azure Virtual machine. Please go through my previous article Running WordPress on ASP.NET Core with Peachpie.
What is Virtual Machine ?
A Virtual Machine(VM), is no different than any other physical computer like a laptop, smart phone or server. It has a CPU, memory, disks to store your files and can connect to the internet if needed. VMs are often thought of as virtual computers or software-defined computers within physical servers, existing only as code.
For more details about Virtual machine visit https://azure.microsoft.com/en-in/overview/what-is-a-virtual-machine/
Prerequisites
– Azure Account
– Visual Studio 2019 ( You can check with prev. version of VS)
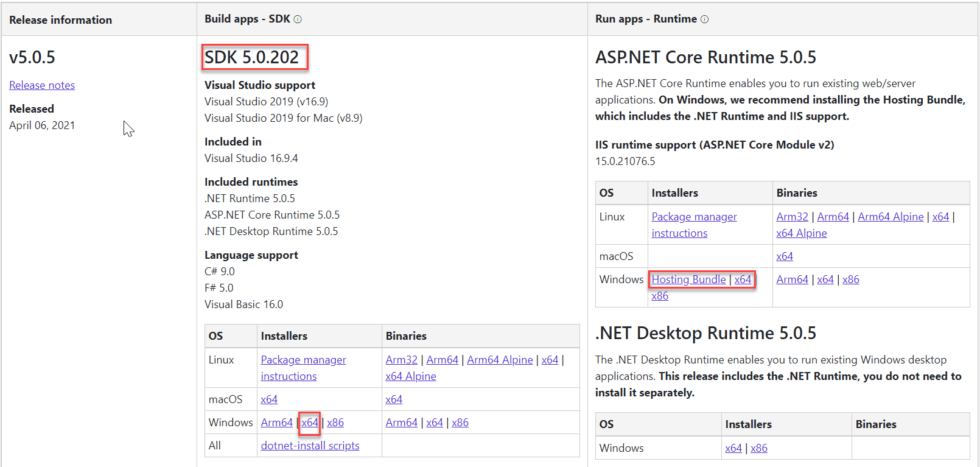
– DotNet SDK 5.0 & Bundle (We consider .NET Core 5)
– Web Deploy bundle in IIS Deploy ASP.NET Core Web App in Azure Virtual Machine
How to Create Azure Virtual Machine(VM) ?
Let’s discuss how to create Azure Virtual Machine(VM) in step by step.
Sign-up Azure Account
- We need to have a subscription in Azure, if we don’t have an account we can get a free one here. If you want to learn how to create Azure account then please follow the link How to sign-up for an Azure free account.
- After creation of Azure portal login with your credential.
- Go to the Azure portal and find the Virtual Machines resource and create a new one.

Steps to Create Virtual Machine(VM)
After click on Virtual Machines link it navigate to below page. We need to filled up with below information.
- Subscription – You need to select the subscription according to your list. (We have Free Trial Subscription)
- Resource Group – You need to select Resource Group, if the resource are not available create a new one according to your location.
- VM Name– Input the VM name according to your convenient.
- Region – Select the region according to nearest GEO location for better availability means better performance.
- Image– We select Windows Server 2019, according to your choice you can select Windows/Linux.
- Size– Select the VM size, it depends upon the RAM with price range.
- Credentials– Set your credentials, you can set the credential according to yours.
- Inbound Ports – Select Inbound Port as HTTP, HTTPS, RDP(Remote Desktop).
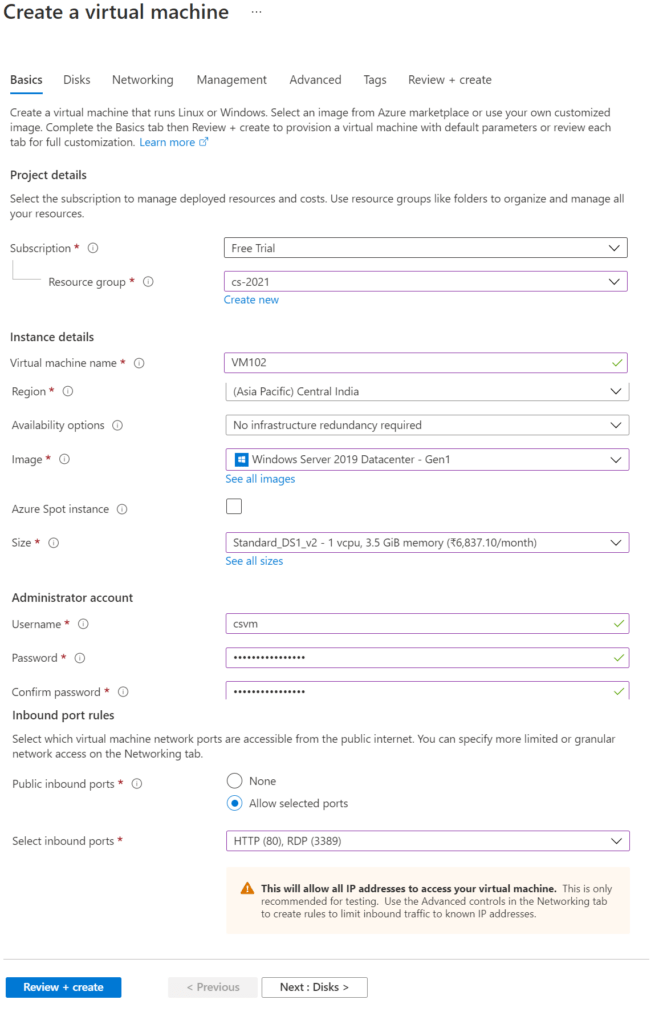
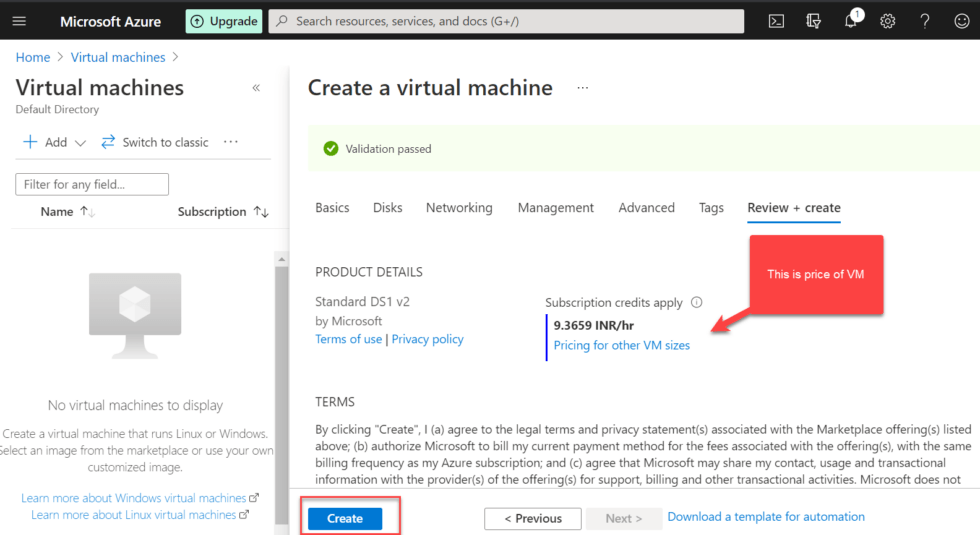
That’s it then click on Review+Create button, it navigate to price of VM like below then hit create button.
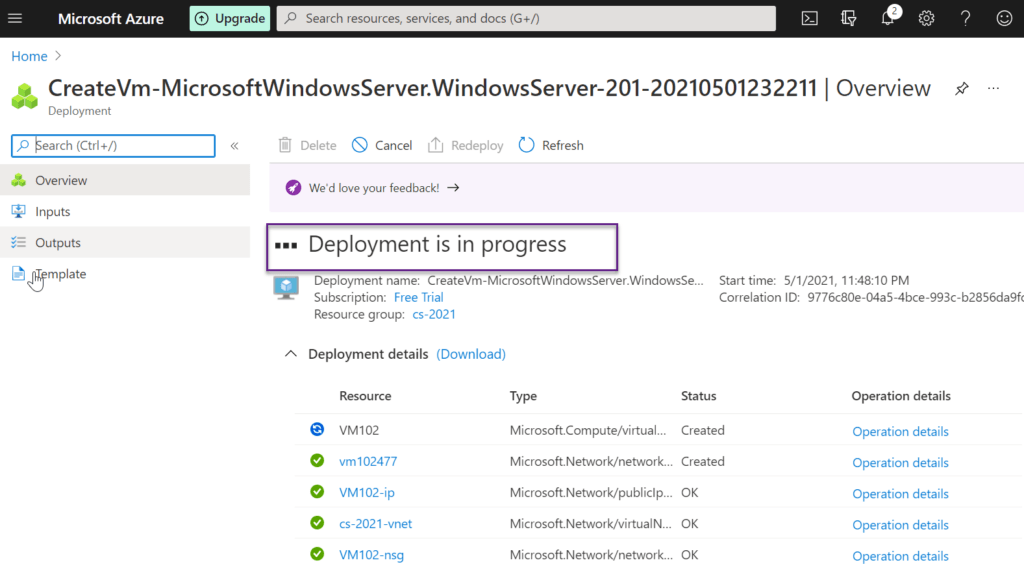
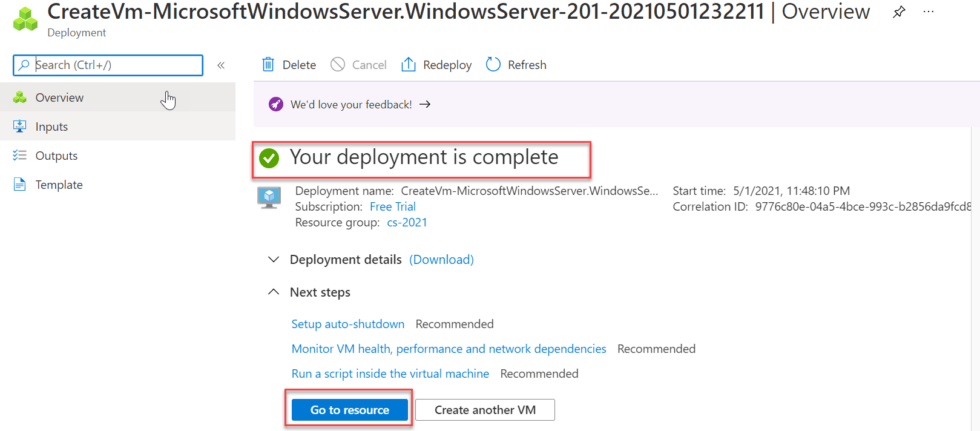
Now you can see the Virtual Machine(VM) set up in Azure is completed.
Connect Virtual Machine(VM) using RDP(Remote Desktop Protocol)
To connect VM using RDP, Open VM and then click on connect button

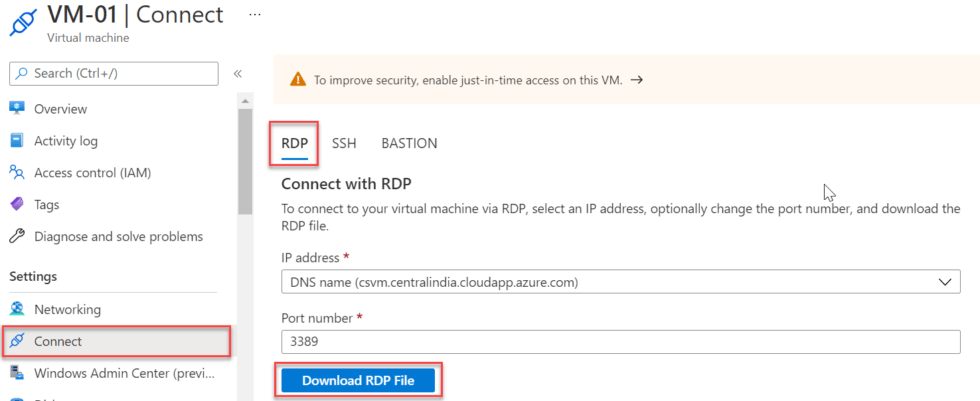
Download the RDP file it download the Remote Desktop connection Protocol, click on that to login using the VM Credential.
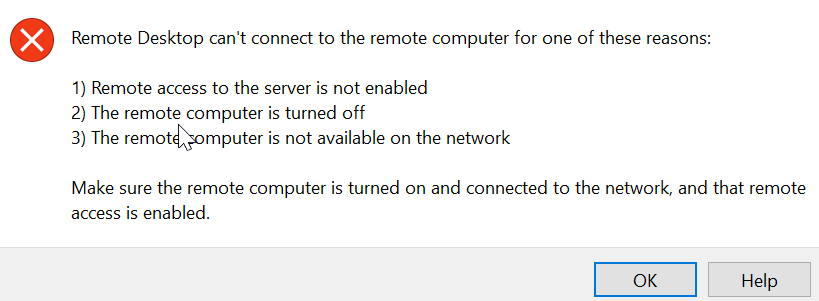
Following below you can fix it.
After creation of Inbound rules, now try again with downloaded RDP, then you can see, connection is success and it ask the credentials. Using the credentials you can able to logged in VM.
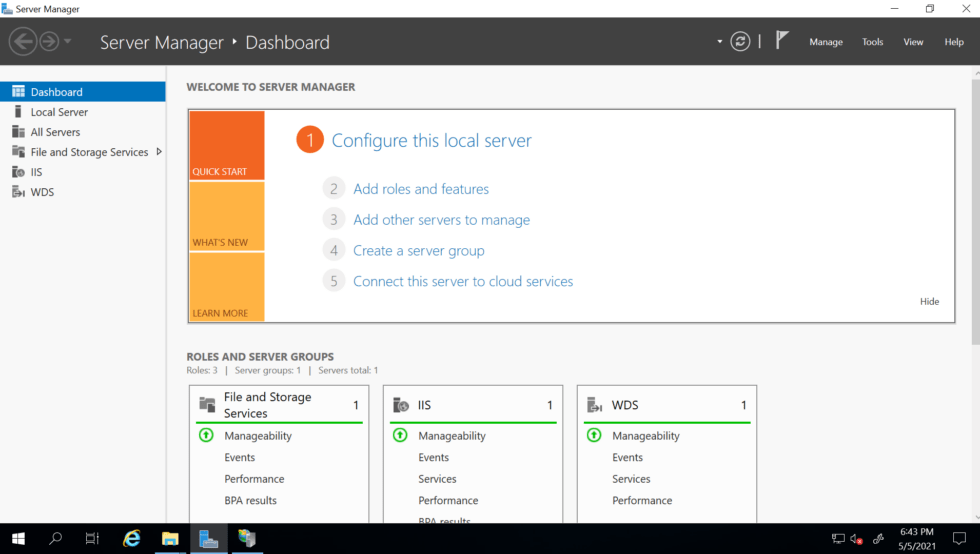
Installing IIS (Web Server) in VM
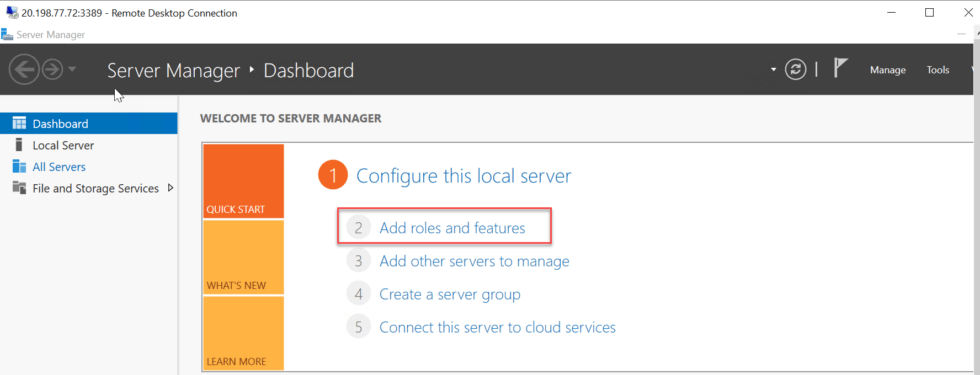
Add roles and features in the Server Manager Dashboard,
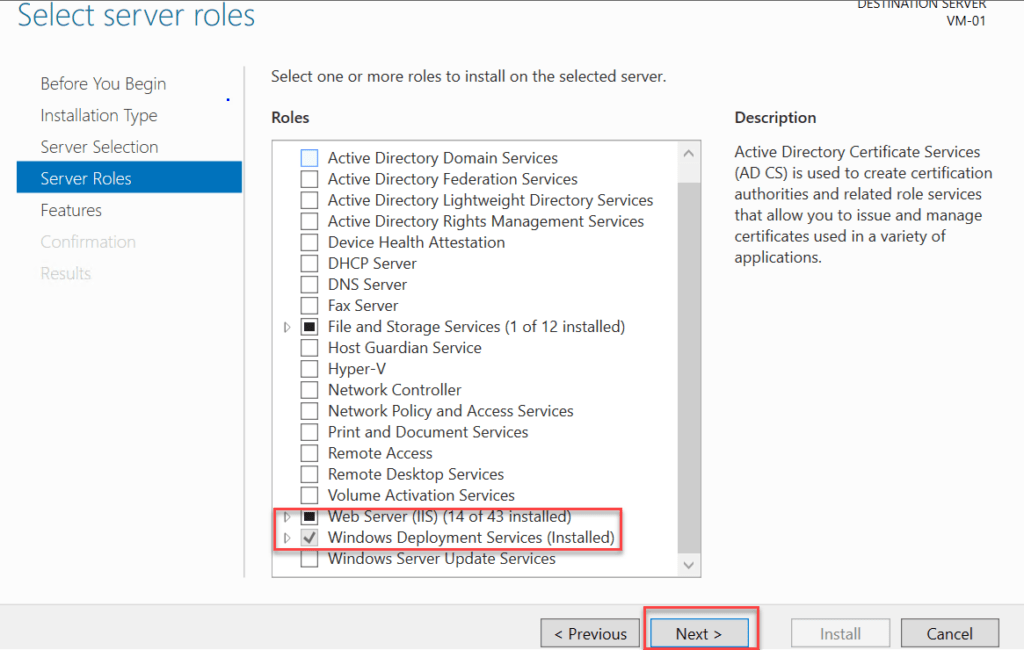
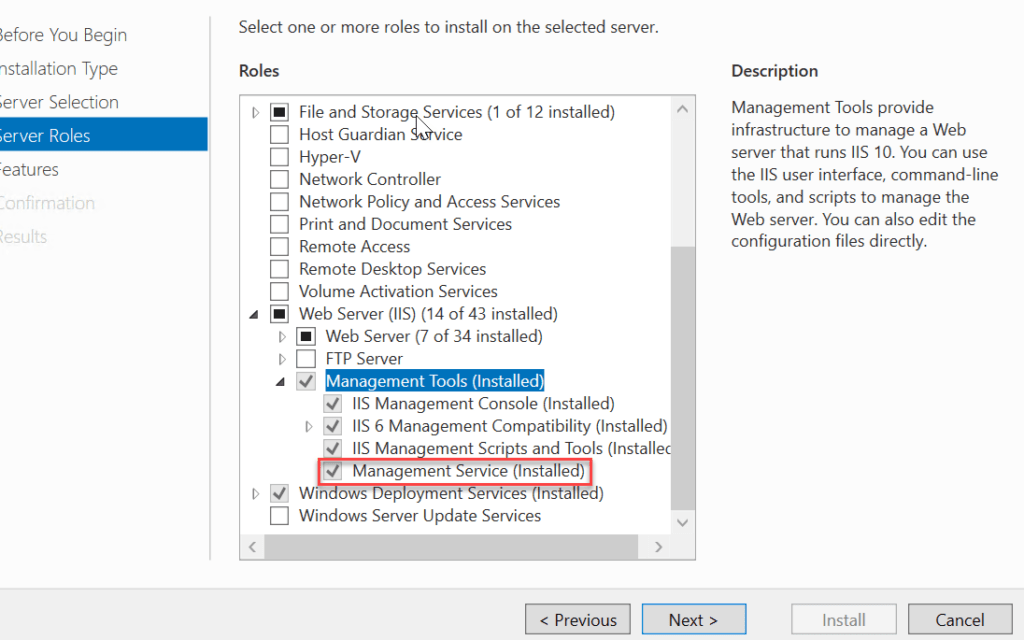
When starting the setup wizard, we must accept the default settings in the Installation Type and Server Selection sections. In the Server Roles section, we will select Web Server (IIS) and accept the additional required installation of IIS Management Console.
Once the installation is complete there are two important considerations,
- IIS is installed and runs with the internal firewall rule created for port 80.
- Web Management Service is installed with the internal firewall rule created for port 8172.
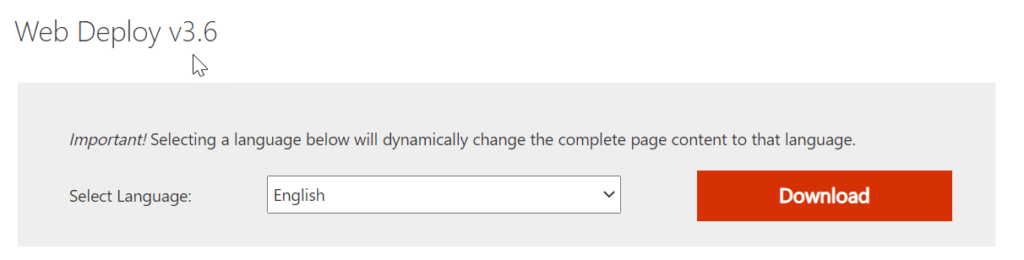
Install Web Deploy, .NET Core SDK & Bundle in VM
Let’s install Web deploy in virtual machine following the link.
Download and Install both SDK and hosting bundle of ASP.NET Core using this link.
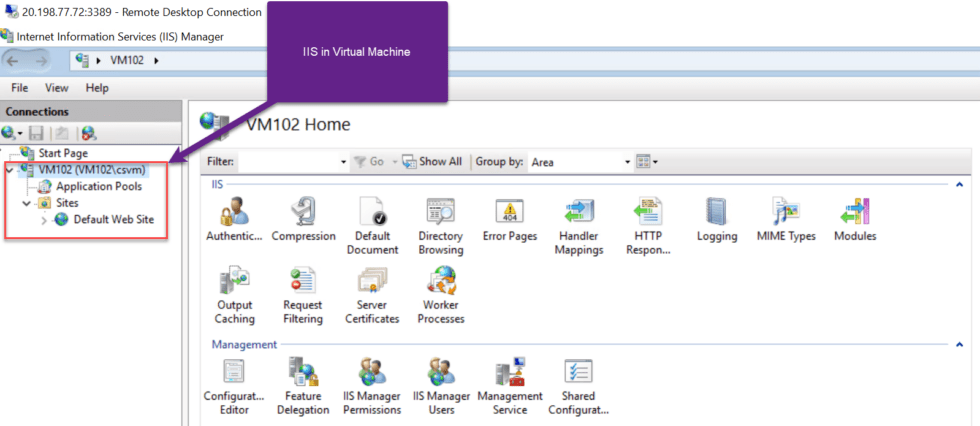
Now everything is ready to configure the application in VM. Let’s open the IIS
Settings in Azure Virtual Machine from the portal
The Windows Server machine in Azure is ready. All we need is two important additional steps. It’s about assigning the DNS (Domain Name System) of the virtual machine and enabling one of the ports to work with Web Deploy.
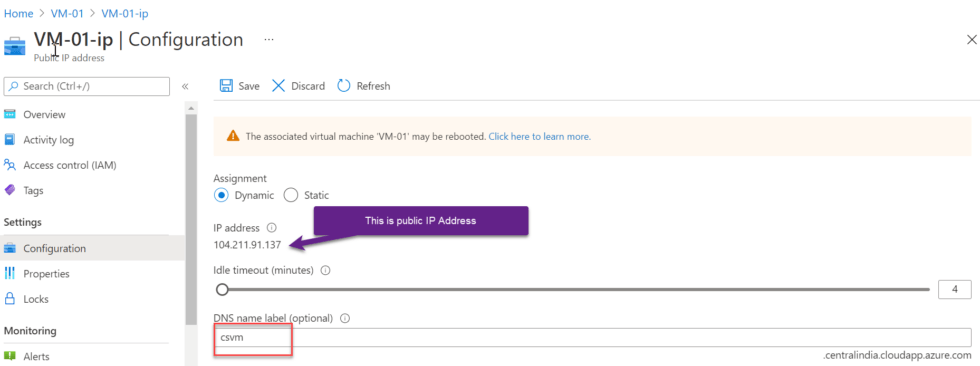
Configure DNS for the virtual machine
To perform this configuration, we need to go to the general section of the virtual machine in the DNS Name option and click Configure. Here we will define a unique DNS name (A green tick appears when the name is validated).
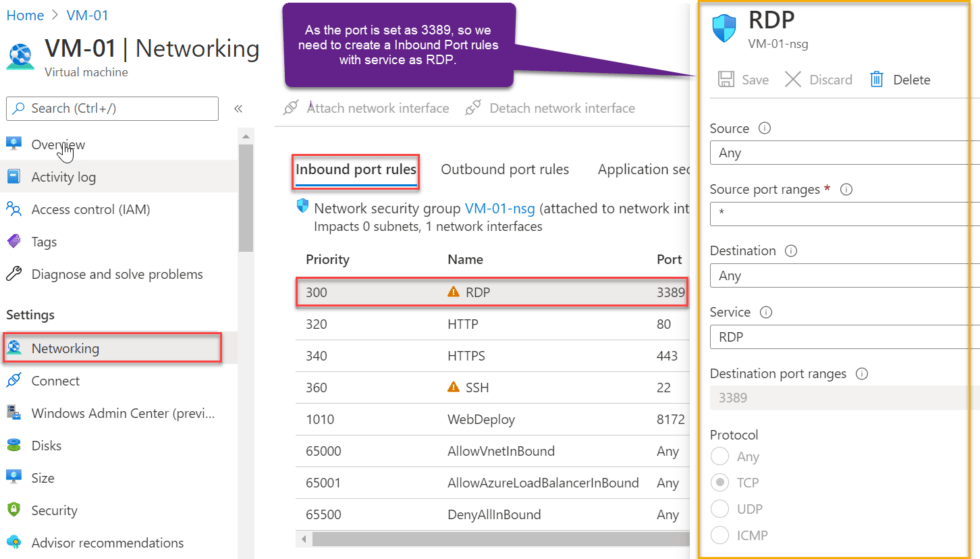
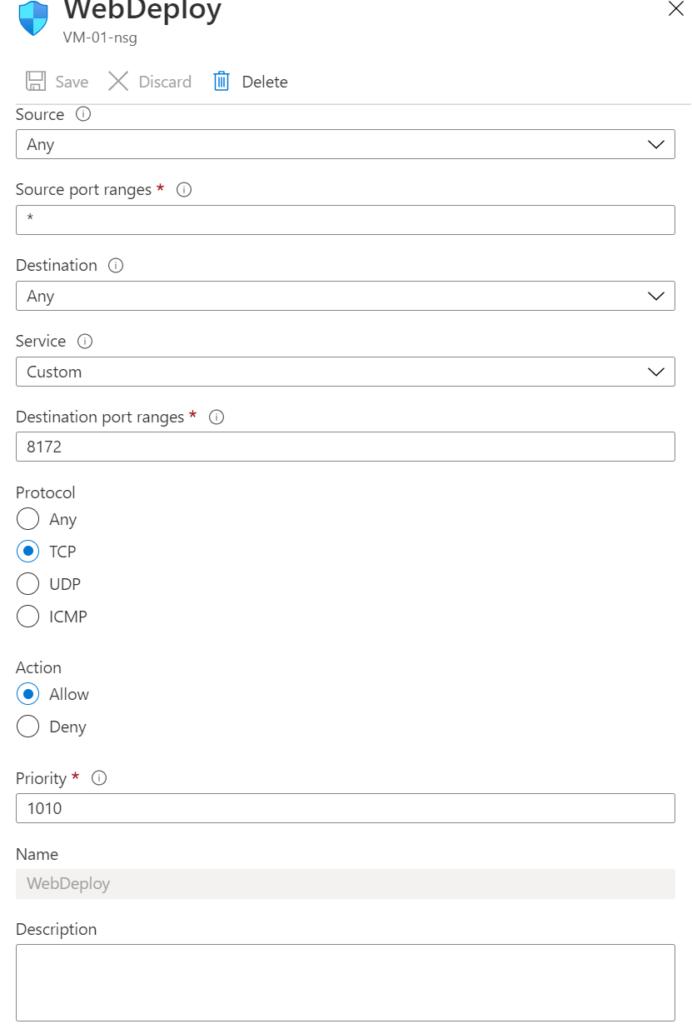
Configure virtual machine inbound firewall rules
For the configuration in this section, we need to go to the Networking section within the VM resource in Azure and select the Add inbound port rule option to create a new firewall rule.
Deploy an ASP.NET Core 5 Web App in Azure Virtual Machine
- Using VS 2019 let’s create a sample web App in ASP.NET Core.
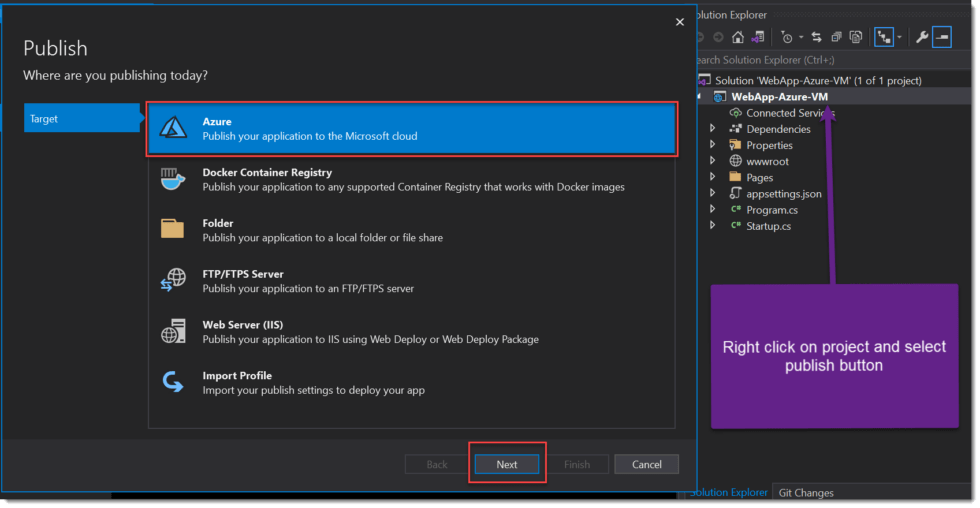
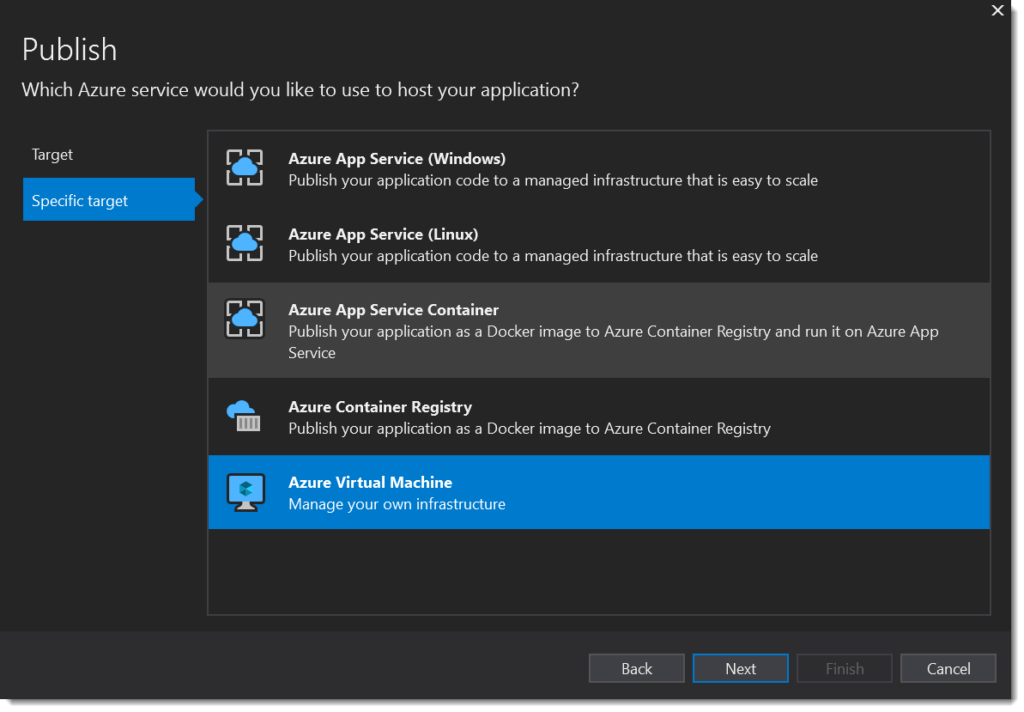
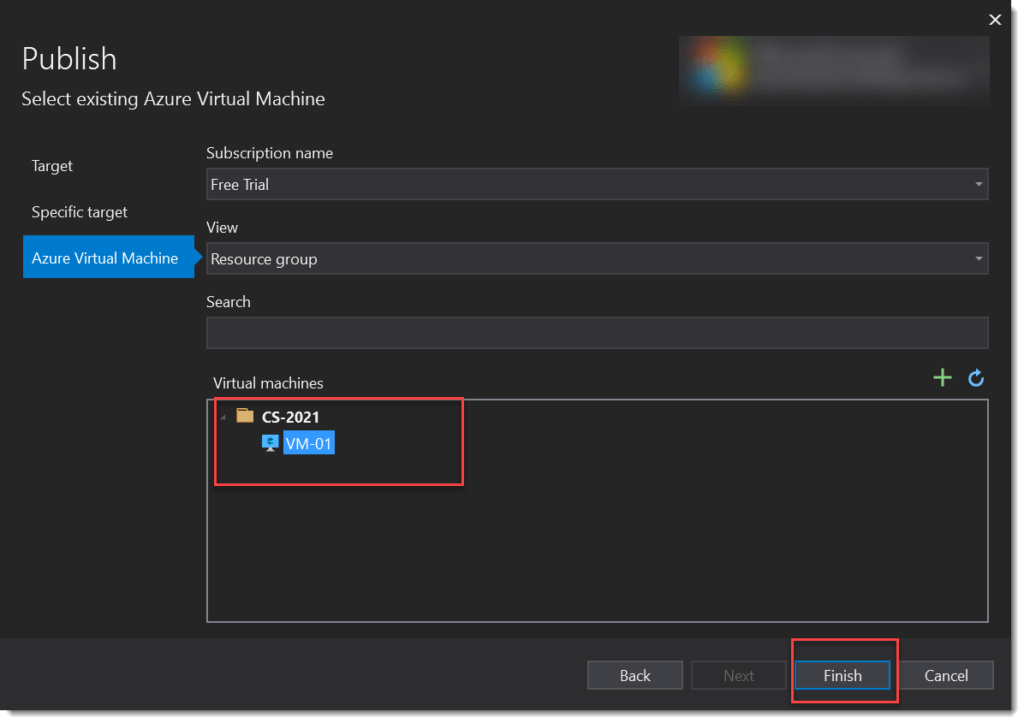
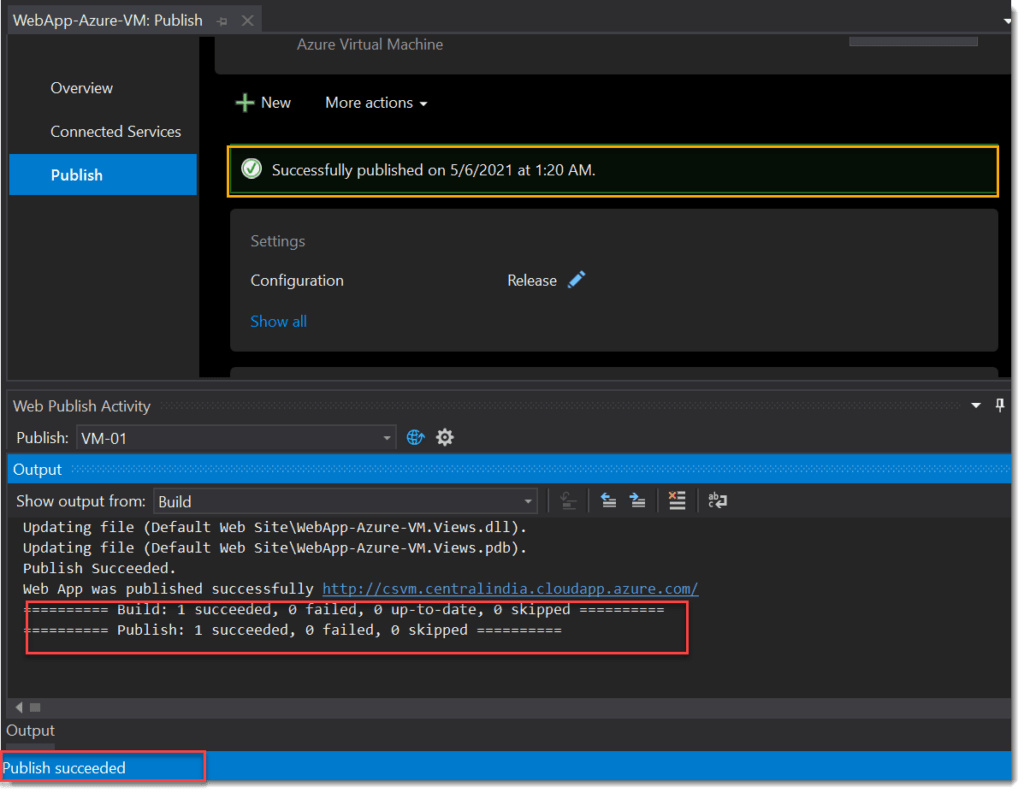
- So, now our VM is ready then we are going to publish the file using Visual studio right way to VM.

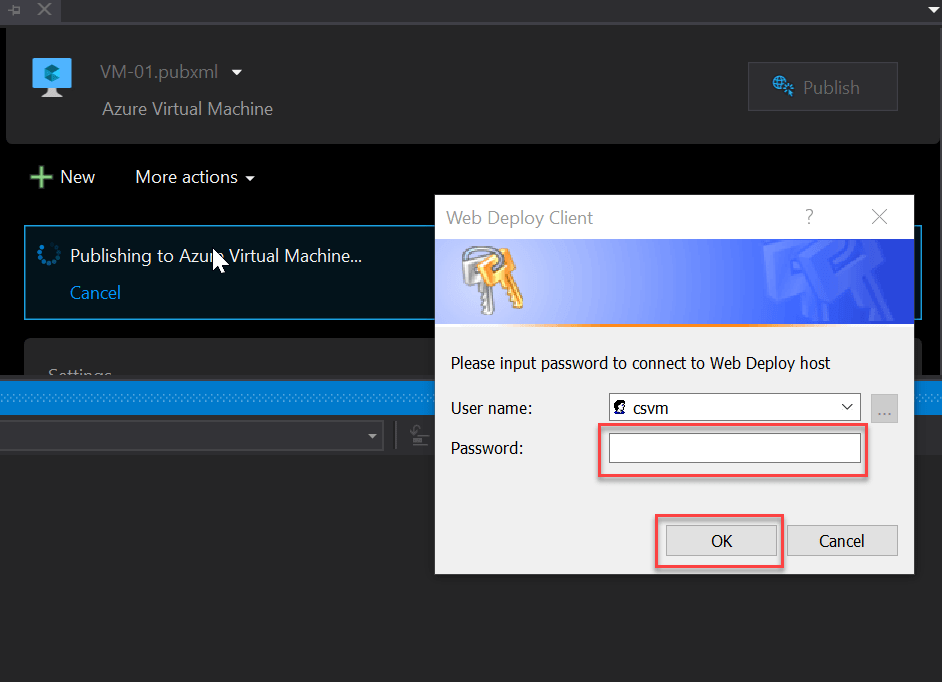
When we hit the publish button, it ask us the credentials again like below. Give the credentials and click on OK button.
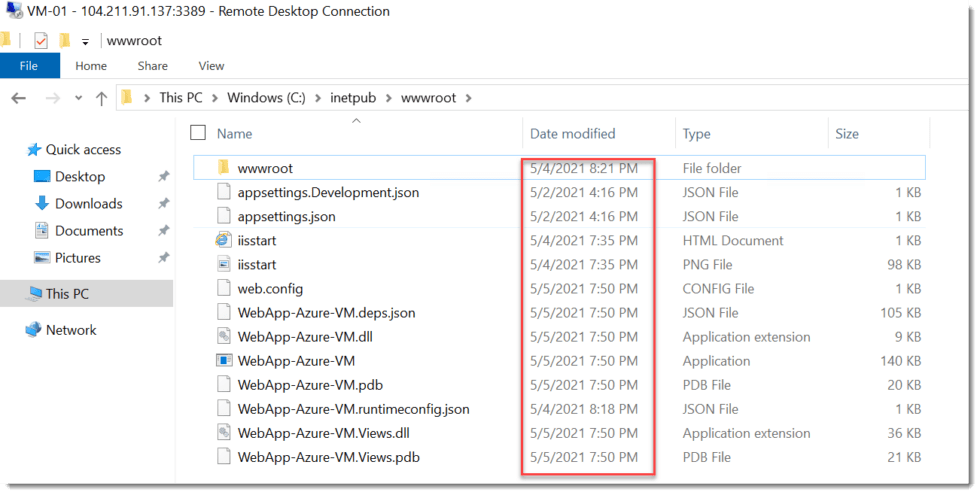
When you navigate to Virtual machine path you can see the required file is
Now everything is done, when you access the URL the ASP.Net Core Website can access.
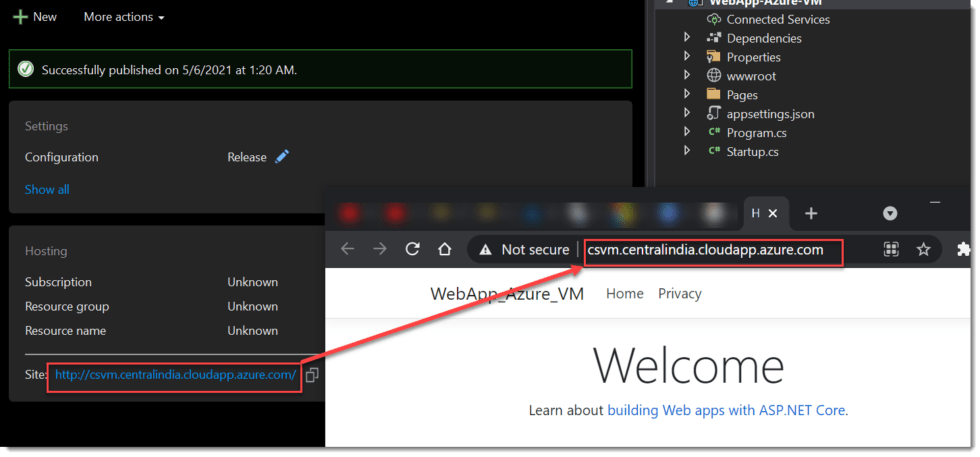
You can see now we can access our deployed site in Azure.
Conclusion
Leave behind your valuable queries and suggestions in the comment section below. Also, if you think this article helps you, do not forget to share this with your developer community. Happy Coding 🙂
Related Article
- 🔐 Securing .NET Core Web Apps with Azure AD/Intra and MSAL
- How to Integrate AdminLTE with ASP.NET Core
- How to run ASP.Net Core Web Application in Docker Container
- ChatGPT Integration in ASP.Net Core using OpenAI
- How to use cookies in ASP.Net Core- Complete Guide
Jayant Tripathy
Coder, Blogger, YouTuberA passionate developer keep focus on learning and working on new technology.