

In this article, we will learn about Deploying Angular apps in Azure Blob Storage with CI/CD Integration. Using the Static website functionality in an Azure Storage Account is a low-cost and straightforward approach to quickly launching an Angular app (or any other type of SPA). If you want to automate the deployment of your Angular app to Azure Blob Storage, follow this guide using CI/CD with Azure DevOps Pipelines. Please read my previous article on how to Build a serverless CRUD app with Azure Functions and Cosmos DB.
📌 What we cover in this article?
- We would create an Angular Material card app and deploy it into Azure Blob Storage.
- Adding CI/CD with Azure DevOps integration to automate the process.
Prerequisites
- Basic Knowledge of Angular App
- Need an Azure account to create the Blob storage
- Basic knowledge of Azure DevOps to automate the CI/CD process
Why do we use Azure Blob Storage over Azure App Service
- Best for: Hosting static websites, single-page applications (SPAs), and serving static assets (e.g., images, videos).
- Cheaper than App Service (No compute cost).
- Faster with built-in CDN support for global delivery.
For Angular apps (or any SPA that doesn’t need a backend), Azure Blob Storage is the best choice because:
✔ Cheaper (No compute cost, only storage & bandwidth)
✔ Faster performance with Azure CDN
✔ Simple CI/CD deployment
✔ Auto-scalable with no manual intervention
However, if you need backend processing, server-side rendering, or authentication, then Azure App Service is a better fit.
Creating an Angular App and deploying into Azure Blob Stoarge
To follow the below steps we can create an angular application.
ng new ng-profile
   // creating a new Angular App using this command
ng add @angular/material
   // add the angular material to use material card
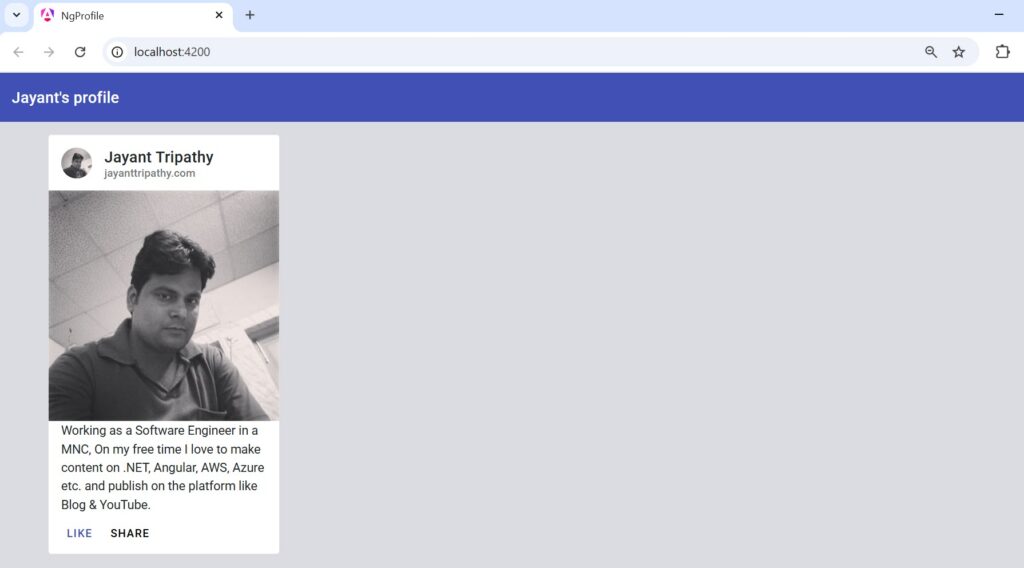
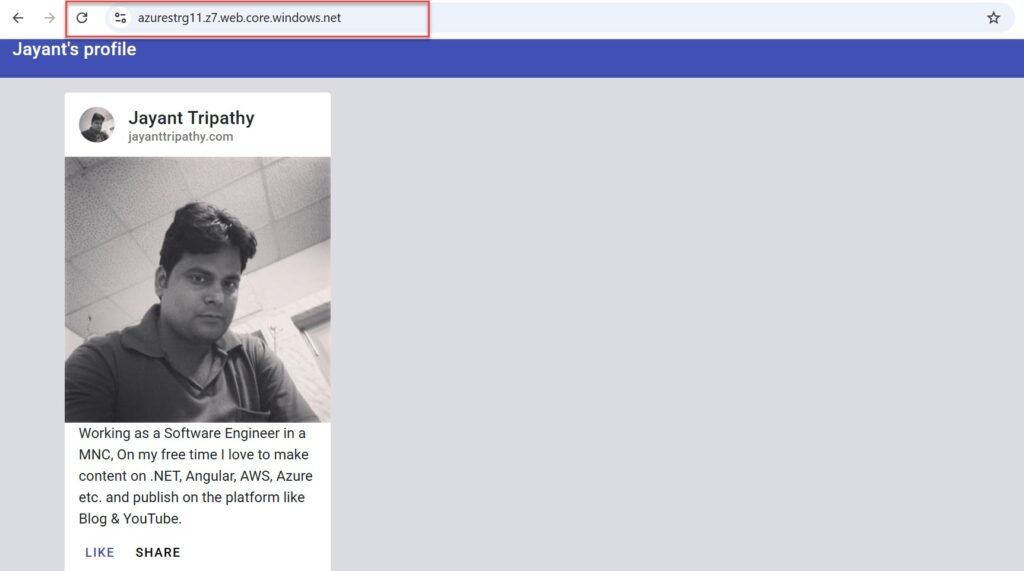
I have added the angular material card on the static angular app, you can follow this link for angular material. When we run the application in local we can see the output like below.
Static hosting your Angular app in Azure Blob Storage
Step:1
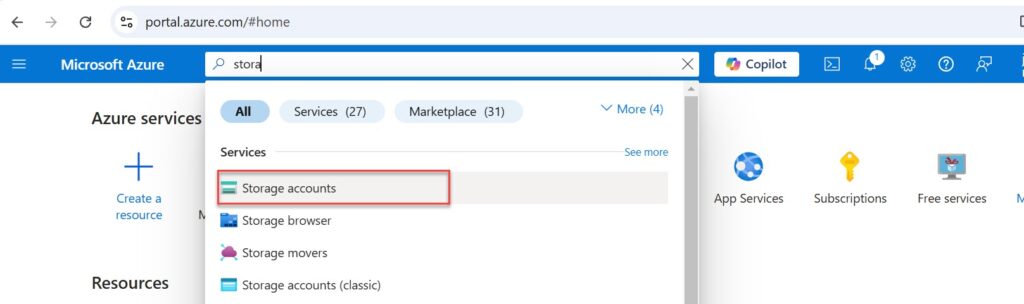
Create your free account by logging into the Azure portal, and click on the storage account.
Step:2
Create the Azure Blob Storage account using the below steps.
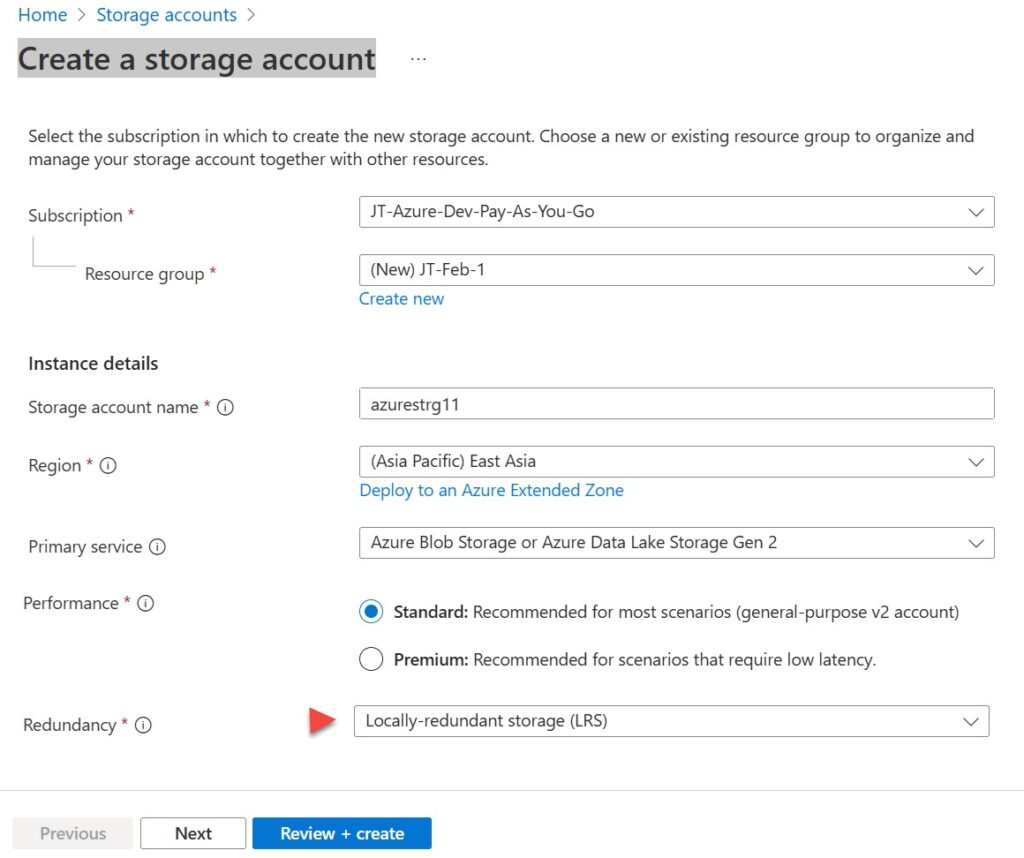
- Subscription: Choose your Azure subscription.
- Resource Group: Create a new one or use an existing one.
- Storage Account Name: Enter a unique name (e.g.,
azurestrg11). - Region: Select a nearby Azure region (e.g.,
East US). - Performance: Choose between:
- Standard (HDD-based, cost-effective)
- Premium (SSD-based, high performance)
- Redundancy:
- LRS (Locally Redundant Storage) – Cheapest, 3 copies in one region.
- GRS (Geo-Redundant Storage) – 6 copies, replicated across regions.
- ZRS (Zone-Redundant Storage) – 3 copies across availability zones.
Click “Review + Create”
- Azure will validate the details.
- Click “Create” to deploy the storage account.
Step:3
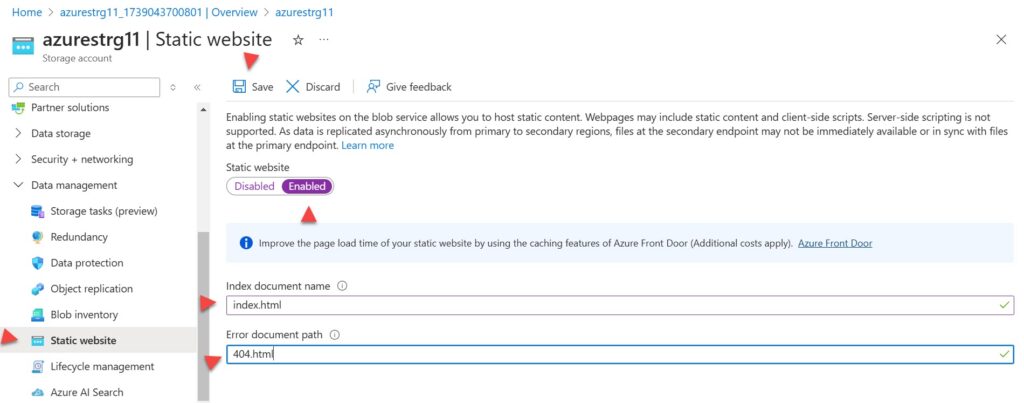
After the deployment, we can see the storage accounts.
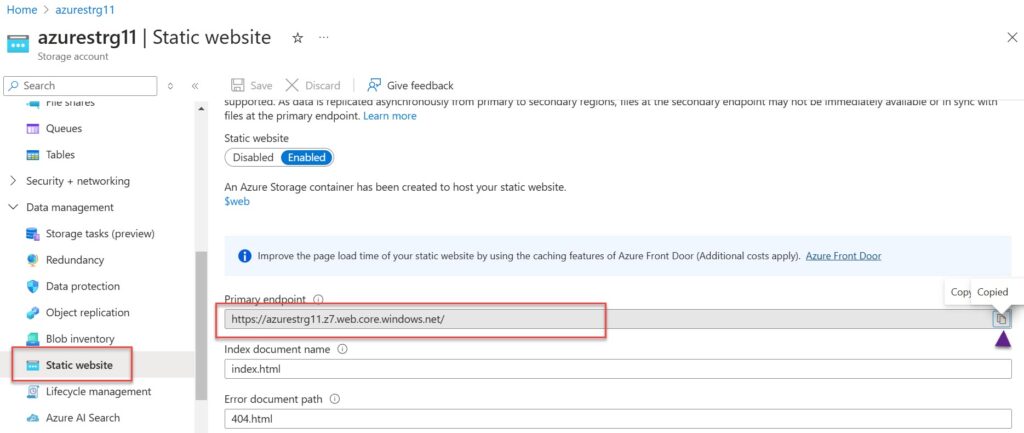
- On the storage accounts, click on Static website under Data management.
- Enabled the static website and added the index document name as “
index.html“, Error document path as “404.html” and click on save.
Step:4 Uploading angular project files to azure blob
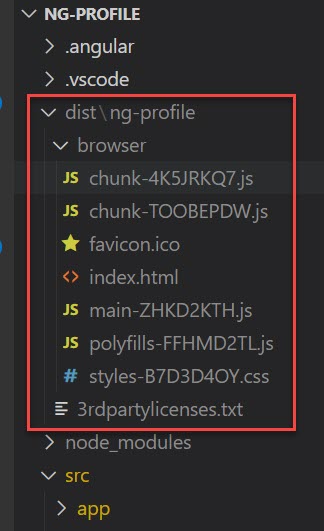
- Build you angular project using
ng build --configuration=productionthis creates the distribution folder(dist), this folder is used to deploy to the blob storage.
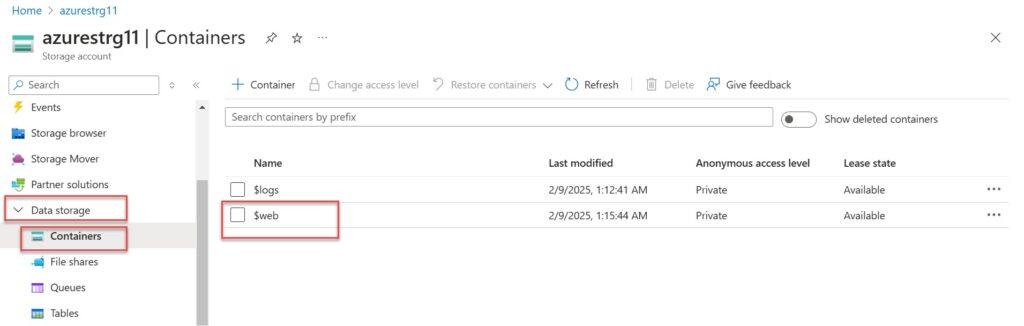
- On the storage accounts, Click on the Containers under Data Storage. Click on the $web to upload the files
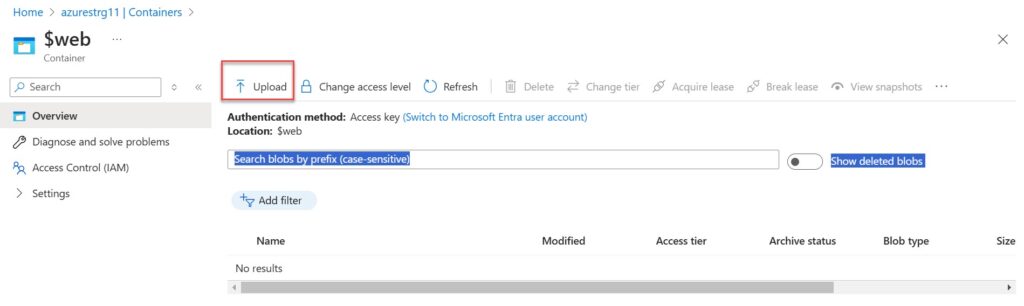
- Click on the Upload icon to upload the
distfiles manually.
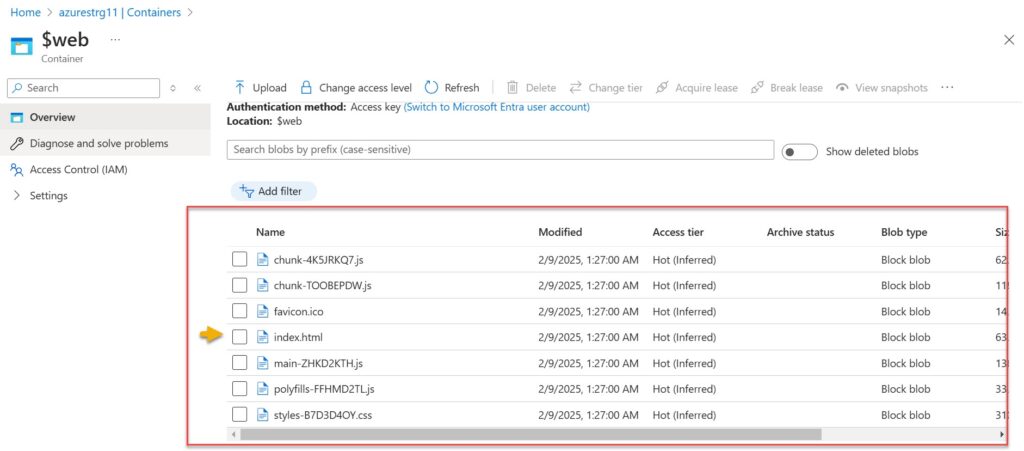
- Once it uploaded the files from the distribution folder(dist) it looks like below.
- Go to the Static website and copy the path of the end-point and access the Angular app.
Adding CI/CD with Azure DevOps to your Angular app
First, let’s push the angular application into GitHub repository. The GitHub repository you can find here.If are new to Azure Pipelines CI/CD Integration you can check below links.
- Building CI/CD Pipeline using Azure DevOps- Part 1
- Building CI/CD Pipeline using Azure DevOps- Part 2
- Building CI/CD Pipeline(YAML) using Azure DevOps – GitHub to Azure Web App (PaaS)
Let’s build the Continuous Deployment first using Azure DevOps Pipeline.
Building Continuous Integration(CI) Process
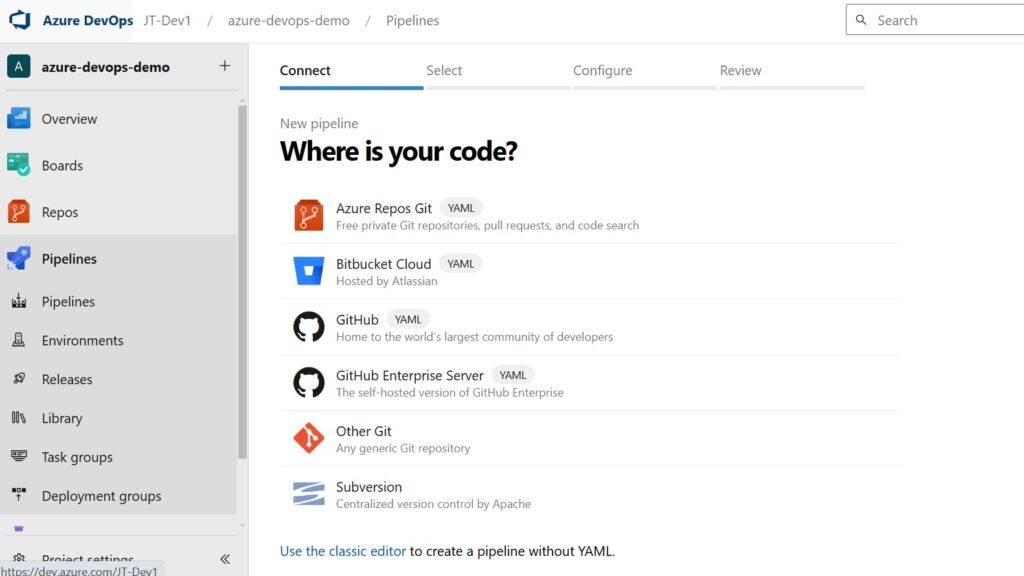
- Click on the pipelines on the left link and click on the new pipeline.
- Click on the GitHub (YAML)
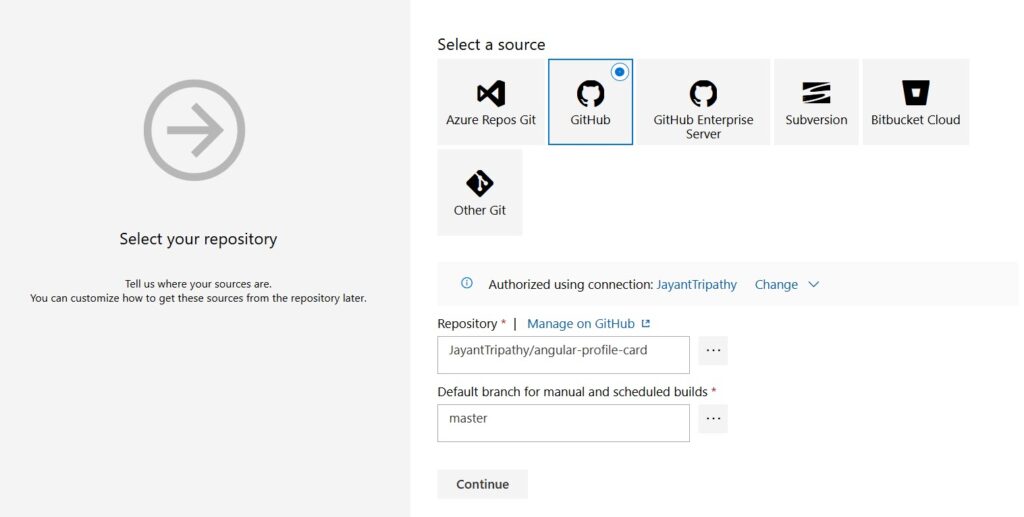
- Choose GitHub and find the repository from GitHub where your repository present.
- On next install
Node.js with Angular
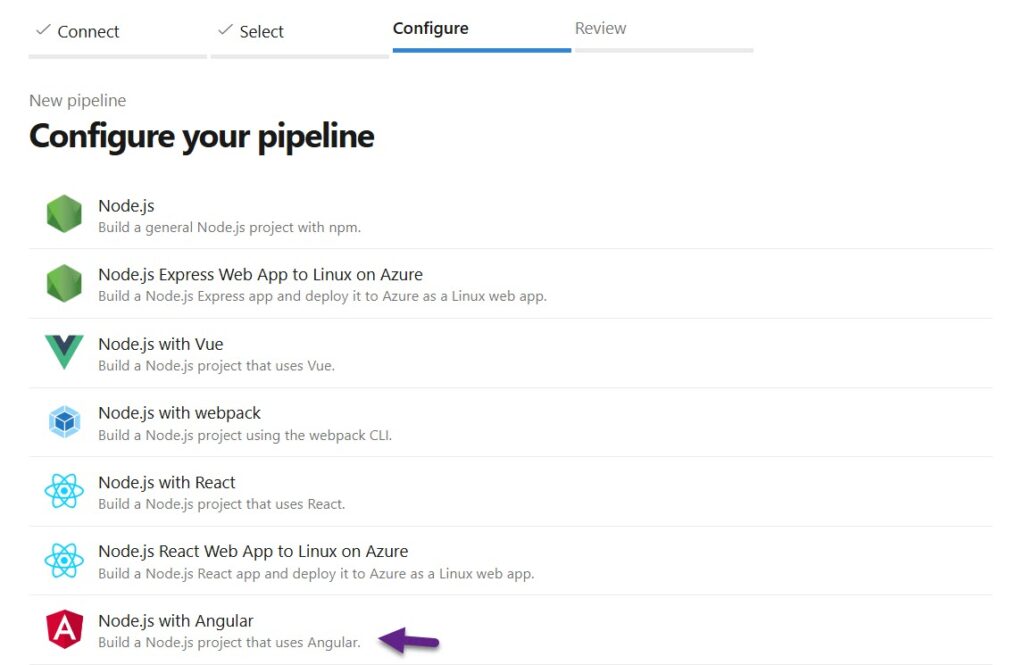
Then build the Yaml like below:
trigger:
- master

pool:
  vmImage: ubuntu-latest

steps:
- task: NodeTool@0
  inputs:
    versionSpec: '20.x'
  displayName: 'Install Node.js'

- script: |
    npm install -g @angular/cli
    npm install
    ng build --configuration=production
  displayName: 'npm install and build'
- task: AzureCLI@2
  inputs:
    azureSubscription: 'MyAzureConnection'  # Replace with your actual service connection name
    scriptType: 'bash'
    scriptLocation: 'inlineScript'
    inlineScript: |
      set -x  # Enable debugging
      az storage blob upload-batch \
        --destination "\$web" \    #This is my container name, you can set your container name here
        --source "$(Build.SourcesDirectory)/dist/ng-profile/browser" \   #shared your /dist path
        --account-name "azurestrg11" \            # Replace with your storage account
        --overwrite true
  displayName: 'Upload files to Azure Storage ($web)'
- Enable Contionius Integration like below, so that on next push it automaticvally trigger the CI process.

Building Continuous Development (CD) process
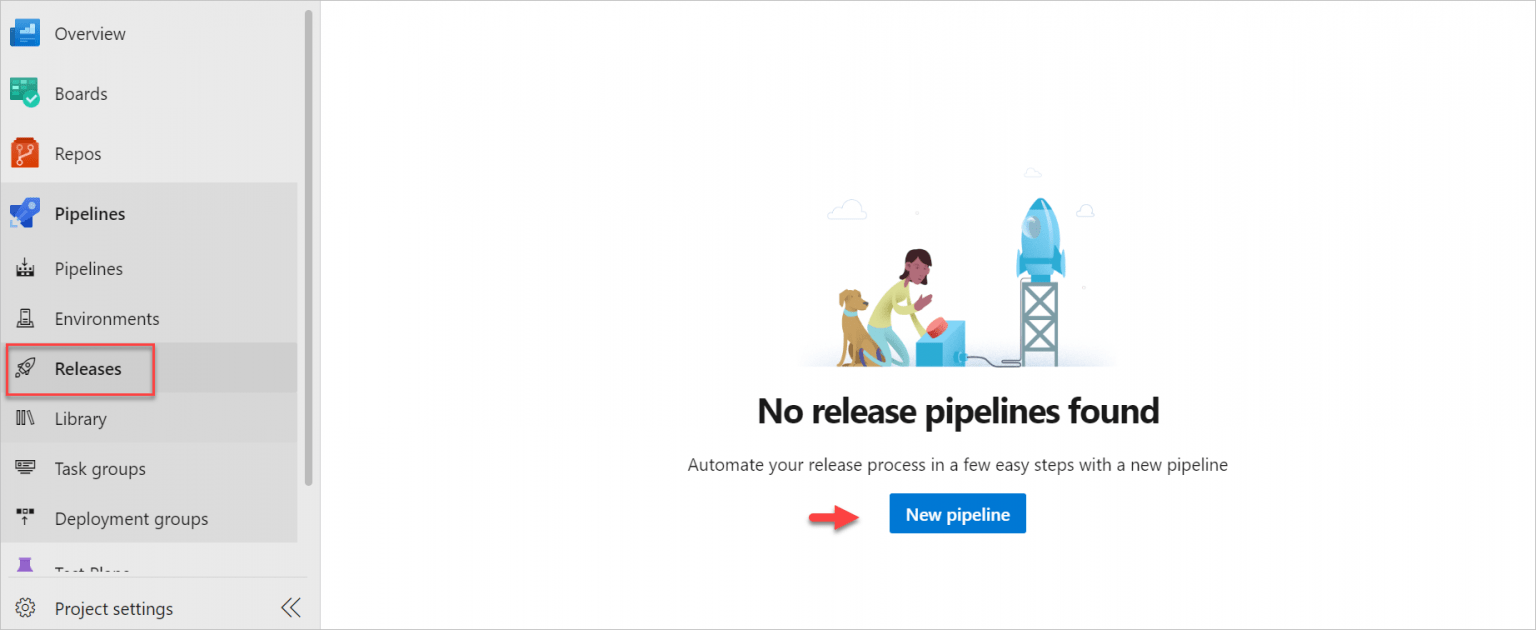
- To initiate the release pipeline, follow the below steps. Click on the Releases on left panel and click on New pipeline.
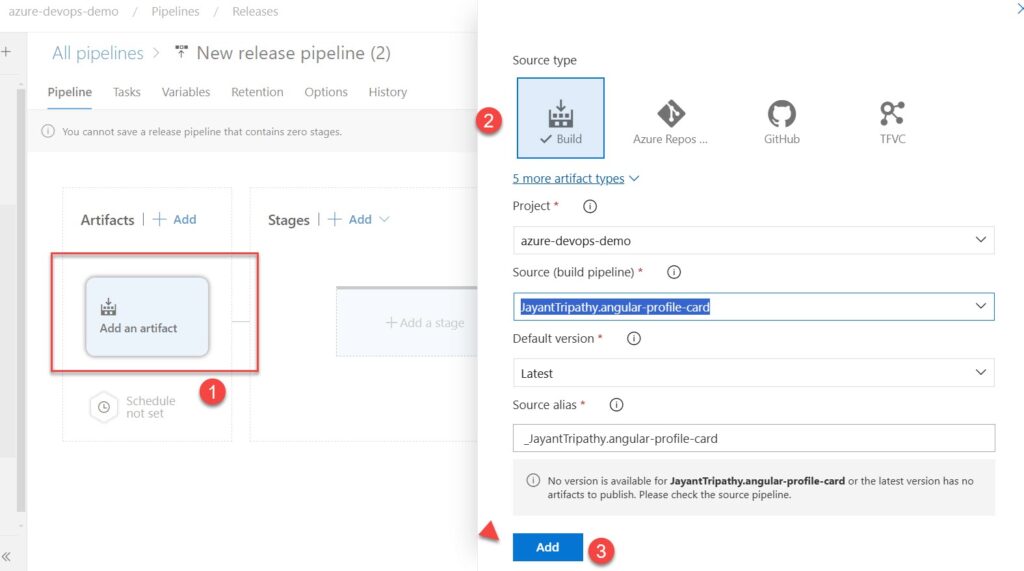
- On next it open the below page where you can choose the template where we want to deploy our code/service. For this example I have taken for deployment as Azure App Service, So I select the “Azure App Service deployment”.
Trigger the Release pipeline Automatic
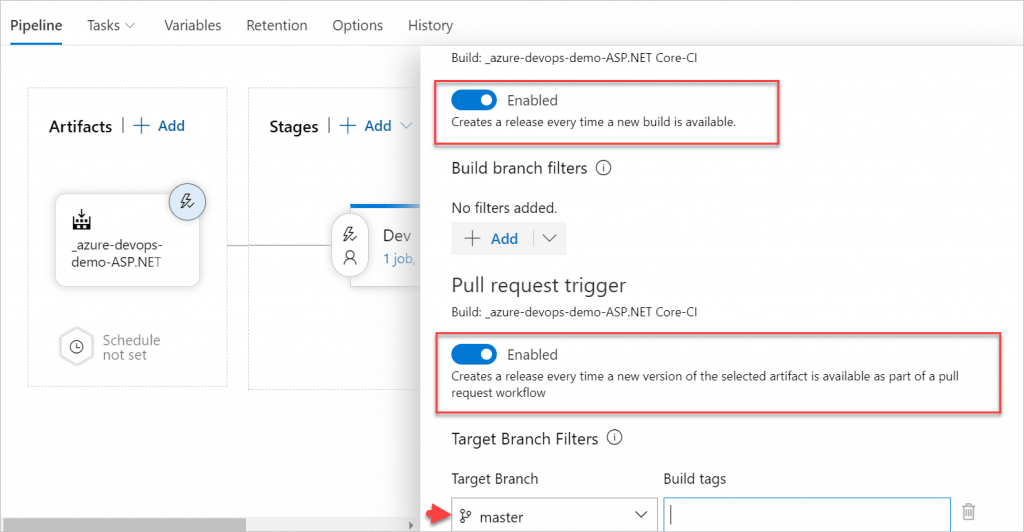
- Click on the
Edit Releaseand Edit the Artifacts
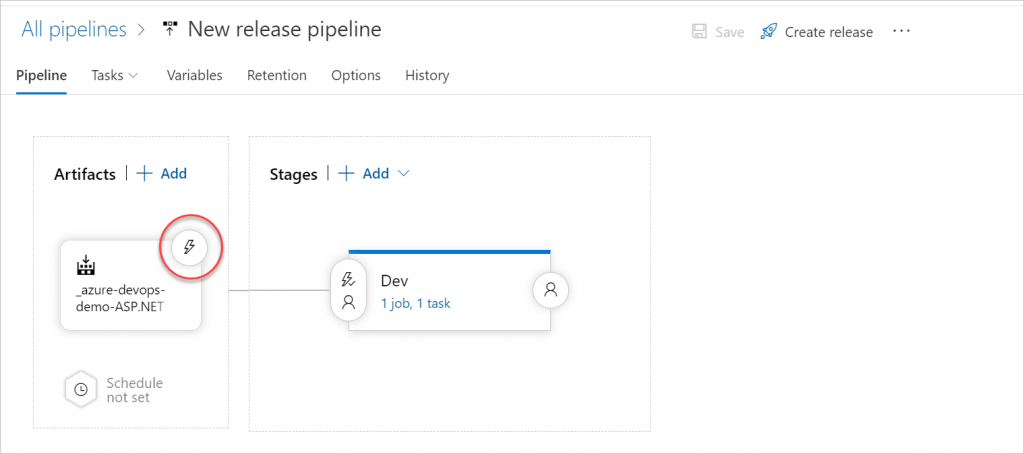
- Enabled the Creates Release and Enabled the Pull requests Trigger.
- And the target branch is
master
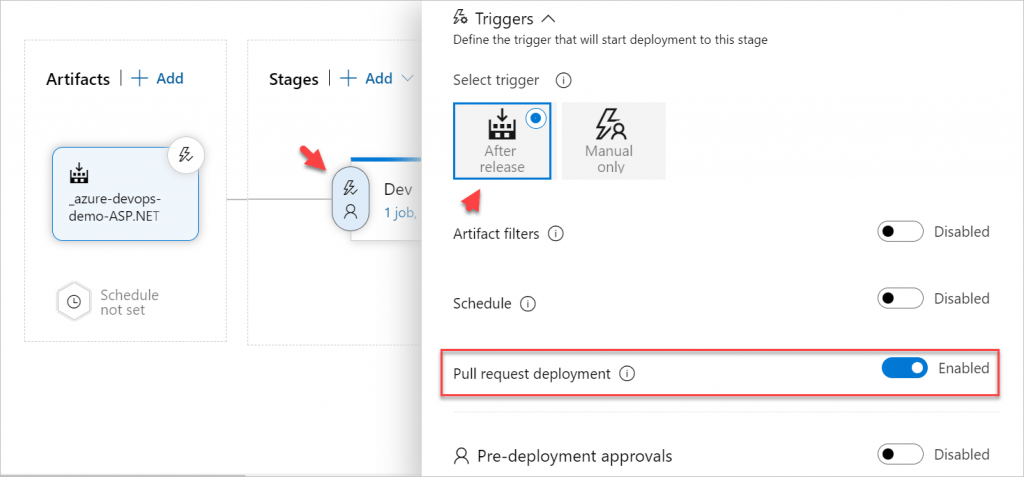
- And then Click the Edit of Stages, and enabled the pull request deployment.
That’s it for this article, please see on below the when we push the file to repo it automatic trigger and gone through CI/CD process and update the file into Azure Blob Storage.
Conclusion
In this article, we discussed about Deploying Angular apps in Azure Blob Storage with CI/CD Integration. Using the Static website functionality in an Azure Storage Account is a low-cost and straightforward approach to quickly launching an Angular app (or any other type of SPA).
Leave behind your valuable queries and suggestions in the comment section below. Also, if you think this article helps you, do not forget to share this with your developer community. Happy Coding 🙂
Latest Article
- Building an AI Knowledge Base Search with Azure AI Foundry: Step-by-Step Guide
- How to Secure React.js application with Azure AD Authentication Using MSAL Library
- 🔐 Securing .NET Core Web Apps with Azure AD/Intra and MSAL
- Step-by-Step Guide to Using Azure Redis Cache in ASP.NET Core 9 Web API
- 🤖 Build a Full-Stack AI App with React, Node.js & Azure OpenAI
- Effortless React Deployment 🚀: CI/CD with GitHub Actions & Azure Static Web Apps
- Deploying Angular apps in Azure Blob Storage with CI/CD Integration 🚀
- How to Build a serverless CRUD app with Azure function and Cosmos DB
- How to resolve Function App Cannot Create within Azure Portal
- How to convert Text To Speech With Azure Cognitive Services using Angular and .Net Core
- Building CI/CD Pipeline(YAML) using Azure DevOps – GitHub to Azure Web App (PaaS)
- Upload Download and Delete files in Azure Blob Storage using ASP.NET Core and Angular
- How to upload files to Azure Blob Storage using Asp.Net Core Web API
- Introduction to Azure Cosmos DB
- How to create Cosmos DB in Azure
SUPPORT ME