In this article we will learn about how to use Component communication with @ViewChild. ViewChild makes it possible to access a child component and call methods or access instance variables that are available to the child. Please read my previous article Component communication with @Output. We will discuss more about @ViewChild with other usages in our upcoming article, here we only discuss about how to Component communication with @ViewChild.
The Angular @ViewChild decorator is one of the first decorators that you will run into while learning Angular, as it’s also one of the most commonly used decorators.
ViewChild
The ViewChild query returns the first matching element from the DOM and updates the component variable on which we apply it.
Syntax
The Syntax of the viewChild is as shown below.
ViewChild(selector: string | Function | Type<any>, opts: { read?: any; static: boolean; }): anyViewChild decorator on a Component Property. It takes two arguments selector and opts.
selector: can be a string, a type or a function that returns a string or type. The change detector looks for the first element that matches the selector and updates the component property with the reference to the element. If the DOM changes and a new element matches the selector, the change detector updates the component property.
opts: has two options.
static: Determines when the query is resolved. True is when the view is initialized (before the first change detection) for the first time. False if you want it to be resolved after every change detection
read: Use it to read the different token from the queried elements.
Parent-Child communication using @ViewChild()
The @ViewChild decorator takes the name of the component/directive as its input. It is then used to decorate a property. The Angular then injects the reference of the component to the Property.
Another technique used by the parent to access the child component’s properties and methods is to inject an instance of the child component into the parent as a @ViewChild.
Parent Component
In the parent component typescript file modify the files like below.
- Viewchild is imported and child component is imported in parent component.
-
@ViewChild(ChildComponent) child: ChildComponentis registered the child component so that all the child component methods and variable can access. - Line no. 19-22, here we can called the child component method using
@ViewChild.
import { Component, OnInit, ViewChild } from '@angular/core';
import { ChildComponent } from '../child/child.component';

@Component({
  selector: 'app-parent',
  templateUrl: './parent.component.html',
  styleUrls: ['./parent.component.css']
})
export class ParentComponent implements OnInit {

  constructor() { }

  @ViewChild(ChildComponent) child: ChildComponent | undefined;

  ngOnInit(): void {
  }

   increment() {
    this.child?.incrementChild();
  }
   decrement() {
    this.child?.decrementChild();
  }
}
Parent component HTML markup
- Here we called the child component Increment and Decrement methods.
<p>This is Parent Component</p>
<p> current count is {{child?.count}} </p>
 <button (click)="child?.incrementChild()">Increment</button>
 <button (click)="child?.decrementChild()">decrement</button>

 <!-- Child Component Added here -->
<app-child></app-child>
Child Component
- In the child component we used variables and created methods of Increment() and Decrement() that should expose to parent component.
export class ChildComponent implements OnInit {

  count = 0;
  constructor() { }

  ngOnInit(): void {
  }
  incrementChild() {
    this.count++;
  }
  decrementChild() {
    this.count--;
  }
}
<div class="mt-5">
<p>This is Child Component</p>
<div>Current Child count is : {{ count}}</div>
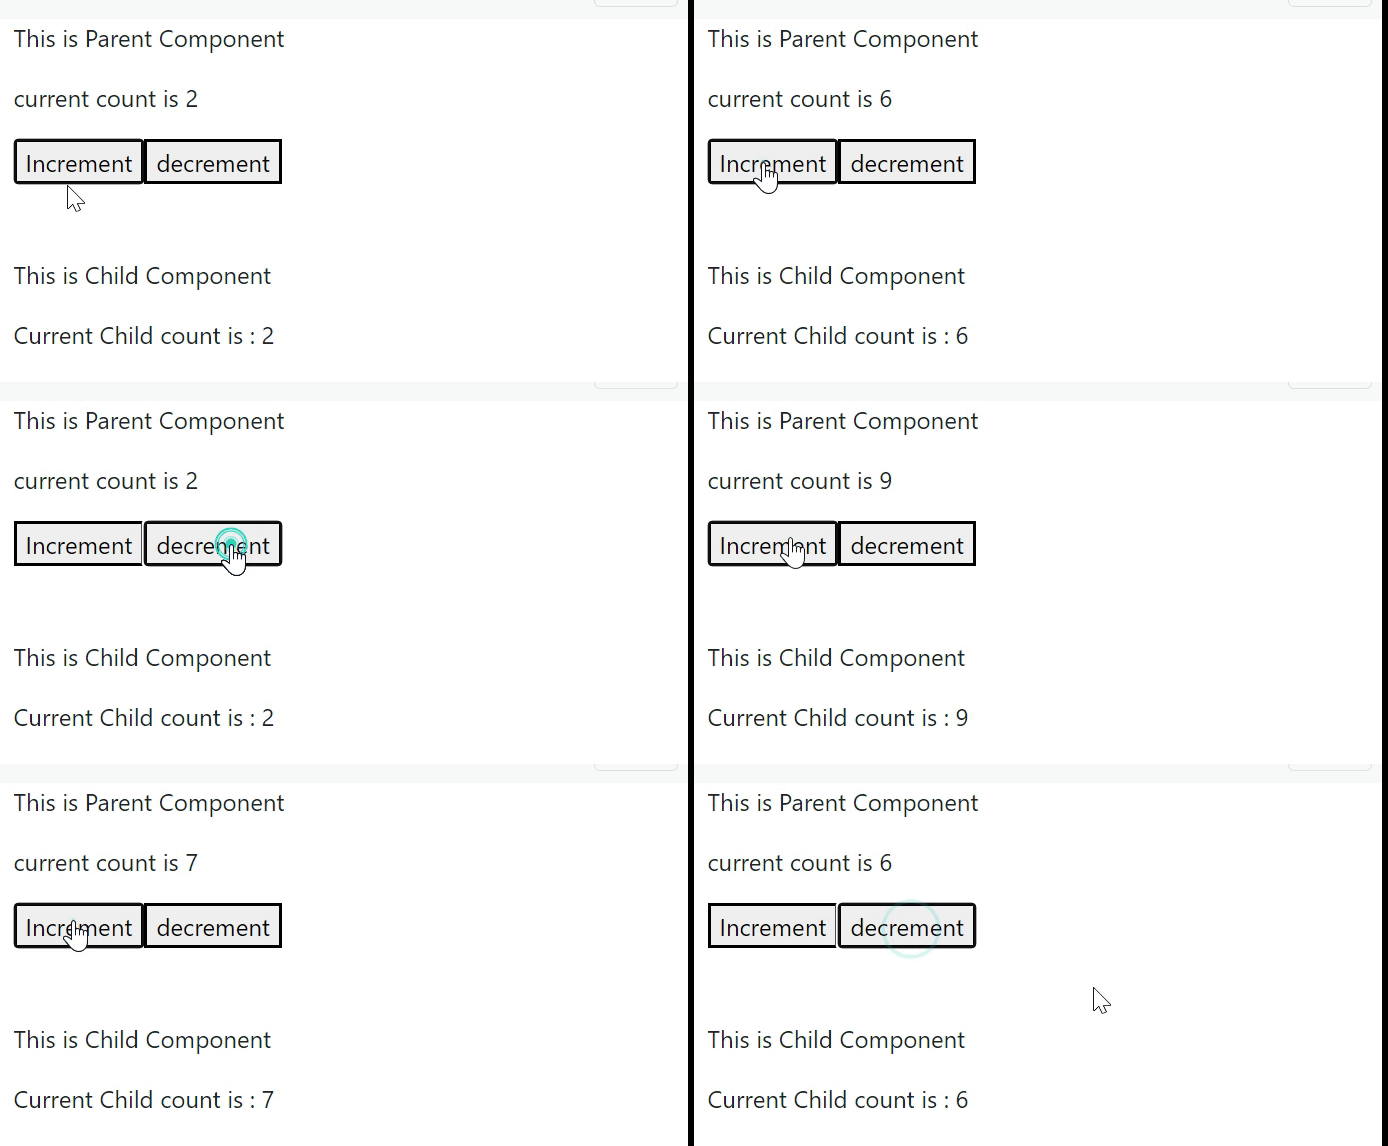
</div>Let’s run the application and see the output like below.

Conclusion
Here we discussed about how to use Component communication with @ViewChild. ViewChild makes it possible to access a child component and call methods or access instance variables that are available to the child.
Leave behind your valuable queries and suggestions in the comment section below. Also, if you think this article helps you, do not forget to share this with your developer community. Happy Coding 🙂
Related Articles
- Deploying Angular apps in Azure Blob Storage with CI/CD Integration 🚀
- How to resolve Function App Cannot Create within Azure Portal
- Building a Chatbot in Angular using Gemini API
- Create a responsive sidebar with Angular Material- Angular 18 Example Series
- How to Deploy Angular 17/18 App in GitHub Pages
Jayant Tripathy
Coder, Blogger, YouTuberA passionate developer keep focus on learning and working on new technology.
