
In this article we will learn about How to Create Custom Pipe in Angular. Angular includes some useful built-in pipes, such as a Date pipe, Currency pipe, and Number pipe, among others. If these pipes do not meet your requirements, we can design our own in Angular. Please read my previous article Async Pipe in Angular.
Why we need Custom Pipe in Angular?
Angular provides some built-in pipes but in some scenarios we need to create to create our custom pipe to transform the result according our requirement, in that scenario the custom pipe is must need.
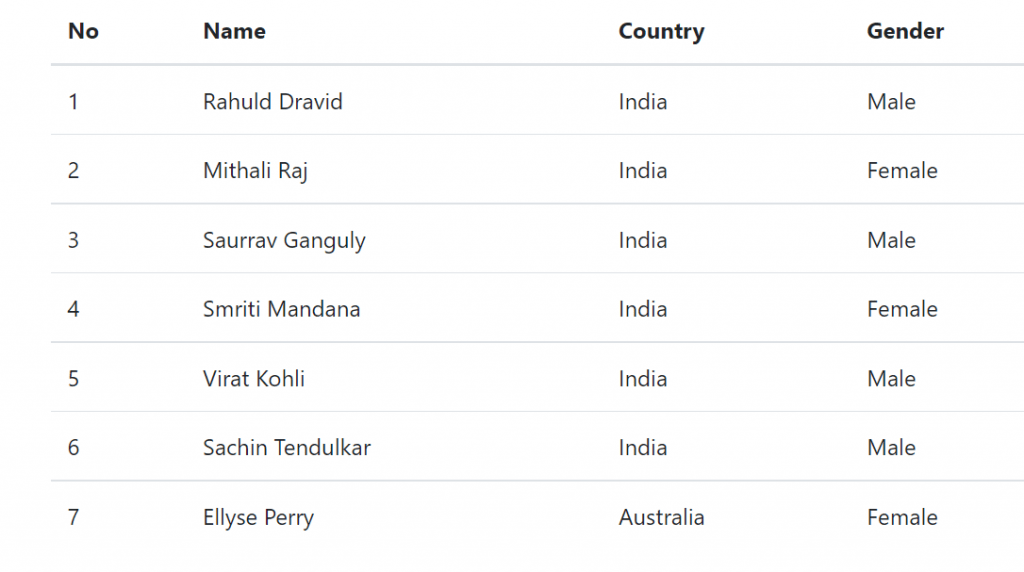
Let’s say on the below example we have the data that to display the cricketer list with their countries and genders. We will create a custom pipe that will allow people to find us based on their genders by appending the salutation to their names, such as Mr. Rahul Dravid and Mrs. Mithali Raj, and so on.
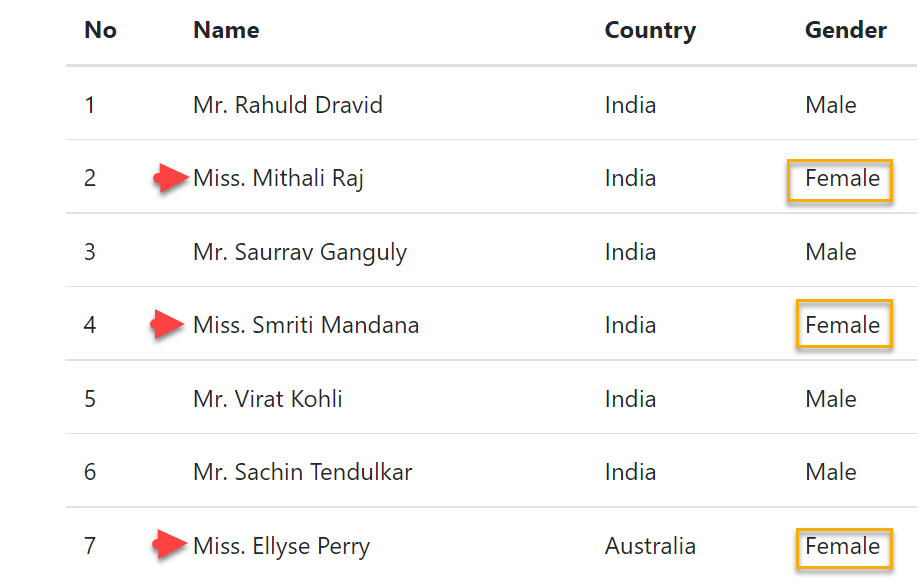
Using custom pipe we expected the result like below, according to the genders we append the salutation with name.
How to Create Custom Pipes
To create a Custom Pipe, first, we need to follow these steps
- Create a pipe class and decorate the class with
@pipedecorator. - Give a name to the pipe in the name meta data of the
@pipedecorator. We will use this name in the template. - The pipe class must implement the PipeTransform interface. The interfaces contain only one method transform.
- The first parameter to the transform method is the value to be transferred. The transform method must transform the value and return the result. You can add any number of additional arguments to the transform method.
- Declare the pipe class in the Angular Module (app.module.ts)
- Use the custom pipe just as you use other pipes.
Creating the Custom Pipe
Let’s create the custom pipe using the command ng g pipe myCustomPipe. After creation the pipe it automatically add the pipe in the app.module.ts file.

import { Pipe, PipeTransform } from '@angular/core';

@Pipe({
  name: 'myCustomPipe'
})
export class MyCustomPipePipe implements PipeTransform {

  transform(name: string, gender: string): string {
    return gender.toLowerCase() == "male" ? "Mr. " + name : "Mrs. " + name;
  }

}- On the above custom pipe we named as pipe as “myCustomPipe”.
- Then on the transform it need the two parameters name & gender.
- According the gender, if the gender is male it append Mr. else it add as Mrs.
Modify the Component class
We have the below typescript that contains the sample cricketers-list with basic details name, country and genders.
export class AppComponent implements OnInit {

  cricketerList: Cricketer[]=[];
  constructor(private httpclient: HttpClient) { }

  ngOnInit() {
    this.getAllCricketers();
  }
  getAllCricketers(){
    this.cricketerList= [
      { id: 1, name: 'Rahuld Dravid', gender: 'Male', country: 'India' },
      { id: 2, name: 'Mithali Raj', gender: 'Female', country: 'India' },
      { id: 3, name: 'Saurrav Ganguly', gender: 'Male', country: 'India' },
      { id: 4, name: 'Smriti Mandana', gender: 'Female', country: 'India' },
      { id: 5, name: 'Virat Kohli', gender: 'Male', country: 'India' },
      { id: 6, name: 'Sachin Tendulkar', gender: 'Male', country: 'India ' },
      { id: 7, name: 'Ellyse Perry', gender: 'Female', country: 'Australia' }
    ];
  }
}
export class Cricketer {
  id: number = 0;
  name: string = '';
  country: string = '';
  gender: string = ''
}
Using the Custom Pipe in Angular Application
Modify the app.component.html file as shown below. Notice that we are passing the gender as an argument for the gender parameter to our custom pipe. The name gets passed automatically.
<table class='table table-stripped'>
    <thead>
      <tr>
        <th>No</th>
        <th>Name</th>
        <th>Country</th>
        <th>Gender</th>
      </tr>
    </thead>
    <tbody>
      <tr *ngFor="let cricketer of cricketerList">
          <td>{{cricketer.id}}</td>
          <td>{{cricketer.name | myCustomPipe : cricketer.gender}}</td>
          <td>{{cricketer.country}}</td>
          <td>{{cricketer.gender}}</td>
        </tr>
    </tbody>
  </table>
That’s it now run the application and we can see the output as per your requirement.
Reference
Conclusion
We discussed here about How to Create Custom Pipe in Angular. Angular includes some useful built-in pipes, such as a Date pipe, Currency pipe, and Number pipe, among others. If these pipes do not meet your requirements, we can design our own in Angular.
Leave behind your valuable queries and suggestions in the comment section below. Also, if you think this article helps you, do not forget to share this with your developer community. Happy Coding 🙂
Related Articles
- Deploying Angular apps in Azure Blob Storage with CI/CD Integration 🚀
- How to resolve Function App Cannot Create within Azure Portal
- Building a Chatbot in Angular using Gemini API
- Create a responsive sidebar with Angular Material- Angular 18 Example Series
- How to Deploy Angular 17/18 App in GitHub Pages
- How to convert Text To Speech With Azure Cognitive Services using Angular and .Net Core
- Angular Interceptors- The Complete Guide
- Upload Download and Delete files in Azure Blob Storage using ASP.NET Core and Angular
- Introduction to Azure Cosmos DB
- How to create Cosmos DB in Azure
Jayant Tripathy
Coder, Blogger, YouTuberA passionate developer keep focus on learning and working on new technology.