
In this article, we will explain How to create Cosmos DB in Azure. CosmosDB is a database service supplied by Microsoft that may be used for any type of application, such as web, IOT, or gaming, that requires enormous data read, write, and processing. CosmosDB has become one of the most sought-after Azure services of all time due to its infinite capacity for data management. Internally, MongoDB, like other non-relational database engines (MongoDB, Cassandra, and so on), stores all data in an efficient storage format such as Key-value, Graph, or Document stores. Before Starting this article please refer to my previous article on Introduction to Azure Cosmos DB.
Creating Azure Cosmos DB
Creating a Cosmos DB in Azure involves several steps. Cosmos DB is a multi-model, globally distributed database service provided by Microsoft Azure. Below are the general steps to create a Cosmos DB account using the Azure Portal:
- Log in to the Azure Portal:
- Open your web browser and navigate to the Azure Portal.
- Log in with your Azure account.
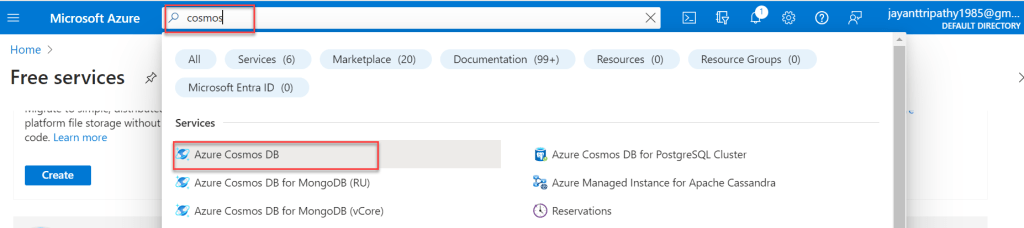
- Search the cosmos DB:
- Select it under Services like the below image.
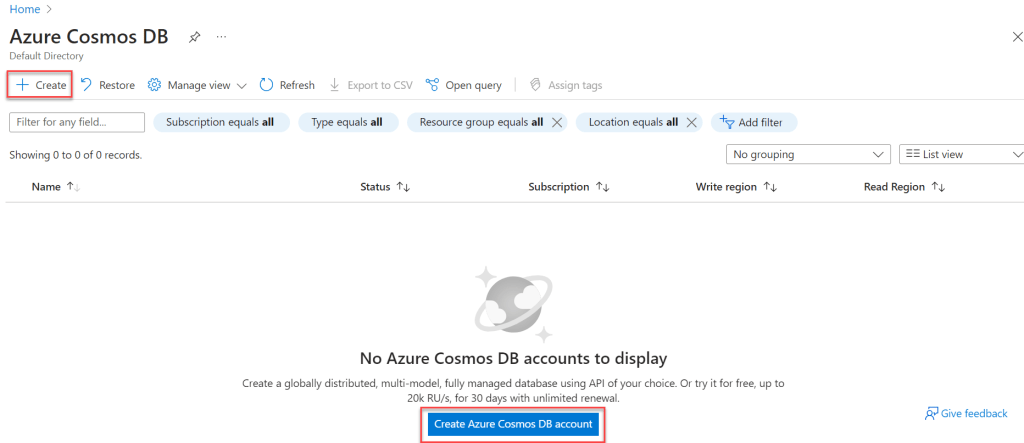
- Creating Azure Cosmos DB:
- Click on the Create button/ Create Azure Cosmos DB account to proceed further.
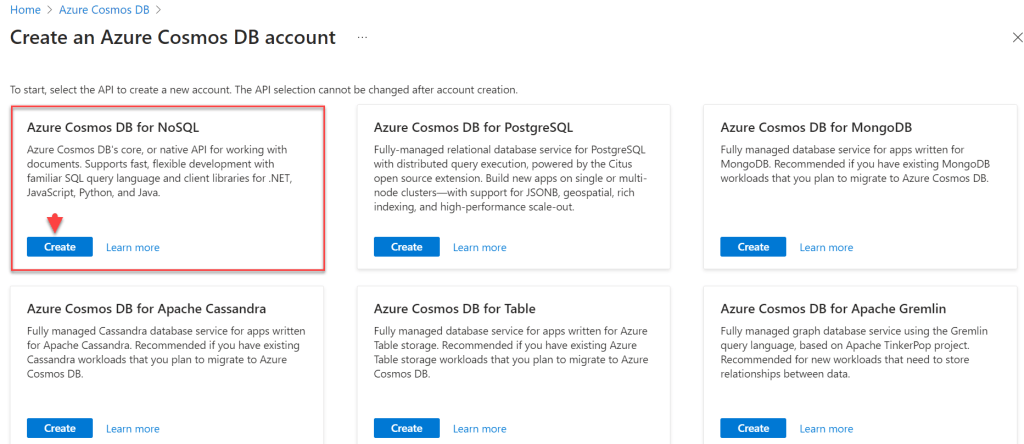
- Create an Azure Cosmos DB account:
- Click on the Azure Cosmos DB for NoSQL Create button, I choose here Core SQL -Recommended option. The benefit of choosing the Core SQL is, that you can use the SQL syntax to query the DB.
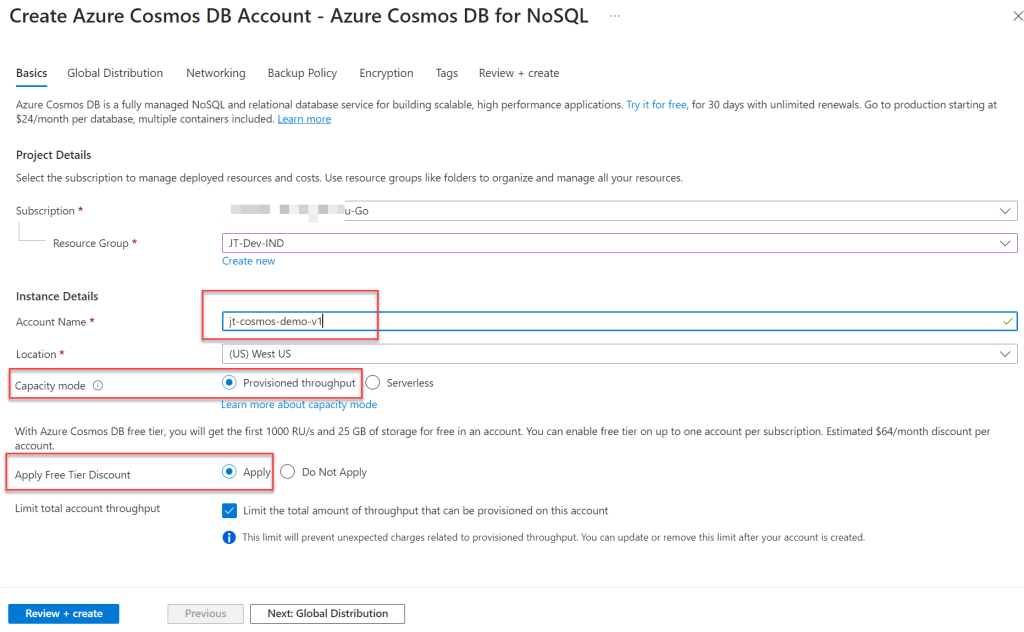
- On the Create Azure Cosmos DB Account – Core (SQL) page, provide the below details on the Basics tab.
- Subscription: Select the Azure Subscription that you want to use here to create the Azure Cosmos DB Account.
- Resource Group: Select the existing resource group or if you don’t have an existing resource group, you can click on the Create new link to create a new resource group.
- Account Name: Provide a unique name for the Azure Cosmos DB Account.
- Location: Select the region or location.
- Capacity mode: Choose the capacity mode, you can choose provisional throughout/serverless.
- Apply Free Tier Discount: Choose the Apply free tier discount option based on your need.
- Click on the Next: Global Distribution button to navigate to the Global Distribution tab.
- On the Global Distribution tab, do the below changes:
- Geo-Redundancy: Choose the Disable option.
- Multi-region Writes: Select the Disable option.
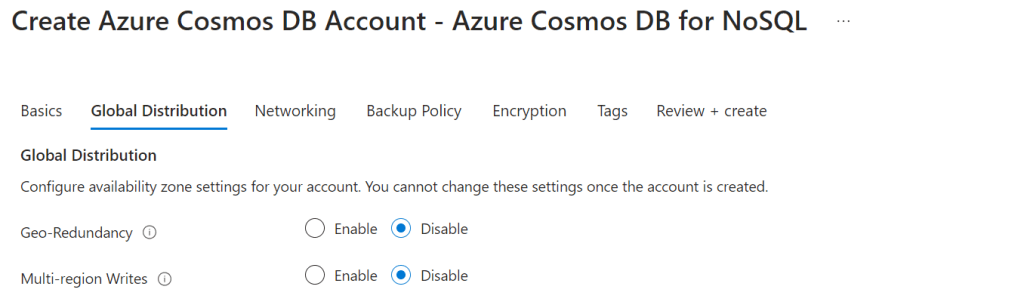
- Keep the other tab options as the default value as is and then click on the Review + Create button:
- Now, the system will validate all the details entered by you and will show you the validation passed. Then you can able to see the Create button. Click on the Create button to create the Azure CosmosDB account.
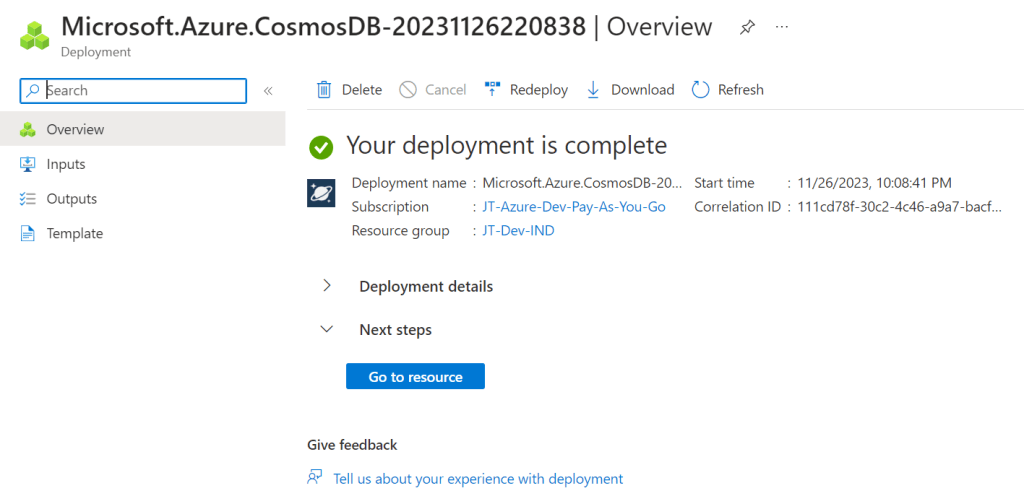
- Finally, you can see the message “Your deployment is complete”. Click on the Go to Resource button to navigate to the Azure CosmosDB account you created just now.
Creating a database and a container
Using the below steps we can create the database and a container.
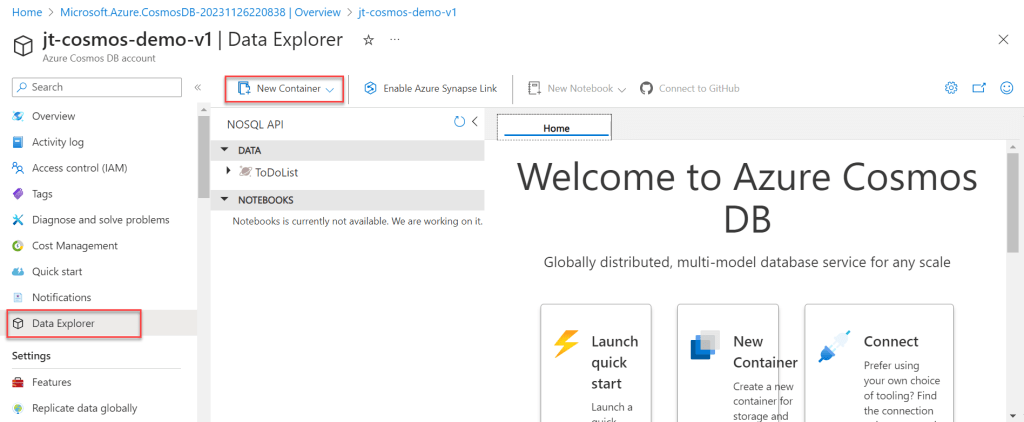
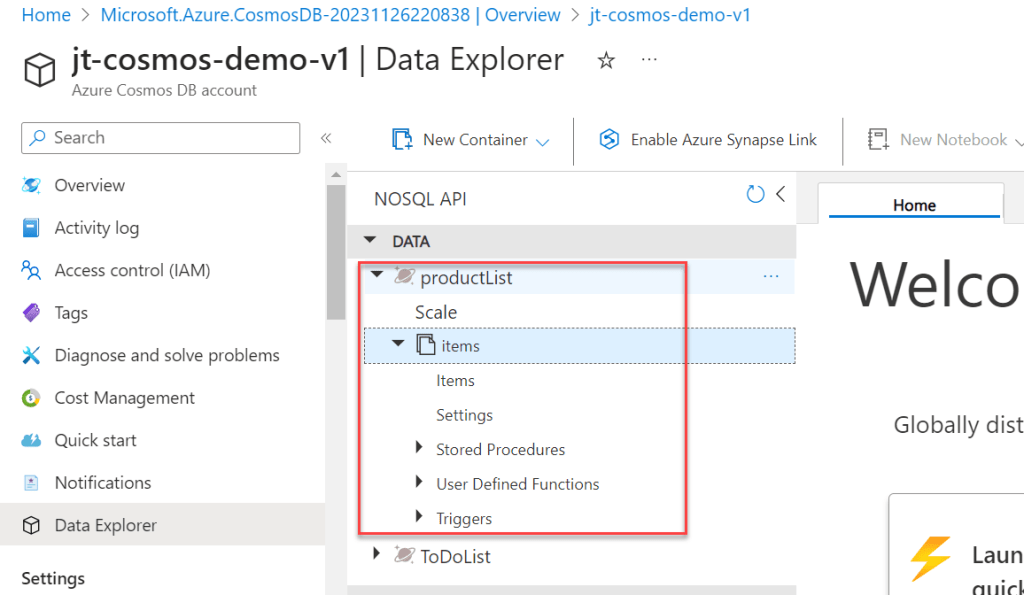
On the Azure Cosmos DB account page, select the Data Explorer from the left navigation and then select the New Container option as highlighted below.
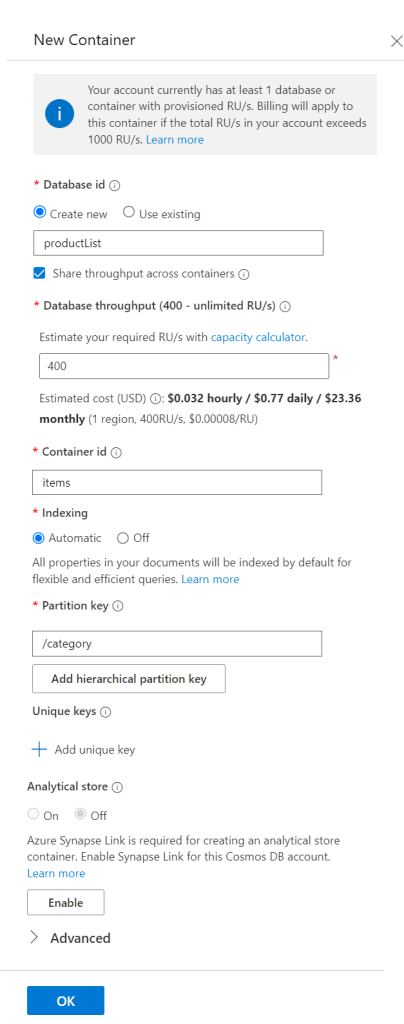
On the New Container window, apply the below settings.
- Database Id: Enter the database ID as “productList“. Note that the database name you will enter must be within 1 through 255 characters. Special characters like \, #, ?/ or trailing space are not allowed.
- Database throughput (autoscale): You can choose Autoscale or Manual based on your need. If you will select the Manual option, you will have the provision to scale the RU/s by yourself and if you will choose autoscale the system will automatically scale the RU/s based on your usage.
- Container Id: Enter the Container name as items. Note that the Container name you will enter must be within 1 through 255 characters. Special characters like \, #, ?,/ or trailing space are not allowed.
The database and container will now be generated.
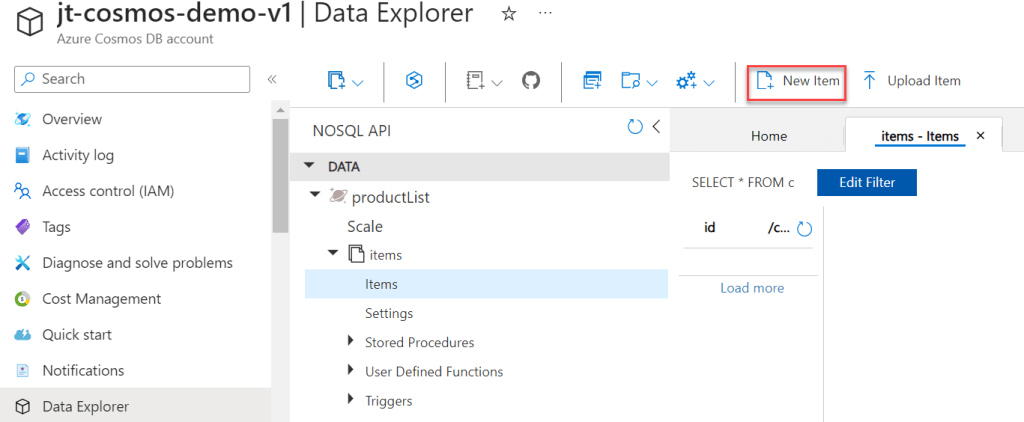
We’ve previously constructed the database and the container; now it’s time to populate the database with data. The steps for adding data to the database are outlined below.
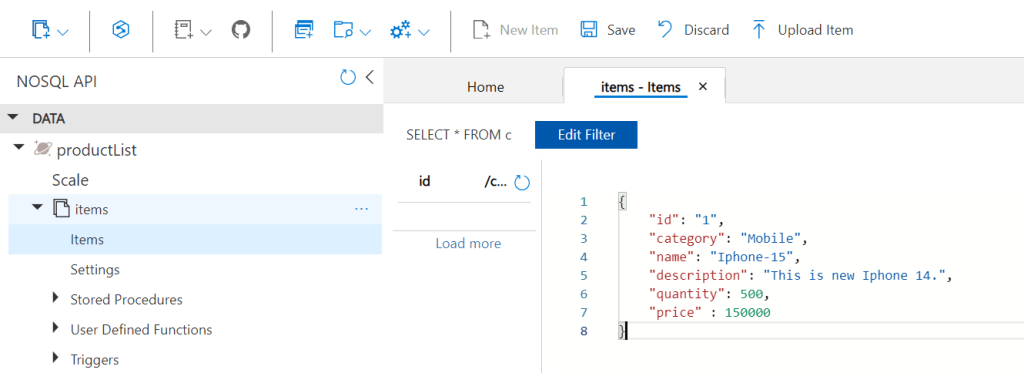
{
"id": "1",
"category": "Mobile",
"name": "Iphone-15",
"description": "This is new Iphone 14.",
"quantity": 500,
"price": 150000,
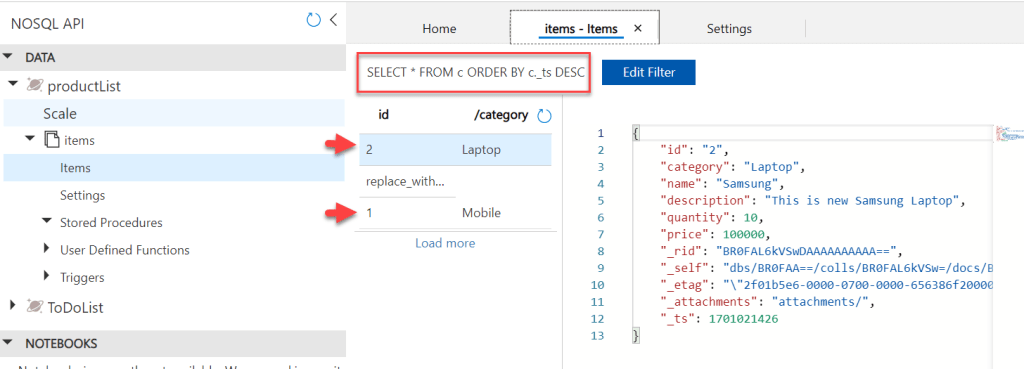
"_rid": "BR0FAL6kVSwBAAAAAAAAAA==",
"_self": "dbs/BR0FAA==/colls/BR0FAL6kVSw=/docs/BR0FAL6kVSwBAAAAAAAAAA==/",
"_etag": "\"2f01b1e5-0000-0700-0000-6563866f0000\"",
"_attachments": "attachments/",
"_ts": 1701021295
}
Conclusion
In this article, we explained How to create Cosmos DB in Azure. Cosmos DB is a multi-model, globally distributed database service provided by Microsoft Azure.
Leave behind your valuable queries and suggestions in the comment section below. Also, if you think this article helps you, do not forget to share this with your developer community. Happy Coding 🙂
Related Articles
- Building an AI Knowledge Base Search with Azure AI Foundry: Step-by-Step Guide
- How to Secure React.js application with Azure AD Authentication Using MSAL Library
- 🔐 Securing .NET Core Web Apps with Azure AD/Intra and MSAL
- Step-by-Step Guide to Using Azure Redis Cache in ASP.NET Core 9 Web API
- 🤖 Build a Full-Stack AI App with React, Node.js & Azure OpenAI
- Effortless React Deployment 🚀: CI/CD with GitHub Actions & Azure Static Web Apps
- Deploying Angular apps in Azure Blob Storage with CI/CD Integration 🚀
- How to Build a serverless CRUD app with Azure function and Cosmos DB
- How to resolve Function App Cannot Create within Azure Portal
- How to convert Text To Speech With Azure Cognitive Services using Angular and .Net Core
SUPPORT ME