
In this article, we will learn about Intro to Azure Logic Apps- Complete Guide. Logic Apps is a service that runs on the cloud. It enables us to respond to an event in one service (for example, Facebook) and then do something with the data from that event in another service (for example, Twitter). Users create workflows to automate certain business actions and procedures across applications and services. We can use Azure Logic Apps to connect our mission-critical apps and services, automating your workflows without writing a single line of code. Please read my previous article on How to use Azure Key Vault in ASP.Net Core.
What are Azure Logic Apps?
Microsoft Azure Logic Apps is a cloud-based Platform-as-a-Service (PaaS) used to automate processes, workflows, etc. It aids in developing and implementing automated processes capable of combining services, systems, and applications. The majority of enterprises and B2B scenarios use Azure Logic Apps to construct highly scalable integration solutions.
In current environment, we use most services separately and use their benefits on our own. To avoid these drawbacks, Microsoft develops the Logic App service, which uses automated process to bridge the gap between each service and application. It does not require programming and is easy to set up.
Why do we use Logic Apps?
Logic Apps are extremely easy to design and utilize. It does not necessitate extensive technical knowledge or programming abilities.
As our businesses digitize, logic apps make it easier and faster to integrate historical, modern, and cutting-edge systems. As a result, we concentrate on the business logic and functionality of your project. As a result, you won’t have to bother about developing, hosting, scaling, administering, maintaining, or monitoring your apps. It takes care of these issues for you. You just pay for what you use.
Who can use Logic Apps?
Anyone who needs automated workflows can use Microsoft Flow. It is generally applicable to all industries, firms, organizations, and businesses, among others.
It is quite simple to design and utilize. It does not necessitate extensive technical knowledge or programming abilities. As a result, anyone may easily construct the Logic App. It is the line of business in large corporations.
Key Components of Azure Logic Apps
Now that we’ve established what the Azure Logic Apps platform entails, let’s look at the various components of Azure Logic Apps: Building workflows based on specific connectors, triggers, and actions. The template includes the fundamental building blocks of a flow. Each flow is made up of a number of triggers, actions, conditions, and loops.
- Triggers are events that start a flow.
- Actions are tasks accomplished by the flow.
- Controls allow for branching statements that apply logic in a flow.
- Loops are for iterating over actions more than once.
Workflows
Workflows are an important component of Azure Logic Apps. A workflow is essentially a collection of activities and actions expressed as steps. A workflow is started once an input is fed into the system via logical connectors. As a result, by creating workflows for business operations, business activities can be automated using Azure Logic Apps.
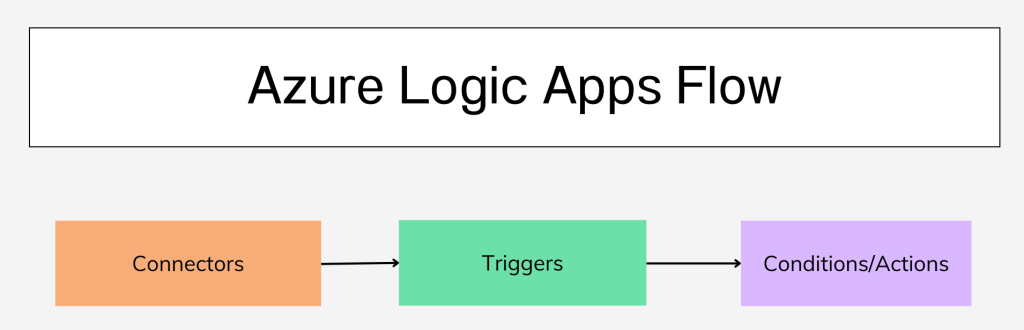
Connectors
Logical connectors carry out the actions and processes that occur in Azure Logic Apps. These connectors are built in such a way that they can integrate and work with user data. There are various sorts of logical connectors. However, they have been separated into two major categories: predefined connectors and customized connectors. It is also possible in some cases to use ARM templates to define connectors.
Triggers
Triggers are the starting point for the full Azure Logic App operation. Triggers are tied to actions, workflow, and processes. These Azure Logic Apps components cannot function without the activation of a trigger. Custom connectors can initiate numerous triggers in Logic Apps, where custom connectors are utilized to initiate the triggers.
Logic Apps provides these kinds of triggers,
- Polling triggers: These triggers poll your service at a specified frequency and check for new data. When new data is available, a new instance of your logic app gets created and runs with the data that’s passed in as input.
- Push triggers: These triggers listen for new data at an endpoint or for an event to happen, which creates and runs a new instance of your logic app.
- Recurrence trigger: This trigger creates and runs an instance of your logic app based
Conditions/Actions
In Azure Logic Apps, actions are the steps that are executed when a trigger is triggered. As previously stated, the creation of a trigger initiates a sequence of activities and procedures. Once a trigger is triggered, actions will begin to run sequentially. These actions are real processes that will be carried out based on pre-determined business tasks and user-supplied data. Azure Logic Apps allows the user to select a specified set of actions from the connection repository’s numerous alternatives.
Benefits of using Azure Logic Apps
Azure Logic Apps offer the most important benefits in the industry for solving various complex business problems:
- Ease of Defining Workflows: Azure Logic Apps make it easy to define the right workflow with actions, processes, and triggers through a user-friendly graphical user interface (GUI).
- Robust Applications: Azure Logic Apps play an important role in providing support integration with enterprise-level applications such as Office 365, Dropbox, etc.
- Debugging: Azure Logic Apps allow easy debugging through triggers, workflow, and processes running history.
- Ease of Automation: When the workflows are defined with triggers and the trigger is successfully initiated, the Logic App is automatically fired.
- Easy Integration: Azure Logic Apps help in the easy integration of Logic Apps with on-premise solutions such as SAP, etc.
Building the Azure Logic Apps
Using the below steps we can create the Azure Logic Apps.
Step-1
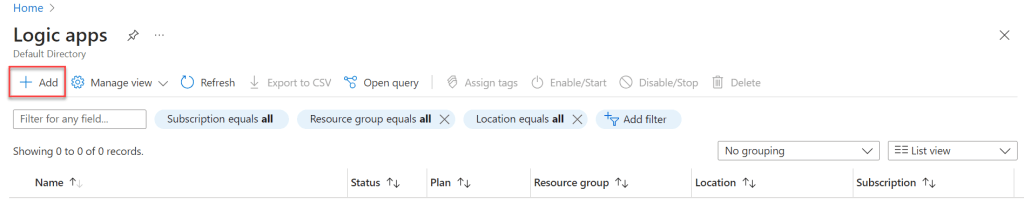
- Search the Logic App in the Azure portal and click on the highlighted Logic Apps
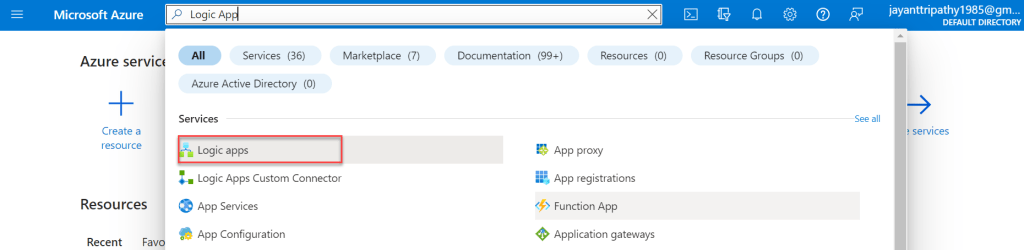
- Click the highlighted Add button to create the Logic Apps
Step-2

- Choose your subscription and resource group.
- Set the logic app name according to your choice, note that the logic app name should be unique.
- Set as publish workflow and region.
- Set the plan type as Standard/ Consumption according to your usage.
- We set Zone redundancy as disabled and then create the
Review + Create
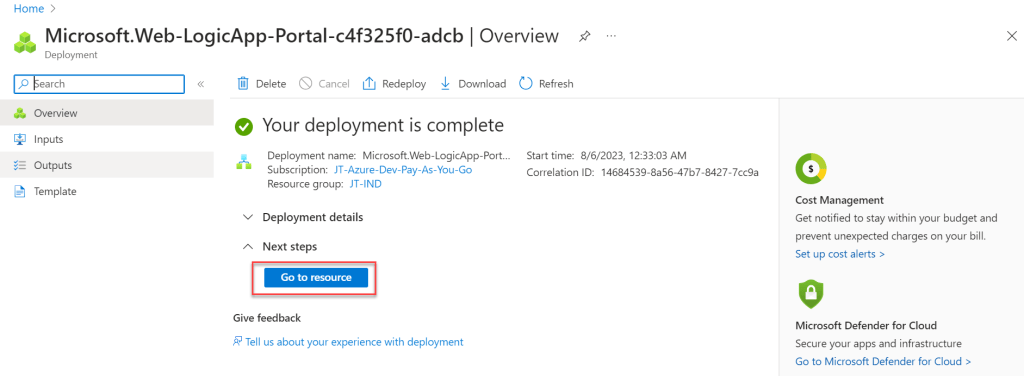
The deployment has been completed, Click on the Go to the resource we can see the logic apps has been created with the following URL.

Step-3
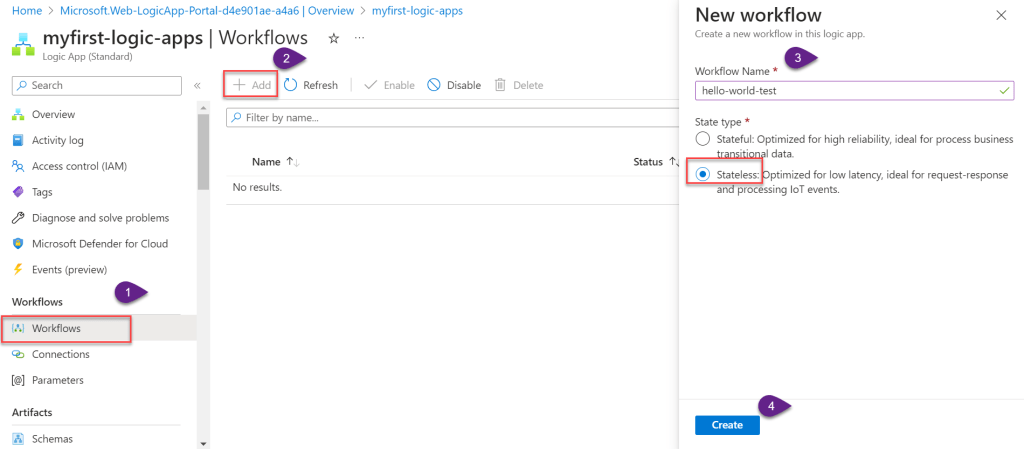
In the below image, you can see the Create workflow as a designer, click it to create the workflow

- Under the Workflows, Click to add the new Workflow like below.
- And in the right-hand side prompt window add the workflow name, here I have added the workflow name as “
logic-app-dev1“. - We can set the workflow items as Stateful/Stateless.
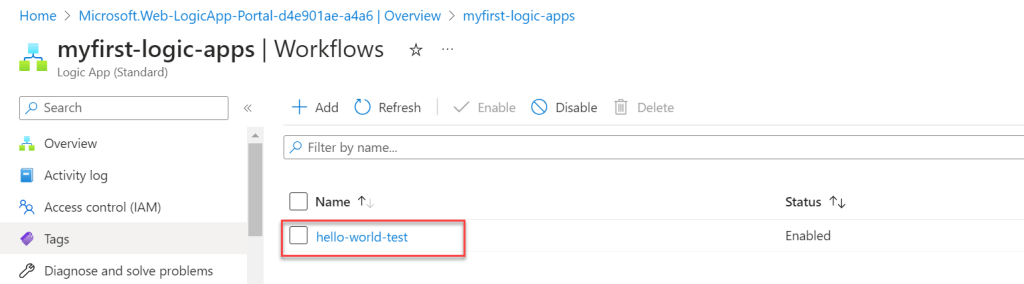
- Here you can see the workflow has been created, click on the link to the workflow
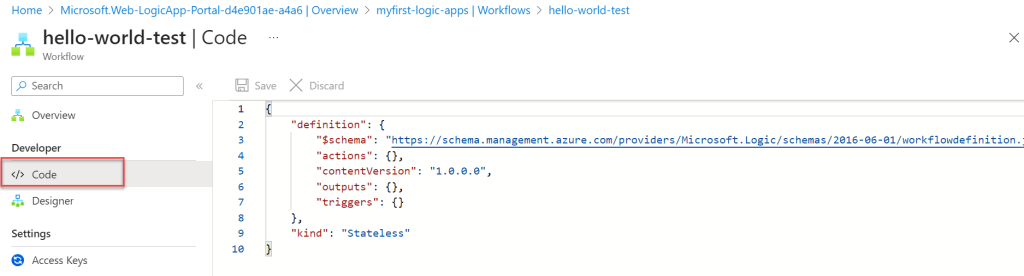
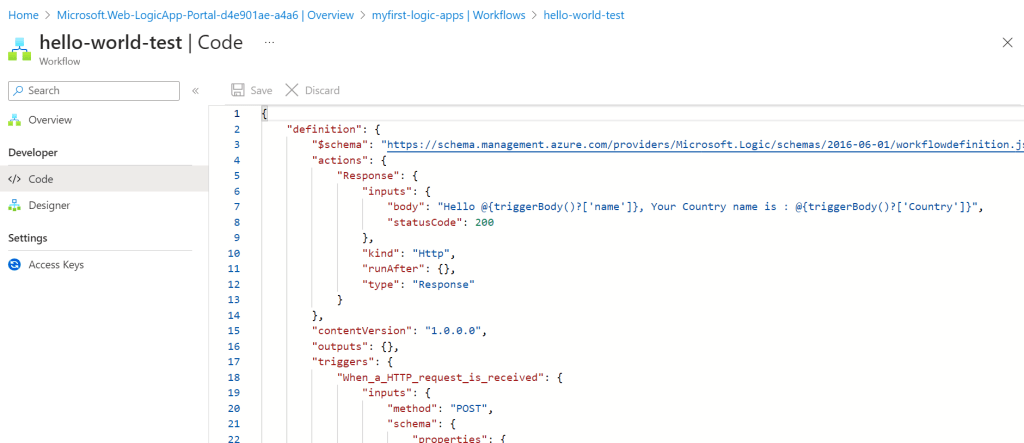
- The workflow developer code has been created as below. Logic App Code view – Writing the code to create the Logic App
- Logic App Designer – Drag & Drop the connectors to create the Logic App
Create the sample HTTP request Logic Apps
Using the below steps we can create a sample hello-world HTTP request using logic apps. In this example, we can see how we can use HTTP triggers using GET and POST methods.
HTTP GET Request & Response
In the below steps we will learn how to use HTTP GET request and response using workflow Trigger.
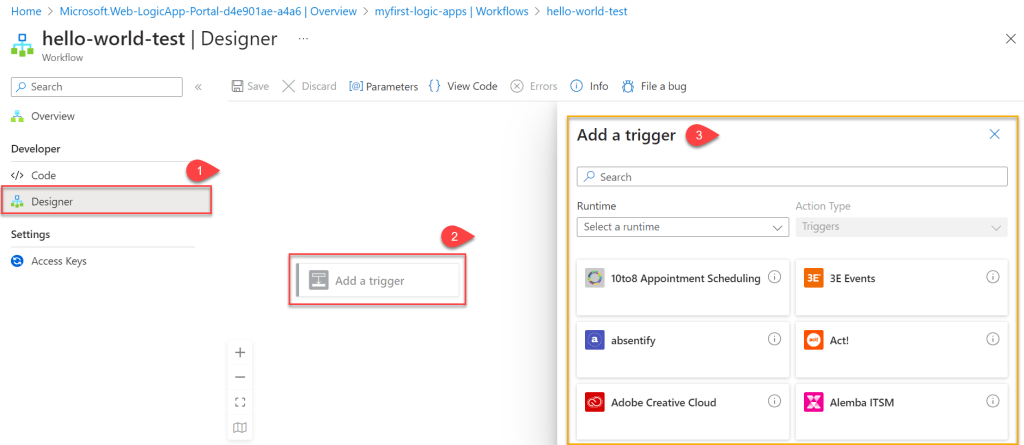
Step-1: Add the Http Trigger into the Designer Workflow
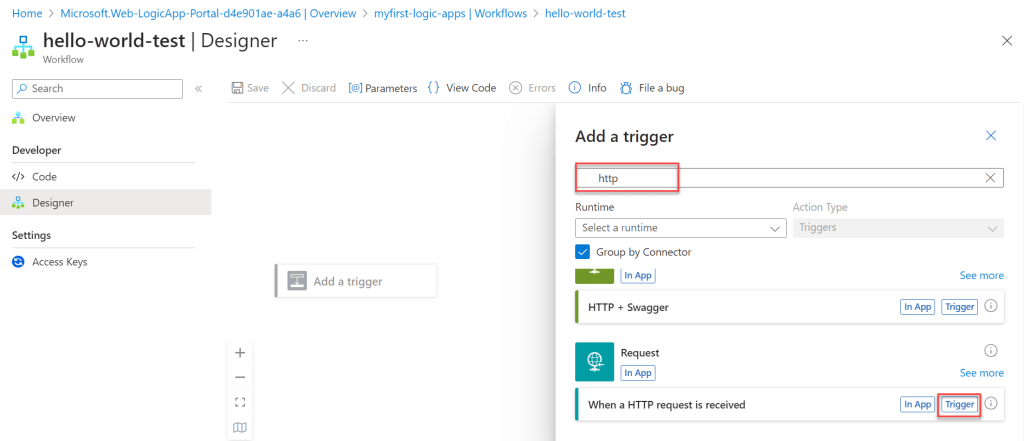
- Search for Http and choose the highlighted request trigger.
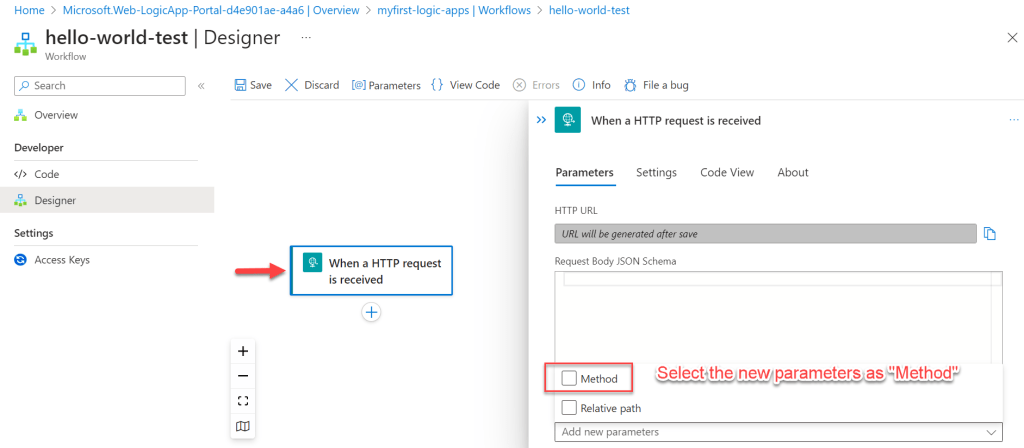
Step-2: After selecting the Request trigger, you can see “HTTP request is received” is added to the center of the screen.
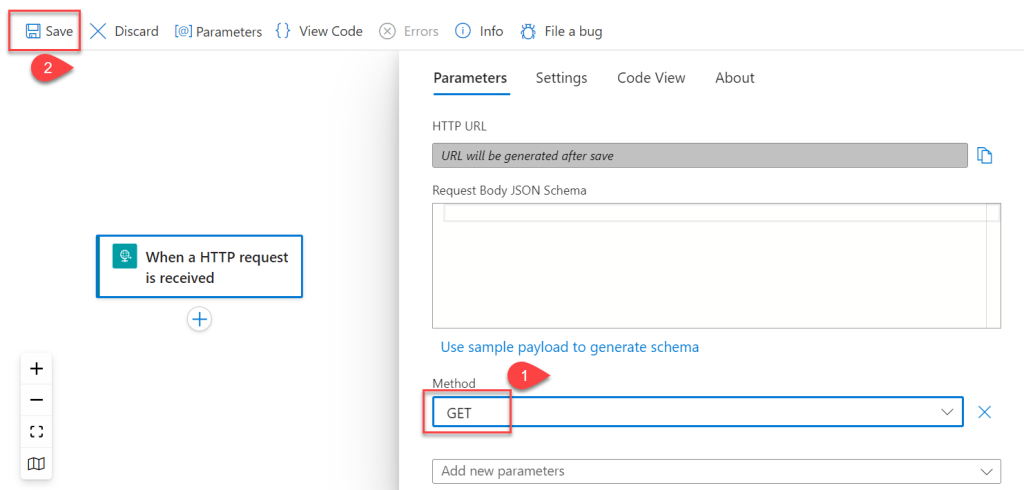
- Here we need to select the parameters as “Method” and Save it.
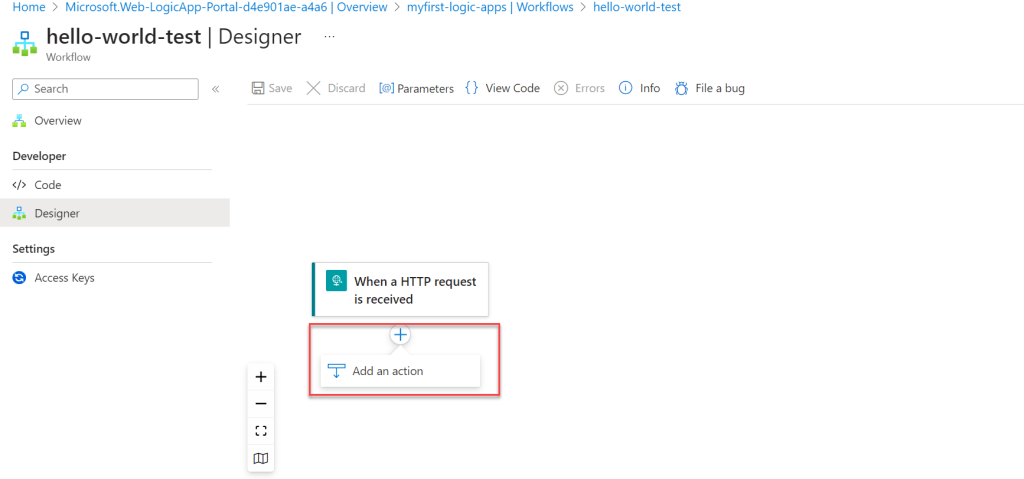
Step-3: Add the HTTP GET Response
- The HTTP Request method was added on the above so we need to add the response, To do so click on the plus(+) icon and click on the
Add an action.
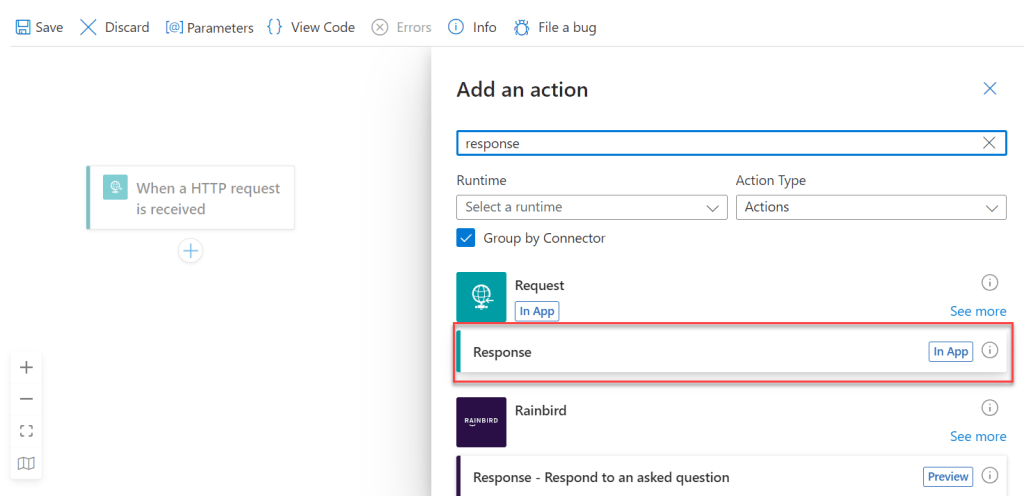
- On the right-hand side prompt, select the response like below and add the “In App”.
- Also, you can see the Response is added to the HTTP flow.
- Below, inside the Body section add the custom message that you want to see when the GET method is run.
- Click on Save to capture all the information that you have entered.

- Now you move to the HTTP Request and here you can see the URL, Copy it and run into the browser.
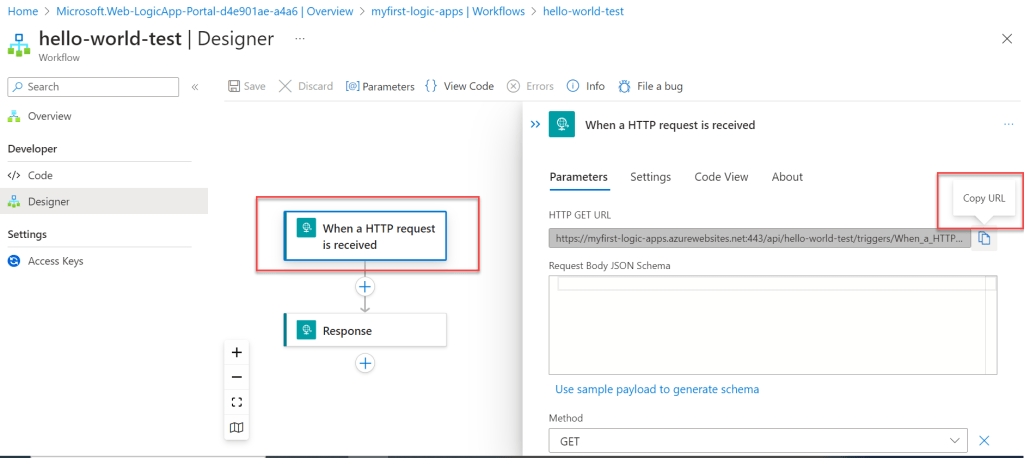
Now, when we visit the copied URL, we see the custom message that we created in Azure Logic Apps Workflow.

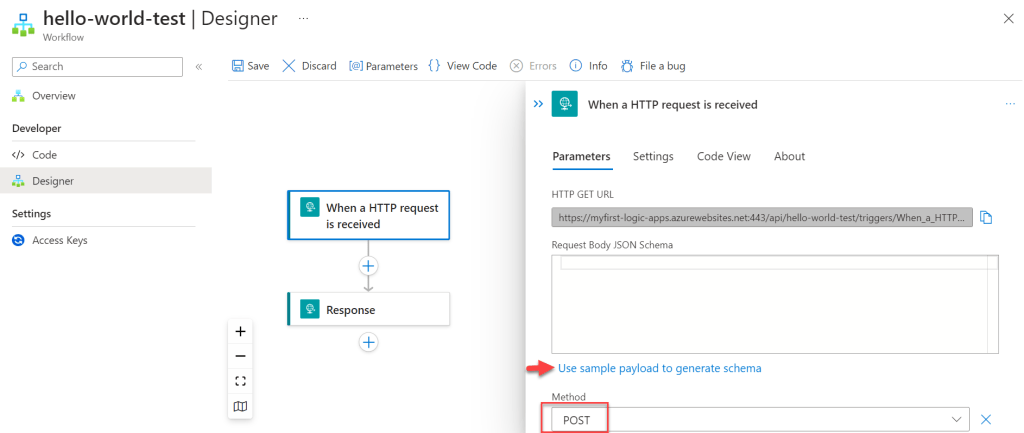
Let’s move to the POST method and how we can use the trigger
HTTP POST Request & Response
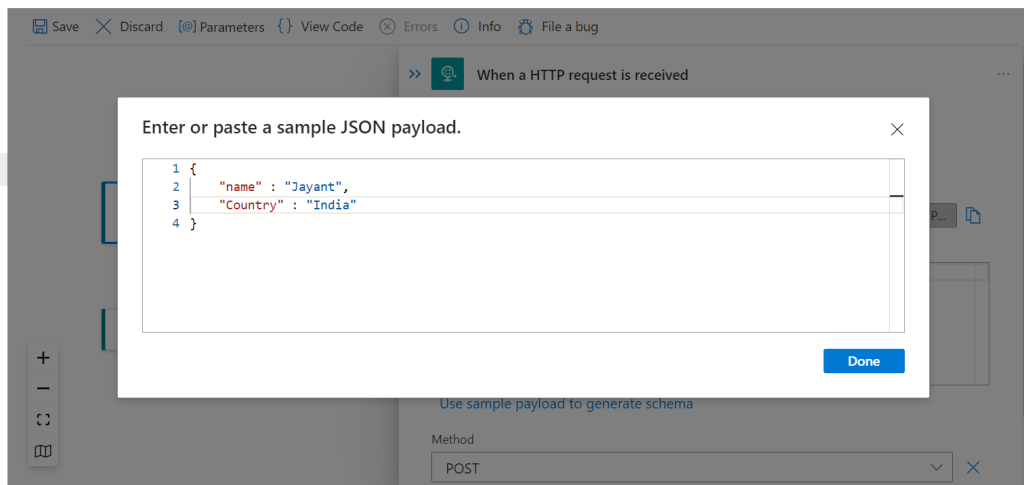
- Change the method as POST and click on the “sample payload to generate schema”
- It opens the below Prompt window and adds the below JSON file and click as done.
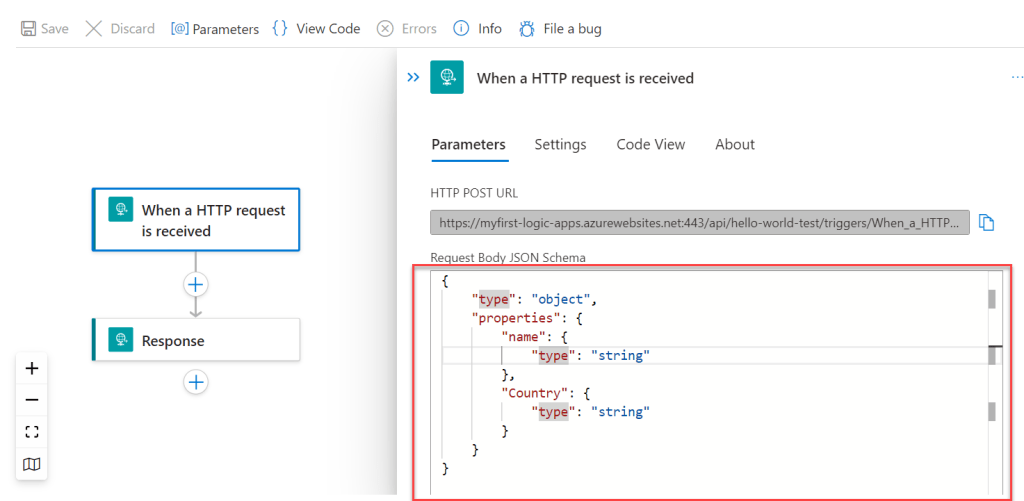
- After adding the Request body Json we can see it look like below.
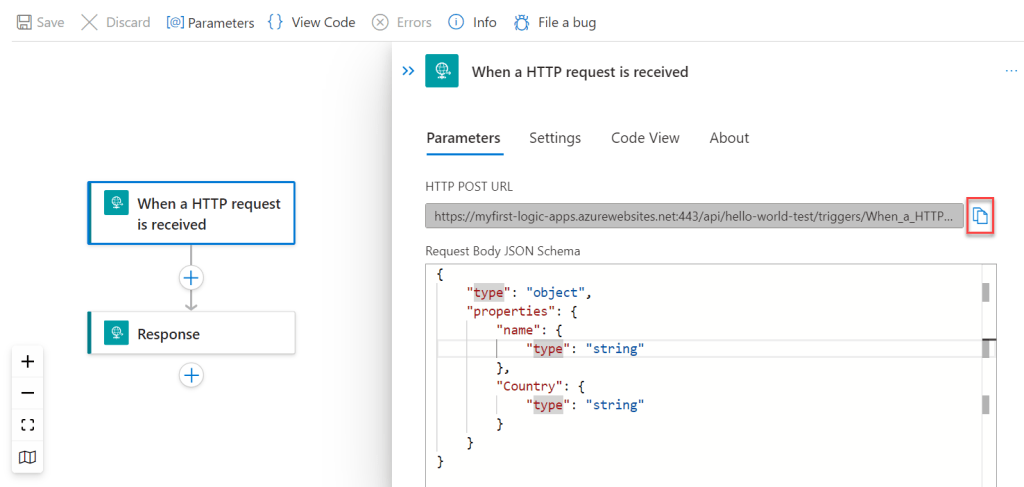
- Select the response, and modify the body to add the selected parameters.

- All the changes has been done, copy the URL and move to the Postman.
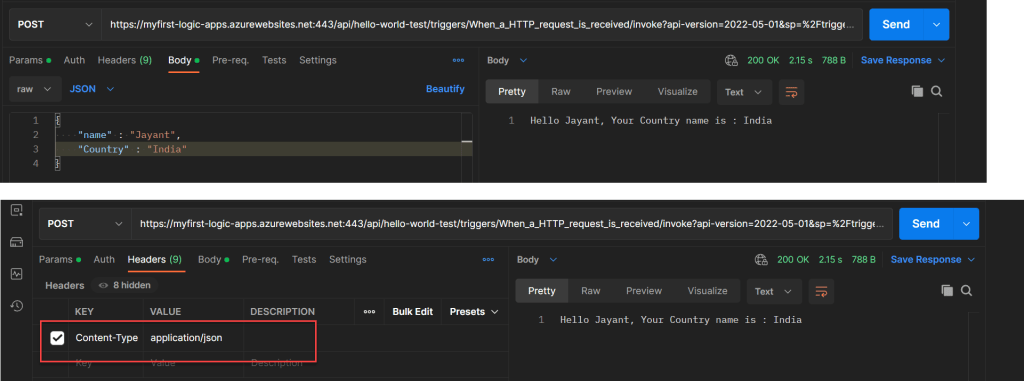
- Here we have added the copied URL and inside the body, we have added the JSON along with the content type as “application/json”
- Click on the Send button and we can see the POST result message according to our expected result.
- If we navigate to the workflow code, we can see that the designer modifications have been included into the code section.
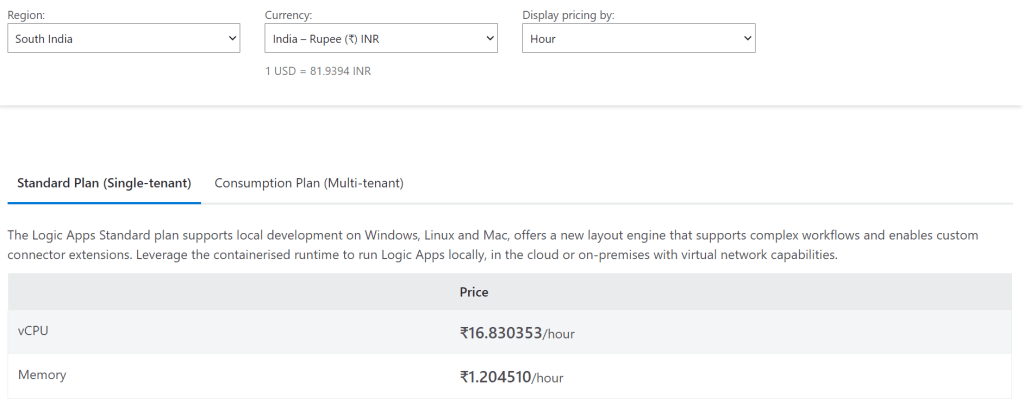
Azure Logic Apps Pricing
Below are the Azure Logic Apps pricing according to Indian currency and Region. You can check according to your region and currency in this link.
Conclusion
In this article, we discussed Intro to Azure Logic Apps, step by step process to create Sample Azure Logic apps, and also discussed why and when we can use logic apps.
Leave behind your valuable queries and suggestions in the comment section below. Also, if you think this article helps you, do not forget to share this with your developer community. Happy Coding 🙂
Related Articles
- Building an AI Knowledge Base Search with Azure AI Foundry: Step-by-Step Guide
- How to Secure React.js application with Azure AD Authentication Using MSAL Library
- 🔐 Securing .NET Core Web Apps with Azure AD/Intra and MSAL
- Step-by-Step Guide to Using Azure Redis Cache in ASP.NET Core 9 Web API
- 🤖 Build a Full-Stack AI App with React, Node.js & Azure OpenAI
- Effortless React Deployment 🚀: CI/CD with GitHub Actions & Azure Static Web Apps
- Deploying Angular apps in Azure Blob Storage with CI/CD Integration 🚀
- How to Build a serverless CRUD app with Azure function and Cosmos DB
- How to resolve Function App Cannot Create within Azure Portal
- .NET 8 Authentication with Identity in a Web API using Bearer Tokens and Cookies
SUPPORT ME