
In this article we will learn about How to use Azure Key Vault in ASP.Net Core. Azure Key Vault is a safe and dependable service for storing sensitive information including secrets, keys, and certifications. In this blog, we’ll discuss how to build a .Net Core Web application and combine it with Azure Key Vault for secure secret storage and access. Please read my previous article of How to Implement Repository Pattern in ASP.Net Core Web API.
Please find the Source Code implementation here in this link.
One of the ways we can keep our secrets secret is by using the Azure Key Vault which is a cloud-based service that keeps cryptographic keys and secrets that our applications and services use. In simple terms, it offers a safe way to store the key-value pairs that we use in our applications.
Key Vault allows you to separate your configuration data into sensitive and non-sensitive information. For example, you could use Application Settings to store some default settings but use Key Vault to store your API keys, connection strings, and passwords that your application depends on. When you configure an application to connect to a Key Vault it gets added as a separate configuration source. You can then read values just as you would for any other configuration data.
In order to use the Azure Key Vault, you must have an active Microsoft Azure subscription.
Prerequisites
Before we begin, ensure you have the following installed on your machine.
Why Azure Key Vault is required?
Key Vault allows you to categorise your configuration data as sensitive or non-sensitive. For example, you may use Application Settings to store some default settings while using Key Vault to store API keys, connection strings, and passwords on which your application relies.
When an application is configured to connect to a Key Vault, it is added as a distinct configuration source. The values can then be read just like any other configuration data.
var nonSensitiveSetting = Configuration["EnableLogging"]; // read from app settings
var sensitiveSetting = Configuration["ApiKey"]; // read from Key Vault
When you move sensitive data to KeyVault, it is stored independently from your application and protected by a different Identity.
Configuring Azure Key Vault
To configure Azure Key Vault we need to follow below steps.
Creating Azure Key Vault
Step-1: Set Up Azure Key Vault
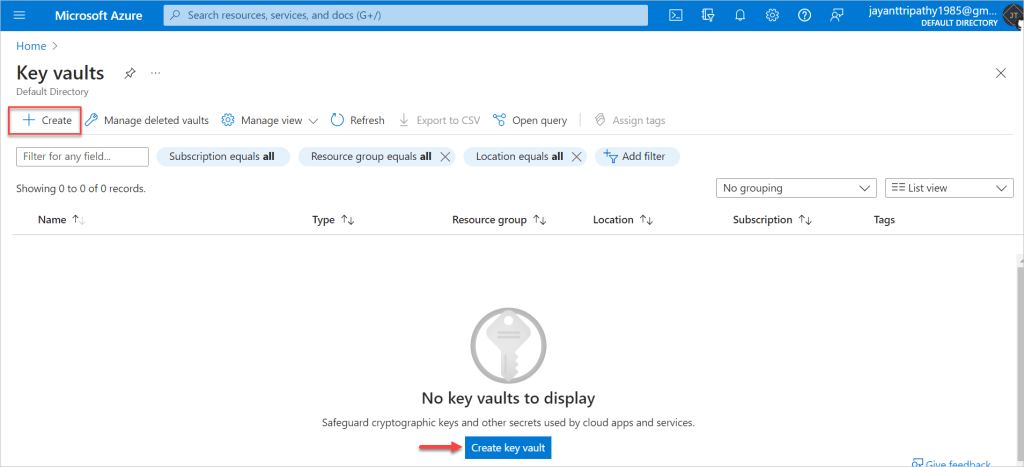
- Login to the Azure Portal with your credentials
- Search for Key Vaults and Click on it, it will open the window where we can create the Key Vaults.
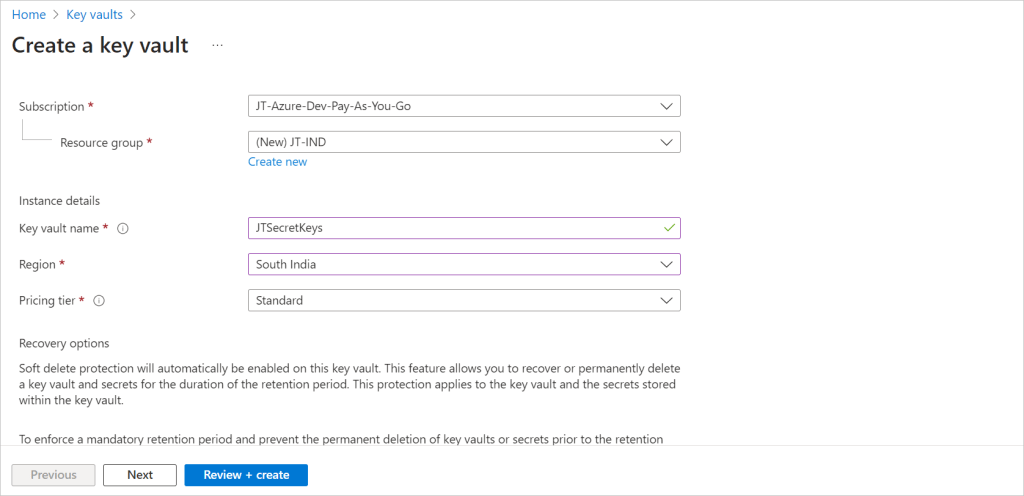
- Click Create and fill in the required information, such as subscription, resource group, key vault name, and region.
- Click Review + create and then Create to create the Key Vault.
Fill in the required information, such as subscription, resource group, key vault name, and region and then click on Review + Create button.
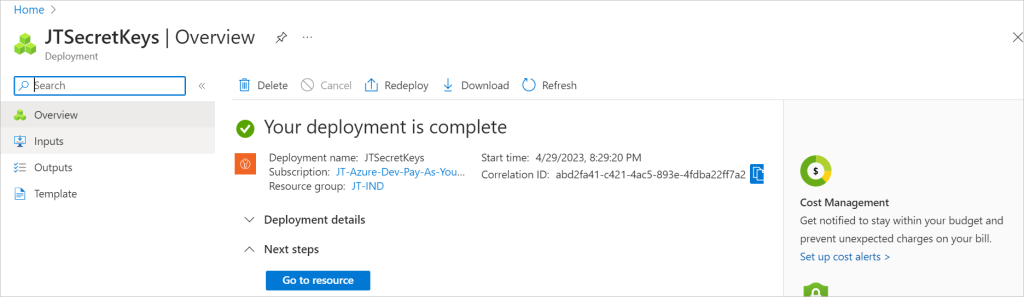
After click on the Review & Create button it will take some moment to create the Azure Key vault.
Creating Azure Secret
Add a Secret to Azure Key Vault
- In the Azure Portal, navigate to the Key Vault you just created.
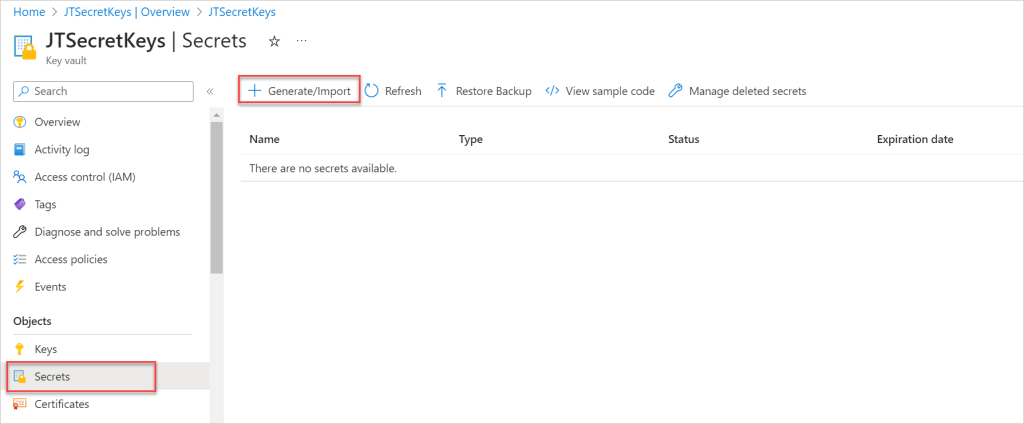
- Under the Settings section, click on Secrets.
- Click +Generate/Import.
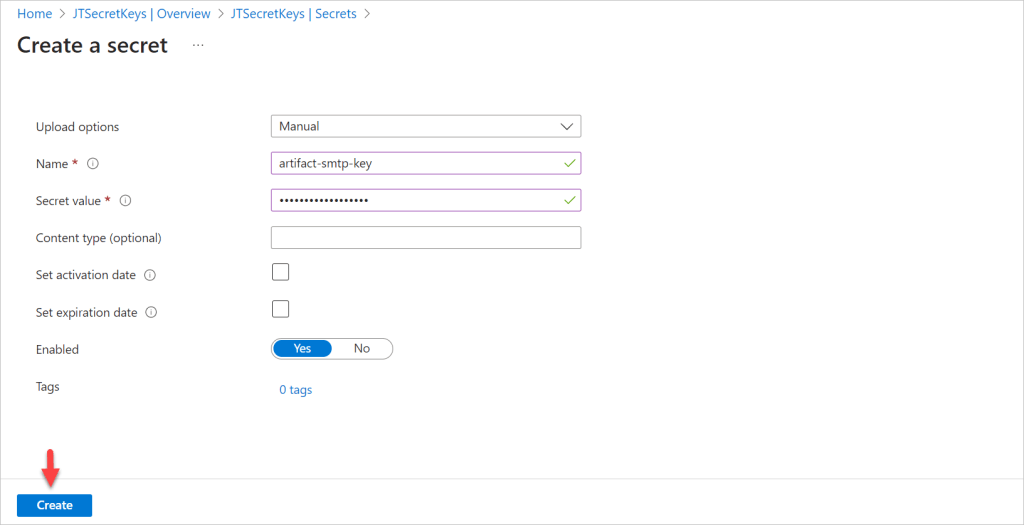
- Fill in the required information, such as the secret name and value, and click Create.
After click on Generate/Import button it open the below window where we can add the upload options( Here I have added as Manual other is certificate). Add the Secret Key name and Value then click on Create button.
Key Vault also supports a contentType field for secrets. Clients may specify the content type of a secret to help interpreting the secret data when it’s retrieved. The maximum length of this field is 255 characters. The suggested usage is as a hint for interpreting the secret data.
- We can set the upload settings, the name of the secret, and the secret value in the create secret dialog box based on your needs.
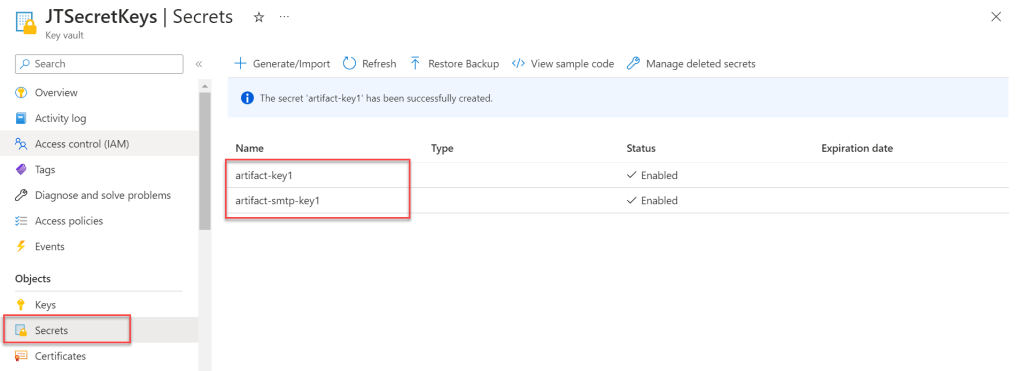
After click on the create button, we can see the artifact has been created.

I’ve added two secret keys to the Key Vault secret; you can add as many as you need.
Creating Azure Active Directory
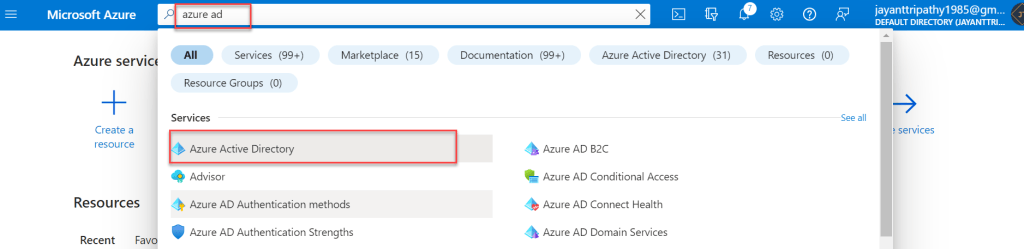
- To create the Azure Active Directory, Search as Azure Ad and select the link like below.
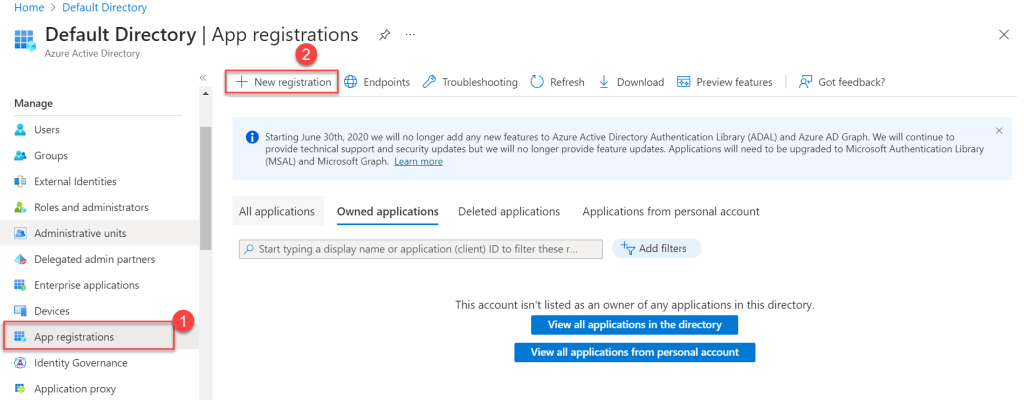
- Move to App registrations and click on New Registration.
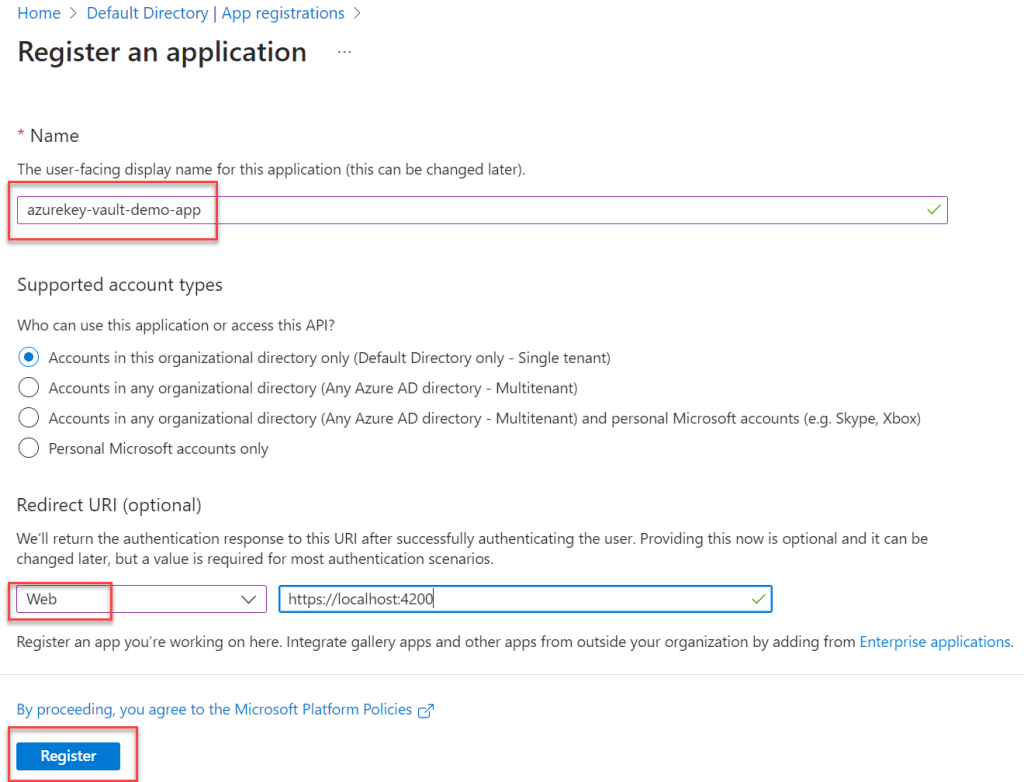
- Set the application name to whatever you want; for example, “azurekey-vault-demo-app” is what I called mine.
- Redirect URL you can set as Web and set the URL(you can set anyport).
- Once all the setup is done Register the Azure AD
Create Client Secret
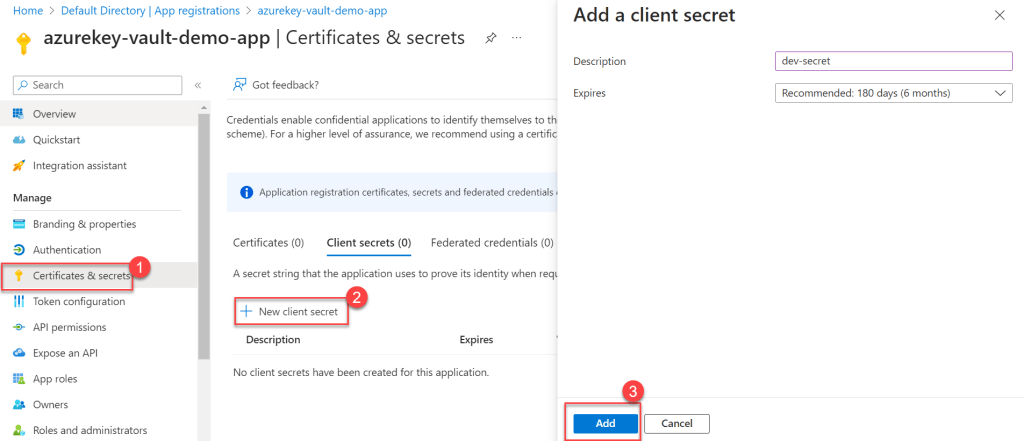
- Move to the app that we have created earlier, and click on Certificates & Secrets.
- Click on New Client Secret, add the client secret and add.
Set the Policies to Azure Key Vault
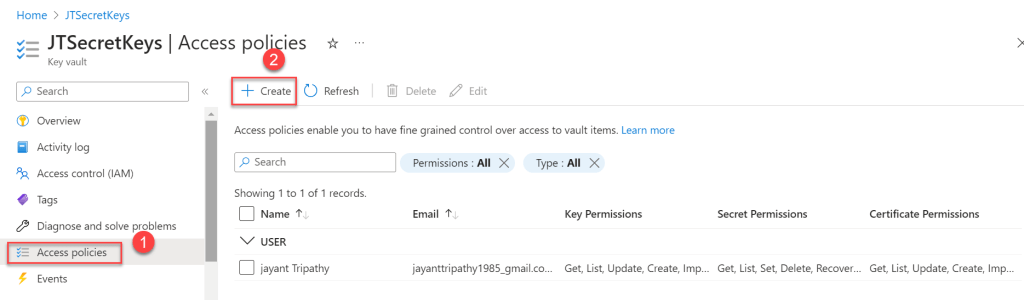
- Go to your Azure Key Vault, that you have created ealier and Click on access Policies and Create the new policy.

- Set the Secret Permissions as GET, LIST as we are fetching the data only this method. According to your requirement you can set policies here.
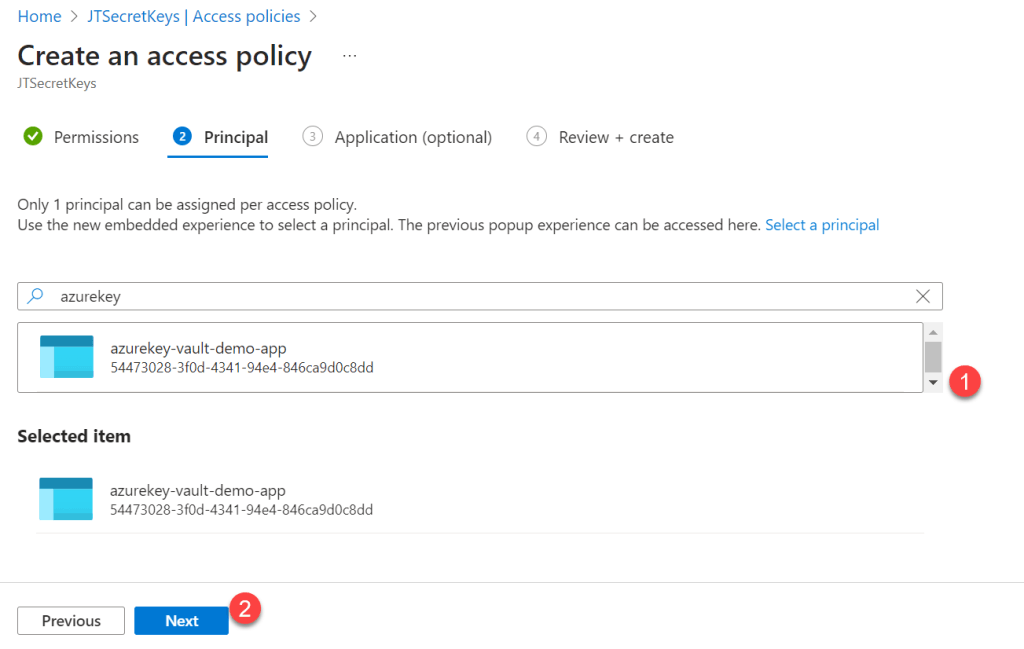
- Under the principal, you can search the app name that we have created earlier, click net.
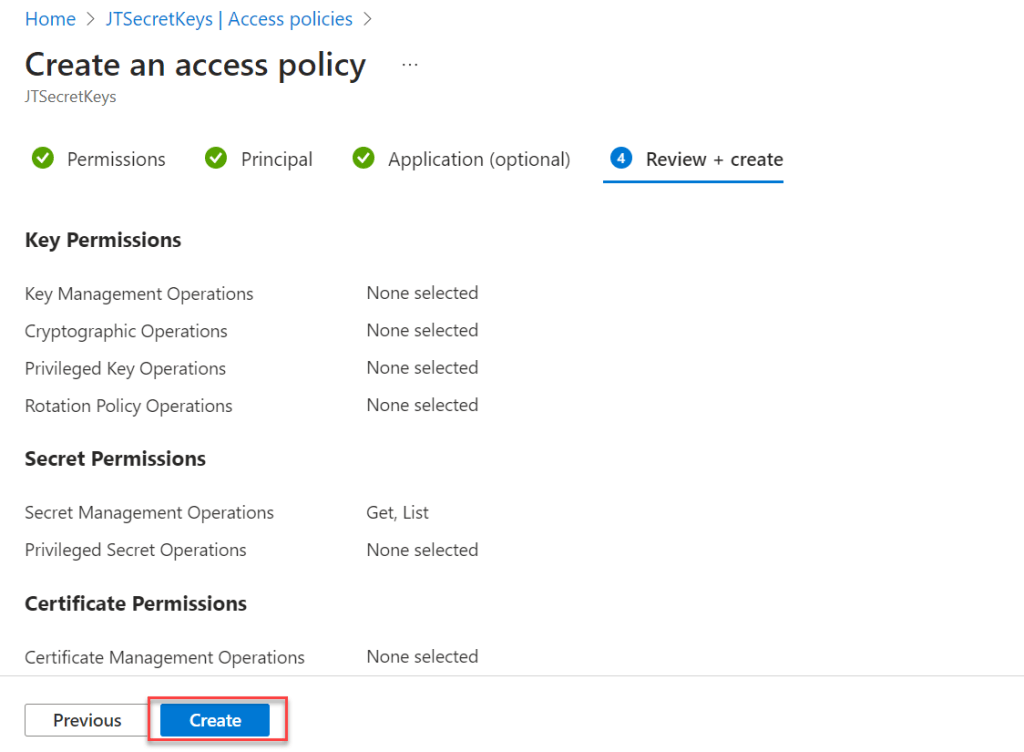
- Under Review+Create you can verify all of the things and click in Create button.
That concludes Azure Key Vault Configuration; our next step is to construct an ASP.Net Core application that reads the values from Azure Key Vault.
Create an ASP.Net Core API to implement Azure Key Vault
Here I’m creating ASP.Net Core API and we implement the repository pattern. The project using .NET SDK 7
- Launch the Visual Studio IDE and click on “Create new project”.
- In the “Create new project” window, select “
ASP.NET Core API” from the list of templates displayed. - Click Next. In the “Configure your new project” window, specify the name and location for the new project and then click Create.
- In the “Create New ASP.NET Core API” window shown next, select .NET Core as the runtime and
.NET 7.0from the drop-down list at the top. Select “API” as the project template to create a new ASP.NET Core API application. - Ensure that the check boxes “Enable Docker Support” is disabled s we won’t be using the default feature we will add it manually later and “Configure for HTTPS” are checked.
- Ensure that Authentication is set as “No Authentication” as we won’t be using authentication either and Click Create.
Install required Nuget packages to get the Azure Key Vault
To enable the use of Azure Key Vault we need to install below packages.
PM> Install-Package Azure.Security.KeyVault.Secrets
PM> Install-Package Azure.Extensions.AspNetCore.Configuration.Secrets
PM> Install-Package Azure.Identity
Read Azure Key Vault Secrets in .NET Core
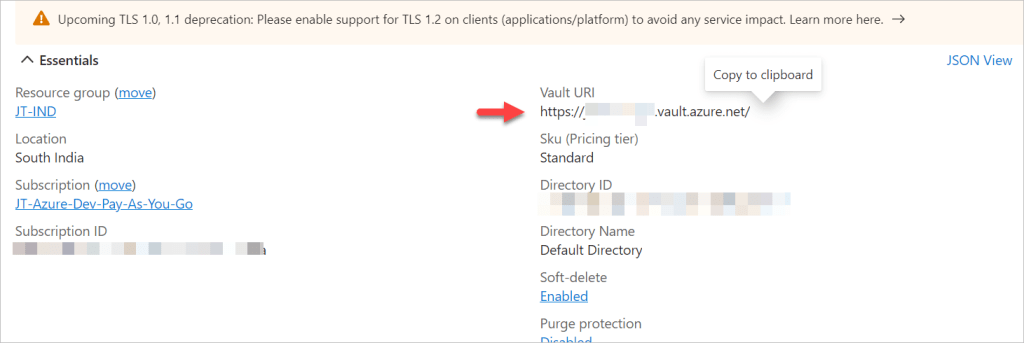
Specify the Vault Uri in AppSettings – Create a section named “KeyVault” in the appsettings.json file and specify a key named “BaseUrl” in there as shown below:
Here the URI you can copy from the created Vault Secret
{
  "Logging": {
    "LogLevel": {
      "Default": "Information",
      "Microsoft.AspNetCore": "Warning"
    }
  },
  "AllowedHosts": "*",
  "KeyVault": {
    "BaseUrl": "<Add the BaseURL of KeyVault>"
  },
  "AzureAd": {
    "ClientId": "<Add the ClientId of the APP>",
    "ClientSecret": "<Add the Client Secret Id>",
    "TenantId": "<Add the TenantId of the APP>"
  }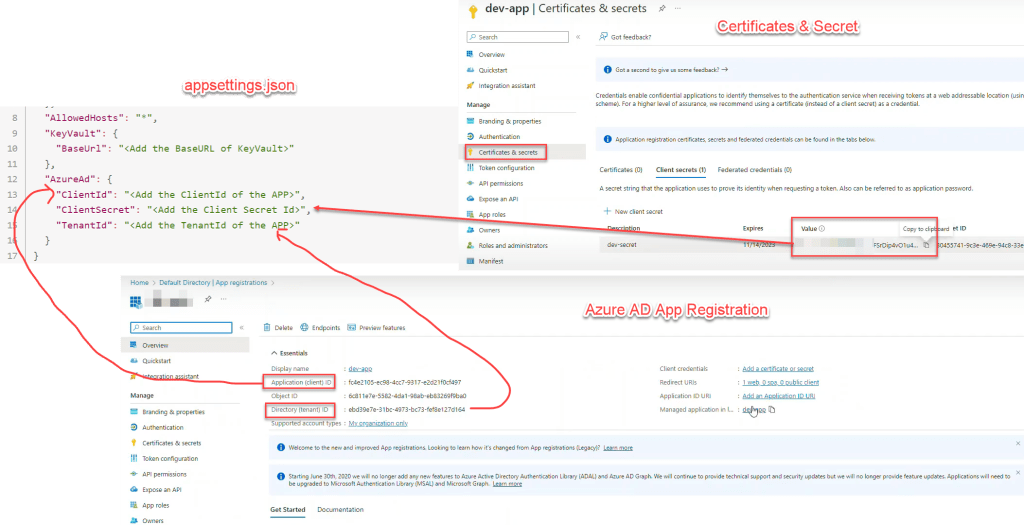
}- Regarding Azure AD Section, for Client Id, ClientSecret, Tenant Id follow the below image.
- Client Id and Tenant Id you can copy from after creation of
Azure AD App Registration. - Client Secret Id you can copy under
Certificates & Secret.
- Client Id and Tenant Id you can copy from after creation of
Creating the Model Class
Create the model calss named as Vault Secret that holds 2 properties.
 public class VaultSecret
    {
        public string Name { get; set; }
        public string Value { get; set; }
    }
Creating the Services to Read the Azure Key Valut
We created the Interface under Interfaces folder.
 public interface IKeyVaultSecretService
    {
        List<VaultSecret> GetSecrets();
    }
public class KeyVaultSecretService : IKeyVaultSecretService
{
private readonly IConfiguration _configuration;
private readonly ILogger<KeyVaultSecretService> logger;
public KeyVaultSecretService(IConfiguration configuration, ILogger<KeyVaultSecretService> logger)
{
_configuration = configuration;
this.logger = logger;
}
public List<VaultSecret> GetSecrets()
{
var keyVaultSecrets = new List<VaultSecret>();
try
{
var keyVaultEndpoint = _configuration["KeyVault:BaseUrl"];
var clientId = _configuration["AzureAd:ClientId"];
var clientSecret = _configuration["AzureAd:ClientSecret"];
var tenantId = _configuration["AzureAd:TenantId"];
var secretClient = new SecretClient(new Uri(keyVaultEndpoint), new ClientSecretCredential(tenantId, clientId, clientSecret));
if (!string.IsNullOrEmpty(keyVaultEndpoint))
{
// Get the root configuration section
var rootConfiguration = (IConfigurationRoot)_configuration;
// Create a dictionary to hold the secrets
var secrets = new Dictionary<string, string>();
// Get the keys of all the existing secrets
var secretProperties = secretClient.GetPropertiesOfSecrets();
foreach (var secretProperty in secretProperties)
{
var secretName = secretProperty.Name;
var secretValue = secretClient.GetSecret(secretName).Value.Value;
keyVaultSecrets.Add(new VaultSecret() { Name = secretName, Value = secretValue });
}
}
else
{
logger.LogWarning("The KeyVault:BaseUrl configuration setting is missing or empty. No secrets were refreshed.");
}
}
catch (Exception ex)
{
logger.LogError(ex, "An error occurred while refreshing the secrets from Key Vault.");
}
return keyVaultSecrets;
}
}- I’ve injected two interfaces here, IConfiguration and KeyValut Services, to read configurations and maintain the logger.
- Line #18-21, to read the confuration from appsettings.
- Line #35-41, read the client secrets and add the items into dictionary.
Register the details in Program.cs file
builder.Services.AddSingleton<IKeyVaultSecretService, KeyVaultSecretService>();

builder.Services.AddAzureClients(azureClientFactoryBuilder =>
{
    azureClientFactoryBuilder.AddSecretClient(
    configuration.GetSection("KeyVault"));
});- We have added the Interface and Services for enabling dependancy injection.
- Line #6 to read the BaseURL from KeyVault Section.
Create the KeyVault Controller to Read the Secret Keys
    [Route("api/[controller]")]
    [ApiController]
    public class KeyVaultController : ControllerBase
    {
        private readonly IConfiguration _configuration;
        private readonly IKeyVaultSecretService keyVaultSecretService;
        public KeyVaultController(IConfiguration configuration, IKeyVaultSecretService keyVaultSecretService)
        {
            _configuration = configuration;
            this.keyVaultSecretService = keyVaultSecretService;
        }
        [HttpGet]
        [Route("getsecrets")]
        public async Task<IActionResult> GetSecretConfigurations()
        {
            try
            {
                var response = keyVaultSecretService.GetSecrets();
                return Ok(response);
            }
            catch(Exception ex)
            {
                return BadRequest("Error: Unable to read secret");
            }
        }
}- Here we have injected the IKeyVaultService to read the KeyVault secrets
- In the GET method we called the service to fetch the secret Keys.
So far, that’s all the changes. Let’s launch the application and use swagger to see the secret keys we’ve generated.
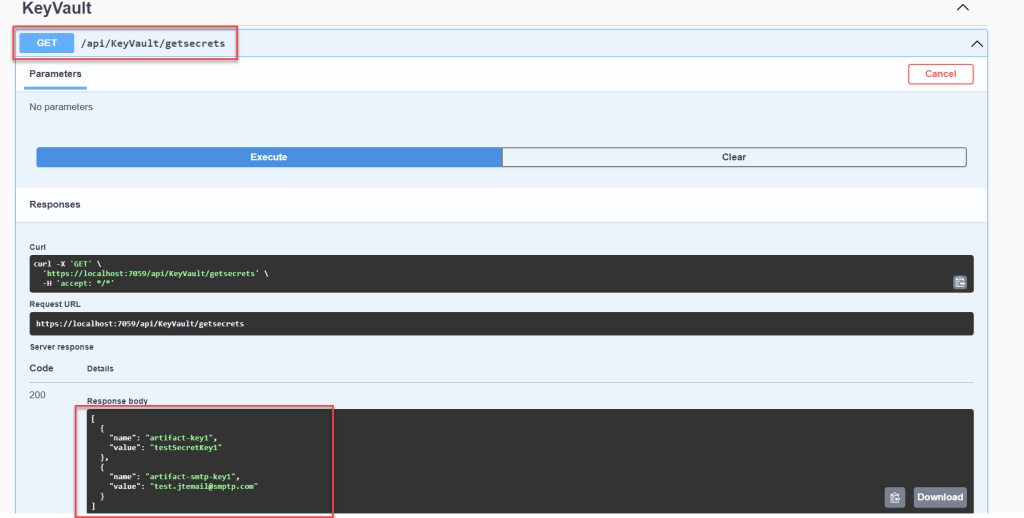
Please find the Source Code implementation here in this link.
Conclusion
We discussed here about How to use Azure Key Vault in ASP.Net Core, step by step process to create and learn regarding Azure Key vault secrets use in ASP.Net Core.
Leave behind your valuable queries and suggestions in the comment section below. Also, if you think this article helps you, do not forget to share this with your developer community. Happy Coding 🙂
Relatted Articles
- Building an AI Knowledge Base Search with Azure AI Foundry: Step-by-Step Guide
- How to Secure React.js application with Azure AD Authentication Using MSAL Library
- 🔐 Securing .NET Core Web Apps with Azure AD/Intra and MSAL
- Step-by-Step Guide to Using Azure Redis Cache in ASP.NET Core 9 Web API
- 🤖 Build a Full-Stack AI App with React, Node.js & Azure OpenAI
- Effortless React Deployment 🚀: CI/CD with GitHub Actions & Azure Static Web Apps
- Deploying Angular apps in Azure Blob Storage with CI/CD Integration 🚀
- How to Build a serverless CRUD app with Azure function and Cosmos DB
- How to resolve Function App Cannot Create within Azure Portal
- .NET 8 Authentication with Identity in a Web API using Bearer Tokens and Cookies
SUPPORT ME
It is very full post.