
In this article, we will learn about Building CI/CD Pipeline(YAML) using Azure DevOps. A continuous integration and continuous deployment (CI/CD) pipeline is a set of actions required to provide a new version of software. CI/CD pipelines are a practice that uses automation to improve software delivery across the whole software development life cycle. CI can be considered as the first stage in producing and delivering code, and CD as the second. CI focuses on preparing code for release (build/test), whereas CD involves the actual release of code (release/deploy).
Before starting this article, it is recommended please read my previous 2 articles on Azure DevOps.
- Building CI/CD Pipeline using Azure DevOps- Part 1
- Building CI/CD Pipeline using Azure DevOps- Part 2
What is Azure DevOps?
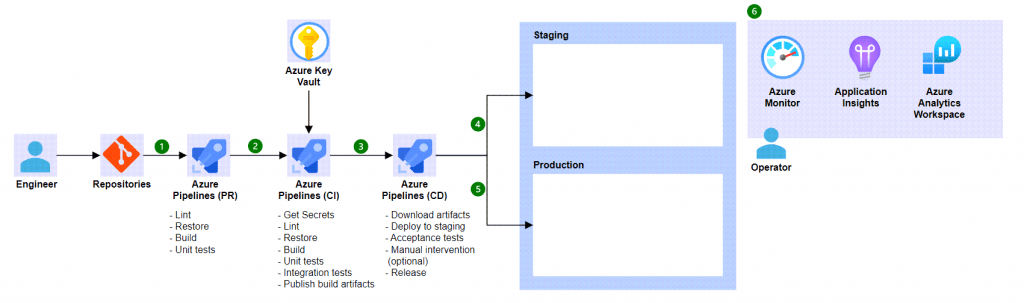
Azure DevOps Pipelines provide you the option to do your CI builds for any platform and any tool or language. Azure DevOps Pipelines provides a web interface where you can create jobs that contain steps that need to take place to create a production artifact for your software. The build automation pipelines allow you to trigger from any external repository like GitHub, SVN, or your local Git server or Azure DevOps repositories. The triggers will then fire the build according to the definition you created. Besides, Azure DevOps also provides the following options for automation
- Build automation
- Deployment automation
DevOps Projects does all the work for the initial configuration of a DevOps pipeline including everything from setting up the initial Git repository, configuring the CI/CD pipeline, creating an Application Insights resource for monitoring, and providing a single view of the entire solution with the creation of a DevOps Projects dashboard in the Azure portal.
What is CI/CD?
Continuous integration and continuous deployment (CI/CD) are the backbone of DevOps. It helps fast software development and deployment to enable continuous delivery of value to end users by achieving incremental software delivery. Continuous integration (CI) is an automated way to build, package, and test applications. These builds are passed as inputs to the CD pipeline.
Continuous delivery (i.e. CD) automates the delivery of applications to selected infrastructure environments like development, UAT, and production. With Azure DevOps, you deploy any software on any platform.
Creating an ASP.Net Core Application and Push into GitHub
Create a sample ASP.Net Core application using the below steps.
- Launch the Visual Studio IDE and click on “Create new project”.
- In the “Create new project” window, select “ASP.NET Core Web Project(MVC)” from the template list. You may choose different templates of .NET Core according to your choice.
- Click Next. In the “Configure your new project” window, specify the name and location for the new project and then click Create.
- In the “Create New ASP.NET Core Web” window shown next, select .NET Core as the runtime and .NET 8.0 from the drop-down list at the top(I’m using .NET 8 .net core SDK). Select “API” as the project template to create a new ASP.NET Core API application.
- Ensure that Authentication is set as “No Authentication” as we won’t be using authentication either and Click Create.
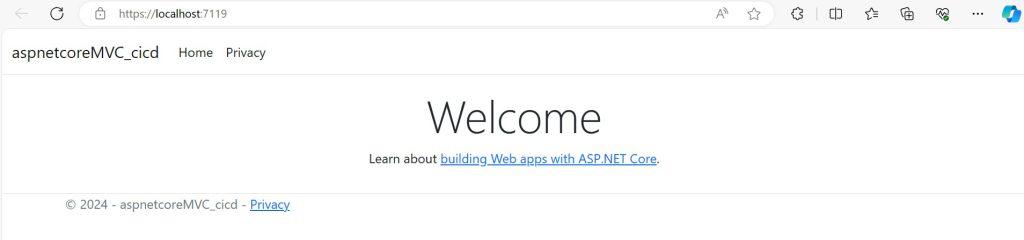
After running the application we can see the output loaded in a browser like below.
The application is ready, let’s push this code into GitHub using the below steps.
Create a GitHub Repository and Push the Code
- Log in with the GitHub Account
- Click on Create
New Repository

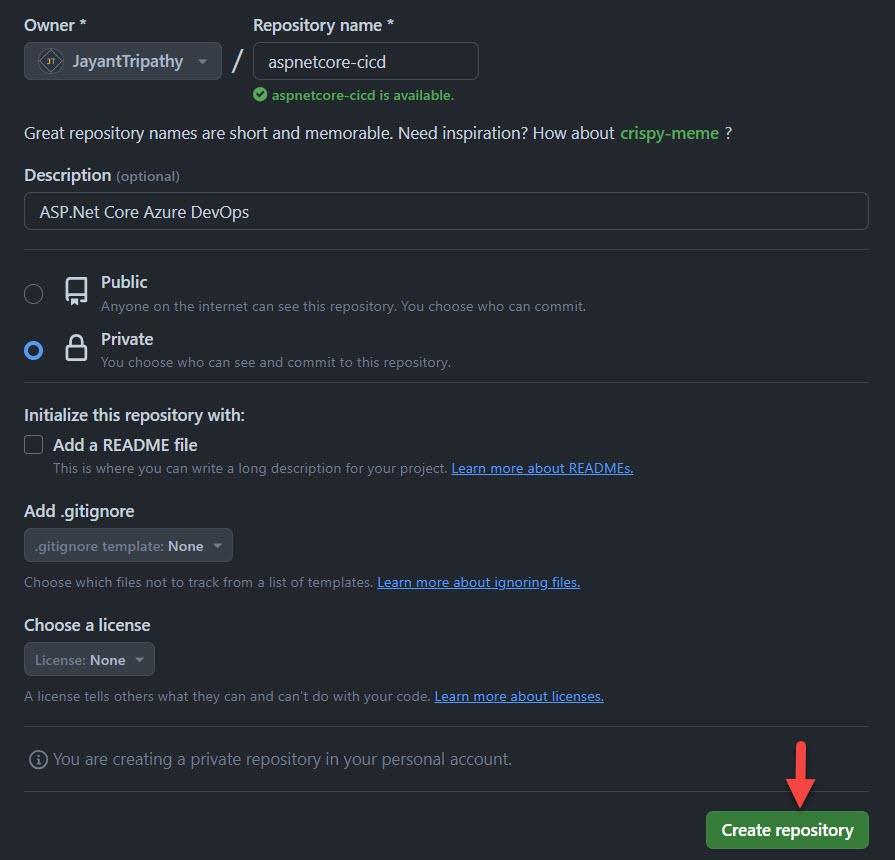
- Select the repository name, give the description, and click on Create Repository.
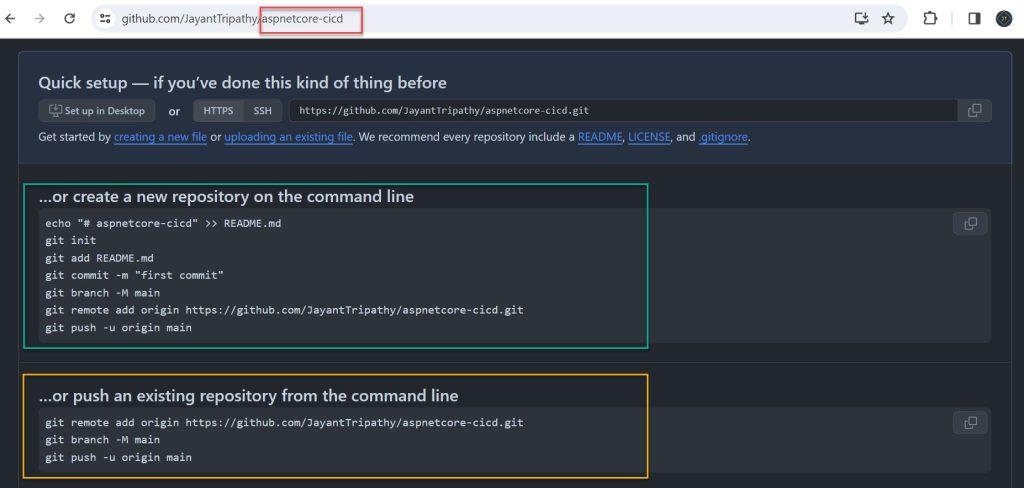
- A new repository is created and now we can copy commands and keep them in Notepad to run in the developer command prompt.
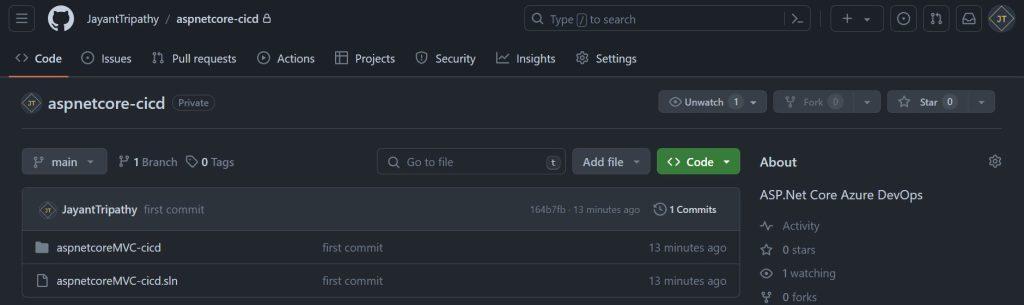
- Push the Code into the GitHub Repository by below green highlighted.
- Once you push the code we can see that the sample code has been pushed into GitHub Repo.
Configure the pipeline in Azure DevOps
If you are unfamiliar with how to establish a pipeline in Azure DevOps and how to proceed, please refer to this link Building CI/CD Pipeline using Azure DevOps- Part 1. We briefly addressed CI/CD generation.
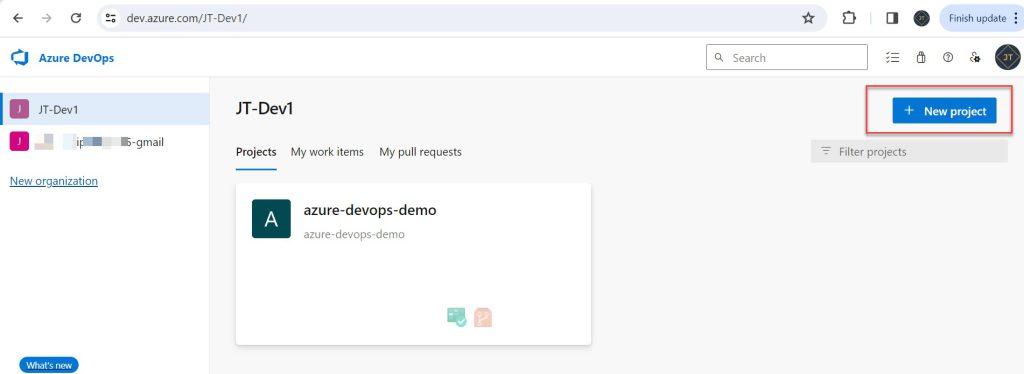
- Login into your Azure DevOps https://azure.microsoft.com/en-us/products/devops/?nav=min.
- Click on
+New Project
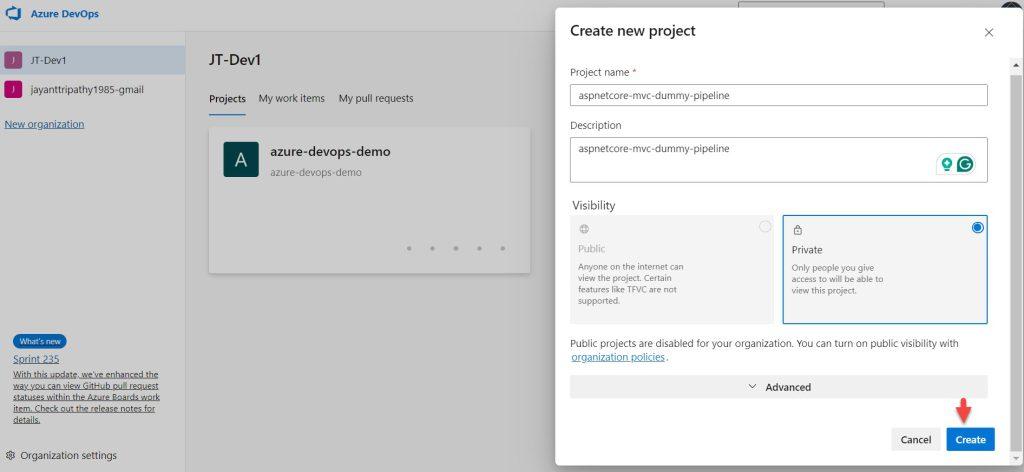
- On the right-hand panel, provide the project name like “aspnetcore-mvc-dummy-pipeline”.
- You can make the visibility private/public according to the requirements. In my case, I set it as a private then click on create
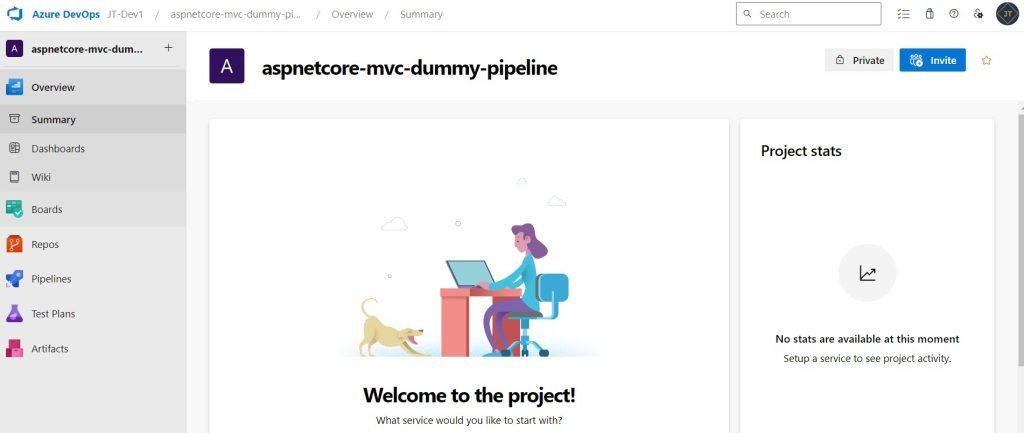
- Once the project is created we can see that project has been created successfully.
Creating CI(Continuous Integration) Pipeline
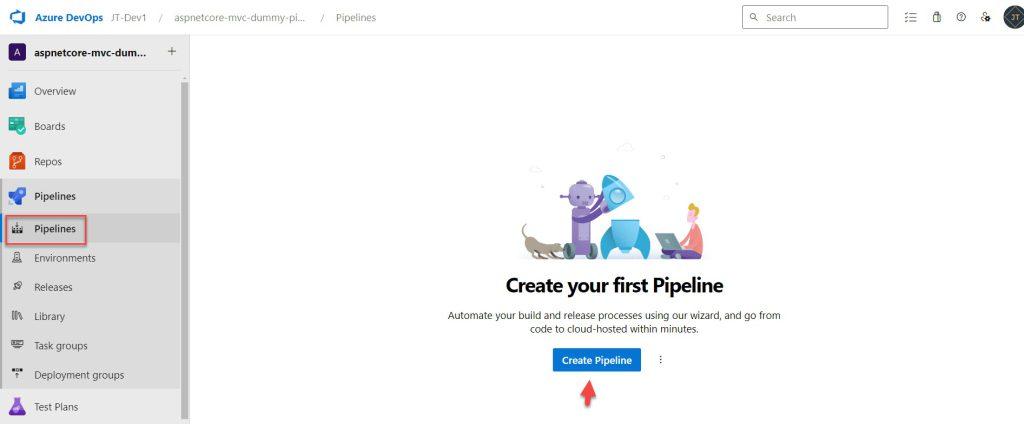
- Now we are in the project section. On the left go to Pipelines -> select pipelines
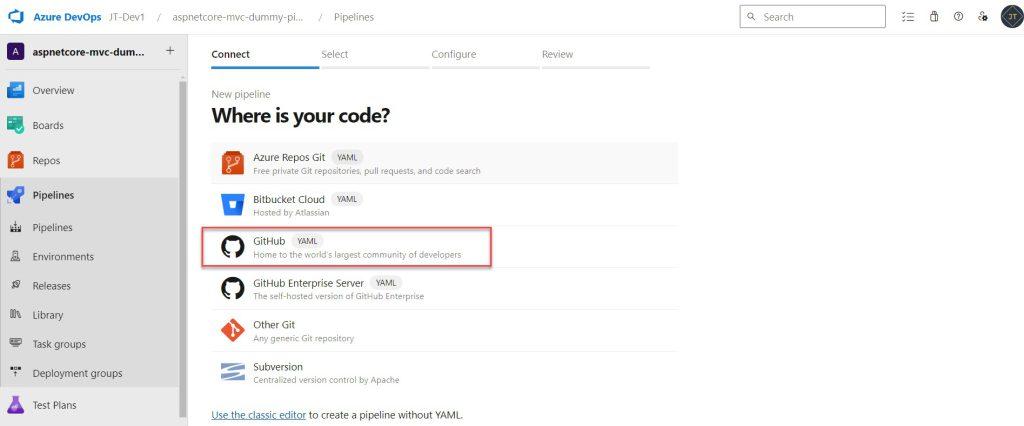
- To establish a pipeline, we must provide permission to visit GitHub through the Azure DevOps Project settings option. Choose the GitHub (YAML) option, as shown.
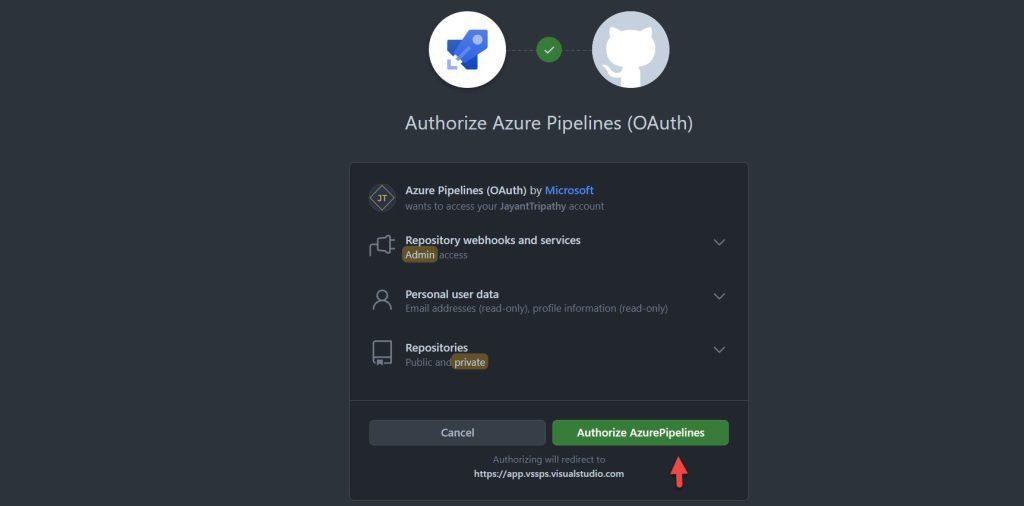
- Click to Authorize Azure Pipelines.
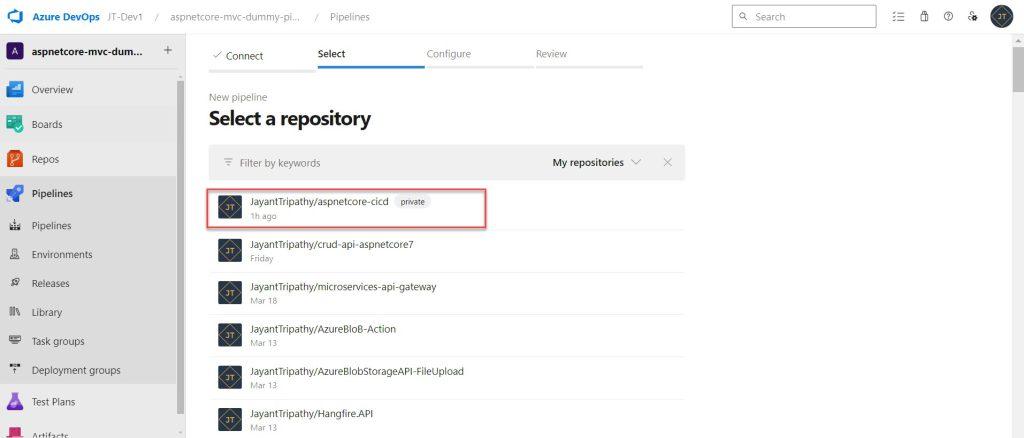
- Then select the GitHub repository that we want to link.
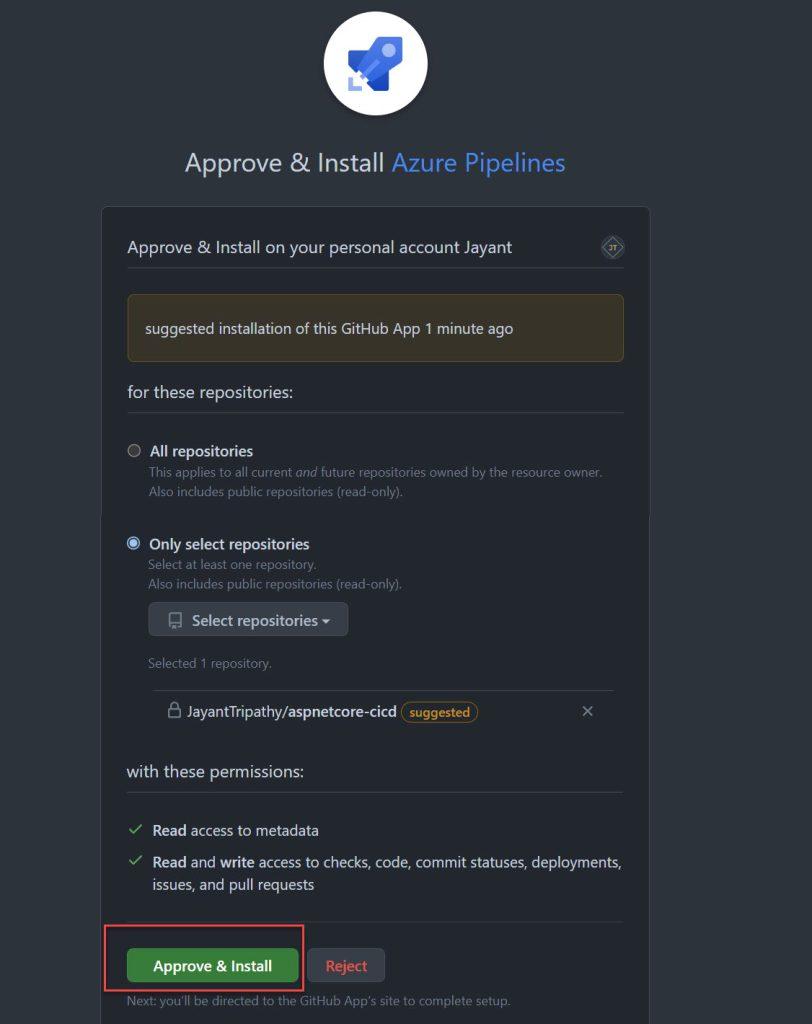
- It will be instructed to authenticate the repository to access it through Azure DevOps. Click the ‘Approve & Install’ button.
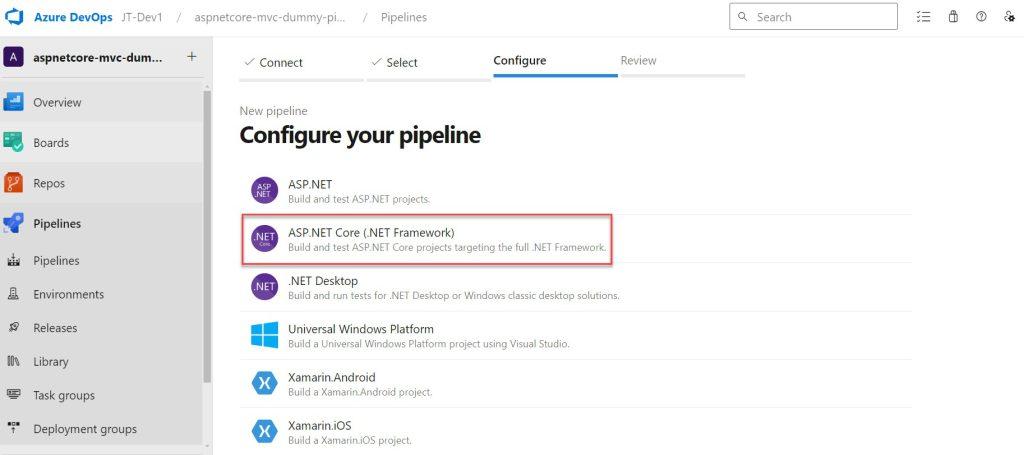
- The following ‘Configure’ stage involved selecting environment details. Selecting Asp.Net Core (.Net Framework) will take you to the ‘Review’ area.
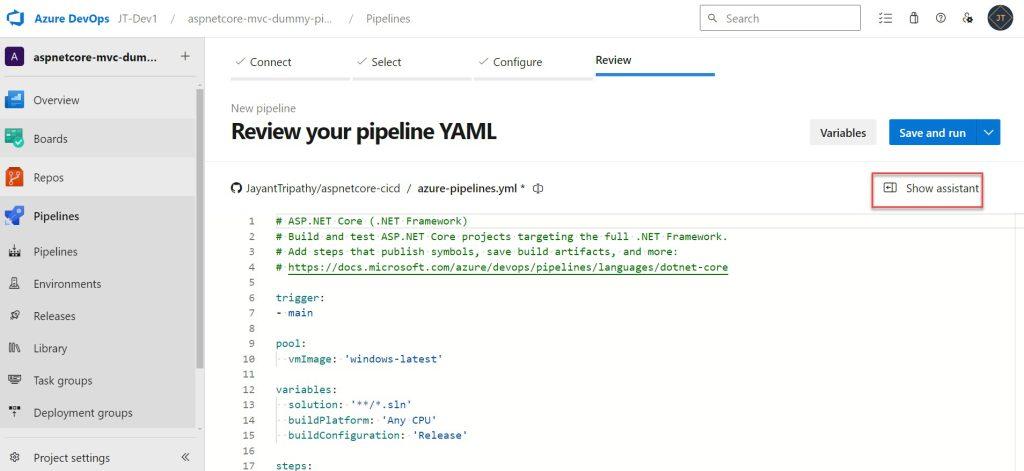
- YAML code was generated in the ‘Review’ stage; in this area, we must add one task as the final step in the YAML coding process. Go to ‘Show assistance’ and include ‘Tasks’ in the YAML execution steps.
- Click on Show Assistant
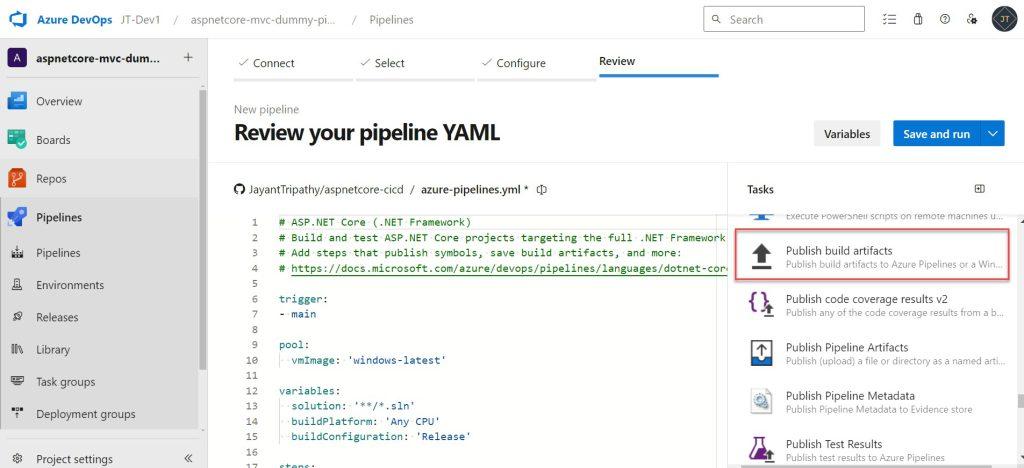
- Type the ‘publish’ keyword in the Tasks section to bring up the ‘Publish build artifacts‘ option.
- After clicking on Publish and Build artifacts, it prompts the below screen.
- Click the Add button and then Click Save and Run.
- After clicking the Add button we can see the ‘Publish build artifacts‘ details have been added on YAML.
- task: PublishBuildArtifacts@1
  inputs:
    PathtoPublish: '$(Build.ArtifactStagingDirectory)'
    ArtifactName: 'drop'
    publishLocation: 'Container'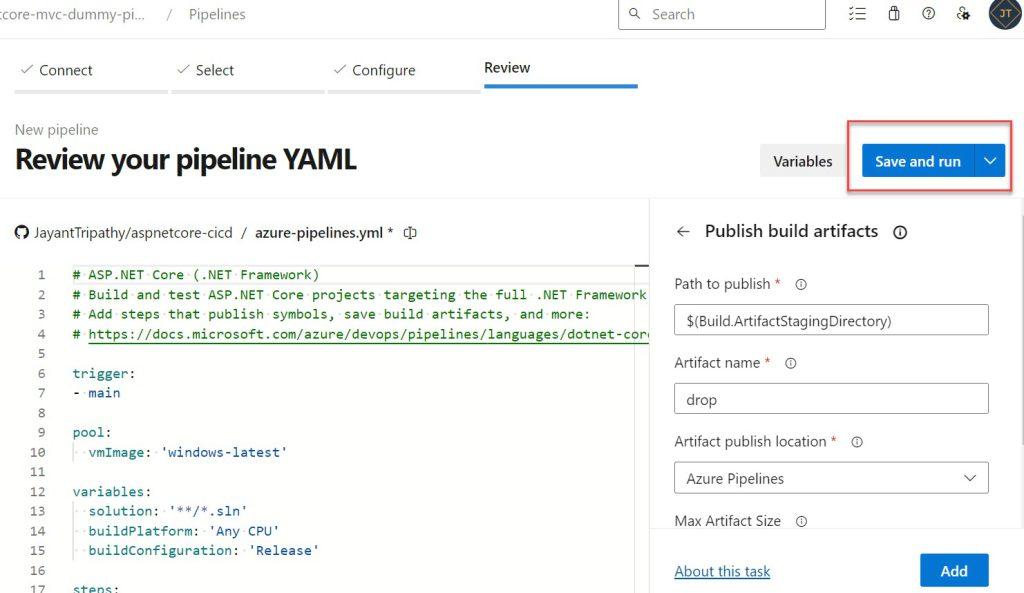
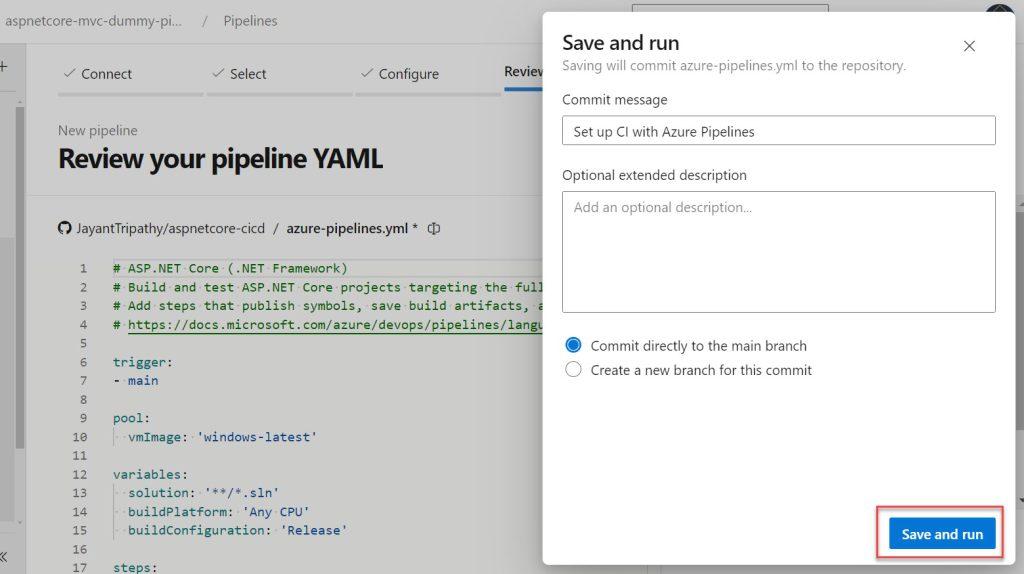
- Next, it asks for the commit message for CI, clicks to save, and runs to execute the pipeline.
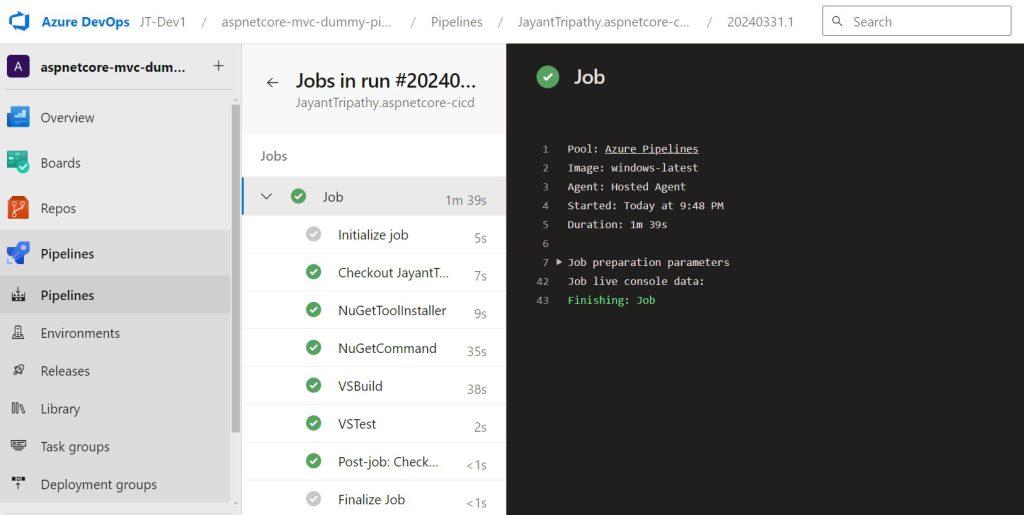
- Quickly click on the ‘Pipelines’ option to view the status of pipelines. To view pipeline log information, click on ‘Job’.
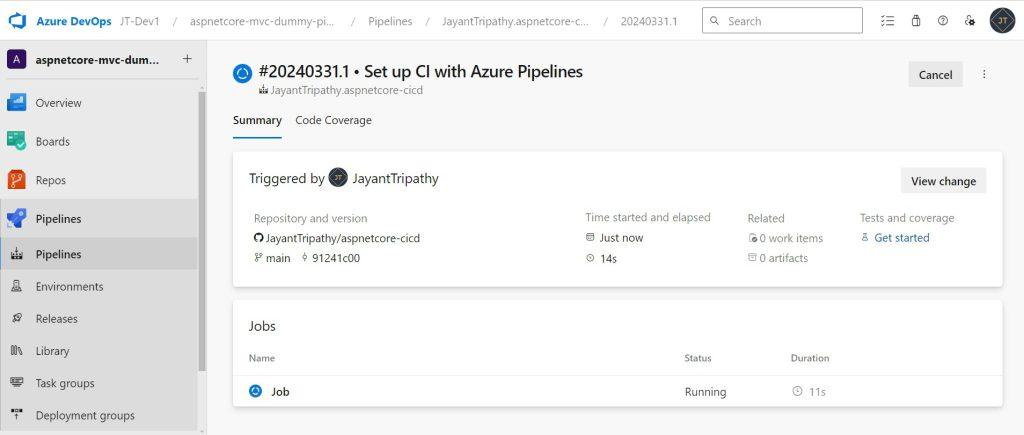
- This part will set up the pipeline execution job step by step.
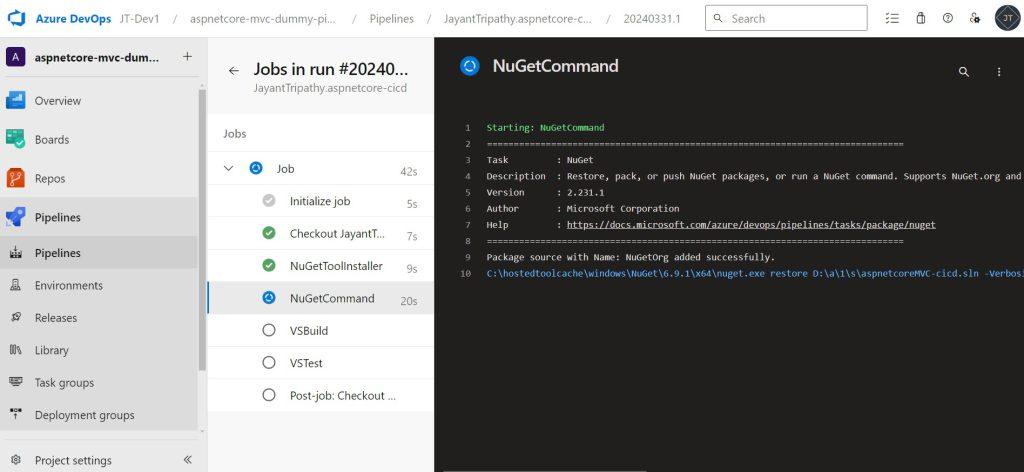
- When the Execution job is completed successfully, it will appear in green, as shown in the screenshot below.
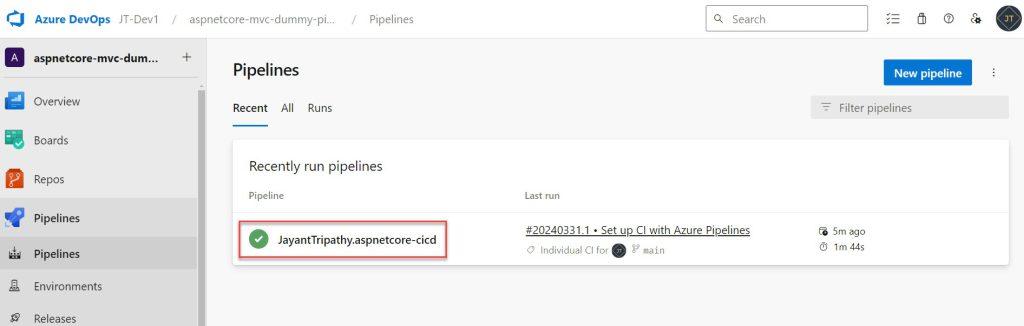
- Go to the Pipelines option to discover the status of Continuous Integration (CI), we can see the pipeline build is a success.
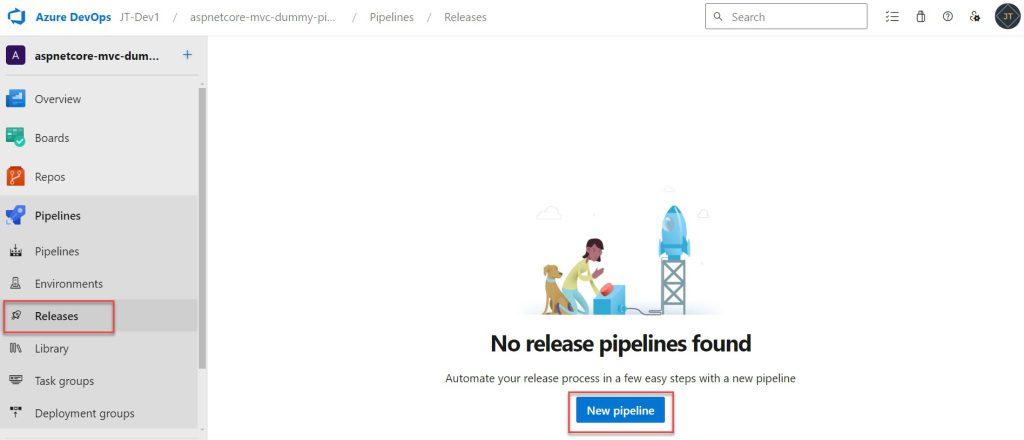
Creating CD(Continuous Deployment) Pipeline
- Go to the Release section and click on New Pipeline for Continuous Deployment.
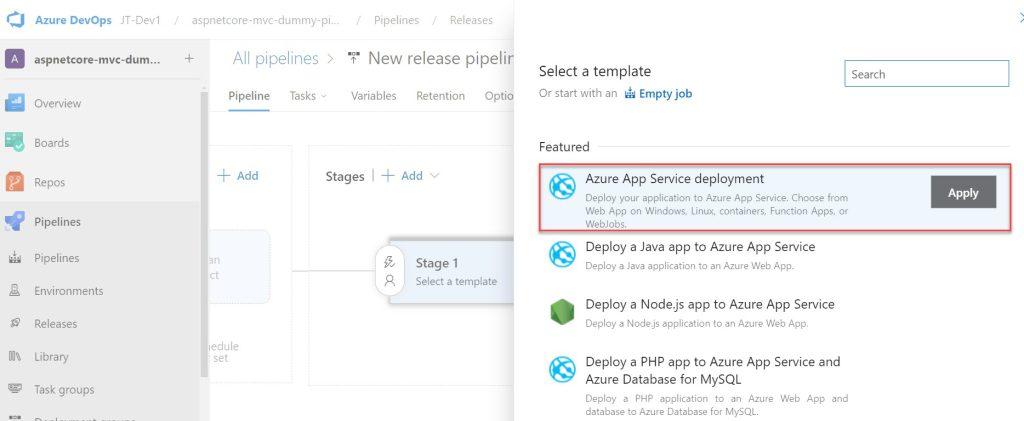
- Option to select the template. Select Azure App Service deployment and click ‘Apply’.
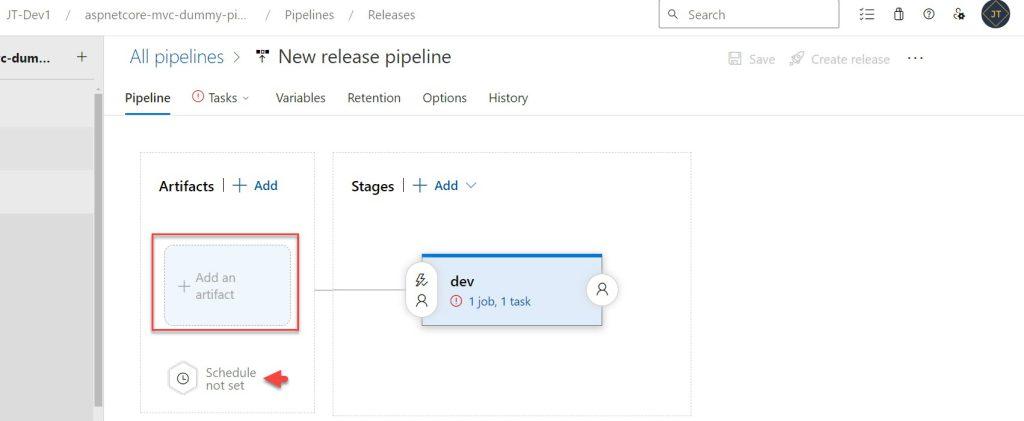
- This section includes Artifacts and Stages. We need to provide a proper stage name and stage owner details for deployment. Here I named the stage name as dev.

- Stage details are available as shown below, are there is no schedule set.
- Click on Add an Artifact
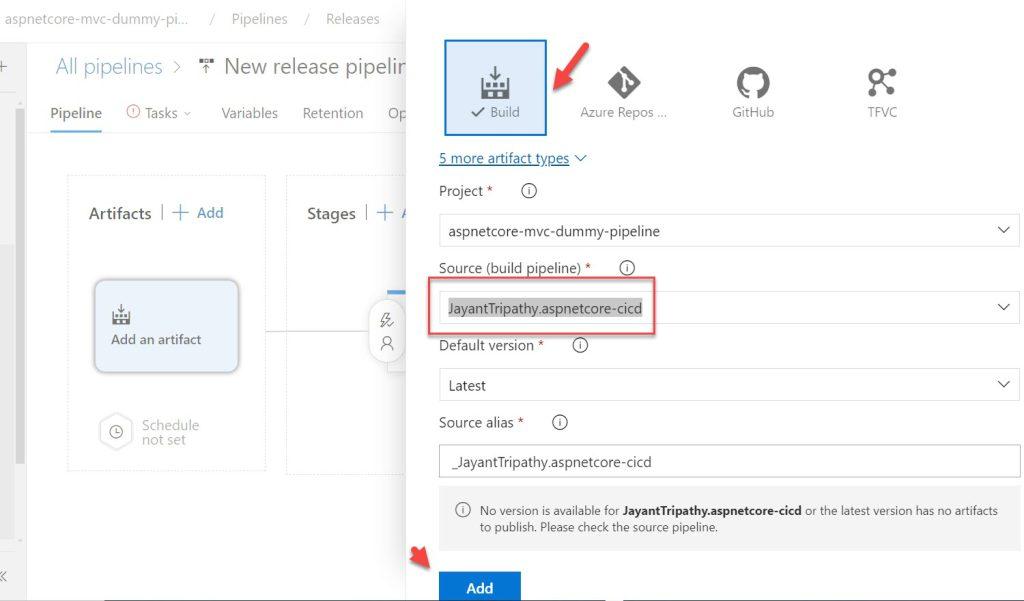
- Create an artifact to choose our build code from the build pipeline. Enter valid information from each drop-down list and click the ‘Add’ button.
- Choose the Source
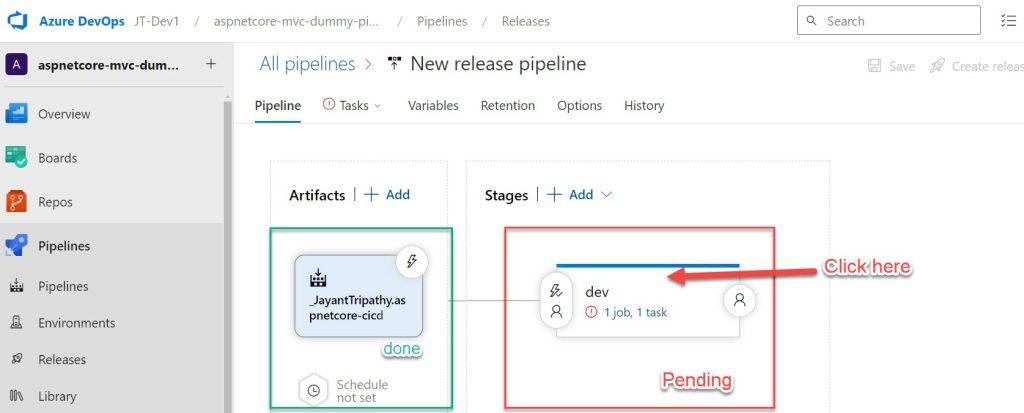
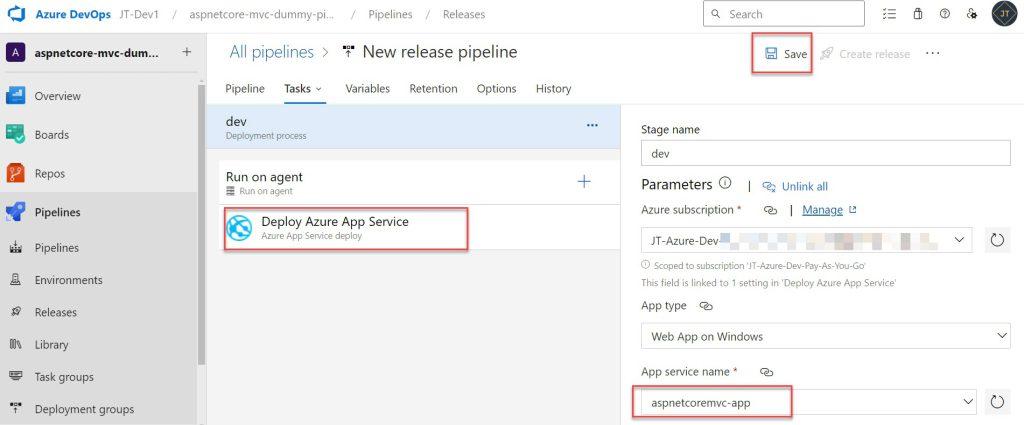
- The artifact has been added, however, we still have an error in the ‘Dev Stage‘. To configure our project directory (.zip file), select ‘1 job, 1 task‘.
- Here on the below screen, we need to add the Azure Subscription details.
- Then set the app service name.
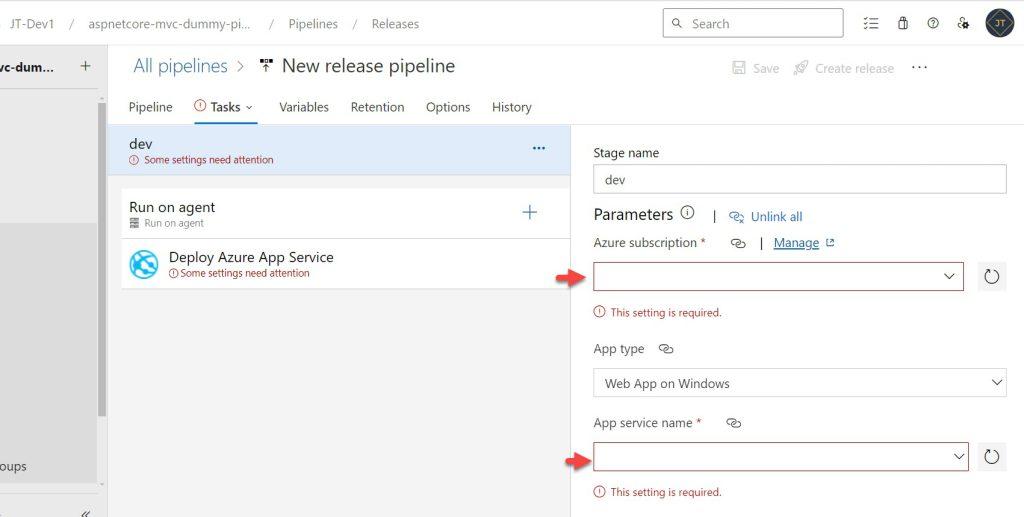
- Like the below screen, select your Azure subscription and authorize it.
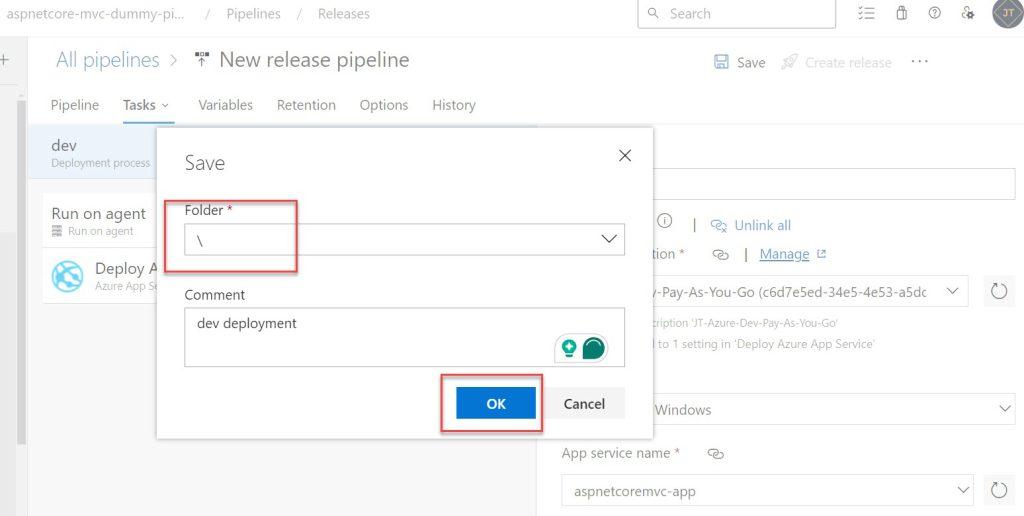
- Set the App Service name and click on the Save button.
- Provide a valid comment and click the ‘OK’ button.
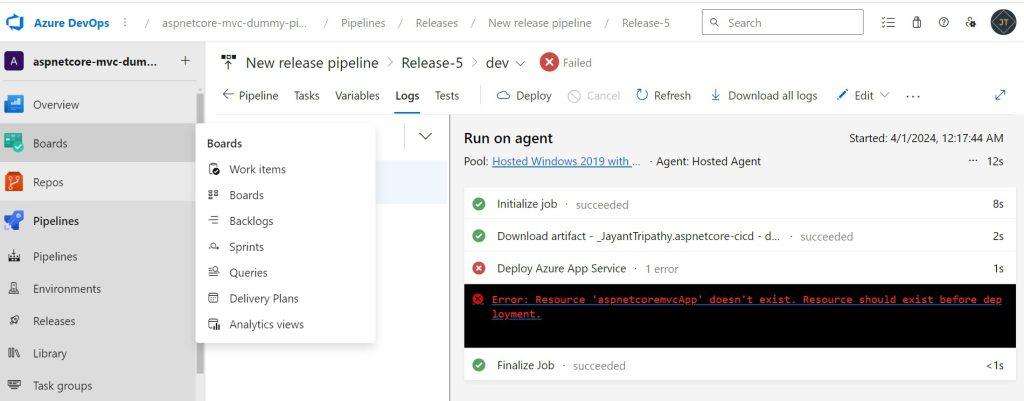
- On below we can select the dev and click on deploy.
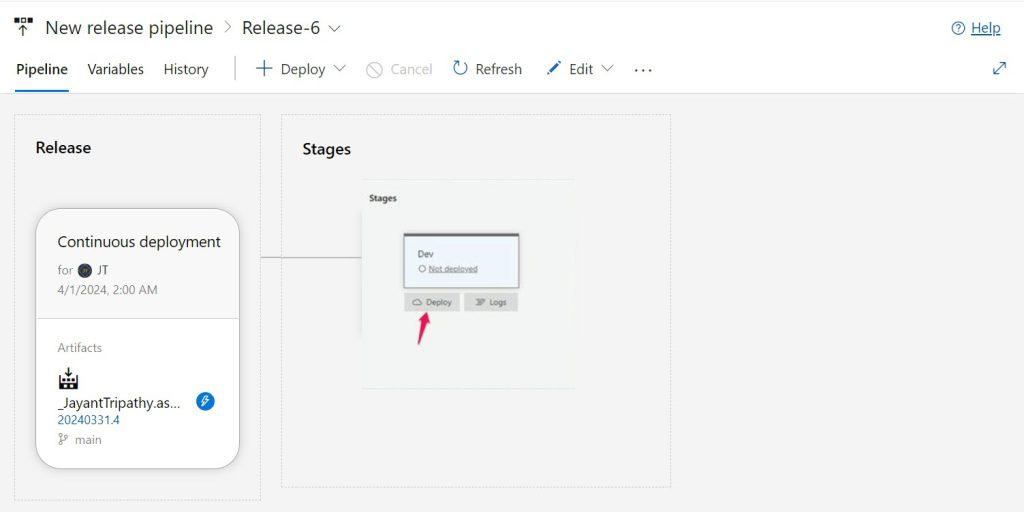
- After clicking on deploy, it deploy the application into Azure App Service.
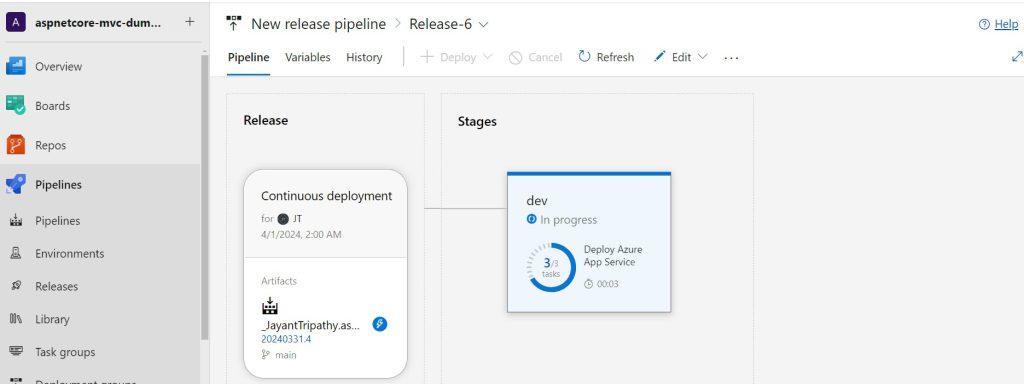
The release process failed because the application name we specified did not exist in the Azure App service. To resolve this issue, we will go to the Azure portal and manually create a web app before rerunning the release.
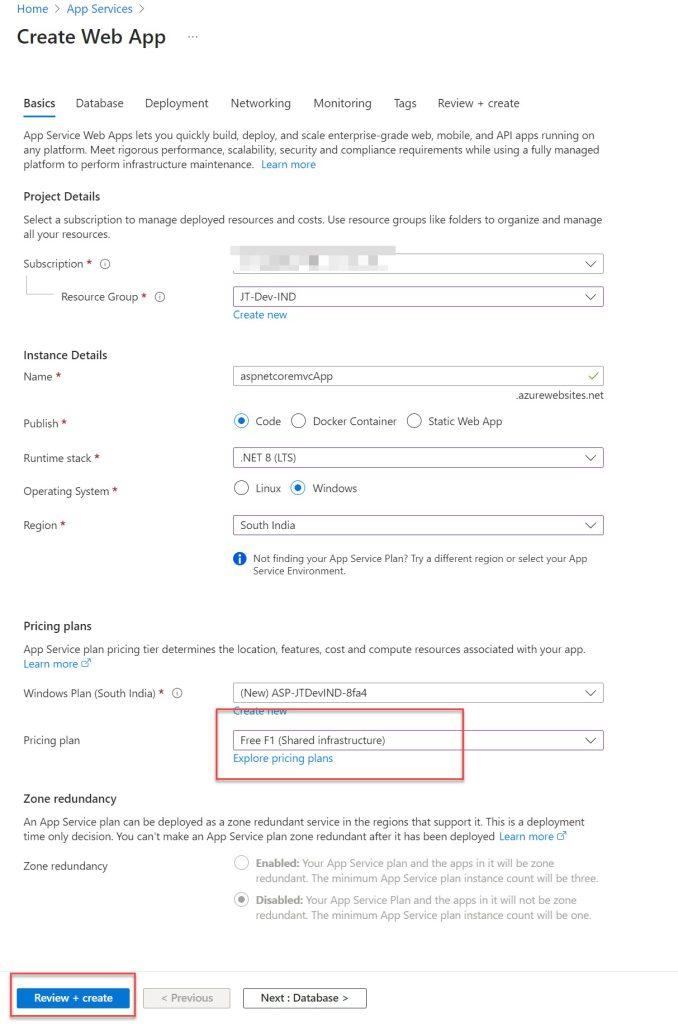
Creating the Web App in Azure Portal
- Choose your subscription, application name, and Runtime Stack/Framework.
- Here I select the pricing plan as free.
- Once the Web App has been created, perform the deployment again. However, we are still experiencing troubles, but they are different now. We see now the basic authentication issue.
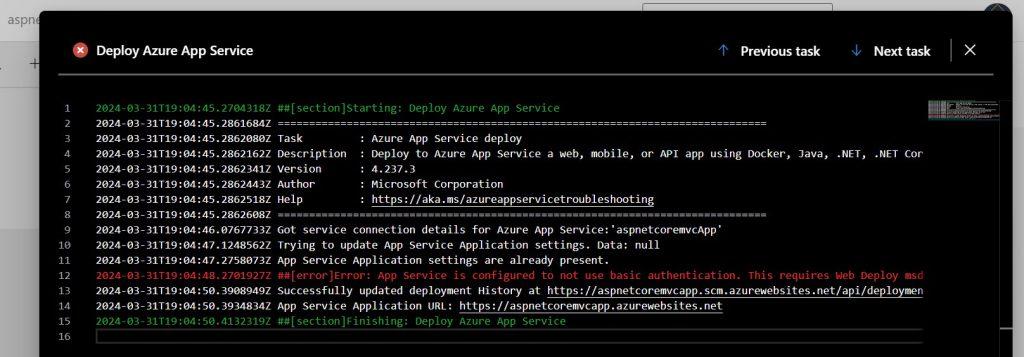
To resolve this issue please follow this link. https://learn.microsoft.com/en-us/azure/app-service/configure-basic-auth-disable?tabs=portal
To resolve this, follow the steps outlined below: access the web app generated on the Azure portal.
- Goto Configuration and enable the below highlighted.
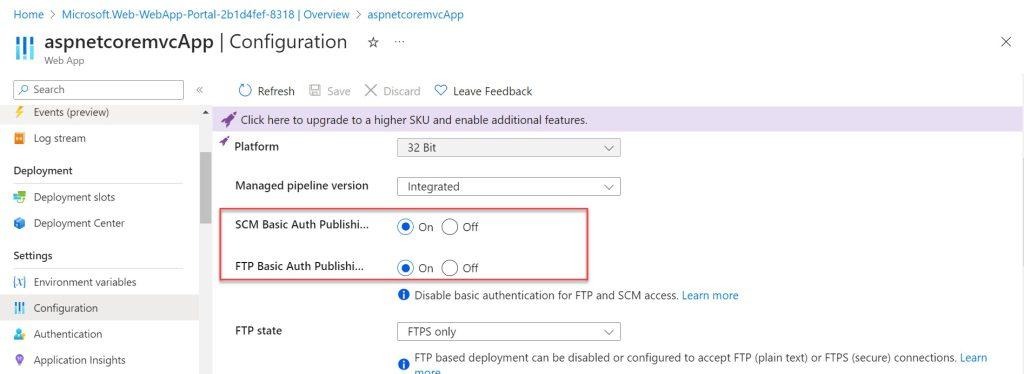
That’s it, run the Pipeline again, and this time we can see the release pipeline proceeds successfully.
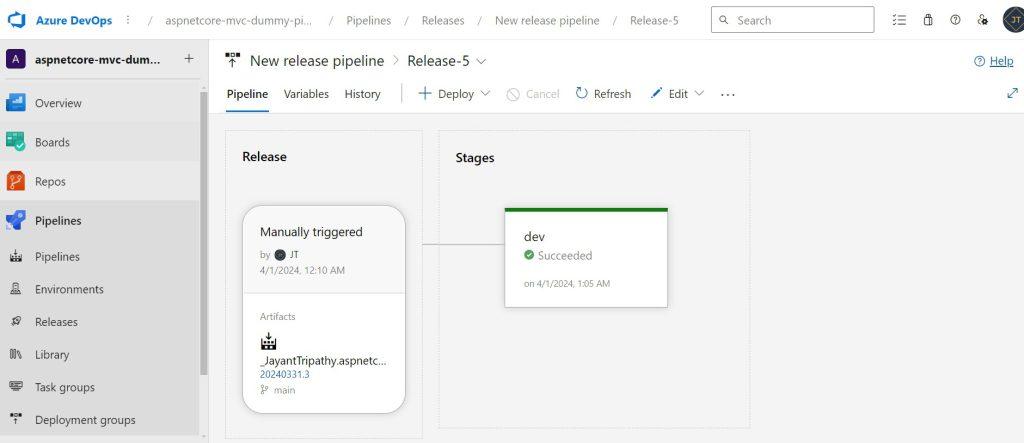
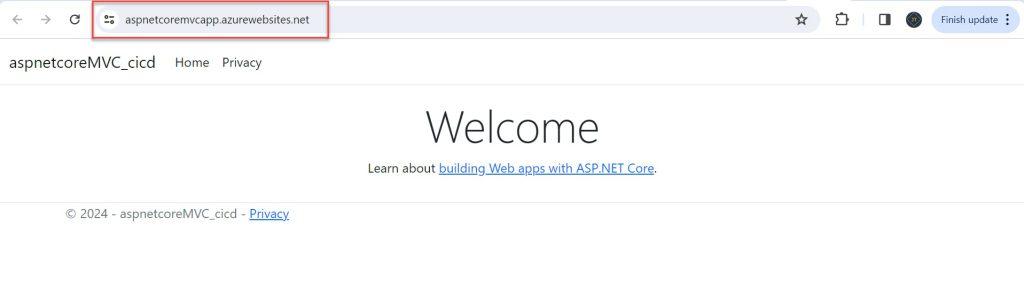
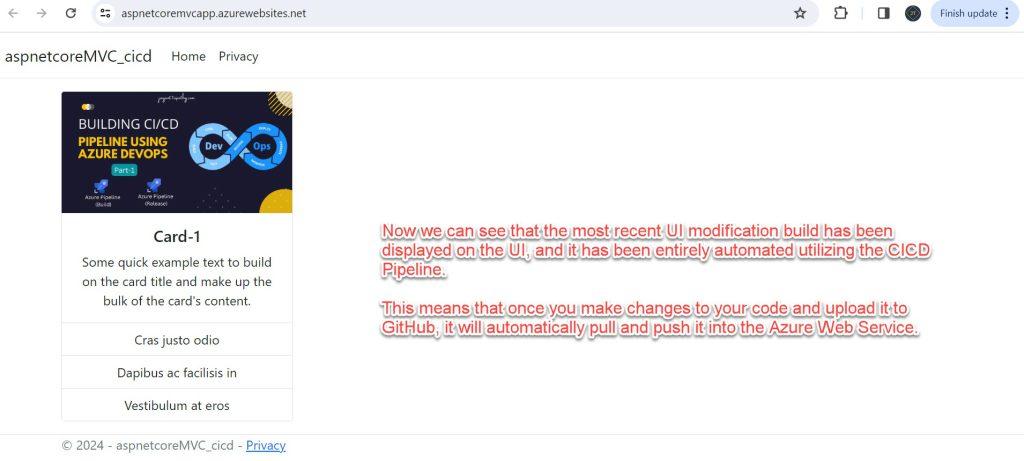
Now, move to Azure Web Portal and access the domain, we can see that our ASP.Net Core Web App is ready.
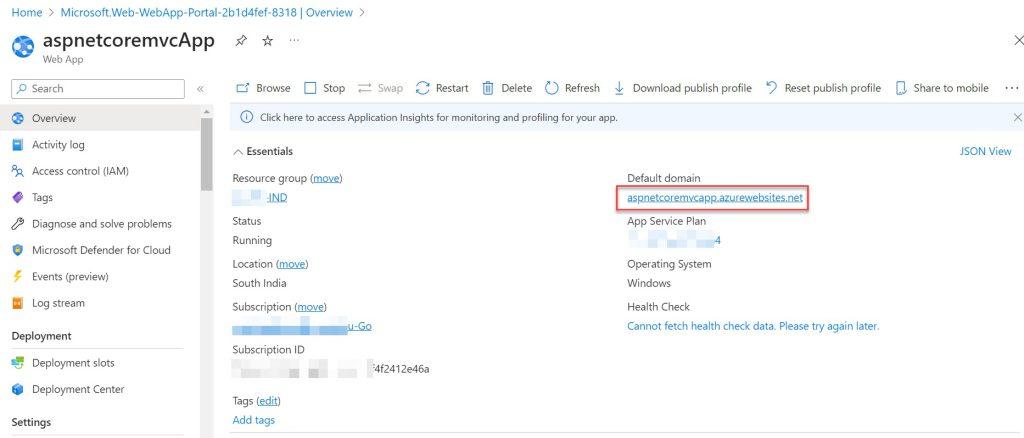
Woooh !!! Now we can see the output
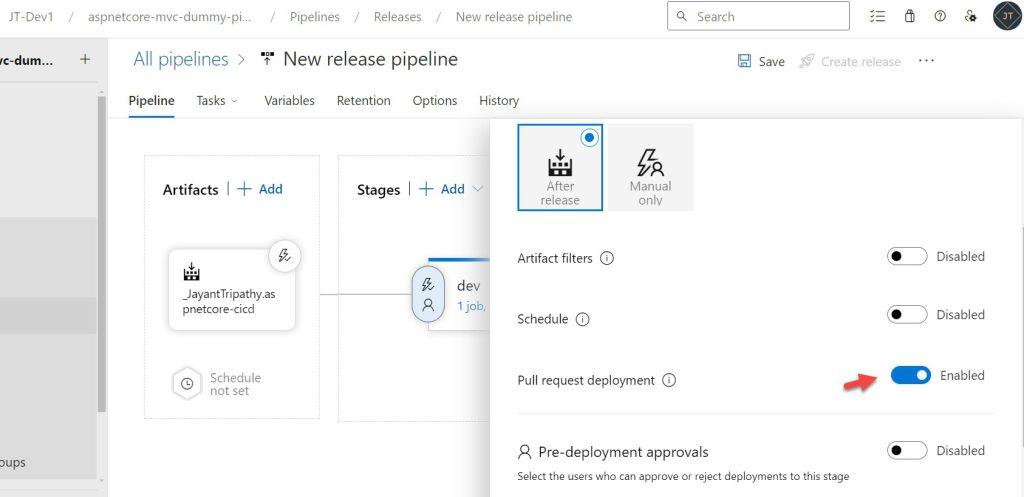
Trigger the Release pipeline Automatic
To trigger the build pipeline we need to follow the below steps, This implies that when we update any code and push the build/release pipeline automated trigger ad, we can view the new results.
- Click on the
Edit Releaseand Edit the Artifacts
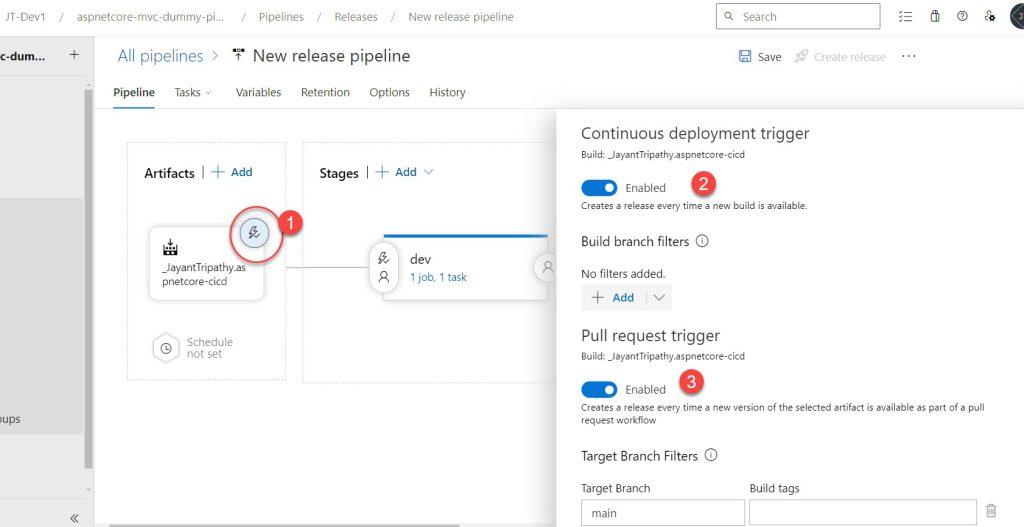
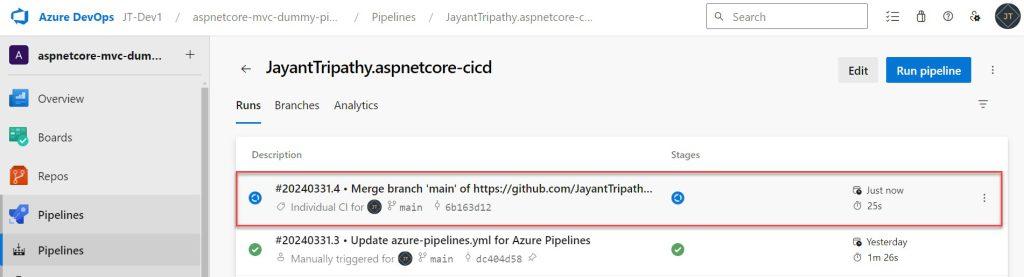
I changed something in my “Index.cshtml” file and pushed the code using the Git command, as seen below. It triggered automatically, and we can see the most recent UI modification below.
That’s it for the Building CI/CD Pipeline(YAML) using Azure DevOps.
Conclusion
In this article, we discussed Building CI/CD Pipeline(YAML) using Azure DevOps. We reviewed the step-by-step process of constructing an Azure pipeline, which is useful for everyone from beginners to advanced users.
Leave behind your valuable queries and suggestions in the comment section below. Also, if you think this article helps you, do not forget to share this with your developer community. Happy Coding 🙂
Latest Articles
- Building an AI Knowledge Base Search with Azure AI Foundry: Step-by-Step Guide
- How to Secure React.js application with Azure AD Authentication Using MSAL Library
- 🔐 Securing .NET Core Web Apps with Azure AD/Intra and MSAL
- Step-by-Step Guide to Using Azure Redis Cache in ASP.NET Core 9 Web API
- 🤖 Build a Full-Stack AI App with React, Node.js & Azure OpenAI
- Effortless React Deployment 🚀: CI/CD with GitHub Actions & Azure Static Web Apps
- Deploying Angular apps in Azure Blob Storage with CI/CD Integration 🚀
- How to Build a serverless CRUD app with Azure function and Cosmos DB
- How to resolve Function App Cannot Create within Azure Portal
- How to convert Text To Speech With Azure Cognitive Services using Angular and .Net Core
SUPPORT ME