

In this article we will learn about Routing in Angular. Routing in Angular allows the users to create a single-page application with multiple views and allows navigation between them. Users can switch between these views without losing the application state and properties.
We will learn what Angular Routing is and how it works in this tutorial. We’ll also take a look at the various components that comprise the Angular Router Module. Then we’ll figure out how to set up and configure the router. Please read my previous article How to Create Custom Pipe in Angular.
Prerequisites
Before creating a route, we should be familiar with the following:
- Basics of components
- An Angular app — We can generate a basic Angular application using the Angular CLI.
What is Routing in Angular?
Angular Router is a powerful JavaScript router built and maintained by the Angular core team that can be installed from the @angular/router package. It provides a complete routing library with the possibility to have multiple router outlets, different path matching strategies, easy access to route parameters and route guards to protect components from unauthorized access.
The Angular Routing is a mechanism which is used for navigating between pages and displaying appropriate component or pages on the browser. In other words, the Routing in Angular Application allows us to navigate across the application from one view to another. It also enables us to keep the state, implement modules, and then load the modules based on the user’s roles.
Adding Routing in Angular
When we are creating an angular application, at the time of creation it is asking whether you want to add angular routing to your project or not. If you select yes, then it automatically add the routing model in your project. If you select no then you need to add it manually. You can use the below CLI code to generate the router in Angular Application.
ng generate module app-routing --flat --module=app--flat puts the file in src/app folder instead of its own folder and --module=app tells the CLI to register it in the imports array of the AppModule.
Configuring Routes in Angular Application
Once you created the routing module, then you need to configure the path and their respective component in the AppRoutingModule. As you can see, here we have created 4 paths i.e. employees, cricketers, about-us and contact-us (you need to use the path properties to set the path. You can give any meaningful name here) and also set the respective components using the component property (Here you need to provide the component class name).
import { NgModule } from '@angular/core';
import { RouterModule, Routes } from '@angular/router';
import { AboutUsComponent } from './componenets/about-us/about-us.component';
import { ContactUsComponent } from './componenets/contact-us/contact-us.component';
import { CricketerListComponent } from './componenets/cricketer-list/cricketer-list.component';
import { EmployeeComponent } from './componenets/employee/employee.component';
import { HomeComponent } from './componenets/home/home.component';
import { NotFoundComponent } from './componenets/not-found/not-found.component';

const routes: Routes = [
  { path: 'home', component: HomeComponent },
  {path:'employess', component: EmployeeComponent},
  {path:'cricketers', component: CricketerListComponent},
  {path:'about-us', component: AboutUsComponent},
  {path:'contact-us', component: ContactUsComponent},
  { path: '', redirectTo: 'home', pathMatch: 'full' },
  { path: '**', component: NotFoundComponent }
];

@NgModule({
  imports: [RouterModule.forRoot(routes)],
  exports: [RouterModule]
})
export class AppRoutingModule { }
- We import Routes from router module.
- We need to import all the components, that requires routing. We have imported component employee, crickter-list, about-us and contact-us.
- Finally, we have defined a constant (appRoutes) that contains the Routes that we wish to create. The Routes is an array of route configuration object (or route object).
- {
path:'home',component: HomeComponent} : The first parameter is the path, which represents the URL path segment. The second parameter is the component to display. The above route configuration means, when you navigate to /employee(URL path segment), then the EmployeeComponent gets call and the corresponding template will show. - Default Route : Here the default route is
{ path: '', redirectTo: 'home', pathMatch: 'full' }- The default route is redirected to the home path using the RedirectTo argument. This route means that, when you navigate to the root of your application /, you are redirected to the home path (/home), which in turn displays the HomeComponent.
- pathMatch argument set to ‘full’. The pathMatch tells the Router how to match the URL. When it is set to full, the path is matched to the entire URL. Every route ends in an empty space for ex: /contact/’’. If pathMatch is not set to full then the router will apply the redirect, which results in the error.
- Wild Card Route –
{ path: '**', component: NotFoundComponent }- The Angular router selects this route any time the requested URL doesn’t match any router paths. To set up a wildcard route, add the following code to your routes definition. The two asterisks, ** , indicate to Angular that this routes definition is a wildcard route.
- Here if the redirection is not matched any of the route then it call the
NotFoundComponent
Note:
path does not contain the leading slash.
Routing Order : First one wins
The Routes are matched in the order they are defined. The Router always returns the first matching route (first-match-wins strategy) Since the wildcard route (**) matches every URL and should be placed last.
Defining the Navigation
Open the app.component.html. The AppComponent is only handling navigation. It will display the menu option, which user can click to navigate to a view.
<nav class="navbar navbar-expand-lg navbar-light bg-light">
<a class="navbar-brand ml-5" href="#">Angular Lessons</a>
<button class="navbar-toggler" type="button" data-toggle="collapse" data-target="#navbarNav" aria-controls="navbarNav"
aria-expanded="false" aria-label="Toggle navigation">
<span class="navbar-toggler-icon"></span>
</button>
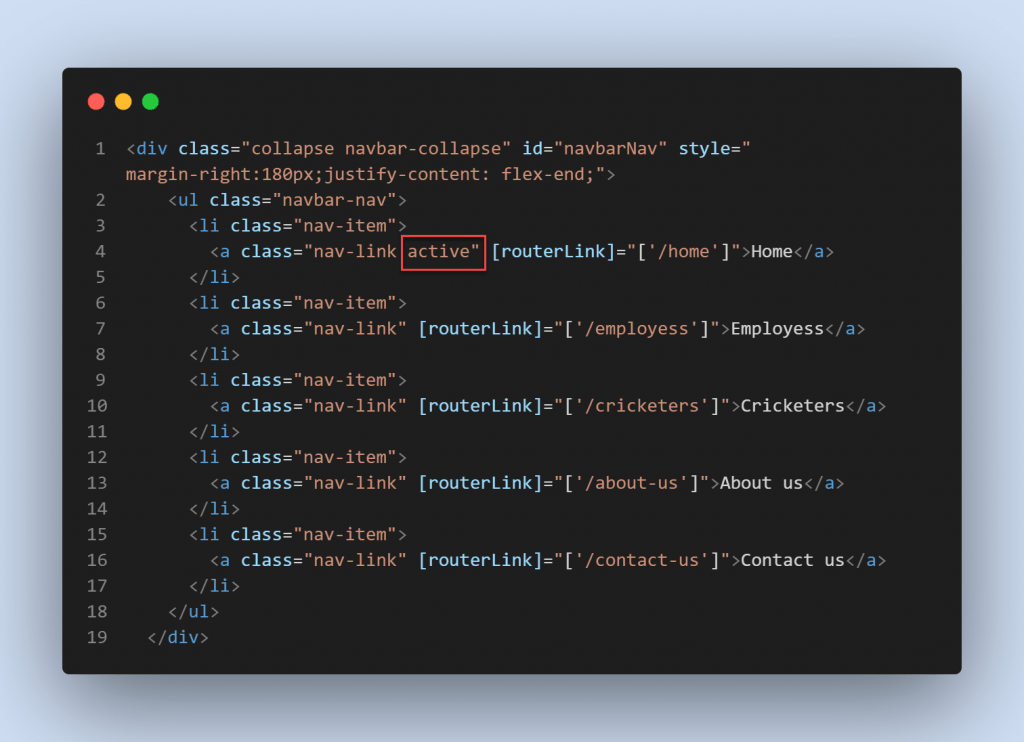
<div class="collapse navbar-collapse" id="navbarNav" style="margin-right:180px;justify-content: flex-end;">
<ul class="navbar-nav">
<li class="nav-item">
<a class="nav-link active" [routerLink]="['/home']">Home</a>
</li>
<li class="nav-item">
<a class="nav-link" [routerLink]="['/employess']">Employess</a>
</li>
<li class="nav-item">
<a class="nav-link" [routerLink]="['/cricketers']">Cricketers</a>
</li>
<li class="nav-item">
<a class="nav-link" [routerLink]="['/about-us']">About us</a>
</li>
<li class="nav-item">
<a class="nav-link" [routerLink]="['/contact-us']">Contact us</a>
</li>
</ul>
</div>
</nav>
<div class="container mt-5" >
<router-outlet></router-outlet>
</div>- RouterLink
- We use the routerLink directive to bind anchor tag elements to the route.
- RouterLink is an attribute directive. We enclose it a square bracket. The routerLink is then bound to template expression, which returns a link parameters array.
- The Link Parameters array is the Parameters or arguments to the Route. The Angular Router module constructs the URL using the link parameters array.
- When the user clicks on the link, the Router service uses the path to locating the route associated with the path and activates the component.
- Router-outlet directive
<router-outlet></router-outlet>The RouterOutlet is a directive that tells the Angular where in our page we want to display the view, it is working as a pl.- We do not have to import the RouterOutlet and RouterLink directives. These directives are imported when we imported RouterModule in our app.module
That’s it, Run the application and we can see the result on below image.
- Here the default route is Home Component.
- According to navigation like Employees, Cricketers , About us and Contact us it navigated to the corresponding templates view.
- And when if we hit the other URL(/contact-us1) that are not matching with the route pattern it navigated to NotFound Component.
How to make use Router Link Active
One thing you can see the Router Link Active class is not working properly, that means when we navigate through About-us menu it should highlight the color as blue with text underline like Home menu.

Below are the css that are used for active class.
.active
{
color: blue !important;
text-decoration: underline !important;
}
So far, the active class has been used as shown below; we use the CSS class to achieve the desired result; however, the active class cannot be changed dynamically.
RouterLinkActive
Let’s change the below change and we can get the expected result.
The RouterLinkActive is a directive for adding or removing classes from an HTML element that is bound to a RouterLink. Using this directive, we can toggle CSS classes for active Router Links based on the current RouterState. The main use case of this directive is to highlight which route is currently active. You can either make the font bold or apply some background color.
The right-hand side of RouterLinkActive contains a Template expression. The template expression must contain a space-delimited string of CSS classes, which will be applied to the element when the route is active.
- Here on below we use
routerLinkActive="active"in each navigation. That makes to apply theactiveclass.
<div class="collapse navbar-collapse" id="navbarNav" style="margin-right:180px;justify-content: flex-end;">
    <ul class="navbar-nav">
      <li class="nav-item">
        <a class="nav-link active" [routerLink]="['/home']" routerLinkActive="active">Home</a>
      </li>
      <li class="nav-item">
        <a class="nav-link" [routerLink]="['/employess']" routerLinkActive="active">Employess</a>
      </li>
      <li class="nav-item">
        <a class="nav-link" [routerLink]="['/cricketers']" routerLinkActive="active">Cricketers</a>
      </li>
      <li class="nav-item">
        <a class="nav-link" [routerLink]="['/about-us']" routerLinkActive="active">About us</a>
      </li>
      <li class="nav-item">
        <a class="nav-link" [routerLink]="['/contact-us']" routerLinkActive="active">Contact us</a>
      </li>
    </ul>
  </div>
Conclusion
We discussed here about angular router and learned how to use it, by creating a sample application. Routing in Angular allows the users to create a single-page application with multiple views and allows navigation between them. Users can switch between these views without losing the application state and properties.
Leave behind your valuable queries and suggestions in the comment section below. Also, if you think this article helps you, do not forget to share this with your developer community. Happy Coding 🙂
Related Articles
- Deploying Angular apps in Azure Blob Storage with CI/CD Integration 🚀
- How to resolve Function App Cannot Create within Azure Portal
- Building a Chatbot in Angular using Gemini API
- Create a responsive sidebar with Angular Material- Angular 18 Example Series
- How to Deploy Angular 17/18 App in GitHub Pages
- How to convert Text To Speech With Azure Cognitive Services using Angular and .Net Core
- Angular Interceptors- The Complete Guide
- Upload Download and Delete files in Azure Blob Storage using ASP.NET Core and Angular
- Introduction to Azure Cosmos DB
- How to create Cosmos DB in Azure
Jayant Tripathy
Coder, Blogger, YouTuberA passionate developer keep focus on learning and working on new technology.