
In this article we will learn about How to read connection string in .NET Core. In ASP.NET Core, configuration API provides a way of configuring an app based on a list of name-value pairs that can be read at runtime from multiple sources. Please note that class libraries don’t have an appsettings.json by default. The solution is simple — access appsettings.json key-value pairs in your project through Dependency Injection principle in ASP.NET Core. Please read my previous article Introduction to ASP.Net Core.
If you are a developer or knowledge about .Net then you must think that it may a silly topic, Common we all are know that, it is very simple add the Connection string in App.config/Web.config and fetch it through Connection Manager, Yes you are right in traditional .Net we can add/fetch in this way.
But if you are new to .NET Core and on the scenario you need to communicate with database then its must give headache how the connection string is work it is little bit different to use the connection string. I am gonna explain you step by step guide to add/fetch the connection string in .Net Core.
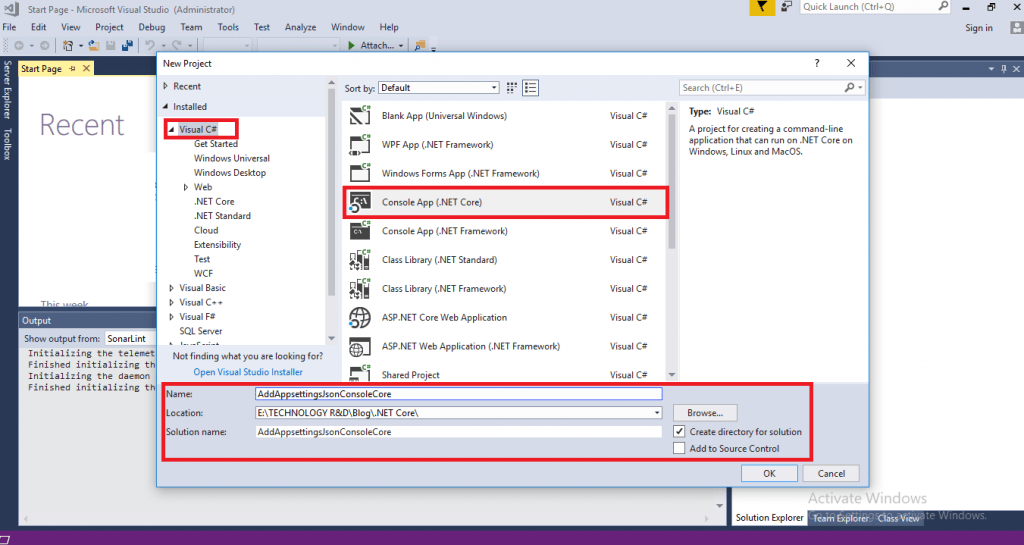
Creating a .NET Core Project
- Open Visual Studio 2017 then go to File -> New Project
- Select Project as C# and project template as Console App (.Net Core).
- Mention the Project name and Project save location etc., like below image.
- This will create a Brand new .Net Core console application take few second/minute depending upon your system performance. Like below image the application looks alike.
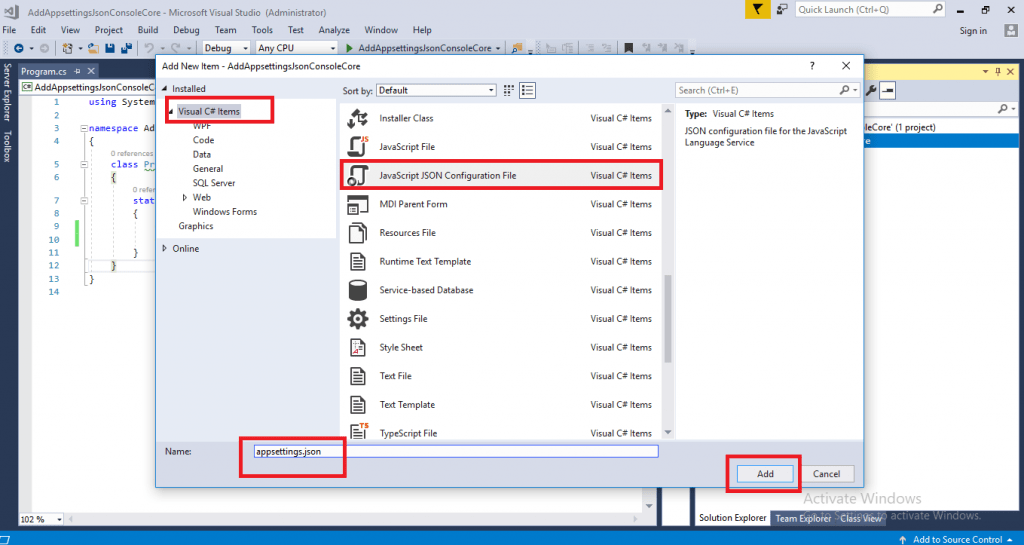
- Our agenda is add the connection string, to adding the connection string right click the project then add new item.
- To access the .Net Core connection string We need to “appsettings.json” file like below image.
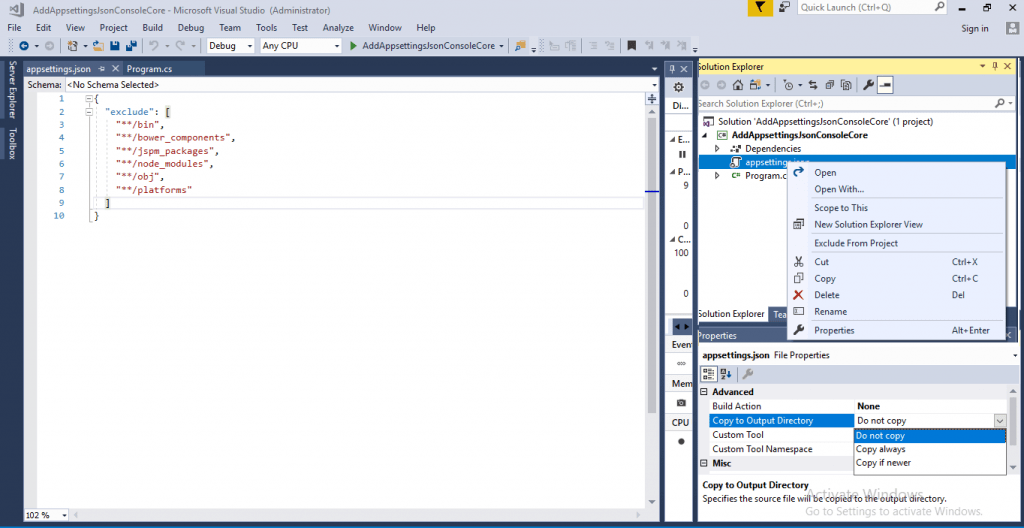
The appsettings.json file looks like below. One thing we need to do Right click on “appsettings.json” select “Properties” and change “Copy to output Directory” as “Copy if newer”.
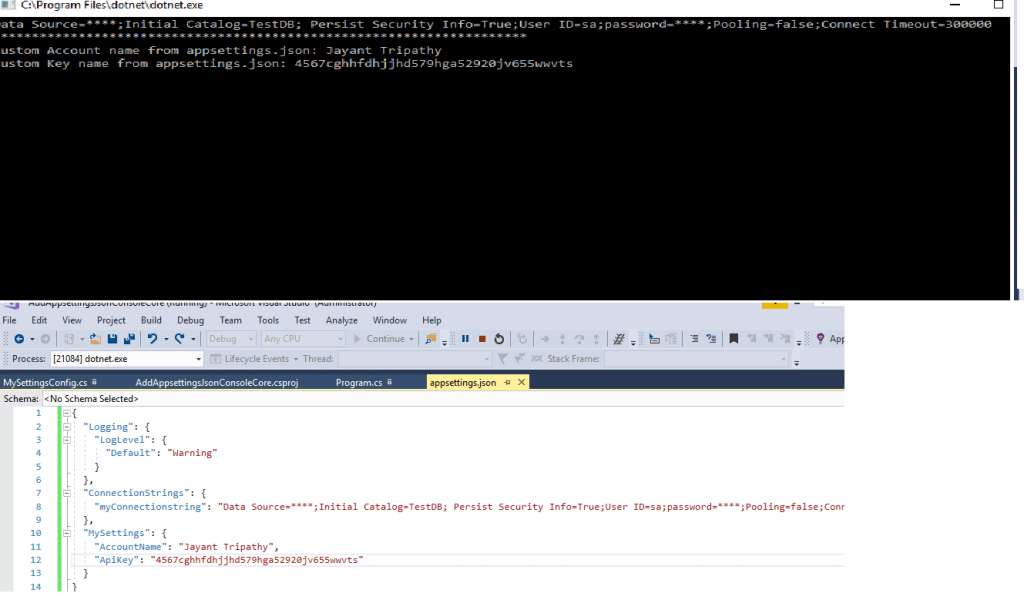
Change the Json file as like below. We added the Connection String Parameter and also added a Key name as “MySettings”
{
  "Logging": {
    "LogLevel": {
      "Default": "Warning"
    }
  },
  "ConnectionStrings": {
    "myConnectionstring": "Data Source=****;Initial Catalog=TestDB; Persist Security Info=True;User ID=sa;password=****;Pooling=false;Connect Timeout=300000"
  },
  "MySettings": {
    "AccountName": "Jayant Tripathy",
    "ApiKey": "4567cghhfdhjjhd579hga52920jv655wwvts"
  }
}
Adding Required Packages
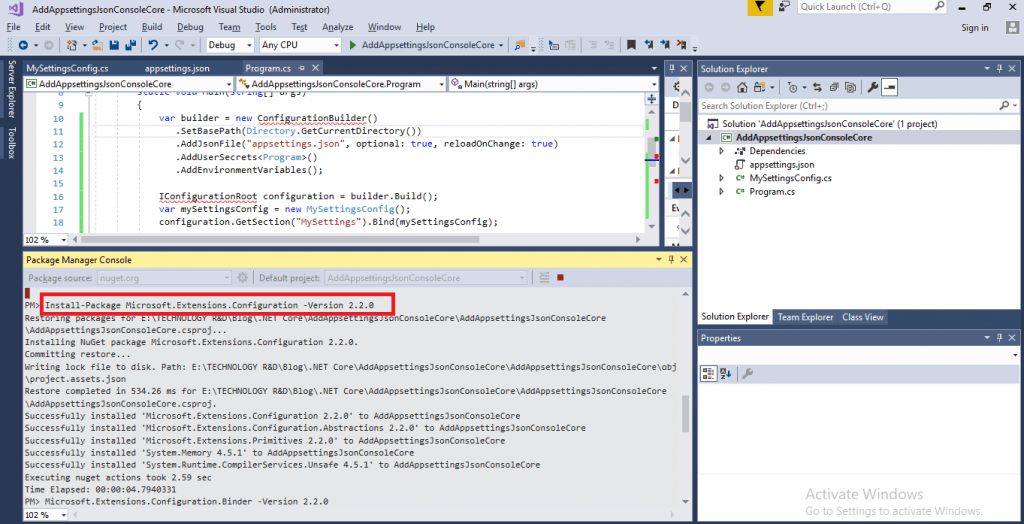
Install-Package Microsoft.Extensions.Configuration -Version 2.2.0
Install-Package Microsoft.Extensions.Configuration.Binder -Version 2.2.4
Install-Package Microsoft.Extensions.Configuration.EnvironmentVariables -Version 2.2.4
Install-Package Microsoft.Extensions.Configuration.FileExtensions -Version 2.2.0
Install-Package Microsoft.Extensions.Configuration.Json -Version 2.2.0
Install-Package Microsoft.Extensions.Configuration.UserSecrets -Version 2.2.0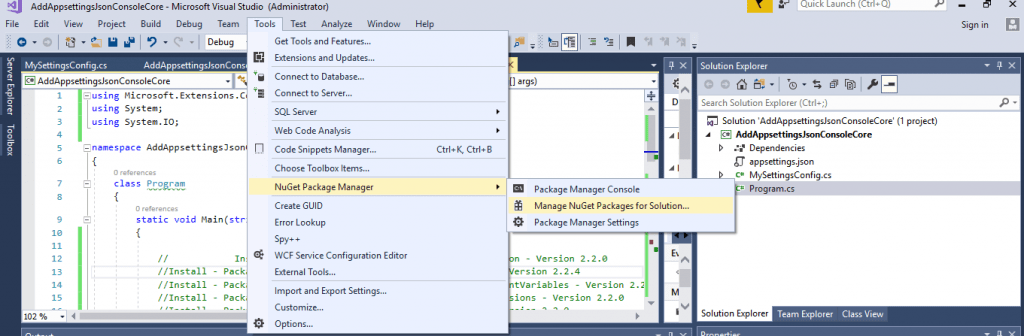
Install the required packages in Nuget Console like below.
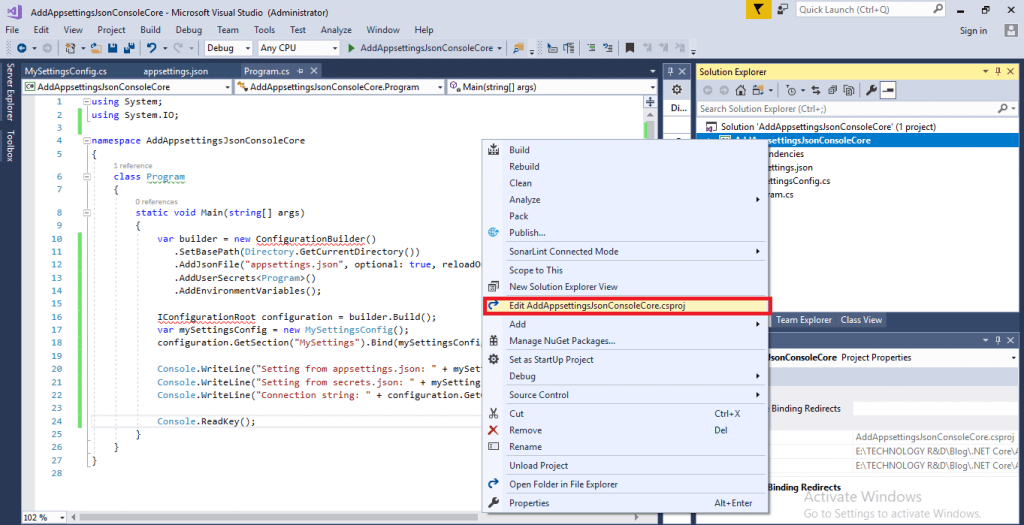
- The installed packages are added into the Project file to see Please follow below.
- Right Click on Project name then Click Edit “ProjectName.csproj” and the packages are added into it.
<Project Sdk="Microsoft.NET.Sdk">
  <PropertyGroup>
    <OutputType>Exe</OutputType>
    <TargetFramework>netcoreapp2.1</TargetFramework>
  </PropertyGroup>
  <ItemGroup>

    <PackageReference Include="Microsoft.Extensions.Configuration" Version="2.2.0" />
    <PackageReference Include="Microsoft.Extensions.Configuration.Binder" Version="2.2.4" />
    <PackageReference Include="Microsoft.Extensions.Configuration.EnvironmentVariables" Version="2.2.4" />
    <PackageReference Include="Microsoft.Extensions.Configuration.FileExtensions" Version="2.2.0" />
    <PackageReference Include="Microsoft.Extensions.Configuration.Json" Version="2.2.0" />
    <PackageReference Include="Microsoft.Extensions.Configuration.UserSecrets" Version="2.2.0" />
  </ItemGroup>
  <ItemGroup>
    <None Update="appsettings.json">
      <CopyToOutputDirectory>PreserveNewest</CopyToOutputDirectory>
    </None>
  </ItemGroup>
</Project>
Accessing Key value inside Project
- To get access of “MySettings” from “appsetting.json” I added a class with two parameters.
- And add the Code in “Program.cs” to fetch the connection string like below.
My Setting Class
namespace AddAppsettingsJsonConsoleCore
{
   public class MySettingsConfig
    {
        public string AccountName { get; set; }
        public string ApiKey { get; set; }
    }
}
Program.cs
using Microsoft.Extensions.Configuration;
using System;
using System.IO;
namespace AddAppsettingsJsonConsoleCore
{
    class Program
    {
        static void Main(string[] args)
        {
            var v = Environment.GetFolderPath(Environment.SpecialFolder.LocalApplicationData);
            string[] strs = Directory.GetFiles(Path.Combine(v, "Apps"), "[QuikSpace].exe", SearchOption.AllDirectories);
            var builder = new ConfigurationBuilder()
      .SetBasePath(Directory.GetCurrentDirectory())
      .AddJsonFile("appsettings.json", optional: true, reloadOnChange: true);
            IConfigurationRoot configuration = builder.Build();
            var mySettingsConfig = new MySettingsConfig();
            configuration.GetSection("MySettings").Bind(mySettingsConfig);
            Console.WriteLine(configuration.GetConnectionString("myConnectionstring"));
            Console.WriteLine("*********************************************************************");

            Console.WriteLine("Custom Account name from appsettings.json: " + mySettingsConfig.AccountName);
            Console.WriteLine("Custom Key name from appsettings.json: " + mySettingsConfig.ApiKey);
            Console.ReadKey();
        }
    }
}
Finally Run the application the “Connection String” and “MySetting” Value are printed like below. We declare as in “appsettings.json” the same are print on Console Window also.
Conclusion
So far we learn about How to read connection string in .NET Core. If you have any suggestion please share your feedback.