In this article we will learn about ngSwitch Directive in Angular. The ngSwitch is an Angular structural directive, which allows us to add or remove DOM elements. It works in conjunction with ngSwitchcase, & ngSwitchDefault directives. It is similar to the switch statement of JavaScript. In this tutorial, we will look at the syntax of ngSwitch, ngSwitchcase & ngSwitchDefault. Please read my previous article Angular ngFor trackBy.
ngSwitch Syntax
The ngSwitch is an Angular directive, which allows us to display one or more DOM elements based on some pre-defined condition.
<container_element [ngSwitch]="switch_expression">
    <inner_element *ngSwitchCase="match_expresson_1">...</inner_element>
    <inner_element *ngSwitchCase="match_expresson_2">...</inner_element>
    <inner_element *ngSwitchCase="match_expresson_3">...</inner_element>
    <inner_element *ngSwitchDefault>...</element>
</container_element>
What is the Angular ngSwitch directive?
The Angular ngSwitch directive is actually a combination of two directives i.e. an attribute directive and a structural directive. It is very similar to the switch statement of other programming languages like Java and C# but within a template.
The ngSwitch directive lets you hide or show the HTML elements based on an expression. Here, you can also define a default section using the ng-switch-default directive to show a section if no other sections get a match. So, while working with ngSwitch directive, you need three things to keep in mind, they are ngSwitch, ngSwitchCase and ngSwithDefault.
Angular ngSwitch Directive Example
Let’s create a form like below that holds a dropdown of countries and according to dropdown change we implement the ngSwitch to select the dropdown items.

Modify the app.component.ts file
- Here we declared dummy countries list.
- SetDropDownValue method responsible for change the dropdown items.
import { Component, EventEmitter, Input, Output } from '@angular/core';

@Component({
  selector: 'app-root',
  templateUrl: './app.component.html',
  styleUrls: ['./app.component.css']
})
export class AppComponent {
  public dropDownValue = "";
  countries = [
    new country(1, 'India'),
    new country(2, 'USA'),
    new country(3, 'UK'),
    new country(4, 'Germany')
  ];
  SetDropDownValue(dropvalue: any){
    this.dropDownValue = dropvalue.target.value;
  }
}
class country {
  id: number = 0;
  name: string = '';
  constructor(id: any, name: any) {
    this.id = id;
    this.name = name
  }
}
Modify the app.component.html file
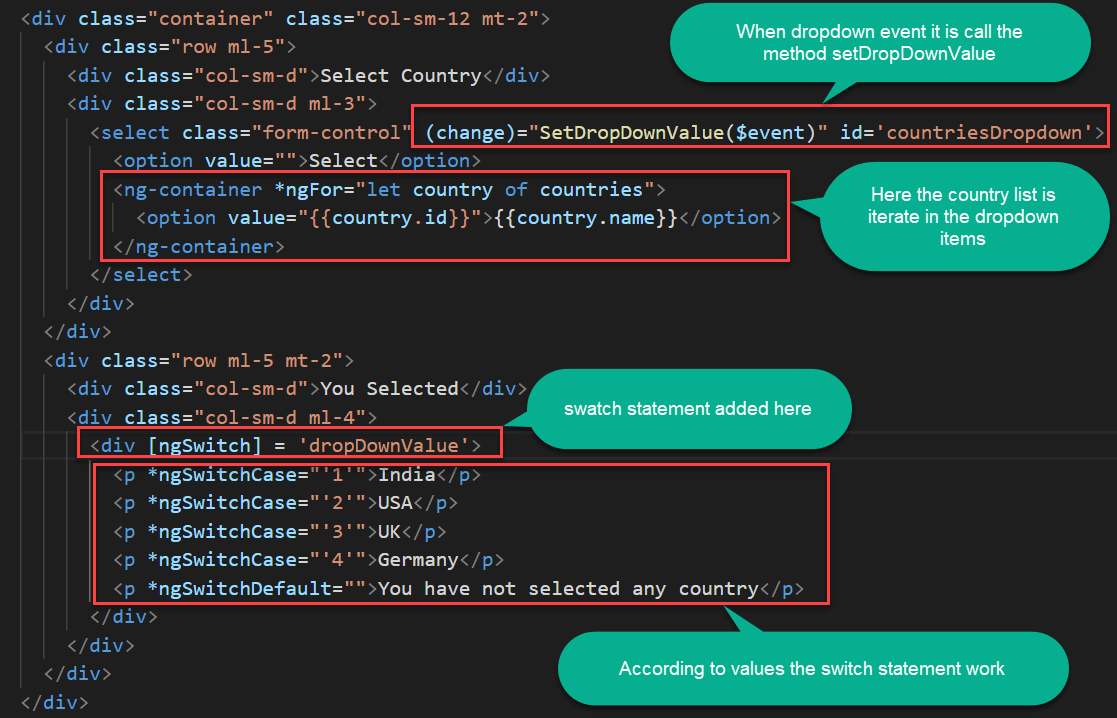
- We need to create the drop-down list and then on the change event of the dropdown list, we need to call the SetDropDownValue method that we created within our component class.
- Then we need to use the ngSwitch directive and here we need to bind the property (dropDownValue) and whose value is set by the drop-down list change event. Then we need to write the required ngSwitchCase statements. As we have three options in the drop-down list and so we have one ngSwitchCase one per each option value. Finally, we have the default switch case i.e. ngSwitchDefault which will execute when no options are selected from the dropdown list.

<div class="container" class="col-sm-12 mt-2">
  <div class="row ml-5">
    <div class="col-sm-d">Select Country</div>
    <div class="col-sm-d ml-3">
      <select class="form-control" (change)="SetDropDownValue($event)" id='countriesDropdown'>
        <option value="">Select</option>
        <ng-container *ngFor="let country of countries">
          <option value="{{country.id}}">{{country.name}}</option>
        </ng-container>
      </select>
    </div>
  </div>
  <div class="row ml-5 mt-2">
    <div class="col-sm-d">You Selected</div>
    <div class="col-sm-d ml-4">
      <div [ngSwitch] = 'dropDownValue'>
        <p *ngSwitchCase="'1'">India</p>
        <p *ngSwitchCase="'2'">USA</p>
        <p *ngSwitchCase="'3'">UK</p>
        <p *ngSwitchCase="'4'">Germany</p>
        <p *ngSwitchDefault="">You have not selected any country</p>
      </div>
    </div>
  </div>
</div>
ngSwitchDefault is used to show the entry as default irrespective of result.

Conclusion
In this article we will learn about ngSwitch Directive in Angular. The ngSwitch is an Angular structural directive, which allows us to add or remove DOM elements. It works in conjunction with ngSwitchcase, & ngSwitchDefault directives. It is similar to the switch statement of JavaScript. In this tutorial, we will look at the syntax of ngSwitch, ngSwitchcase & ngSwitchDefault.
Leave behind your valuable queries and suggestions in the comment section below. Also, if you think this article helps you, do not forget to share this with your developer community. Happy Coding 🙂
Related Articles
- Deploying Angular apps in Azure Blob Storage with CI/CD Integration 🚀
- How to resolve Function App Cannot Create within Azure Portal
- Building a Chatbot in Angular using Gemini API
- Create a responsive sidebar with Angular Material- Angular 18 Example Series
- How to Deploy Angular 17/18 App in GitHub Pages
- How to convert Text To Speech With Azure Cognitive Services using Angular and .Net Core
- Angular Interceptors- The Complete Guide
- Upload Download and Delete files in Azure Blob Storage using ASP.NET Core and Angular
- Introduction to Azure Cosmos DB
- How to create Cosmos DB in Azure
Jayant Tripathy
Coder, Blogger, YouTuberA passionate developer keep focus on learning and working on new technology.
