
This tutorial explain Automation Testing using Specflow and Selenium in .Net Framework. We will see an end to end example of using Specflow based BDD specifications and the tests will be executed via Selenium Webdriver. The tests could be as simple as testing the login functionality of an application. It is just that, we will describe those tests using Specflow and the Step implementations will use Selenium driver and commands and NUnit as assertion framework. Please read my previous article Export data into PDF in ASP.NET MVC. For more details about BDD please follow this link.
End of article, you can see how work automation Testing in .Net Framework. When the script is run then it automatically call to YouTube then search India as Country.

Creating .NET Project and implement Automation Testing
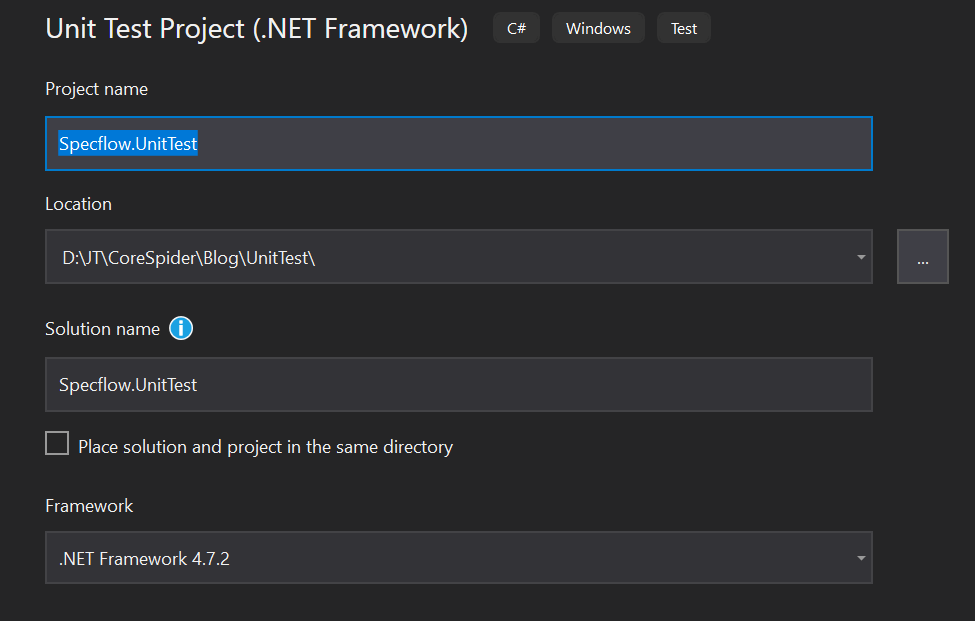
- Create .NET Core Unit Test Project like below. (We consider Visual Studio 2019)
- The .NET Framework version is 4.7.2

Add the below required package in the Project
To add the package into folder we can add using 2 ways.
- Right click on project then Manage Nuget Packages then add the packages
- Add using Nuget package Manager Console, Tools => Nuget Package Manager => Package Manager Console
#1) Install Nuget package for Nunit and Specflow.
Install-Package Specflow.NUnit
#2) Install Selenium’s Webdriver for chrome browser.
This can be installed via Nuget Package Manager console too through the below command.
Install-Package Selenium.WebDriver.ChromeDriver
#3) Install Selenium Webdriver libraries and Selenium Wait Helpers for adding ExpectedCondition waits.
Install-Package Selenium.WebDriver
Install-Package DotNetSeleniumExtras.WaitHelpers
#4) Create folders for Features and Step Definitions to store feature and Step definition implementation files.
This is not a mandatory step but is useful to organize the features and step implementations in separate folders.
Feature and Step Implementation
Now let’s get started with the feature file and the actual step implementation.
Feature Implementation
The sample feature will be of testing/validating the search functionality of YouTube Website. We will be searching for a keyword and asserting that the user got redirected to the search results page.
Add a new feature file and name it as YoutubeSearch.feature
Feature: YoutubeSearch
	In order to test search functionality on youtube
@mytag
Scenario: Youtube should search for the given keyword and should navigate to search results page
	Given I have navigated to youtube website
	And   I have entered India as search keyword
	When I press the search button
	Then I should be navigate to search results page
The above scenario expects the test to:
- Navigate to YouTube Website: This will require a Web automation framework like Selenium, which will use a Webdriver to navigate to a webpage on a browser.
- Search for a keyword: This step will involve looking for appropriate input elements and buttons in order to key-in the keyword and execute the search respectively.
- Assert that the search results are displayed and the user is on the results page: This step will involve assertions around verifying if the user landed on the correct page.
Steps Definition Implementation
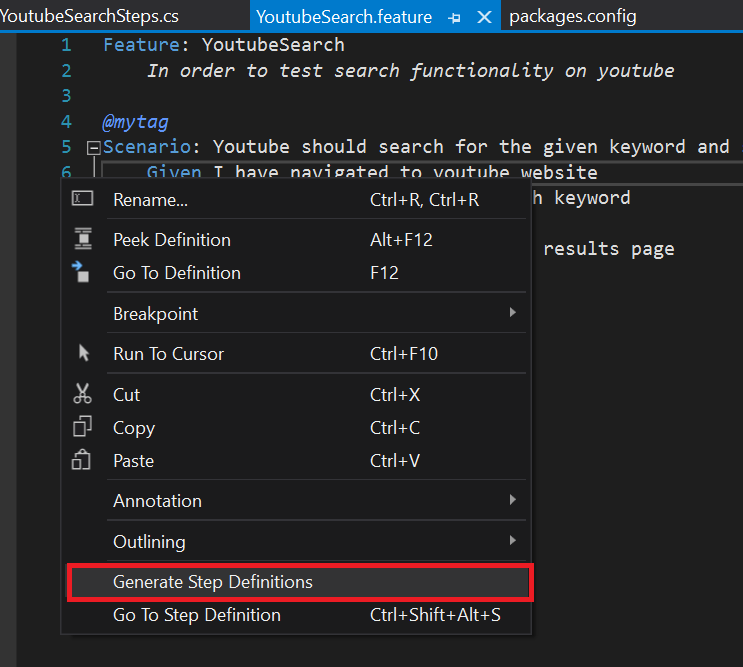
Then you can create the steps definition name it as YoutubeSearchSteps.cs, Right click on feature then Generate Step definitions.
using System;
using TechTalk.SpecFlow;
using NUnit.Framework;
using OpenQA.Selenium;
using OpenQA.Selenium.Chrome;
using OpenQA.Selenium.Support.UI;
using SeleniumExtras.WaitHelpers;
using System.Collections.Generic;
using System.Linq;
namespace Specflow.UnitTest.StepDefinitions
{
    [Binding]
    public class YoutubeSearchSteps : IDisposable
    {
        private String searchKeyword;
        private ChromeDriver chromeDriver;
        public YoutubeSearchSteps() => chromeDriver = new ChromeDriver();

        [Given(@"I have navigated to youtube website")]
        public void GivenIHaveNavigatedToYoutubeWebsite()
        {
            chromeDriver.Navigate().GoToUrl("https://www.youtube.com");
            Assert.IsTrue(chromeDriver.Title.ToLower().Contains("youtube"));
        }
        [Given(@"I have entered (.*) as search keyword")]
        public void GivenIHaveEnteredIndiaAsSearchKeyword(String searchString)
        {
            this.searchKeyword = searchString.ToLower();
            var searchInputBox = chromeDriver.FindElementById("search");
            var wait = new WebDriverWait(chromeDriver, TimeSpan.FromSeconds(2));
            wait.Until(ExpectedConditions.ElementIsVisible(By.Id("search")));
            searchInputBox.SendKeys(searchKeyword);
        }
        [When(@"I press the search button")]
        public void WhenIPressTheSearchButton()
        {
            var searchButton = chromeDriver.FindElementByCssSelector("button#search-icon-legacy");
            searchButton.Click();
        }
        [Then(@"I should be navigate to search results page")]
        public void ThenIShouldBeNavigateToSearchResultsPage()
        {
            System.Threading.Thread.Sleep(2000);
            // After search is complete the keyword should be present in url as well as page title`
            Assert.IsTrue(chromeDriver.Url.ToLower().Contains(searchKeyword));
            Assert.IsTrue(chromeDriver.Title.ToLower().Contains(searchKeyword));
        }
        public void Dispose()
        {
            if (chromeDriver != null)
            {
                chromeDriver.Dispose();
                chromeDriver = null;
            }
        }
    }
}
Code Explanation
#1) Arrange Steps:
Given I have navigated to youtube website
And I have entered India as search keyword
Both of these steps involve interacting with the driver instance. The first step open’s the browser window and navigates to the YouTube website. The second step looks for search input button and enters “India” as the search keyword.
Below is the implementation for both of these steps:
[[Given(@"I have navigated to youtube website")]
public void GivenIHaveNavigatedToYoutubeWebsite()
{
    chromeDriver.Navigate().GoToUrl("https://www.youtube.com");
    Assert.IsTrue(chromeDriver.Title.ToLower().Contains("youtube"));
}
[Given(@"I have entered (.*) as search keyword")]
public void GivenIHaveEnteredIndiaAsSearchKeyword(String searchString)
{
this.searchKeyword = searchString.ToLower();
var searchInputBox = chromeDriver.FindElementById("search");
var wait = new WebDriverWait(chromeDriver, TimeSpan.FromSeconds(2));
wait.Until(ExpectedConditions.ElementIsVisible(By.Id("search")));
searchInputBox.SendKeys(searchKeyword);
}
For the first Step, notice the Assertion that it ensures that the navigation to youtube was successful by checking the window title.
Note: There can be various ways of placing Assertions on different web elements or driver properties, but the end goal of this tutorial is just to illustrate with the most simplistic way.
In the second step, we have added a Dynamic wait using ExpectedConditions which will ensure that the search box is visible before the code tries to key-in the search keyword.
Also, we are storing the searchString in a private field searchKeyword. This is done so that the searchKeyword can be used in other Step implementations too.
Passing data across the Steps
Passing/Storing data by this approach (i.e. through class variables) is one of the means through which data can be shared across Step bindings.
There are other ways to do this as well like Specflow itself provides a Dynamic Dictionary Object called ScenarioContext. We will see more details about this in the upcoming articles.
#2) Act Step
When I press the search button
Now let’s look at the actual action, which is clicking on the Search button. The step implementation file will search for the search button and click it in order to execute the scenario step.
The code for this step looks as shown below:
[When(@"I press the search button")]
public void WhenIPressTheSearchButton()
{
var searchButton = chromeDriver.FindElementByCssSelector("button#search-icon-legacy");
    searchButton.Click();
}
#3) Finally the Assert Step:
Then I should navigate to search results page
In this step, we are just verifying from the Driver properties as to whether the URL and the page title contains the search keyword or not.
The code for this step is shown below:
[Then(@"I should be navigate to search results page")]
public void ThenIShouldBeNavigateToSearchResultsPage()
{
    // After search is complete the keyword should be present in url as well as page title`
    Assert.IsTrue(chromeDriver.Url.ToLower().Contains(searchKeyword));
    Assert.IsTrue(chromeDriver.Title.ToLower().Contains(searchKeyword));
}
Execution
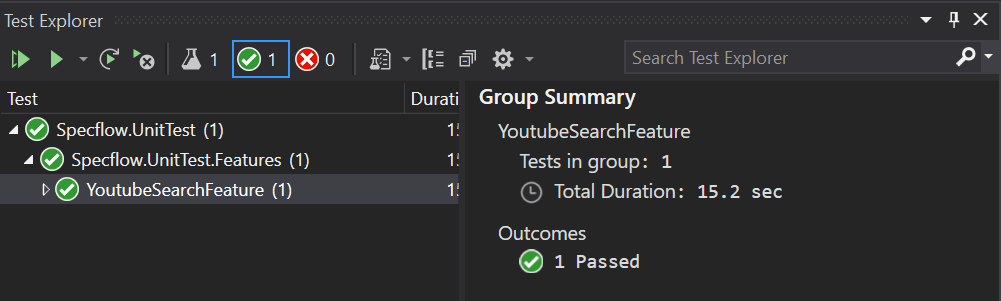
Now, let’s try to execute the Scenario and see the results. Once the Scenario is executed, all the Scenario Steps will be executed Sequentially. The test will be opening a browser, navigating to a website and then performing some action.
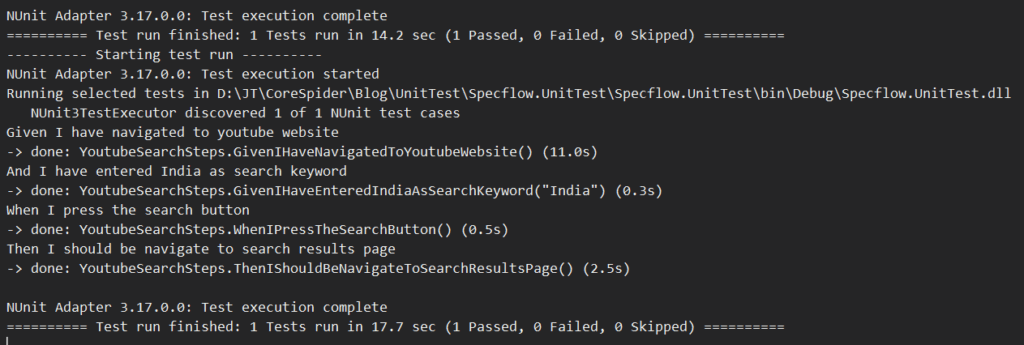
The output of the test can be seen by clicking the “Output” button from the test summary which shows the success/failure of each individual step.
Conclusion
Leave behind your valuable queries and suggestions in the comment section below. Also, if you think this article helps you, do not forget to share this with your developer community. Happy Coding 🙂