
In this article we will discuss how to export PDF in ASP .NET MVC. Here we discuss export into PDF without using any 3rd party libraries. Please go through my previous article Export data into Excel in ASP.NET MVC.
How to export PDF in ASP.NET MVC
Create the Project in ASP .NET MVC and connect database and fetch the record using Dapper ORM and export the data into PDF.
- Create a ASP.NET MVC application using Visual Studio.
- We select as Empty project with targeting to ASP.NET MVC.
- Create a Controller inside the controllers folder, let’s name as “EmployeeController.cs”
- The Employee Db contains a employee table that holds the employee information. The script are find below;
Database Script
CREATE TABLE [dbo].[EmployeeDetails](
	[EmpID] [int] NOT NULL,
	[EmpName] [varchar](50) NULL,
	[Mobile] [varchar](10) NULL,
	[PresentAddress] [varchar](100) NULL,
	[Area] [varchar](50) NULL,
	[City] [varchar](50) NULL,
	[Country] [varchar](50) NULL,
	[Qualification] [varchar](50) NULL,
	[Email] [varchar](50) NULL,
 CONSTRAINT [PK_EmployeeDetails] PRIMARY KEY CLUSTERED
(
	[EmpID] ASC
)WITH (PAD_INDEX = OFF, STATISTICS_NORECOMPUTE = OFF, IGNORE_DUP_KEY = OFF, ALLOW_ROW_LOCKS = ON, ALLOW_PAGE_LOCKS = ON) ON [PRIMARY]
) ON [PRIMARY]

GO
Employee.cs
Add a employee property class in Models folder.
public class Employee
    {
        public int EmpID { get; set; }
        public string EmpName { get; set; }
        public string Mobile { get; set; }
        public string PresentAddress { get; set; }
        public string Area { get; set; }
        public string City { get; set; }
        public string Country { get; set; }
        public string Qualification { get; set; }
        public string Email { get; set; }
    }
Connection string
Declare the connection string in Web.config like below;
 <connectionStrings>
    <add name="ConnectionString" connectionString="Data Source=corespider;Initial Catalog=EmployeeDb;Persist Security Info=True;User ID=sa;password=**********;Pooling=false;Connect Timeout=300000" providerName="System.Data.SqlClient" />
  </connectionStrings>
To connect with database and fetch the record, her ewe use Dapper ORM.
What is Dapper ?
Dapper is an object-relational mapping product for the Microsoft .NET platform: it provides a framework for mapping an object-oriented domain model to a traditional relational database. Its purpose is to relieve the developer from a significant portion of relational data persistence-related programming tasks.
Add Dapper package in Nuget

EmployeeRepository.cs
Add another class in Models folder to retrieve the employee information from database.
public class EmployeeRepository
    {
        public IDbConnection connection
        {
            get
            {
                return new SqlConnection(ConfigurationManager.ConnectionStrings["ConnectionString"].ConnectionString);
            }
        }
        public async Task<object> GetEmployeeList()
        {
            object result = null;
            try
            {
                using (IDbConnection con = connection)
                {
                    string Query = "SELECT EmpID, EmpName, Mobile, PresentAddress, Area, City, Country, Qualification, Email" +
                                    " from EmployeeDetails";
                    con.Open();
                    DynamicParameters param = new DynamicParameters();
                    result = await con.QueryAsync<Employee>(Query, param, commandType: CommandType.Text);
                }
                return result;
            }
            catch (Exception ex)
            {
                throw ex;
            }

            return result;
        }

    }
Code Explanation
- Here We create the IDbConnection that hold the connection string information.
- Using Dapper ORM fetch the employee tables.
- In real-time application you may use Stored procedure instead of text.
- Dapper ORM directly return the list of employee.
EmployeeController.cs
EmployeeRepository _emprepo = new EmployeeRepository();
        // GET: Customer
        public async Task<ActionResult> Index()
        {
            List<Employee> _empList =await _emprepo.GetEmployeeList() as List<Employee>;
            return View(_empList);
        }
Code Explanation
- Here we create object of the employee repository class.
- In the Index() we fetch the employee list and return to the view.
Index.cshtml
@model IEnumerable<ExportPDFMVC.Models.Employee>

@{
    ViewBag.Title = "Index";
}
@using (Html.BeginForm("Export", "Employee", FormMethod.Post))
{
    <div class="container" style="margin-top:10px;">
        <input type="submit" value="Export to PDF" class="btn btn-primary" />
    </div>
    <table class="table">
        <tr>
            <th>
                @Html.DisplayNameFor(model => model.EmpID)
            </th>
            <th>
                @Html.DisplayNameFor(model => model.EmpName)
            </th>
            <th>
                @Html.DisplayNameFor(model => model.Mobile)
            </th>
            <th>
                @Html.DisplayNameFor(model => model.PresentAddress)
            </th>
            <th>
                @Html.DisplayNameFor(model => model.Area)
            </th>
            <th>
                @Html.DisplayNameFor(model => model.City)
            </th>
            <th>
                @Html.DisplayNameFor(model => model.Country)
            </th>
            <th>
                @Html.DisplayNameFor(model => model.Qualification)
            </th>
            <th>
                @Html.DisplayNameFor(model => model.Email)
            </th>
            <th></th>
        </tr>

        @foreach (var item in Model)
        {
            <tr>
                <td>
                    @Html.DisplayFor(modelItem => item.EmpID)
                </td>
                <td>
                    @Html.DisplayFor(modelItem => item.EmpName)
                </td>
                <td>
                    @Html.DisplayFor(modelItem => item.Mobile)
                </td>
                <td>
                    @Html.DisplayFor(modelItem => item.PresentAddress)
                </td>
                <td>
                    @Html.DisplayFor(modelItem => item.Area)
                </td>
                <td>
                    @Html.DisplayFor(modelItem => item.City)
                </td>
                <td>
                    @Html.DisplayFor(modelItem => item.Country)
                </td>
                <td>
                    @Html.DisplayFor(modelItem => item.Qualification)
                </td>
                <td>
                    @Html.DisplayFor(modelItem => item.Email)
                </td>

            </tr>
        }
       </table>
}
Code Explanation
- Here we use scaffold technique to create list of employees.
- Added a button to Export the data into PDF.
- Export is the action method and Employee is the Controller.
Export Action method to convert PDF
[HttpPost]
        public async Task<ActionResult> Export()
        {
            List<Employee> _empList =await _emprepo.GetEmployeeList() as List<Employee>;
            using (StringWriter sw = new StringWriter())
            {
                using (HtmlTextWriter hw = new HtmlTextWriter(sw))
                {
                    //To Export all pages
                    GridView gridview = new GridView();
                    gridview.DataSource = _empList;
                    gridview.DataBind();

                    gridview.RenderControl(hw);
                    StringReader sr = new StringReader(sw.ToString());
                    Document pdfDoc = new Document(PageSize.A2, 10f, 10f, 10f, 0f);
                    HTMLWorker htmlparser = new HTMLWorker(pdfDoc);
                    PdfWriter.GetInstance(pdfDoc, Response.OutputStream);
                    pdfDoc.Open();
                    htmlparser.Parse(sr);
                    pdfDoc.Close();
                    Response.ContentType = "application/pdf";
                    Response.AddHeader("content-disposition", "attachment;filename=Export.pdf");
                    Response.Cache.SetCacheability(HttpCacheability.NoCache);
                    Response.Write(pdfDoc);
                    Response.End();
                }

                return View();
            }
        }
Code Explanation
- In the export Post method we fetch the employee information.
- To export data into PDF we use Gridview controls that are in System.Web.UI.WebControls namespace.
- In Gridview controls hold the employee list.
- In the string writer and string Reader st the PDF using HTMLWorker.
- Response content type as PDF and finally append the PDFdoc that export into PDF.
Run the application and see the output

After click the export button it convert the above data into PDF like below;
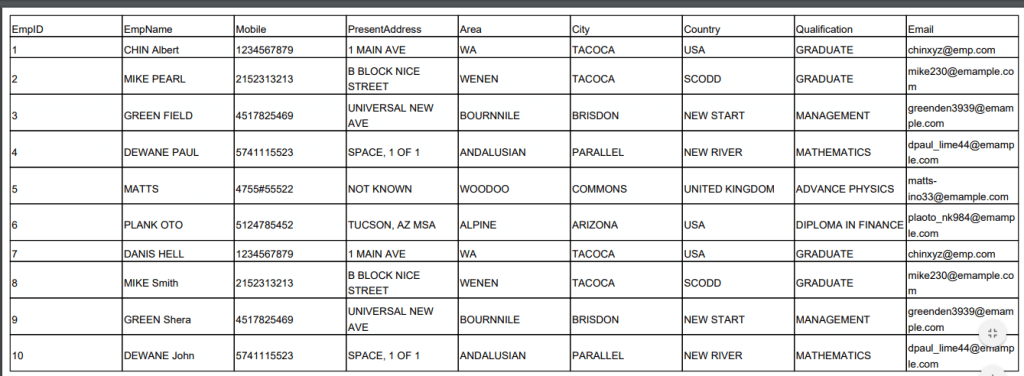
You can see the demo image below,
Conclusion
Leave behind your valuable queries and suggestions in the comment section below. Also, if you think this article helps you, do not forget to share this with your developer community. Happy Coding 🙂
Related Articles
- Two-Factor Authentication Using Google Authenticator in Asp.Net MVC
- Export data into PDF in ASP.NET MVC
- Export data into Excel in ASP.NET MVC
- Autocomplete Using JQuery, Ajax & WCF in MVC
- Translate Language Using Google Translate API in ASP.Net MVC
Jayant Tripathy
Coder, Blogger, YouTuberA passionate developer keep focus on learning and working on new technology.