In this article we will learn about How to use Router Link Server side. On the previous article we learnt how to use Router Link Client Side, Sometimes it is also required to set the route dynamically based on some condition and that can be done at server side. For your application to work with server side rendering, the element hosting directive has to be a link (anchor) element. Before starting this article please read my previous article Routing in Angular.
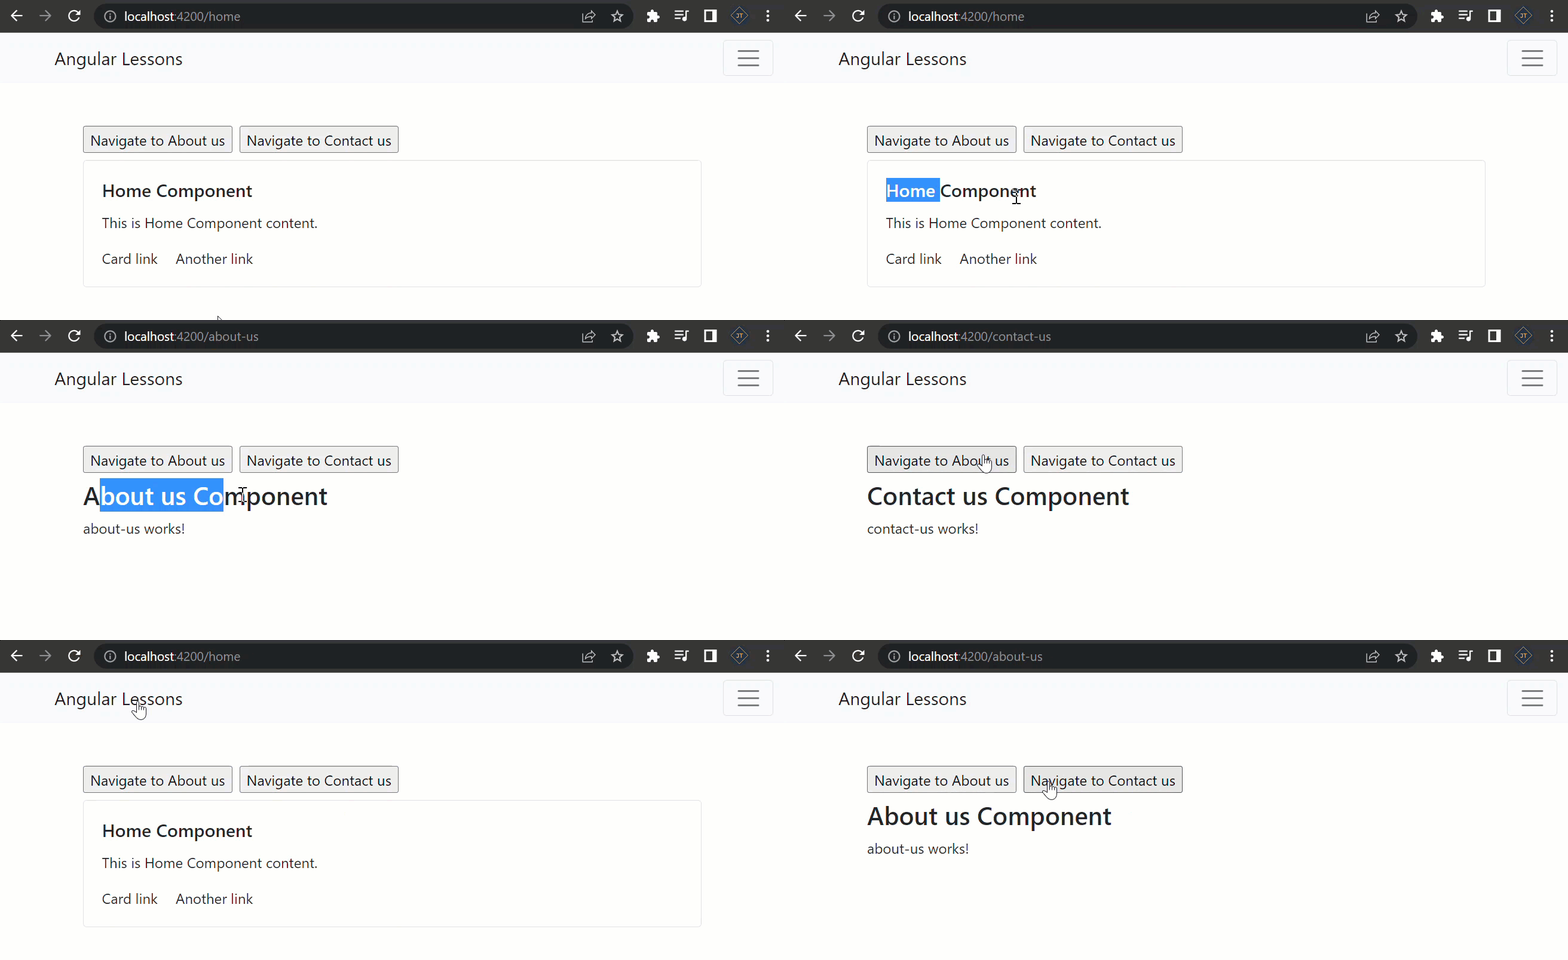
Sometime we need to navigate to other components, We can do that using router link server side. On the below example we have two buttons and here we can navigate through server side(Typescript) code.
Setting up the Routing Navigation
import { NgModule } from '@angular/core';
import { RouterModule, Routes } from '@angular/router';
import { AboutUsComponent } from './componenets/about-us/about-us.component';
import { ContactUsComponent } from './componenets/contact-us/contact-us.component';
import { CricketerListComponent } from './componenets/cricketer-list/cricketer-list.component';
import { EmployeeComponent } from './componenets/employee/employee.component';
import { HomeComponent } from './componenets/home/home.component';
import { NotFoundComponent } from './componenets/not-found/not-found.component';

const routes: Routes = [
  { path: 'home', component: HomeComponent },
  {path:'employess', component: EmployeeComponent},
  {path:'cricketers', component: CricketerListComponent},
  {path:'about-us', component: AboutUsComponent},
  {path:'contact-us', component: ContactUsComponent},
  { path: '', redirectTo: 'home', pathMatch: 'full' },
  { path: '**', component: NotFoundComponent }
];

@NgModule({
  imports: [RouterModule.forRoot(routes)],
  exports: [RouterModule]
})
export class AppRoutingModule { }
- We import Routes from router module.
- We need to import all the components, that requires routing. We have imported component employee, crickter-list, about-us and contact-us.
- Finally, we have defined a constant (appRoutes) that contains the Routes that we wish to create. The Routes is an array of route configuration object (or route object).
- {
path:'home',component: HomeComponent} : The first parameter is the path, which represents the URL path segment. The second parameter is the component to display. The above route configuration means, when you navigate to /employee(URL path segment), then the EmployeeComponent gets call and the corresponding template will show. - Default Route : Here the default route is
{ path: '', redirectTo: 'home', pathMatch: 'full' }- The default route is redirected to the home path using the RedirectTo argument. This route means that, when you navigate to the root of your application /, you are redirected to the home path (/home), which in turn displays the HomeComponent.
- pathMatch argument set to ‘full’. The pathMatch tells the Router how to match the URL. When it is set to full, the path is matched to the entire URL. Every route ends in an empty space for ex: /contact/’’. If pathMatch is not set to full then the router will apply the redirect, which results in the error.
- Wild Card Route –
{ path: '**', component: NotFoundComponent }- The Angular router selects this route any time the requested URL doesn’t match any router paths. To set up a wildcard route, add the following code to your routes definition. The two asterisks, ** , indicate to Angular that this routes definition is a wildcard route.
- Here if the redirection is not matched any of the route then it call the
NotFoundComponent
Adding the server side navigation
On the app.component.html file we added the below navigation code
import { Component, EventEmitter, Input, OnInit, Output } from '@angular/core';
import { Router } from '@angular/router';
@Component({
  selector: 'app-root',
  templateUrl: './app.component.html',
  styleUrls: ['./app.component.css']
})
export class AppComponent implements OnInit {

  constructor(private router : Router) { }
  ngOnInit() {}
  Navigation(pageLink: any){
    return pageLink=='about' ? this.router.navigate(['/about-us']) : this.router.navigate(['/contact-us']);
  }
}- First we need to import the Router package through
@angular/router - We declared the constructor to hold the route navigation.
- Create the method named Navigation with parameter, if the parameter is came back as ‘about’ then it navigate to ‘about-us’ link else it navigate to ‘contact-us’.
Calling the Navigation method in HTML
  <input type="button" value="Navigate to About us" (click)="Navigation('about')">

  <input type="button" value="Navigate to Contact us" class="ml-2 mb-2" (click)="Navigation('contact')">

<router-outlet></router-outlet>- We have declared two buttons and calling these to Navigation with passing the parameter.
- <router-outlet> here works as the placeholder i.e when the page is rendered it display here.
That’s it !! Run the application and see the output like below, These two buttons are navigated properly using the server side router link navigation.

Conclusion
We discussed here about How to use Router Link Server side. Sometimes it is also required to set the route dynamically based on some condition and that can be done at server side. For your application to work with server side rendering, the element hosting directive has to be a link (anchor) element.
Leave behind your valuable queries and suggestions in the comment section below. Also, if you think this article helps you, do not forget to share this with your developer community. Happy Coding 🙂
Related Articles
- Deploying Angular apps in Azure Blob Storage with CI/CD Integration 🚀
- How to resolve Function App Cannot Create within Azure Portal
- Building a Chatbot in Angular using Gemini API
- Create a responsive sidebar with Angular Material- Angular 18 Example Series
- How to Deploy Angular 17/18 App in GitHub Pages
- How to convert Text To Speech With Azure Cognitive Services using Angular and .Net Core
- Angular Interceptors- The Complete Guide
- Upload Download and Delete files in Azure Blob Storage using ASP.NET Core and Angular
- Introduction to Azure Cosmos DB
- How to create Cosmos DB in Azure
Jayant Tripathy
Coder, Blogger, YouTuberA passionate developer keep focus on learning and working on new technology.
