
In this article, we will learn How to Create a RESTful CRUD API With NodeJS, ExpressJS, And MongoDB. We’ll cover how to create an API and use it for basic tasks. Before you start, it’s important to have a good understanding of JavaScript, Node.js, Express.js, and JSON, as this will focus entirely on backend programming. Please follow this article if you are new to MongoDB to see how to install and configure it. ASP.NET Core Web API with MongoDB CRUD- Beginner’s Guide.
This Node.js server code establishes a RESTful API for managing user data, offering endpoints to perform CRUD (Create, Read, Update, Delete) operations on a collection of user records. It utilizes the Express.js framework to handle HTTP requests efficiently.
Node.js is a platform built on Chrome’s JavaScript engine, designed to easily create fast and scalable network applications. It is open-source, cross-platform, and provides a runtime environment for developing server-side and networking applications.
ExpressJS is one of the most widely used web frameworks for Node.js. Built on top of the Node.js HTTP module, it offers support for routing, middleware, and view systems. Unlike other frameworks that try to do too much, Express is simple and minimal, giving developers more flexibility in making design choices.
Mongoose is an ODM (Object Document Mapping) tool for Node.js and MongoDB. It simplifies the process of converting objects in your code into database documents, and vice versa.
Prerequisites
To follow along, you’ll need to have the following:
Setting Up Your Development Environment
We have checked whether the required applications are installed or not. We’ll check Node, NPM, and MongoDB to be installed on the machine. Now open your preferred terminal/command prompt to run. Below are the configurations for me.
node -v
npm -v
mongod --version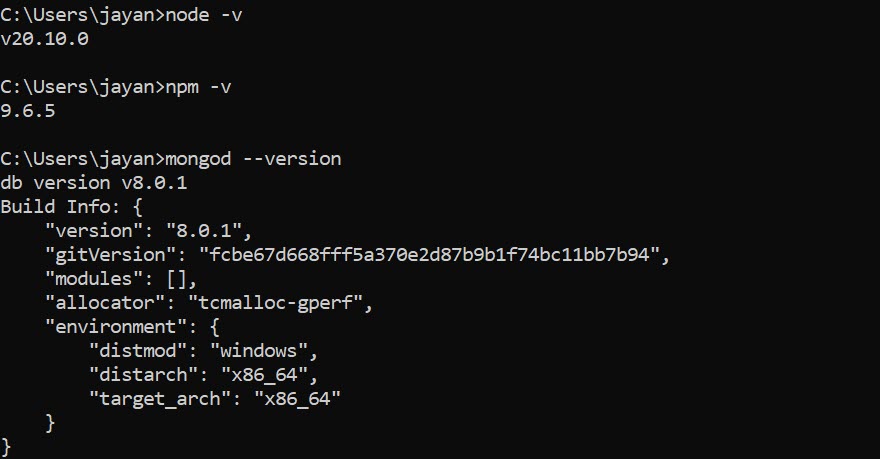
Setting the Project
Now, we’ll begin by setting up our project. First, choose the filesystem or drive where the project will be created. Next, create a directory named NodeExpressAPI and navigate into it. The commands are as follows:
// Create directory for new project named NodeExpressAPI
mkdir NodeExpressAPI
// then Navigate to NodeExpressAPI
cd NodeExpressAPI
Now initialize the node js using npm init
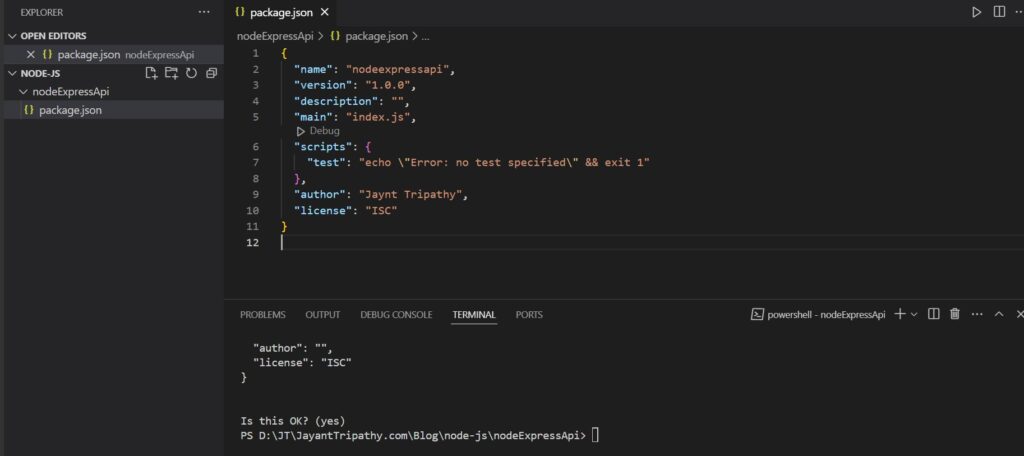
npm initThis will prompt you for details like the project name, version, description, author name, etc. Follow the setup, or if you prefer to skip manual input, use npm init -y, which will automatically generate the package.json file. After adding the info to the command prompt finally accept the licence and you have to write yes Then package.json will be created. Finally, package.json will look like below.
Install express and other dependencies
Now we have to install express, body-parser, mongoose, and nodemon modules in our application. Let’s install them by following in single command, and we can see the related dependencies have been installed.
npm install express body-parser mongoose nodemon --save{
"name": "nodeexpressapi",
"version": "1.0.0",
"description": "",
"main": "index.js",
"scripts": {
"test": "echo \"Error: no test specified\" && exit 1"
},
"author": "Jaynt Tripathy",
"license": "ISC",
"dependencies": {
"body-parser": "^1.20.3",
"express": "^4.21.1",
"mongoose": "^8.7.2",
"nodemon": "^3.1.7"
}
}
Setting up the web server
Create a new file named server.js and add the below code to ready to listen to express js.
const express = require('express');
const bodyParser = require('body-parser');
// create express app
const app = express();
// Setup server port
const port = process.env.PORT || 4000;
// parse requests of content-type - application/x-www-form-urlencoded
app.use(bodyParser.urlencoded({ extended: true }))
// parse requests of content-type - application/json
app.use(bodyParser.json())
// define a root/default route
app.get('/', (req, res) => {
  res.json({"message": "Hello World"});
});
// listen for requests
app.listen(port, () => {
  console.log(`Node server is listening on port ${port}`);
});- Line #1-2
express: This is a Node.js web application framework that simplifies the process of handling HTTP requests and building APIs.bodyParser: This middleware is used to parse incoming request bodies, making the request data accessible (e.g., JSON or URL-encoded form data). - Line #4
app: An instance of the Express application is created. Thisappobject will be used to define routes and middleware, and handle requests. - Line #6
port: This variable determines which port the server will listen on. It either uses a predefinedPORTfrom the environment variables or defaults to4000if no environment variable is set. - Line #8
bodyParser.urlencoded: This middleware is used to parse requests withapplication/x-www-form-urlencodedcontent type (like HTML form data). The{ extended: true }option allows for rich objects and arrays to be encoded. - Line #10
bodyParser.json: This middleware parses incoming JSON requests, allowing the application to easily handle requests withapplication/jsoncontent. - Line #12-14
app.get('/'): This defines a GET route for the root URL (/). When a request is made to the root, the callback function responds with a JSON object:{"message": "Hello World"} - Line #16-18
app.listen:This starts the server, making it listen for incoming requests on the specifiedport. When the server starts successfully, it logs a message to the console indicating that it is running and listening on the defined port.
Finally, run the node server to see the it hits port localhost:4000
node server.js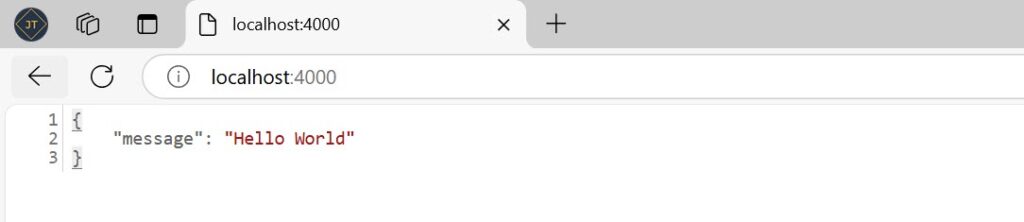
Building the Nodejs API Project
Connecting to the database
We’ll keep all the configurations for the app in a separate folder. Let’s create a new folder config at the root of our applications. There we create the file named db.config.js and add the below code
module.exports = {
    url: 'mongodb://localhost:27017/node-express-api'
}
Now we have to start the mongodb-server for that open another terminal/command prompt window and run the below command
mongodAdd the following piece code to the server.js file after app.use(bodyParser.json()) line :
const express = require('express');
const bodyParser = require('body-parser');
// create express app
const app = express();
// Setup server port
const port = process.env.PORT || 4000;
// parse requests of content-type - application/x-www-form-urlencoded
app.use(bodyParser.urlencoded({ extended: true }))
// parse requests of content-type - application/json
app.use(bodyParser.json())
// Configuring the database
const dbConfig = require('./config/db.config.js');
const mongoose = require('mongoose');
mongoose.Promise = global.Promise;
// Connecting to the database
mongoose.connect(dbConfig.url, {
useNewUrlParser: true
}).then(() => {
  console.log("Successfully connected to the database");
}).catch(err => {
  console.log('Could not connect to the database.', err);
  process.exit();
});
// define a root/default route
app.get('/', (req, res) => {
   res.json({"message": "Hello World"});
});
// listen for requests
app.listen(port, () => {
   console.log(`Node server is listening on port ${port}`);
});
Now we’ll run the web server using nodemon. For that we can run
nodemon server.jsNow run in the terminal
nodemon startCreate a model in Mongoose
Now we’ll create a model for that we make a separate directory for the model, routes, and controllers. Now create src/models at the root of the project and create the file user.model.js
const mongoose = require('mongoose');

const UserSchema = mongoose.Schema({
    first_name: String,
    last_name: String,
    email: String,
    phone: String,
    is_active:  { type: Boolean, default: false },
    is_deleted:  { type: Boolean, default: false }
}, {
    timestamps: true
});

module.exports = mongoose.model('User', UserSchema);
Create routes using Express
Next, we’ll set up the routes for our APIs. Create a new folder called routes inside the src folder and also create user.routes.js file too inside src/routes directory.
const express = require('express')
const router = express.Router()
const userController = require('../controllers/user.controllers');
// Retrieve all users
router.get('/', userController.findAll);
// Create a new user
router.post('/', userController.create);
// Retrieve a single user with id
router.get('/:id', userController.findOne);
// Update a user with id
router.put('/:id', userController.update);
// Delete a user with id
router.delete('/:id', userController.delete);
module.exports = router
Create controllers in the express and create CRUD methods and Test using Postman
Next, we’ll set up the controllers for our APIs. Create a new folder called controllers inside the src folder and also create user.controllers.js file too inside src/controllers directory. We need to create below API end-points
- GET
/api/users: will give all users stored in a database - GET
/api/users/<user_id>: will give a specific user with user_id. - POST
/api/users: user can create a new user - PATCH
/api/users/<user_id>: update a user partially - DELETE
/api/users/<user_id>: delete a user - PUT
/api/users/<user_id>: update a user completely
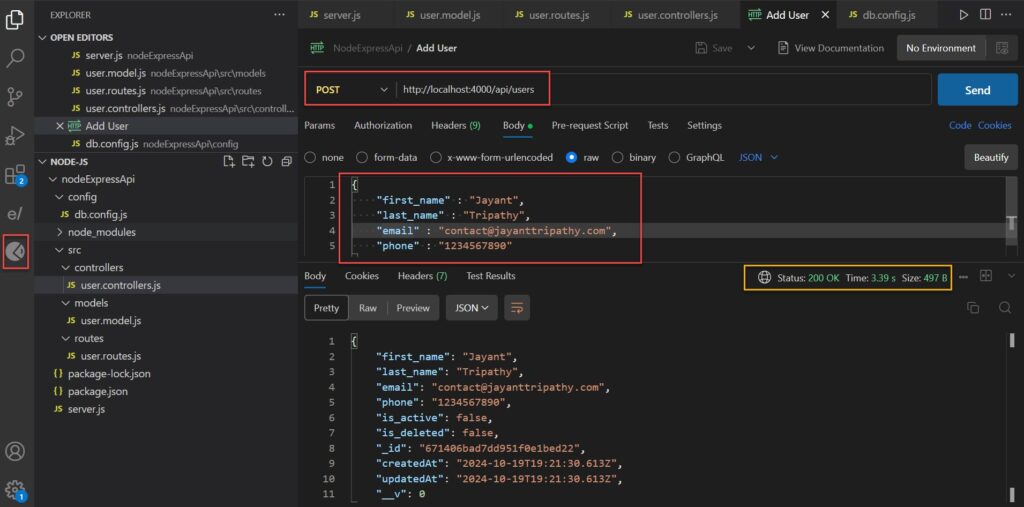
Create the POST /users Endpoint
const User = require('../models/user.model.js');

// Create and Save a new User
exports.create = (req, res) => {
    // Validate request
    if(!req.body) {
        return res.status(400).send({
            message: "Please fill all required field"
        });
    }

    // Create a new User
    const user = new User({
        first_name: req.body.first_name,
        last_name: req.body.last_name,
        email: req.body.email,
        phone: req.body.phone
    });

    // Save user in the database
    user.save()
    .then(data => {
        res.send(data);
    }).catch(err => {
        res.status(500).send({
            message: err.message || "Something went wrong while creating new user."
        });
    });
};
- Line #1: Dependencies: The
Usermodel is required from theuser.model.jsfile. This model represents the structure of the user data and interacts with the database (probably a MongoDB schema, as.save()is a common method for Mongoose). - Line #4-10: Creating a New User Function: This exports a function called
create. It’s typically part of a controller file, where various methods for handling API requests are stored.reqis the request object, containing client data.resis the response object, used to send a response back to the client. Validating the Request: This checks whetherreq.body(i.e., the request payload sent by the client) is present. If the body is missing, a400(Bad Request) status code is sent along with an error message. - Line #13-18: Creating a New User: A new user object is created using the
Usermodel, with the properties (first_name,last_name,email,phone) being populated from the request body. - Line #21-28: Saving the User to the Database: The
.save()method saves theuserto the database.If the save operation is successful, the newly created user’s data is sent back to the client (res.send(data)).If an error occurs during the saving process, a500(Internal Server Error) status code is returned along with the error message.
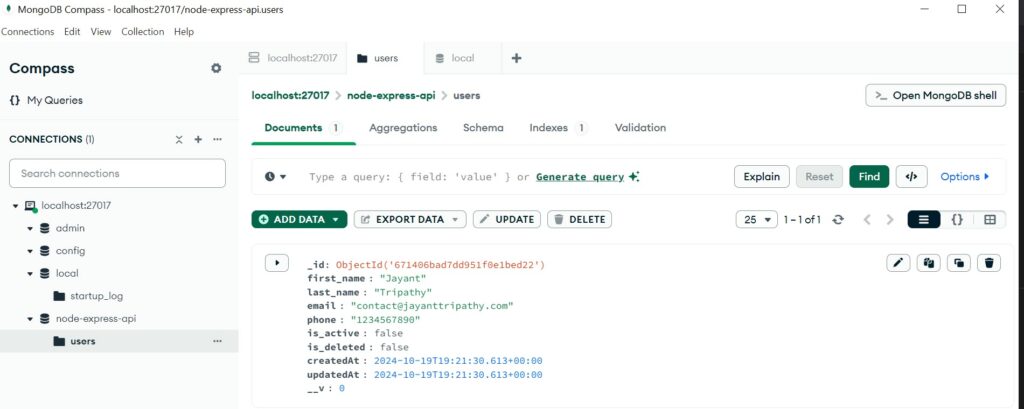
Test the POST method using Postman
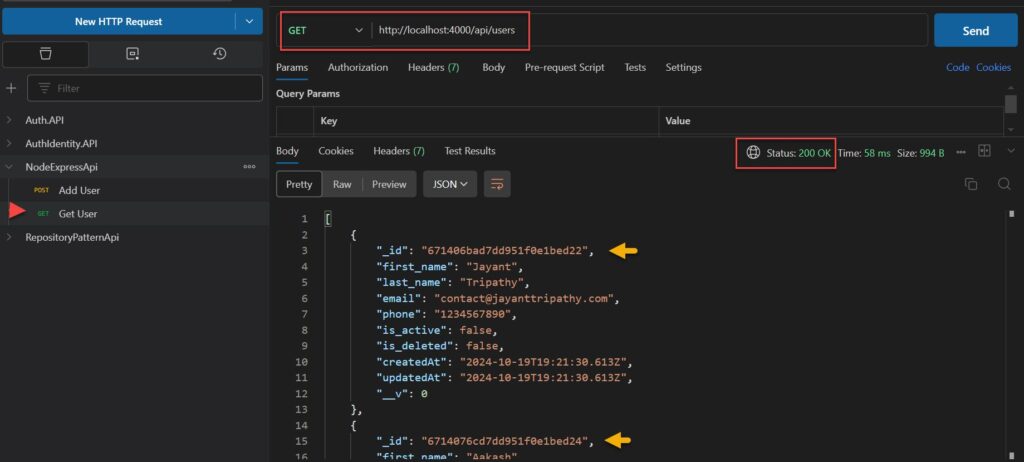
Create the GET /users Endpoint
exports.findAll = (req, res) => {
    User.find()
    .then(users => {
        res.send(users);
    }).catch(err => {
        res.status(500).send({
            message: err.message || "Something went wrong while getting list of users."
        });
    });
};
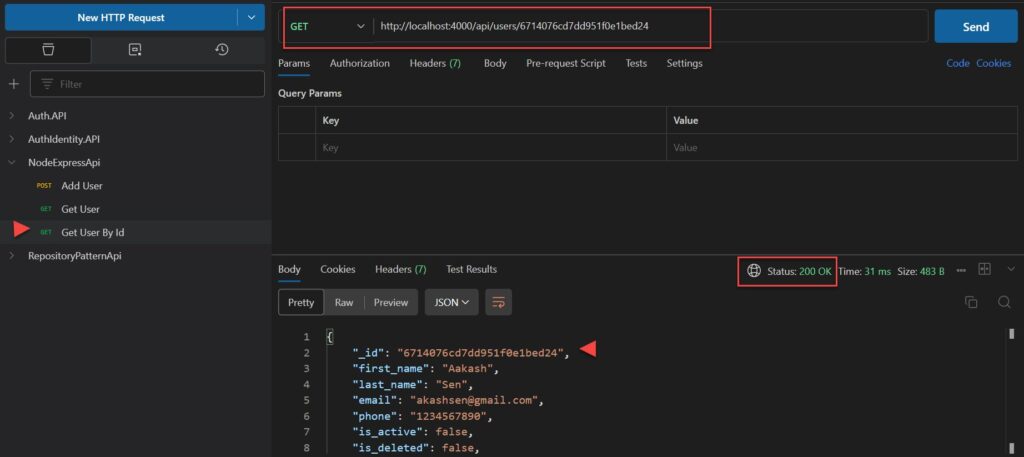
Create the GET By Id /users/id Endpoint
// Find a single User with a id
exports.findOne = (req, res) => {
    User.findById(req.params.id)
    .then(user => {
        if(!user) {
            return res.status(404).send({
                message: "User not found with id " + req.params.id
            });
        }
        res.send(user);
    }).catch(err => {
        if(err.kind === 'ObjectId') {
            return res.status(404).send({
                message: "User not found with id " + req.params.id
            });
        }
        return res.status(500).send({
            message: "Error getting user with id " + req.params.id
        });
    });
};
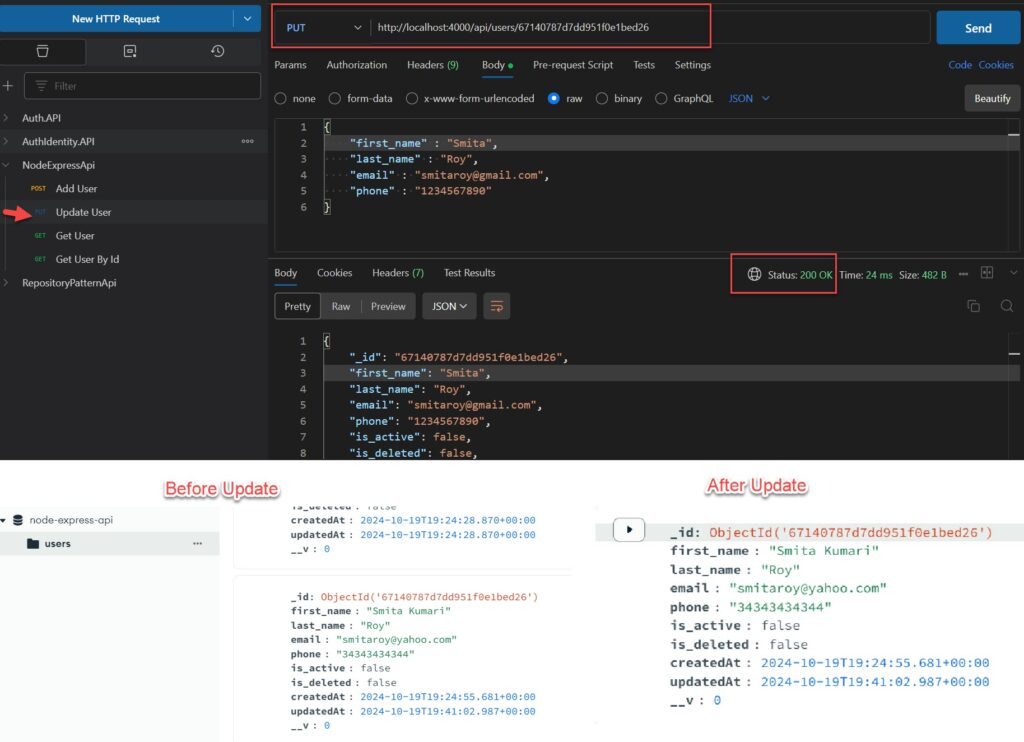
Create the PUT /users Endpoint
// Update a User identified by the id in the request
exports.update = (req, res) => {
    // Validate Request
    if(!req.body) {
        return res.status(400).send({
            message: "Please fill all required field"
        });
    }

    // Find user and update it with the request body
    User.findByIdAndUpdate(req.params.id, {
        first_name: req.body.first_name,
        last_name: req.body.last_name,
        email: req.body.email,
        phone: req.body.phone
    }, {new: true})
    .then(user => {
        if(!user) {
            return res.status(404).send({
                message: "user not found with id " + req.params.id
            });
        }
        res.send(user);
    }).catch(err => {
        if(err.kind === 'ObjectId') {
            return res.status(404).send({
                message: "user not found with id " + req.params.id
            });
        }
        return res.status(500).send({
            message: "Error updating user with id " + req.params.id
        });
    });
};
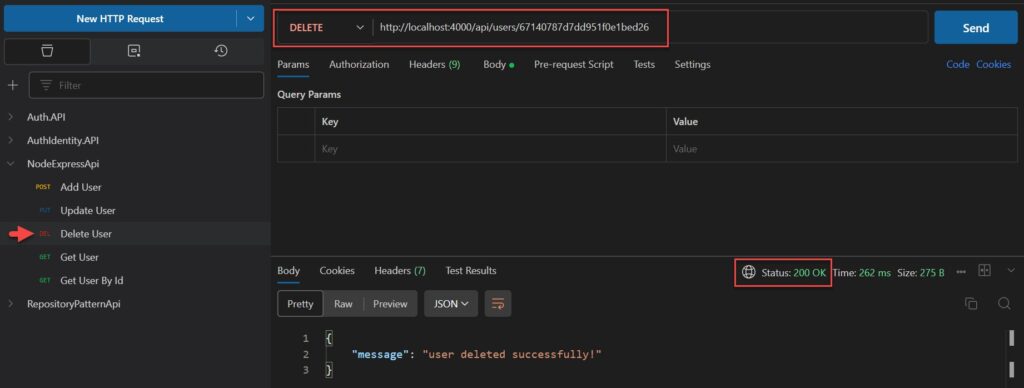
Create the DELETE /users/id Endpoint
// Delete a User with the specified id in the request
exports.delete = (req, res) => {
    User.findByIdAndDelete(req.params.id)
    .then(user => {
        if(!user) {
            return res.status(404).send({
                message: "user not found with id " + req.params.id
            });
        }
        res.send({message: "user deleted successfully!"});
    }).catch(err => {
        if(err.kind === 'ObjectId' || err.name === 'NotFound') {
            return res.status(404).send({
                message: "user not found with id " + req.params.id
            });
        }
        return res.status(500).send({
            message: "Could not delete user with id " + req.params.id
        });
    });
};
Source Code
Please find the source code on this link.
Conclusion
In this article, we discussed How to Create a RESTful CRUD API With NodeJS, ExpressJS, And MongoDB. We covered how to create an API and use it for basic tasks. Before you start, it’s important to have a good understanding of JavaScript, Node.js, Express.js, and JSON, as this will focus entirely on backend programming.
Latest Articles
- Build Your First MCP Server in .NET 10 (C#) – Complete Beginner-Friendly Guide
- Run Local LLMs in .NET: Rapid Prototyping with Ollama & Semantic Kernel
- Building your own AI Assistant Using Python, LangChain, Streamlit & GPT‑4o (Step‑by‑Step Guide)
- How to Secure React.js application with Azure AD Authentication Using MSAL Library
- 🔐 Securing .NET Core Web Apps with Azure AD/Intra and MSAL
- Step-by-Step Guide to Using Azure Redis Cache in ASP.NET Core 9 Web API
- 🤖 Build a Full-Stack AI App with React, Node.js & Azure OpenAI
- Running Microsoft SQL Server in Docker | VS Code MSSQL Extension
- Building Real-Time Messaging with Kafka and .NET Core
- Effortless React Deployment 🚀: CI/CD with GitHub Actions & Azure Static Web Apps
- How to Set up an Amazon CloudFront Distribution for Amazon S3 Bucket 🚀
- Deploying Angular apps in Azure Blob Storage with CI/CD Integration 🚀
- How to Build a serverless CRUD app with Azure function and Cosmos DB
- How to resolve Function App Cannot Create within Azure Portal
- Building a Chatbot in Angular using Gemini API
SUPPORT ME