
In this article, we will learn about Building Real-Time Messaging with Kafka and .NET Core. In today’s fast-paced digital environment, real-time data processing is essential. Apache Kafka stands out as a reliable distributed event streaming technology capable of managing high-throughput, low-latency data flows. Integrating Kafka and .NET Core enables developers to create scalable, event-driven applications. Please read my previous article on How to Build a Serverless CRUD app with Azure function and Cosmos DB.
KafkaSample-DotNetCore project, which demonstrates a simple Kafka integration using .NET Core. The project consists of a Producer API, a Consumer console application, and a Docker Compose configuration for Kafka and Zookeeper.
What is Kafka?
Apache Kafka is a powerful and versatile open-source stream-processing platform and messaging system. It is designed to handle real-time data streams efficiently, making it an essential tool in the modern data-driven landscape.
Kafka serves as a messaging platform that operates on a publish/subscribe model, equipped with inherent features for replication, partitioning, fault tolerance, and enhanced throughput. It’s particularly beneficial for applications requiring extensive data processing on a grand scale. The primary application of Kafka lies in constructing live-streaming data pipelines. Through the integration of fault-tolerant storage and stream processing functionalities, Kafka facilitates the storage and examination of both historical records and live data streams.
Project Overview
- KafkaSample.ProducerAPI: An ASP.NET Core Web API that publishes messages to Kafka.
- KafkaSample.Consumer: A console application that subscribes to Kafka topics and processes incoming messages.
- docker-compose.yml: Facilitates the local deployment of Kafka and Zookeeper using Docker.
KafkaSample.ProducerAPI
Add the blow Nuget Packages
Confluent.Kafka NuGet This project holds the API, we have created the ProducerAPI
public class ProducerService
{
    private readonly ILogger<ProducerService> _logger;

    public ProducerService(ILogger<ProducerService> logger)
    {
        _logger = logger;
    }

    public async Task ProduceAsync(CancellationToken cancellationToken)
    {
        var config = new ProducerConfig
        {
            BootstrapServers = "localhost:9092",
            AllowAutoCreateTopics = true,
            Acks = Acks.All
        };

        using var producer = new ProducerBuilder<Null, string>(config).Build();

        try
        {
            var deliveryResult = await producer.ProduceAsync(topic: "test-topic",
                new Message<Null, string>
                {
                    Value = $"Hello, Kafka Producer Test By JT - {DateTime.UtcNow}"
                },
                cancellationToken);

            _logger.LogInformation($"This message is Delivered to {deliveryResult.Value}, Offset: {deliveryResult.Offset}");
        }
        catch (ProduceException<Null, string> e)
        {
            _logger.LogError($"Delivery failed: {e.Error.Reason}");
        }

        producer.Flush(cancellationToken);
    }
}- Line 1–3: Defines the
ProducerServiceclass and injects a loggerILoggerto log information and errors. - Line 5–8: Constructor initializes the logger via dependency injection.
- Line 10–17: Defines the
ProduceAsyncmethod with a cancellation token and sets up Kafka producer configurations.BootstrapServers: Connects to Kafka on localhost.AllowAutoCreateTopics: Enables topic auto-creation (for local/testing).Acks.All: Ensures high durability by waiting for all replicas to acknowledge.
- Line 19: Creates the Kafka producer instance with
Nullkey and string value types. - Line 21–28: Attempts to asynchronously send a message to the Kafka topic
test-topic. The message includes a timestamp string. - Line 30–31: Logs a success message including the message content and the Kafka topic offset it was written to.
- Line 32–35: Catches any Kafka-related errors during message delivery and logs the failure reason.
- Line 37–39: Flushes the producer to ensure all buffered messages are sent before shutting down.
Register the service in the Program.cs
using KafkaSample.Producer.Service;

var builder = WebApplication.CreateBuilder(args);

// Add services to the container.

builder.Services.AddControllers();
// Learn more about configuring OpenAPI at https://aka.ms/aspnet/openapi
builder.Services.AddOpenApi();

builder.Services.AddSwaggerGen();

builder.Services.AddScoped<ProducerService>();

var app = builder.Build();

// Configure the HTTP request pipeline.
if (app.Environment.IsDevelopment())
{
    app.UseSwagger();
    app.UseSwaggerUI();
    app.MapOpenApi();
}

app.UseHttpsRedirection();

app.MapGet("/event-producer-api", async (ProducerService producer, CancellationToken cancellationToken) =>
{

    await producer.ProduceAsync(cancellationToken);

    return "Event Sent!";
})
.WithOpenApi();

app.Run();
- Line 13:
builder.Services.AddScoped<ProducerService>();This line registers theProducerServiceclass in the ASP.NET Core dependency injection (DI) container with a Scoped lifetime. - Line 27-34: Defines a
GETendpoint at/event-producer-apiusing Minimal APIs in ASP.NET Core.- Automatically injects the
ProducerService(thanks to DI setup in line 13) and aCancellationToken(used to cancel the request gracefully if needed). - It Calls the
ProduceAsyncmethod from theProducerServiceto send a message to Kafka. - Returns a simple response string (
"Event Sent!") to the client indicating success. .WithOpenApi()enables OpenAPI/Swagger documentation for this endpoint so it’s visible and testable in Swagger UI.
- Automatically injects the
KafkaSample.Consumer – Console Application
When the producer sends the request, the receiver/consumer gets the message instantly.
 public class EventStreamProcessor : BackgroundService
 {
     private readonly ILogger<EventStreamProcessor> _logger;

     public EventStreamProcessor(ILogger<EventStreamProcessor> logger)
     {
         _logger = logger;
     }

     protected override Task ExecuteAsync(CancellationToken stoppingToken)
     {
         var config = new ConsumerConfig
         {
             BootstrapServers = "localhost:9092",
             GroupId = "test-group",
             AutoOffsetReset = AutoOffsetReset.Earliest
         };

         using var consumer = new ConsumerBuilder<Ignore, string>(config).Build();

         consumer.Subscribe("test-topic");

         while (!stoppingToken.IsCancellationRequested)
         {
             try
             {
                 var consumeResult = consumer.Consume(TimeSpan.FromSeconds(5));

                 if (consumeResult == null)
                 {
                     continue;
                 }
                 _logger.LogInformation($"Consumer getting message here.....");
                 _logger.LogInformation($"Consumed message '{consumeResult.Message.Value}' at: '{consumeResult.Offset}'");
             }
             catch (Exception)
             {
                 // Ignore
             }
         }
         return Task.CompletedTask;
     }
}- Lines 1–3: Defines the background service class and injects an
ILoggerfor logging. - Lines 5–8: Constructor initializes the logger from DI (Dependency Injection).
- Lines 10–17: Kafka consumer configuration setup.
BootstrapServers: Kafka broker address.GroupId: Consumer group name for coordinating message consumption.AutoOffsetReset: Start from the earliest message if no previous offset exists.
- Lines 19–20: Kafka consumer is built and subscribes to a topic
test-topic. - Lines 22–26: Enters a loop that polls Kafka every 5 seconds for new messages.
- If the app is shutting down (
stoppingToken), the loop exits gracefully.
- If the app is shutting down (
- Lines 28–31: Skips null results and continues the loop without error.
- Lines 32–33: Logs that a message was received and shows the content and Kafka offset.
- Lines 34–38: Any exception in the consume process is caught silently (but ideally you should log it).
- Line 40: Marks task completion when the loop ends (e.g., app shutting down).
Add the below lines in program.cs
using KafkaSample.Consumer;
using Microsoft.Extensions.DependencyInjection;
using Microsoft.Extensions.Hosting;

Console.WriteLine("Start consuming events ...");

var builder = Host.CreateApplicationBuilder();

builder.Services.AddHostedService<EventStreamProcessor>();

builder.Build().Run();
docker.compose.yaml
🐳 Docker Compose: Kafka + Zookeeper Setup (Explained)
You’re defining two main services:
- Zookeeper: Coordinates Kafka brokers.
- Kafka: The messaging platform itself
services:
  zookeeper:
    image: confluentinc/cp-zookeeper
    container_name: zookeeper
    ports:
      - 2181:2181
    environment:
      - ZOOKEEPER_CLIENT_PORT=2181
      - ZOOKEEPER_TICK_TIME=2000
    networks:
      - kafka

  kafka:
    image: confluentinc/cp-kafka
    container_name: kafka
    ports:
      - 9092:9092
    environment:
      - KAFKA_ZOOKEEPER_CONNECT=zookeeper:2181
      - KAFKA_BROKER_ID=1
      - KAFKA_OFFSETS_TOPIC_REPLICATION_FACTOR=1
      - KAFKA_ADVERTISED_LISTENERS=PLAINTEXT://localhost:9092
    networks:
      - kafka

networks:
kafka:- Line 1: Starts the definition of all the services (containers) in this setup.
- Lines 2–4: Defines a service named
zookeeperusing the Confluent image. - Lines 5–6: Maps port 2181 from the container to your host machine for external access.
- Lines 7–9: Environment variables for Zookeeper:
ZOOKEEPER_CLIENT_PORT: The port for client connections.ZOOKEEPER_TICK_TIME: Heartbeat timing used internally.
- Lines 10–11: Places the container in the
kafkanetwork so it can communicate with Kafka. - Lines 13–15: Defines a service named
kafkausing Confluent’s Kafka image. - Lines 16–17: Exposes port 9092 so apps like your .NET producer/consumer can connect.
- Lines 18–22: Important Kafka configurations:
KAFKA_ZOOKEEPER_CONNECT: Tells Kafka where Zookeeper is.KAFKA_BROKER_ID: Unique broker ID (needed if multiple brokers exist).KAFKA_OFFSETS_TOPIC_REPLICATION_FACTOR: Set to 1 for single-node setup.KAFKA_ADVERTISED_LISTENERS: Lets local apps discover the Kafka broker atlocalhost:9092.
- Lines 23–24: Connects Kafka to the same network as Zookeeper.
- Lines 26–27: Declares a Docker network named
kafkafor internal service communication.
Why is this YAML setup required?
- Zookeeper on port 2181 to coordinate brokers.
- Kafka on port 9092 to allow local producer/consumer apps to interact.
- Networking so Kafka and Zookeeper can talk to each other using container names (
zookeeper,kafka).
Test the Producer and Consumer Flow
That’s it for the imaplemation of Building Real Time Messaging with Kafka, Go to the solution of project and make sure to start the both ProducerAPI and Consumer project simultaneously like below.
Step-1

Step-2
Go to your project and run the command below to up the Docker container.
docker-compose up -d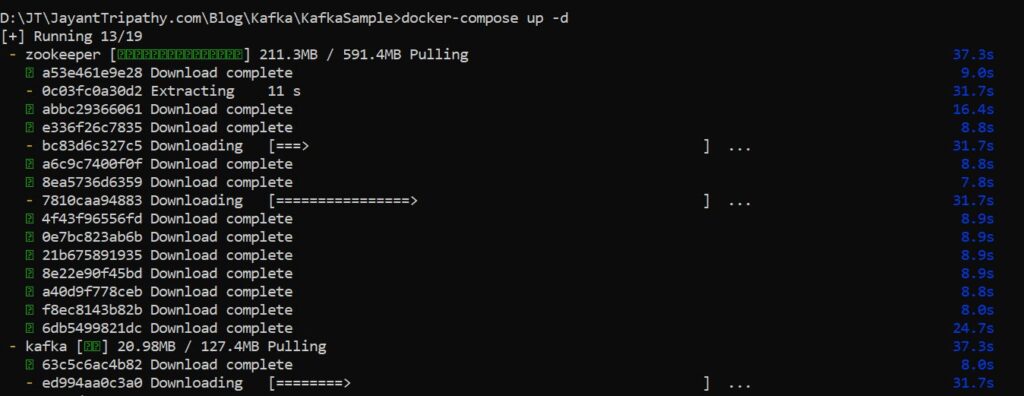
On the Producer API, hit the API that we have created on the minimal endpoint.
The below image are complete flow. When we hit the API, then the producer offsets that message, and at the same time consumer also sees that, so it works bidirectionally.
Conclusion
In this article, we will learn about Building Real-Time Messaging with Kafka and .NET Core. We discussed steps below
| Feature | Description |
| Kafka Setup | Done via Docker Compose |
| Producer | ASP.NET Core Web API |
| Consumer | .NET Console App |
| Message Flow | Producer → Kafka → Consumer |
| Libraries | Confluent.Kafka NuGet |
Leave behind your valuable queries and suggestions in the comment section below. Also, if you think this article helps you, do not forget to share this with your developer community. Happy Coding 🙂
Latest Post
- 🔐 Securing .NET Core Web Apps with Azure AD/Intra and MSAL
- Step-by-Step Guide to Using Azure Redis Cache in ASP.NET Core 9 Web API
- Running Microsoft SQL Server in Docker | VS Code MSSQL Extension
- Building Real-Time Messaging with Kafka and .NET Core
- .NET 8 Authentication with Identity in a Web API using Bearer Tokens and Cookies
- How to convert Text To Speech With Azure Cognitive Services using Angular and .Net Core
- CRUD operation using the repository pattern with .Net 8, Ef-Core, and MySQL
- How to use Response Compression in .NET Core
- How to migrate .Net Core 7 to .Net Core 8
- How to Integrate GraphQL in .Net Core
- Upload Download and Delete files in Azure Blob Storage using ASP.NET Core and Angular
- How to upload files to Azure Blob Storage using Asp.Net Core Web API
- How to store app secrets in ASP.NET Core using Secret Manager
- Logging into Azure App Service with ASP.Net Core
- Integrate Paging in ASP.Net Core Web API- Beginner’s Guide
SUPPORT ME
Subscribe to our newsletter!