

In this article, we will learn about How to Secure React.js application with Azure AD Authentication Using MSAL Library. In the modern digital era, securing your web applications is crucial. A key component of this security is the implementation of user authentication and authorization. Azure Active Directory (Azure AD) provides a powerful platform for this purpose, and the Microsoft Authentication Library (MSAL) simplifies integration of Azure AD into React.js applications. In this article, I will walk you through the process of integrating Azure AD authentication into your React.js app using the @azure/msal-browser and @azure/msal-react libraries. This integration will bolster your application’s security while improving user experience and accessibility. Please read my previous article on Securing .NET Core Web Apps with Azure AD/Intra and MSAL.
Azure Active Directory (AD) and the Microsoft Authentication Library (MSAL) play a crucial role in ensuring secure user authentication in modern web applications. Azure AD delivers a powerful and scalable identity management solution that handles user identities and access management. Meanwhile, MSAL provides developers with tools and libraries that make it easier to integrate Azure AD’s authentication services into React.js applications. This integration process involves configuring Azure AD as the identity provider, enabling secure sign-in and access tokens, and embedding MSAL libraries into the React.js app to handle authentication flows seamlessly. The result is a highly secure yet user-friendly authentication experience built specifically for modern single-page applications.
Prerequisites
Before starting the integration process, ensure that the following prerequisites are met:
- A React.js application: If you don’t have one already, create a basic React.js app using Create React App. You can find the setup guide here: https://create-react-app.dev/
- An Azure AD tenant: This is required to configure your application. If you do not have a tenant, you can easily create one through the Azure Portal.
- Azure AD App Registration: Register your React.js app in Azure AD by creating an App Registration. This step provides you with the essential client ID and other configuration details necessary for authentication setup.
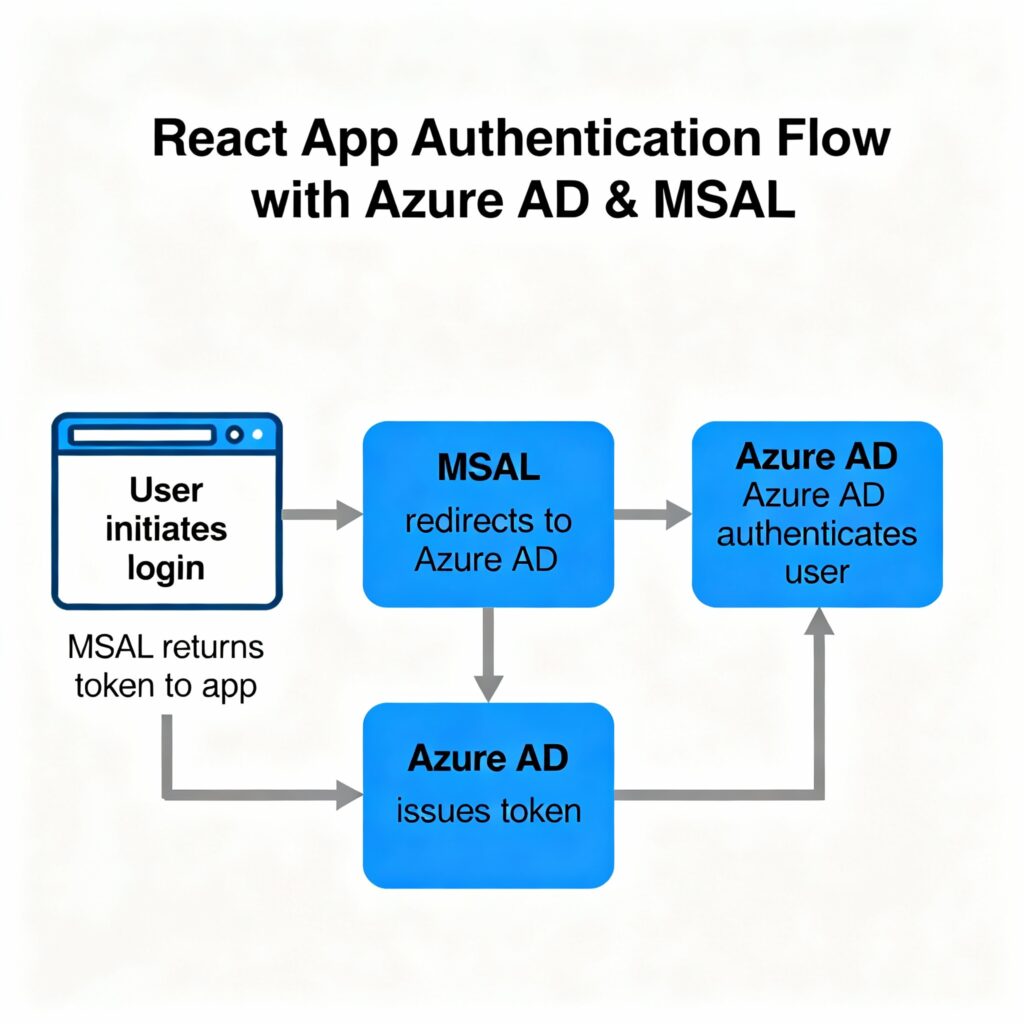
| Step | Action |
|---|---|
| User initiates login | User enters credentials in React app |
| MSAL redirects | MSAL handles and sends login request to Azure AD |
| Azure AD authenticates | Azure AD checks credentials and user identity |
| Azure AD issues token | After successful authentication, token is issued |
| MSAL returns token | MSAL passes security token back to the React app |
Why we choose Azure AD?
Azure AD offers a rich set of features that make it an excellent choice for securing applications. It provides seamless single sign-on (SSO) capabilities, allowing users to authenticate once and gain access to multiple services without repeated logins. Additionally, Azure AD supports multi-factor authentication (MFA), adding an extra layer of security to protect user accounts. With these built-in tools, Azure AD helps enhance application security efficiently, saving developers from having to build these complex features from scratch.
Setting Up Azure Active Directory (Azure AD/Intra)
To begin securing your React.js web application with Azure AD authentication using the MSAL library, the first step is to set up Azure Active Directory (Azure AD) and register your application. This includes creating an Azure AD tenant, registering your app within that tenant, and configuring the necessary authentication settings. Let’s get started!
Step 1: Azure AD App Registration
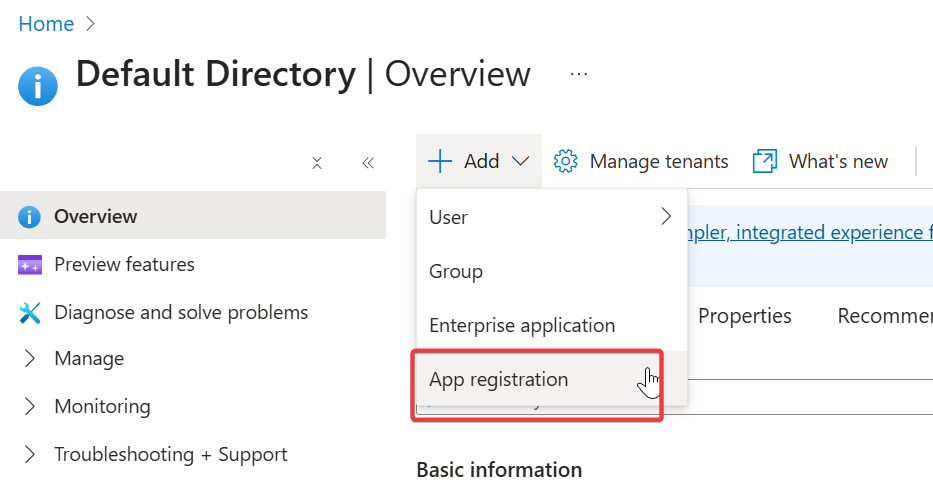
- Go to the Azure Portal and navigate to the Azure Active Directory service.
- Under “App registrations,” create a new app registration for your React.js application.
- Save the Application (client) ID, you will need this in the React.js app
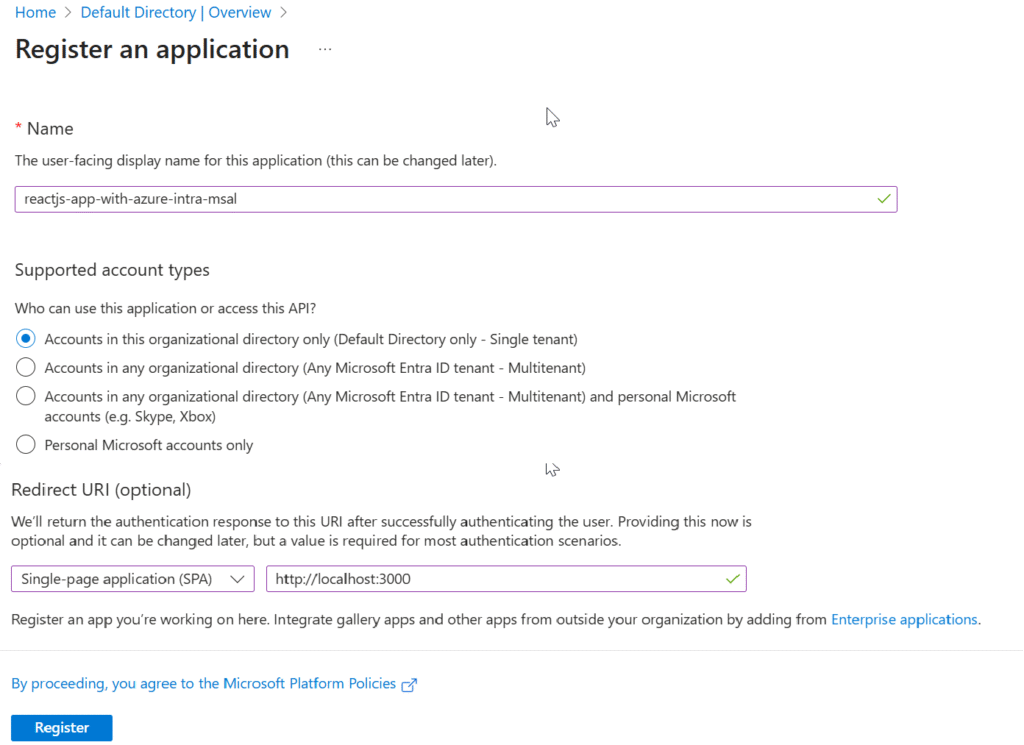
- Name: Provide a clear and descriptive name for your application.
- Supported account types: Select the option that suits your scenario. For example, choose “Accounts in this organizational directory only” for single-tenant apps.
- Redirect URI: First, choose the platform type. Since React.js is a single-page application (SPA) framework, select Single-page application (SPA). Then enter the redirect URI where Azure AD will send users after successful authentication (e.g.,
http://localhost:3000for local testing).
Step 2: Configure Authentication Settings
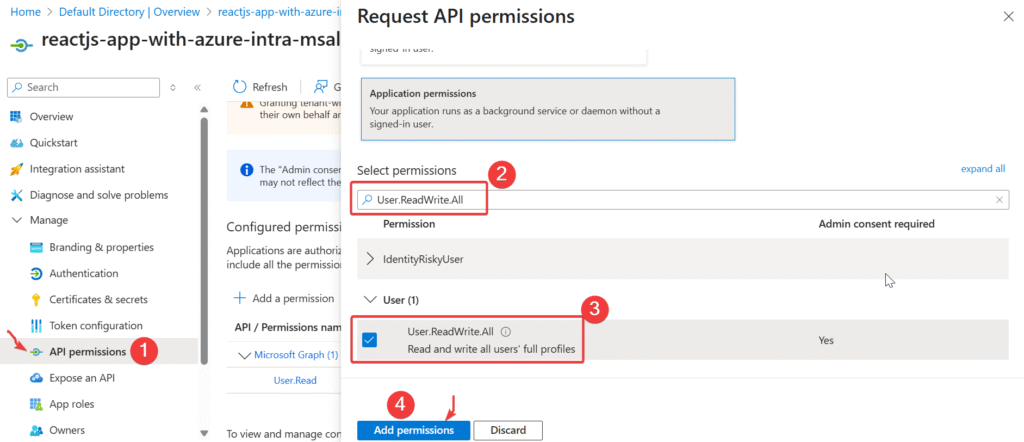
Navigate to the API permissions section of your registered app in Azure AD. Click on Add a permission, then choose Microsoft Graph. Under Delegated permissions, search for and select User.ReadWrite.All. After adding this permission, click Grant admin consent for YOUR_TENANT_NAME to enable the permission for your organization.
Integrating MSAL Library into ReactJs App
Below are the project structure that I followed.
reactjs-with-msal/
├── public/
├── src/
│   ├── authConfig.js
│   ├── App.js
│   ├── index.js
│   ├── Home.js
│   └── Profile.js
├── package.json
...
Step -1 : Create the React application and install required packages
npx create-react-app reactjs-with-msal
cd reactjs-with-msal
Install Required Packages
Add MSAL (Microsoft Authentication Library) for React:
npm install @azure/msal-browser @azure/msal-reactStep -2 : Configure MSAL in React
Create a config file with your Azure AD details (client ID, authority, redirect URI): authConfig.js
export const msalConfig = {
  auth: {
    clientId: "YOUR_CLIENT_ID",
    authority: "https://login.microsoftonline.com/YOUR_TENANT_ID",
    redirectUri: "http://localhost:3000"
  },
  cache: { cacheLocation: "localStorage" }
};
Step -3 : Wrap Your App with MsalProvider
In the Index.js file registered the msal provider as like below.
import React, { useEffect, useState } from 'react';
import ReactDOM from 'react-dom/client';
import { PublicClientApplication } from "@azure/msal-browser";
import { MsalProvider } from "@azure/msal-react";
import { msalConfig } from "./authConfig";
import App from './App';

const msalInstance = new PublicClientApplication(msalConfig);

function RootApp() {
  const [isInitialized, setIsInitialized] = useState(false);

  useEffect(() => {
    msalInstance.initialize().then(() => {
      setIsInitialized(true);
    });
  }, []);

  if (!isInitialized) return <div>Loading...</div>;

  return (
    <MsalProvider instance={msalInstance}>
      <App />
    </MsalProvider>
  );
}

const root = ReactDOM.createRoot(document.getElementById('root'));
root.render(
  <React.StrictMode>
    <RootApp />
  </React.StrictMode>
);
Step -4 : Add Login/Logout Logic
Use MSAL’s hooks (useMsal, useIsAuthenticated) and methods (loginRedirect, logoutRedirect) in your components to handle user authentication.
import React from "react";
import { useIsAuthenticated } from "@azure/msal-react";
import Home from "./Home";
import Profile from "./Profile";
import Details from "./Details";

function App() {
  const isAuthenticated = useIsAuthenticated();
  const path = window.location.pathname || "/";

  if (path.startsWith("/details")) {
    // only allow details view when authenticated
    return isAuthenticated ? <Details /> : <Home />;
  }

  return <div>{isAuthenticated ? <Profile /> : <Home />}</div>;
}

export default App;
Also we declared the Profile and Details page, you can find complete code into source code section.
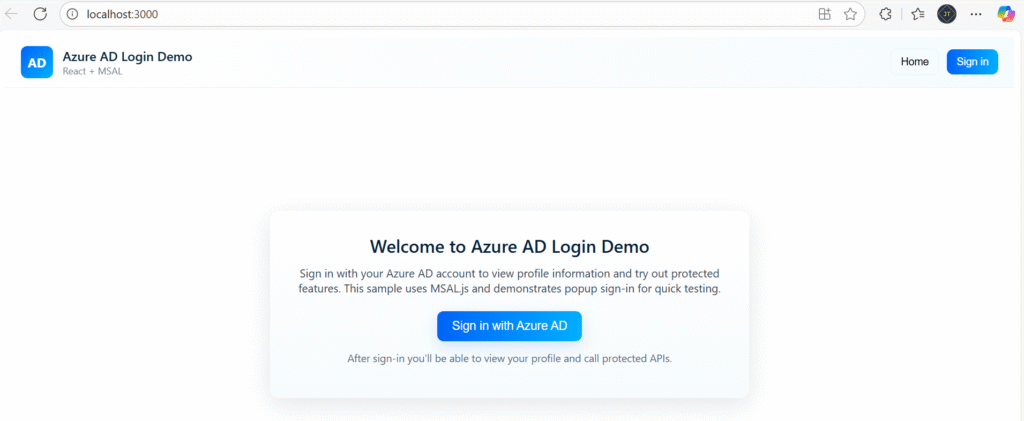
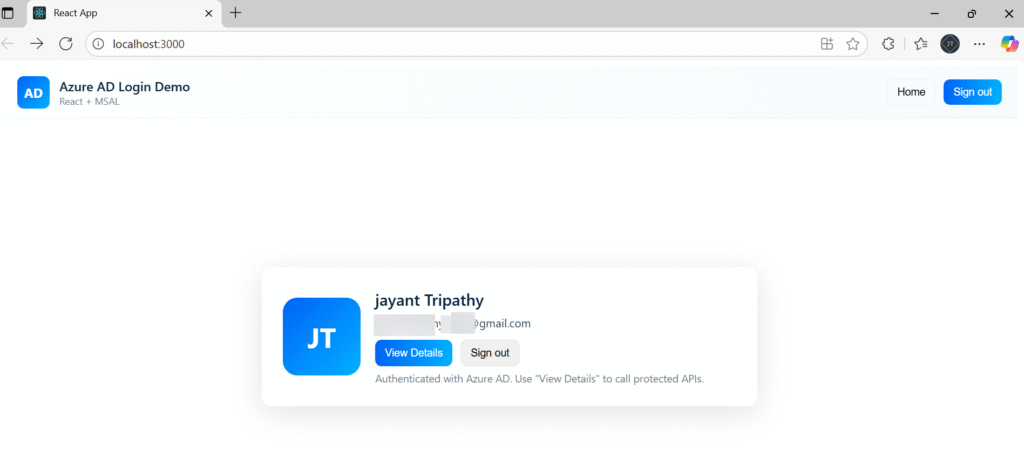
Test Authentication
Start your React app, click login, and you should be redirected to the Microsoft login screen. Upon successful sign-in, MSAL provides access tokens for your protected routes or APIs.
Source Code
Conclusion
In this article we learned How to Secure React.js application with Azure AD Authentication Using MSAL Library. Integrating Azure Active Directory authentication using the MSAL library offers a robust and seamless way to secure React.js applications. By leveraging Azure AD’s identity platform, developers can easily implement secure login flows, enforce organizational policies, and manage user permissions with Microsoft Graph API integration. This approach not only enhances the security posture of your applications but also provides users with a familiar and trusted sign-in experience. Whether building enterprise-grade solutions or scalable single-page applications, using Azure AD with MSAL in React ensures a scalable, standards-based, and flexible authentication system that meets modern app security needs.
Leave behind your valuable queries and suggestions in the comment section below. Also, if you think this article helps you, do not forget to share this with your developer community. Happy Coding 🙂
Latest Post
- How to Secure React.js application with Azure AD Authentication Using MSAL Library
- 🔐 Securing .NET Core Web Apps with Azure AD/Intra and MSAL
- Step-by-Step Guide to Using Azure Redis Cache in ASP.NET Core 9 Web API
- 🤖 Build a Full-Stack AI App with React, Node.js & Azure OpenAI
- Effortless React Deployment 🚀: CI/CD with GitHub Actions & Azure Static Web Apps
- Deploying Angular apps in Azure Blob Storage with CI/CD Integration 🚀
- How to Build a serverless CRUD app with Azure function and Cosmos DB
- How to resolve Function App Cannot Create within Azure Portal
- How to convert Text To Speech With Azure Cognitive Services using Angular and .Net Core
- Building CI/CD Pipeline(YAML) using Azure DevOps – GitHub to Azure Web App (PaaS)
- Upload Download and Delete files in Azure Blob Storage using ASP.NET Core and Angular
- How to upload files to Azure Blob Storage using Asp.Net Core Web API
- Introduction to Azure Cosmos DB
- How to create Cosmos DB in Azure
- Logging into Azure App Service with ASP.Net Core
SUPPORT ME