In this article we will learn how to Creating an EXE For .Net Core Console Application. Sometime as per the requirement we are create console application but the challenge is how to share this application to others like how a tester can test this application. We can’t share the source code directly to others we should share the file as protected. To get rid of this issue the best way is that we should create an EXE file of .Net Core console app and send that EXE file to others. Here In this article, we basically going to learn how to create an EXE file over .Net Core console. Please read my previous article of JWT Authentication And Authorization With Identity Framework in .NET Core 6.0.
Creating a sample .Net Core console application
Create a .NET Core console application using Visual studio templates.
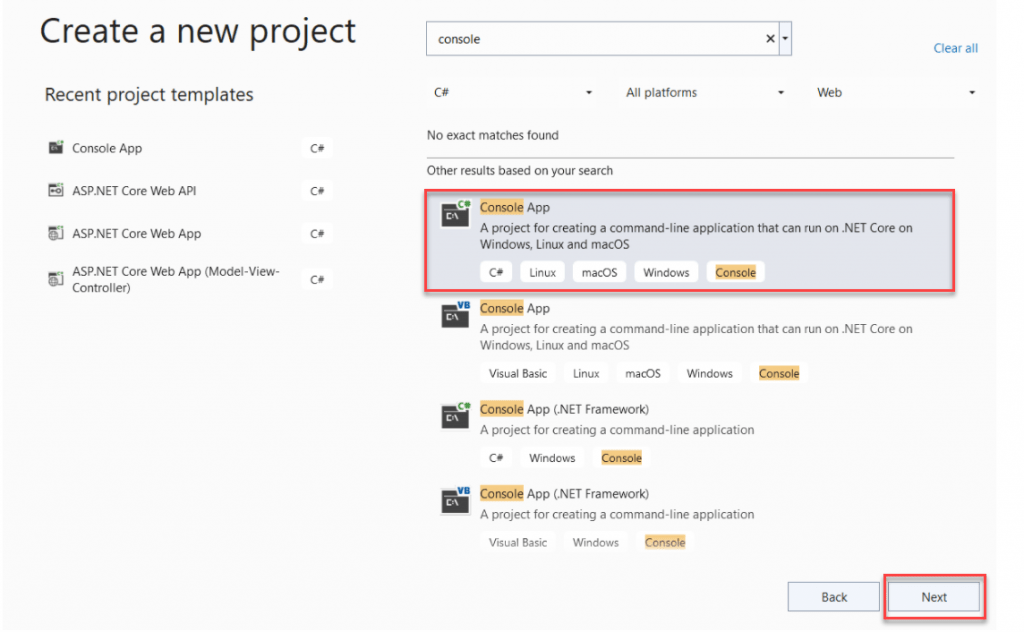
If you can build the project and when move to Debug folder you can’t find the any EXE file is there. It is not a bug. In .NET Core, it runs from the dll, so you have to just run the application by running the command prompt and using the command – dotnet run.

Let’s run the application and we can see the sample console app output.

Creating an EXE file for the .Net core console App
Let’s create an EXE file using Visual studio wizard of .Net Core console application.
Step-1
Right click on the project and click on publish
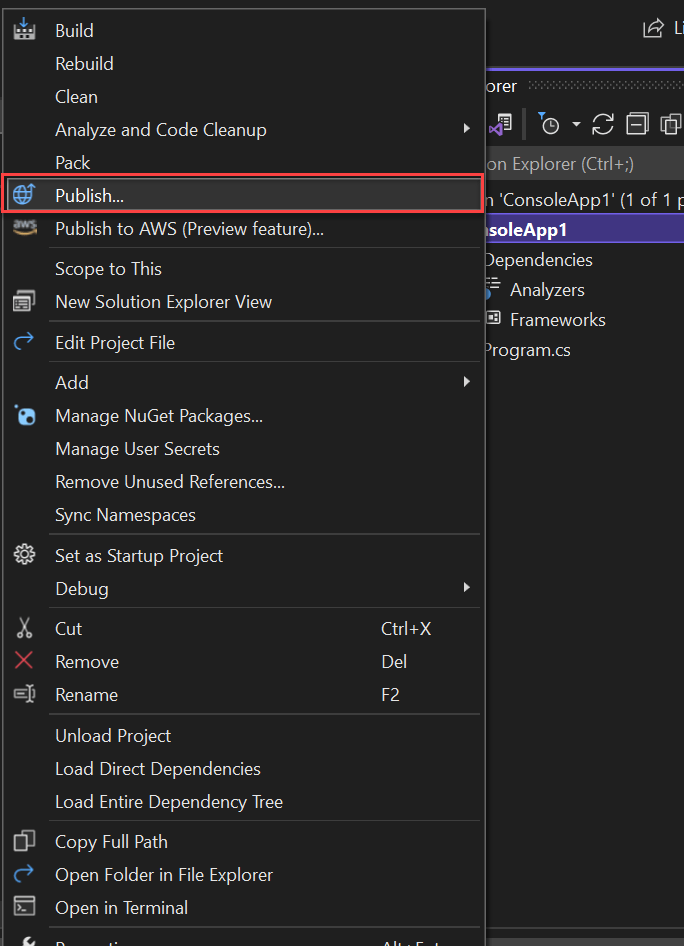
Step-2
After clicking on publish it opened up a next wizard where we can choose publish type, In my case I have chooses Folder option.
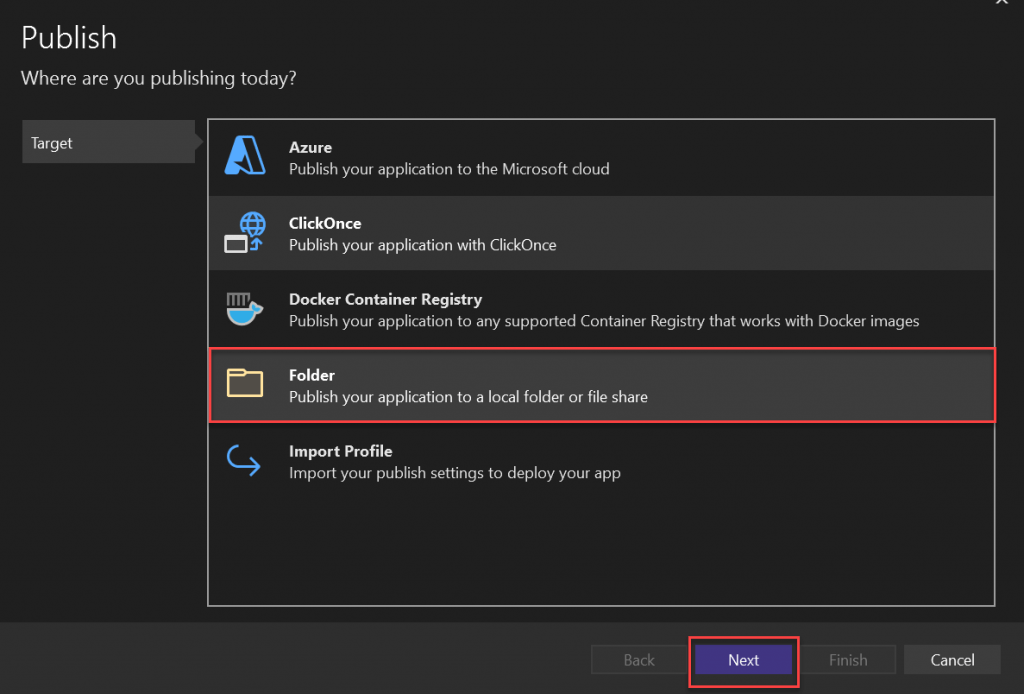
Step-3
After clicking the next button you can see the below screen where it ask to publish location under Release folder. You can change if you want to save in other location.
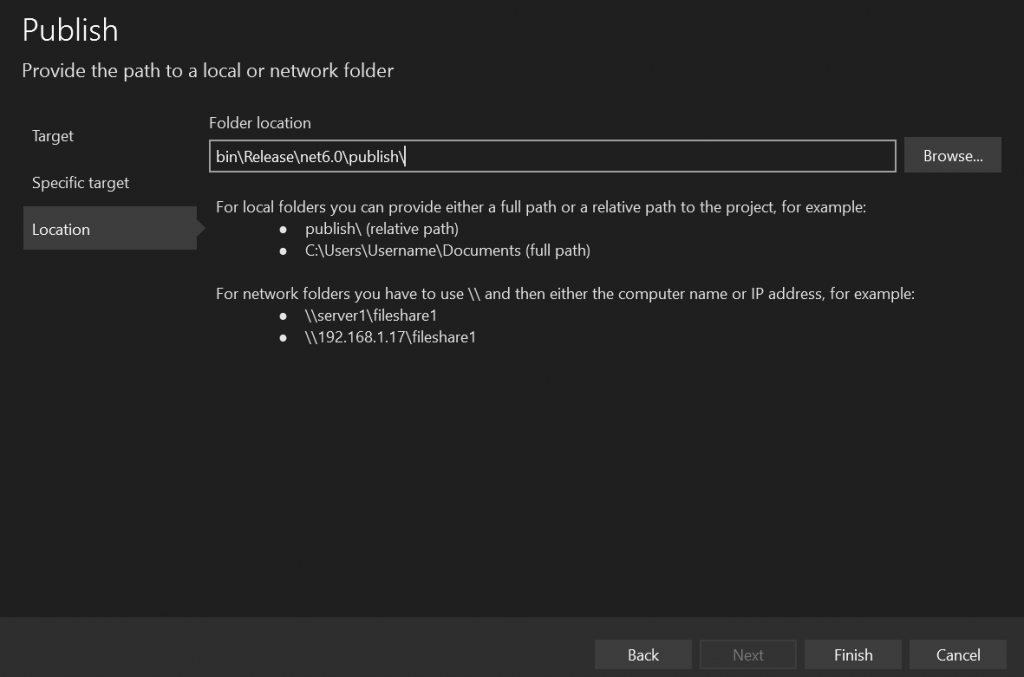
Step-4
After click the Finish button, you can choose the highlighted settings and set target and click on Save button.
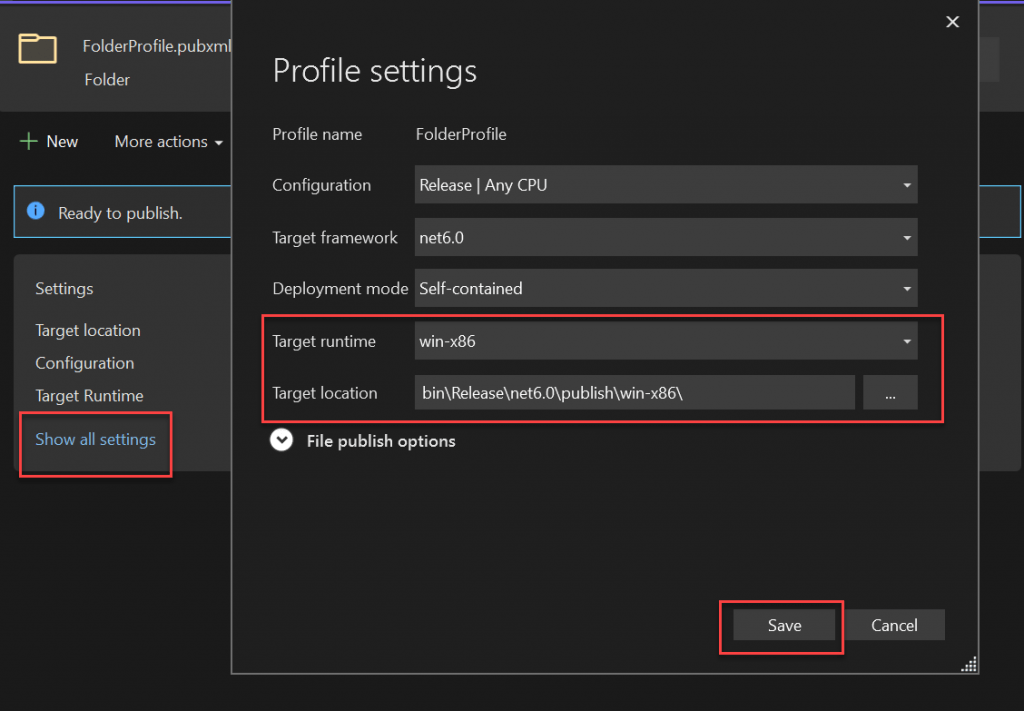
Step-5
Finally click on Publish button, it can publish into desired location.
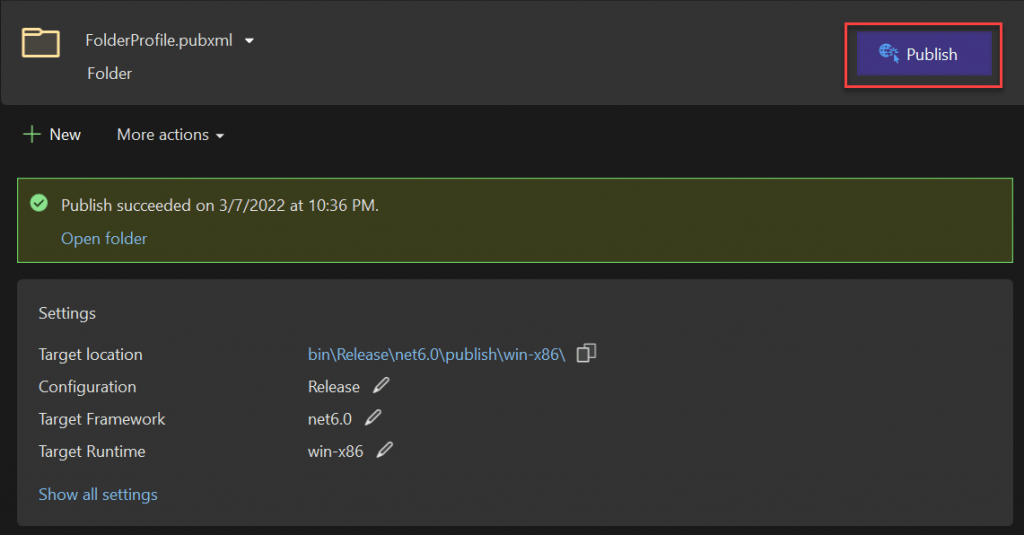
Step-6
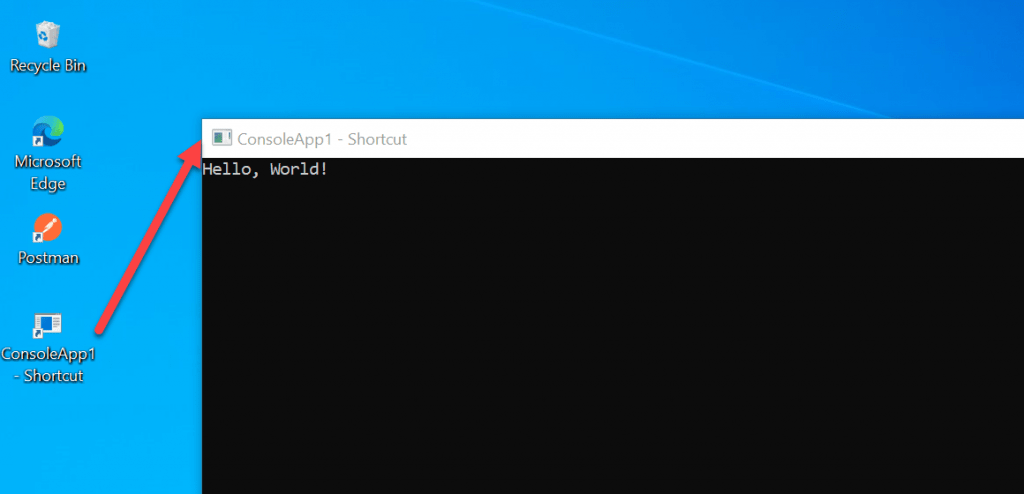
Jump to the folder location and you can there you find an ConsoleApp1 exe file present in Release folder, when you click the application you can see the console window,
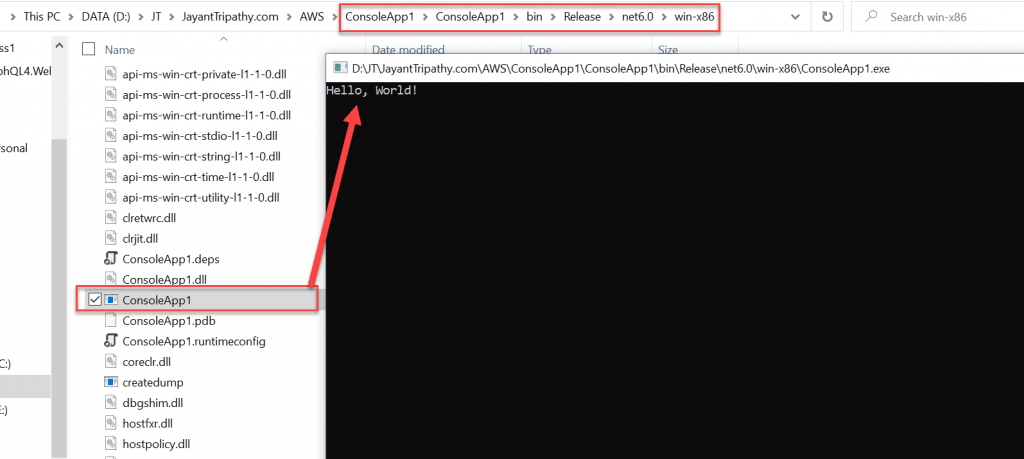
If you want to create Desktop create short Icon of the EXE file then follow below steps and click on the shortcut icon you can see the result.
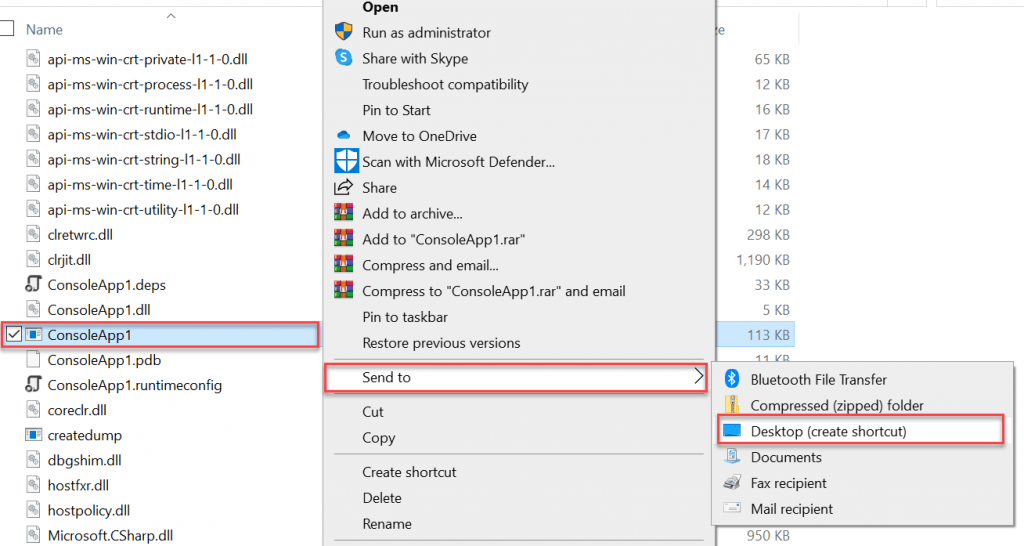
References
- 🔐 Securing .NET Core Web Apps with Azure AD/Intra and MSAL
- Step-by-Step Guide to Using Azure Redis Cache in ASP.NET Core 9 Web API
- Building Real-Time Messaging with Kafka and .NET Core
- .NET 8 Authentication with Identity in a Web API using Bearer Tokens and Cookies
- How to convert Text To Speech With Azure Cognitive Services using Angular and .Net Core
- CRUD operation using the repository pattern with .Net 8, Ef-Core, and MySQL
- How to use Response Compression in .NET Core
- How to migrate .Net Core 7 to .Net Core 8
- How to Integrate GraphQL in .Net Core
- Upload Download and Delete files in Azure Blob Storage using ASP.NET Core and Angular
Jayant Tripathy
Coder, Blogger, YouTuberA passionate developer keep focus on learning and working on new technology.
