
In this article, we will learn about the implementation of .NET 8 Authentication with Identity in a Web API using Bearer Tokens and Cookies. The new Identity endpoints introduced in .NET 8 are designed to make it easier to integrate ASP.NET Core Identity into API server applications. Please read my previous article on JWT Authentication And Authorization With Identity Framework in .NET Core 6.0.
</> Please find the Source Code on this link.
Creating a .NET8 Web API Project
- Launch the Visual Studio IDE and click on “Create new project”.
- In the “Create new project” window, select “ASP.NET Core Web API” from the template list.
- Click Next. In the “Configure your new project” window, specify the name and location for the new project and then click Create.
- In the “Create New ASP.NET Core Web API” window shown next, select .NET Core as the runtime and .NET 8.0 from the drop-down list at the top(I’m using .NET 8 .net core SDK). Select “API” as the project template to create a new ASP.NET Core API application.
Install the below packages
Microsoft.AspNetCore.Identity.EntityFrameworkCore 8.0.3
Microsoft.EntityFrameworkCore.Design 8.0.3
Microsoft.EntityFrameworkCore.SqlServer 8.0.3
Here we have added Authentication with an Identity mechanism, Please follow the below steps.
Creating DataContext Class
namespace DotNet8Auth_Identity.Data
{
    public class DataContext: IdentityDbContext
    {
        public DataContext(DbContextOptions<DataContext> options) : base(options)
        {

        }
    }
}
Adding the appsettings.json file to add the connection string
 "ConnectionStrings": {
   "Constr": "Data Source=JAYANTT\\SQLEXPRESS;Initial Catalog=DotNet8AuthDB;Integrated Security=True;ApplicationIntent=ReadWrite;MultiSubnetFailover=False;TrustServerCertificate=True;Encrypt=True"
 }
Modifying the Program.cs file to add the Identity
// Add services to the container.

builder.Services.AddControllers();
// Learn more about configuring Swagger/OpenAPI at https://aka.ms/aspnetcore/swashbuckle
builder.Services.AddEndpointsApiExplorer();
builder.Services.AddSwaggerGen();

builder.Services.AddDbContext<DataContext>(options => options.UseSqlServer(builder.Configuration.GetConnectionString("Constr")));

builder.Services.AddAuthorization();
builder.Services.AddIdentityApiEndpoints<IdentityUser>()
    .AddEntityFrameworkStores<DataContext>();

var app = builder.Build();

// Configure the HTTP request pipeline.
if (app.Environment.IsDevelopment())
{
    app.UseSwagger();
    app.UseSwaggerUI();
}
app.MapIdentityApi<IdentityUser>();

app.UseHttpsRedirection();

app.UseAuthorization();

app.MapControllers();

app.Run();- Line #8, Here we have registered the database connection string and get the connection string details.
- Line #10-12, We have added Authorization details along with
IdentityUserandDataContext. - Line #22 & #26, we have registered the
IdentityUsermiddleware.
Run the EF Core Migration and Update to Database
Using the below command we can create the migration of EF Core Identity. It creates the DotNet8AuthDB database like below.
dotnet ef migrations add Initial // For migration
dotnet ef database update // To update into database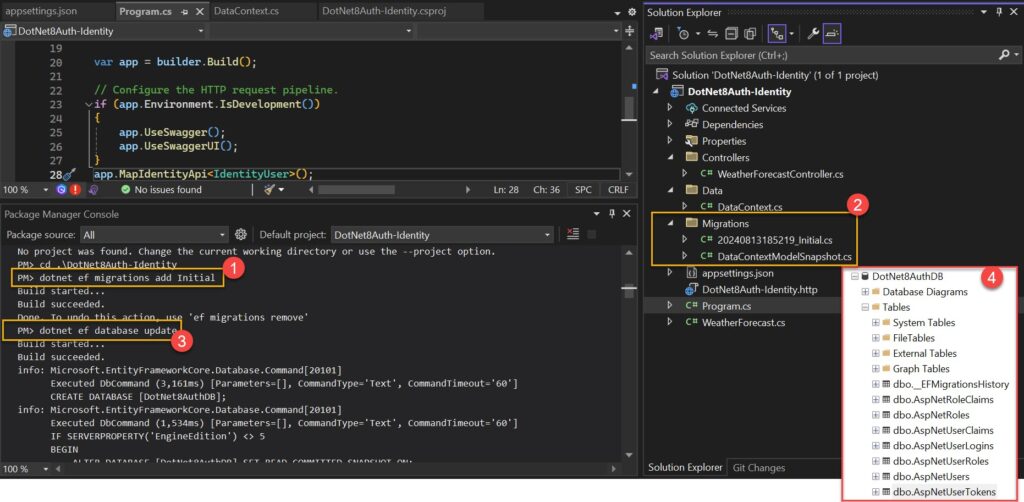
Test the Identity User and roles using Swagger
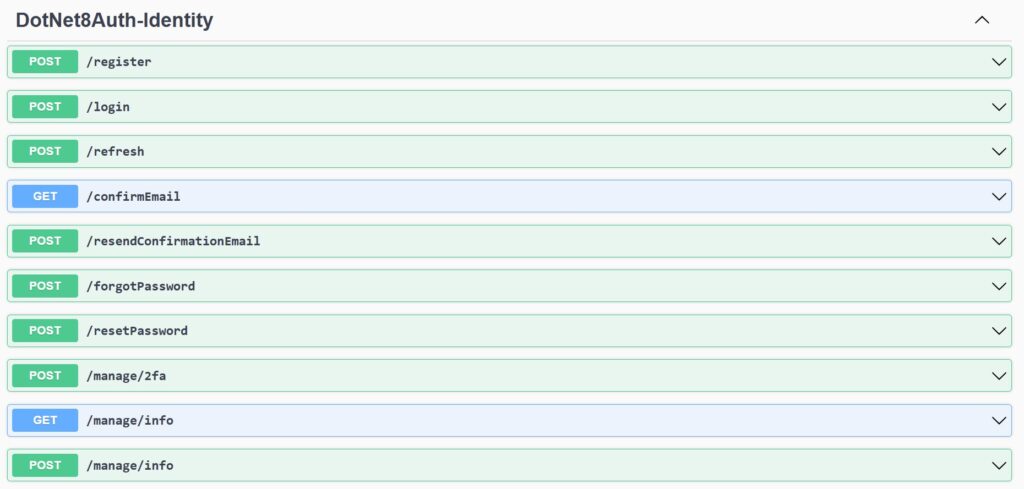
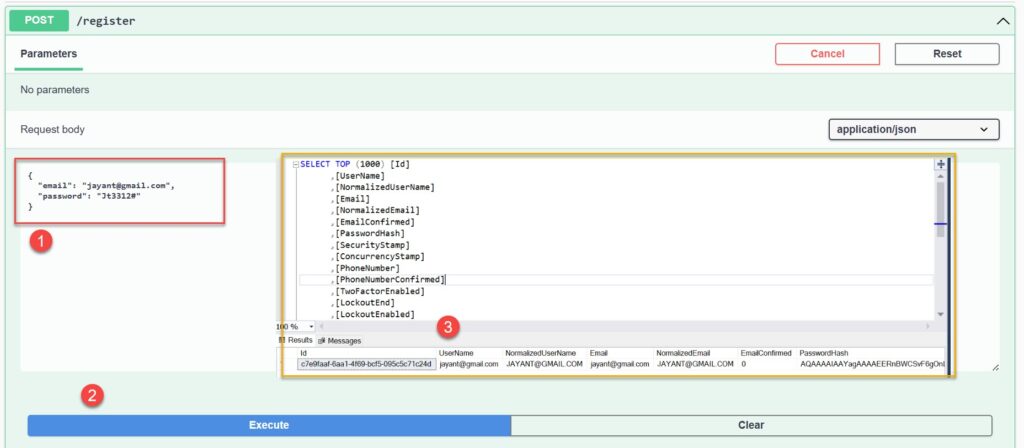
Register the credentials
The email and password we used for registration through the API, and after successful execution it would save the information into the database.
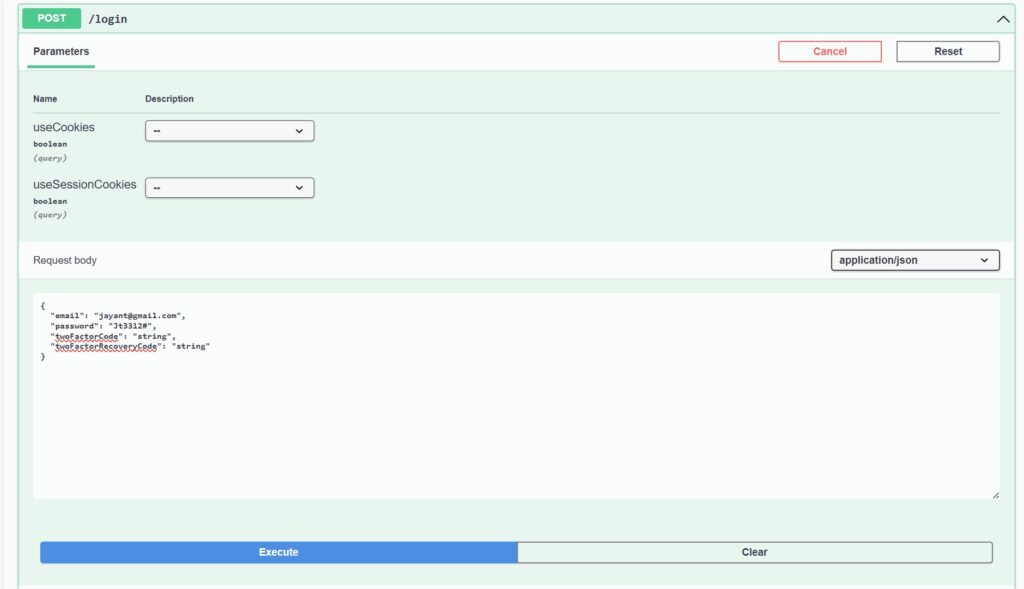
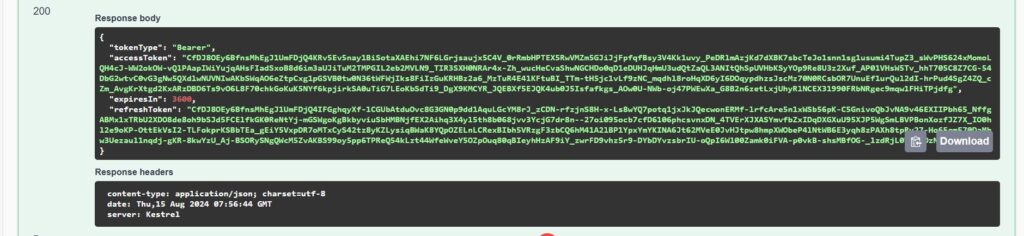
Login using the Credentials
To pass the registered email and password, we can utilize the login API, which returns both an access token and a refresh token. It also mentions the expiry time here.
Configure Swagger to test the Authentication
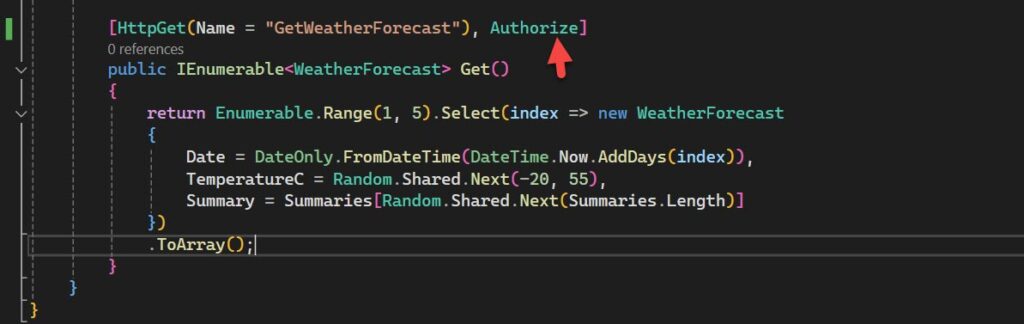
- Here you can see, that we enabled the
Authorizeattribute on the Controller action. - On the below code, we added the swagger configuration to add authentication.
builder.Services.AddSwaggerGen(options =>
{
    options.AddSecurityDefinition("oauth2", new Microsoft.OpenApi.Models.OpenApiSecurityScheme {
        In = ParameterLocation.Header,
        Name = "Authorization",
        Type = SecuritySchemeType.ApiKey
    });
    options.OperationFilter<SecurityRequirementsOperationFilter>();
});
Test the Authentication with Swagger
- After adding the authorization on Swagger you can see it got a 401 issue
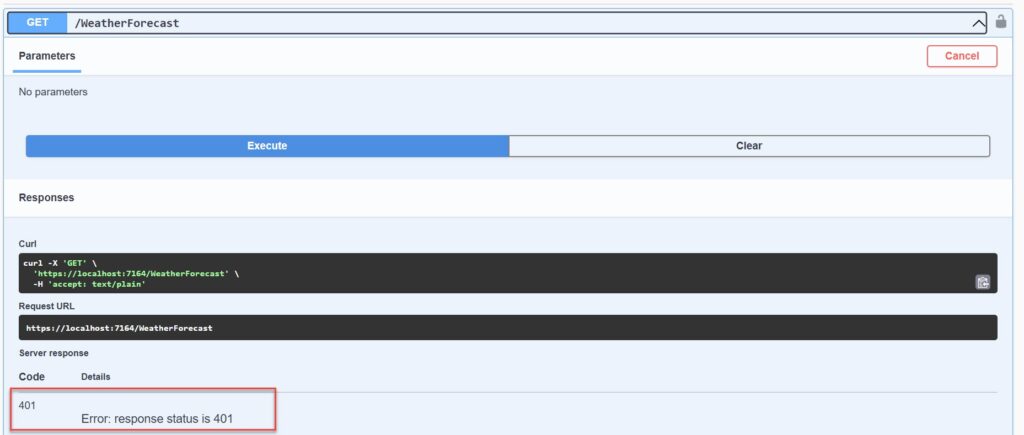
Please have a look at how we got resolved by this.
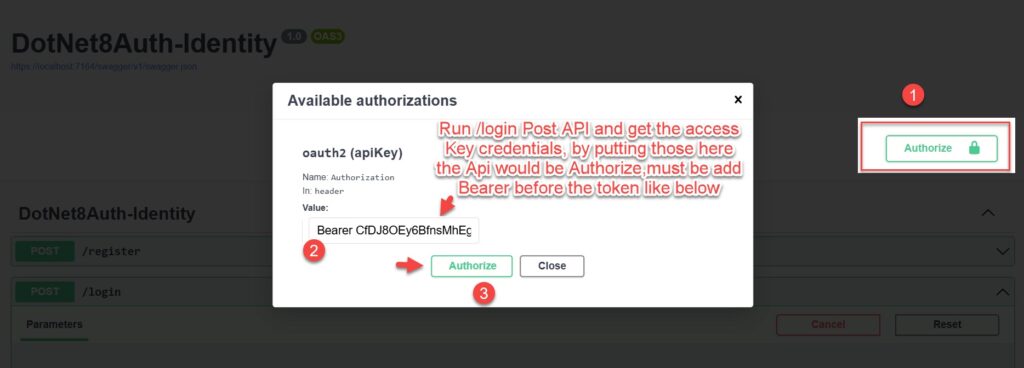
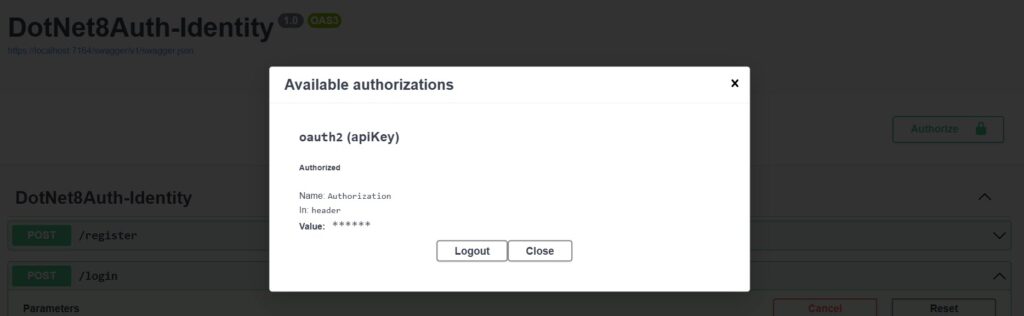
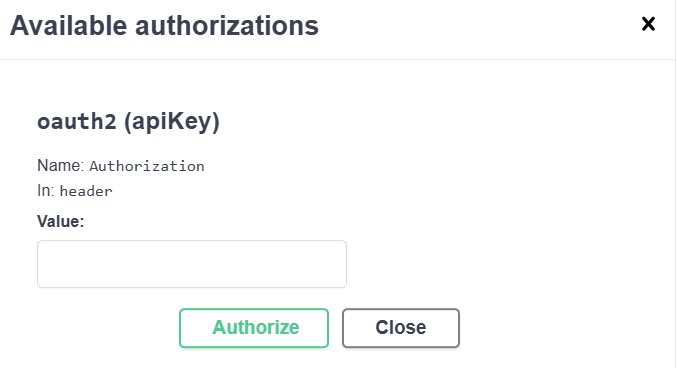
- After integrating the swagger authentication, please proceed to build and launch the project. Once launched, you will find the “Authorize” button at the top. Click on it and provide the access token obtained from the /login API by adding “Bearer” before pasting it into the required field.
- After Authorize with a token, you can see it authorized success with oauth2.
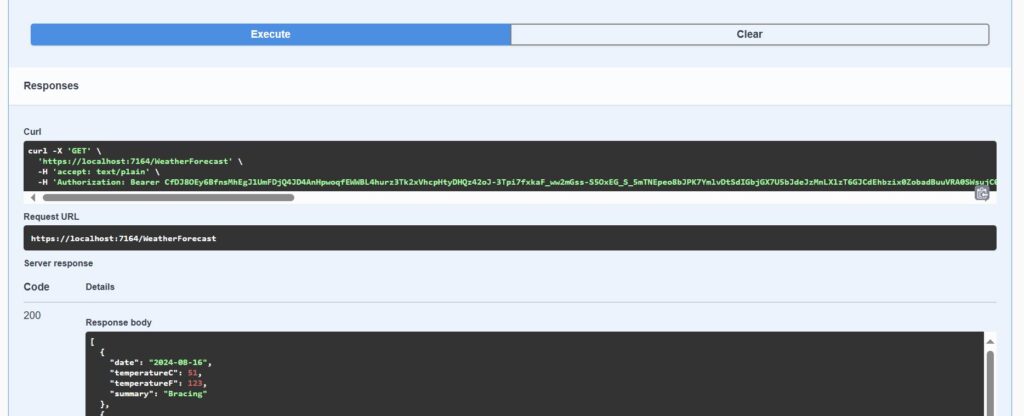
- After the authorization check, you will see that the status for API 200 is successful.
What is Cookie Authentication?
Cookie Authentication is a method used to maintain user authentication in a web application. It works by creating an authentication ticket, which is stored in a cookie on the client’s browser. It contains information about the user, such as their identity and roles, and it is encrypted and signed to prevent tampering.
Test with Cookie Authentication
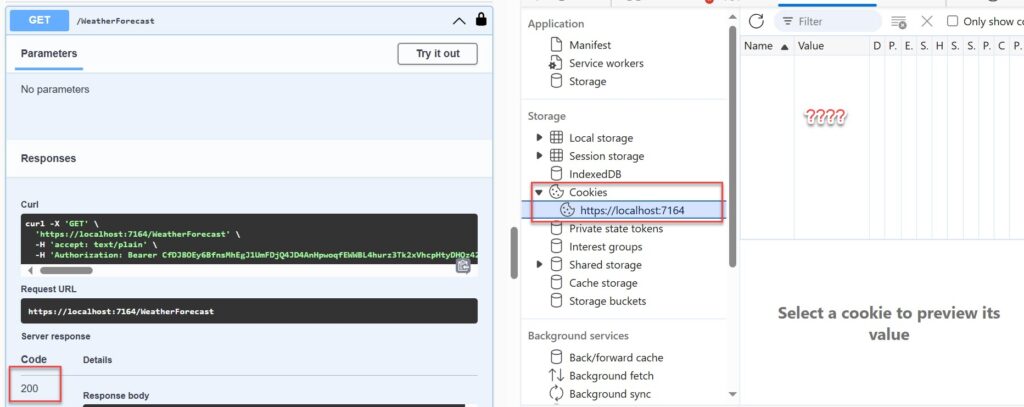
- Here we can see there is no cookie added to the browser as we have not implemented the cookie.
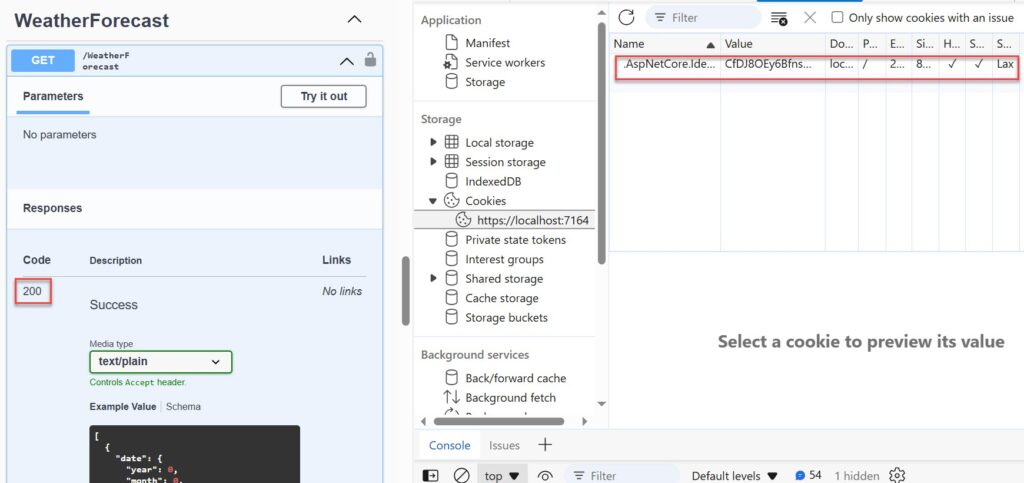
- Below we can see useCookies as true and in response, you can see there is no access token but when we see on the browser we can see the cookies are added on the browser.
- At that point, we can observe that there is no authorization in the API swagger level, but it still works due to cookies.

Conclusion
In this article, we discussed the implementation of .NET 8 Authentication with Identity in a Web API using Bearer Tokens and Cookies. The new Identity endpoints introduced in .NET 8 are designed to make it easier to integrate ASP.NET Core Identity into API server applications.
Leave behind your valuable queries and suggestions in the comment section below. Also, if you think this article helps you, do not forget to share this with your developer community. Happy Coding 🙂
Latest Articles
- Step-by-Step Guide to Using Azure Redis Cache in ASP.NET Core 9 Web API
- .NET 8 Authentication with Identity in a Web API using Bearer Tokens and Cookies
- How to convert Text To Speech With Azure Cognitive Services using Angular and .Net Core
- CRUD operation using the repository pattern with .Net 8, Ef-Core, and MySQL
- How to use Response Compression in .NET Core
- How to Integrate GraphQL in .Net Core
- Upload Download and Delete files in Azure Blob Storage using ASP.NET Core and Angular
- How to upload files to Azure Blob Storage using Asp.Net Core Web API
- How to store app secrets in ASP.NET Core using Secret Manager
- Logging into Azure App Service with ASP.Net Core
SUPPORT ME