
In this article, we will learn about Effortless React Deployment 🚀: CI/CD with GitHub Actions & Azure Static Web Apps. In this guide, we will walk through the step-by-step process of creating a React application, pushing it to GitHub, and effortlessly deploying it to Azure using GitHub Actions. Please read my previous article on How to deploy Angular App in Azure Static Web App.
CI/CD for React with GitHub Actions & Azure
Continuous Integration and Continuous Deployment (CI/CD) are essential for modern web applications. Automating your deployment process ensures smooth, error-free, and efficient application updates. In this guide, we will explore how to set up a CI/CD pipeline for a React application using GitHub Actions and deploy it to Azure Static Web Apps.
Why Use CI/CD for React?
Setting up CI/CD for your React application offers several benefits:
- Automated testing: Ensures code quality before deployment.
- Faster Releases: Automates the build and deployment process.
- Reduced Errors: Eliminates manual deployment mistakes.
- Continuous Delivery: Deploys updates seamlessly to users.
Prerequisites
Before you start, ensure you have:
- A GitHub repository with your React project.
- An Azure account.
- An Azure static web app.
- GitHub Actions enabled.
Create an React App
Here’s a step-by-step guide to creating this ReactJS project with Material UI, Bootstrap, and TypeScript:
Step 1: Set Up the React Project
npx create-react-app profile-card-app --template typescriptStep 2: Install Dependencies
Navigate to the project folder and Install Material UI and Bootstrap
cd profile-card-app

npm install @mui/material @emotion/react @emotion/styled bootstrap
Step 3: Import Bootstrap in index.tsx
Open src/index.tsx and add:
import 'bootstrap/dist/css/bootstrap.min.css';Step 4: Create the Profile Card Component
Create a new file: src/components/profilecard.tsx
import React from "react";
import { Button, Card, CardContent, CardMedia, Typography } from "@mui/material";

interface ProfileProps {
  name: string;
  role: string;
  imageUrl: string;
}

const ProfileCard: React.FC<ProfileProps> = ({ name, role, imageUrl }) => {
  return (
    <Card sx={{ maxWidth: 345, boxShadow: 3, borderRadius: 2 }}>
      <CardMedia component="img" height="140" image={imageUrl} alt={name} />
      <CardContent>
        <Typography gutterBottom variant="h5">
          {name}
        </Typography>
        <Typography variant="body2" color="text.secondary">
          {role}
        </Typography>

        <Button
          variant="contained"
          color="primary"
          href="https://jayanttripathy.com/"
          target="_blank"
          sx={{ mt: 2 }}
        >
          Visit My Website
        </Button>
      </CardContent>
    </Card>
  );
};

export default ProfileCard;
Step 5: Create Header and Footer Components
Create a new file: src/components/Layout.tsx
import React from "react";

export const Header: React.FC = () => (
  <nav className="navbar navbar-dark bg-dark">
    <div className="container">
      <a className="navbar-brand" href="#">Profile App</a>
    </div>
  </nav>
);

export const Footer: React.FC = () => (
  <footer className="bg-dark text-white text-center py-3 mt-4">
    <p>© 2025 Profile App. All rights reserved.</p>
  </footer>
);
Step 6: Update App.tsx
Replace the code in src/App.tsx with:
import React from "react";
import ProfileCard from "./components/ProfileCard";
import { Header, Footer } from "./components/Layout";

const App: React.FC = () => {
  return (
    <div className="d-flex flex-column min-vh-100">
      <Header />
      <div className="container flex-grow-1 d-flex justify-content-center align-items-center py-5">
        <ProfileCard
          name="Jayant Tripathy"
          role="Passionate Programmer"
          imageUrl="https://pbs.twimg.com/profile_images/697111882826559488/113lXfh-_400x400.jpg"
        />
      </div>
      <Footer />
    </div>
  );
};

export default App;
Step 7: Start the application using the below command. Now we can see the profile card below.
npm start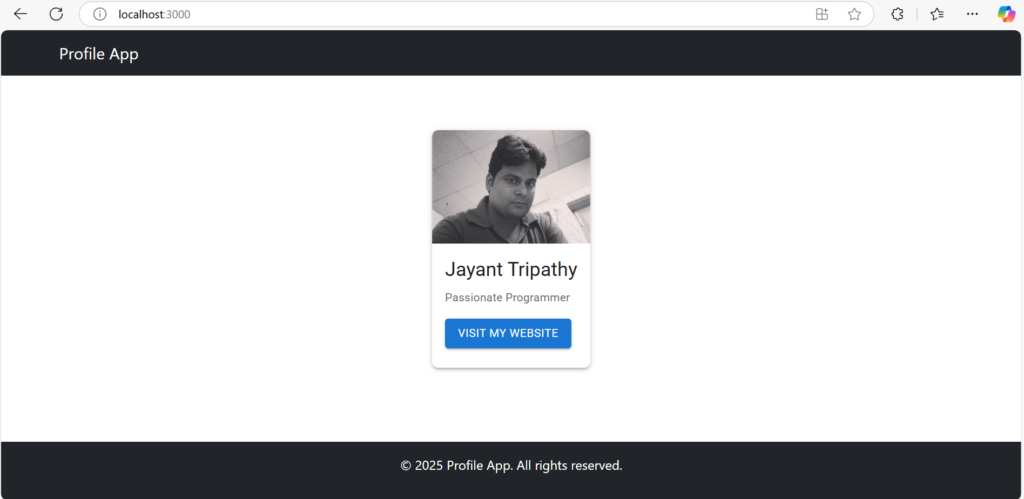
Let’s push this code into the GitHub repository. If you are new to how to push the code into GitHub, then please follow this link: How to Deploy Angular 17/18 App in GitHub Pages.
The repo has been created; using the below command, we can push the code.
echo "# reactjs-profile-card" >> README.md
git init
git add README.md
git commit -m "first commit"
git branch -M main
git remote add origin https://github.com/JayantTripathy/profile-card.git
git push -u origin main
Create an Azure Static Web App
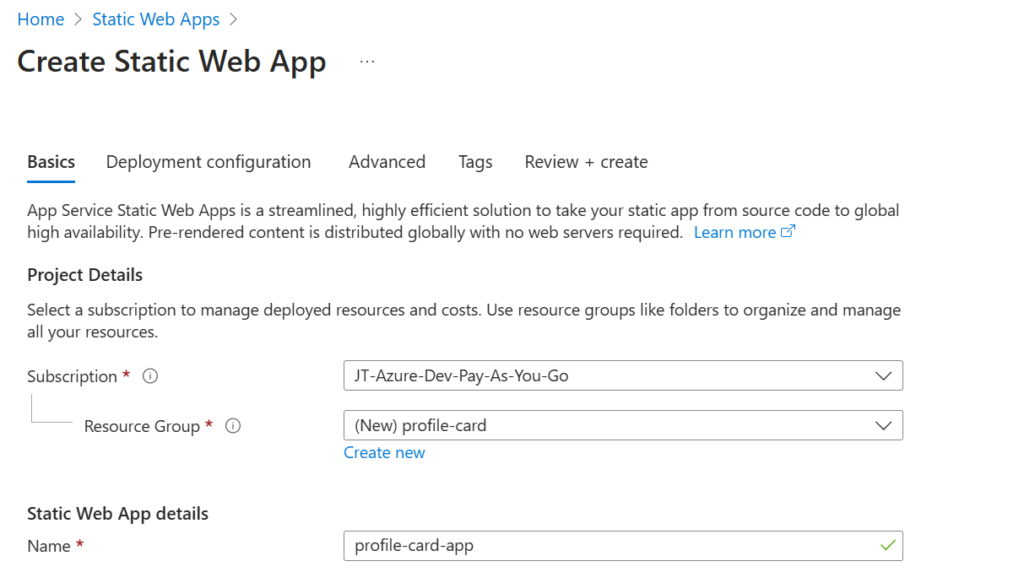
- Go to the Azure Portal → Search for “Static Web Apps.“
- Click “Create” and enter:
- Resource Group: Create or select an existing one.
- App Name:
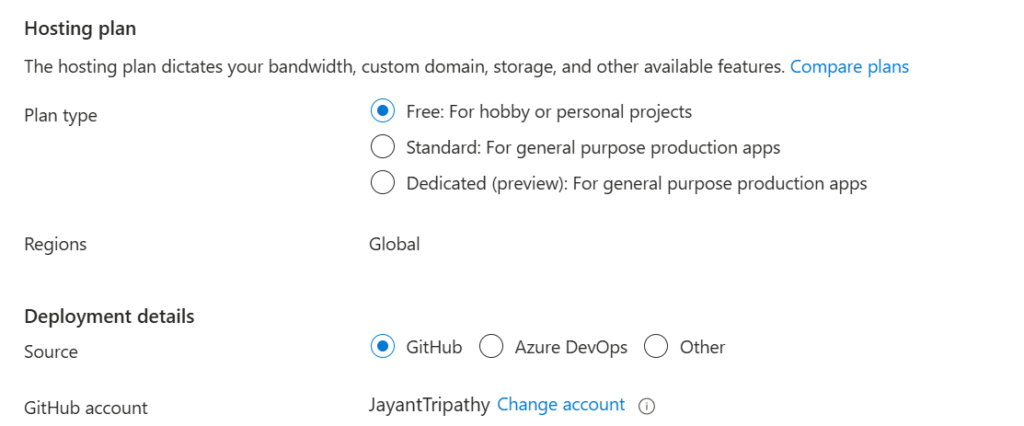
profile-card-app - Deployment Source: Select GitHub and authorize Azure to access your repo.
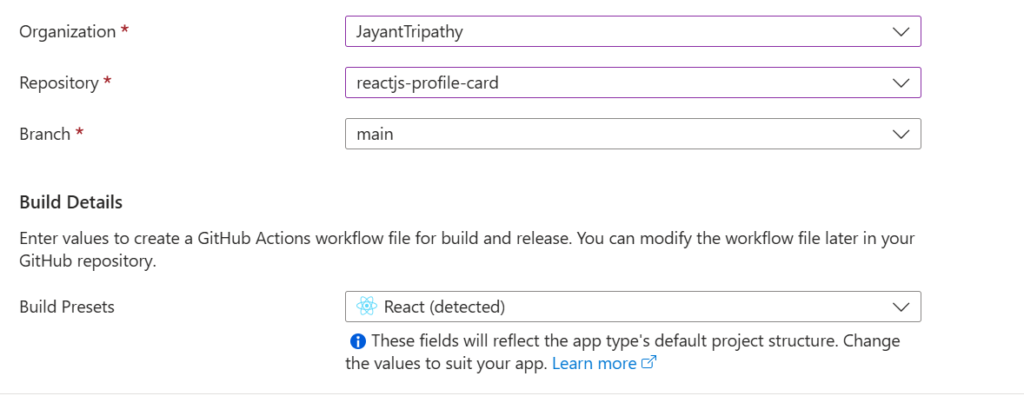
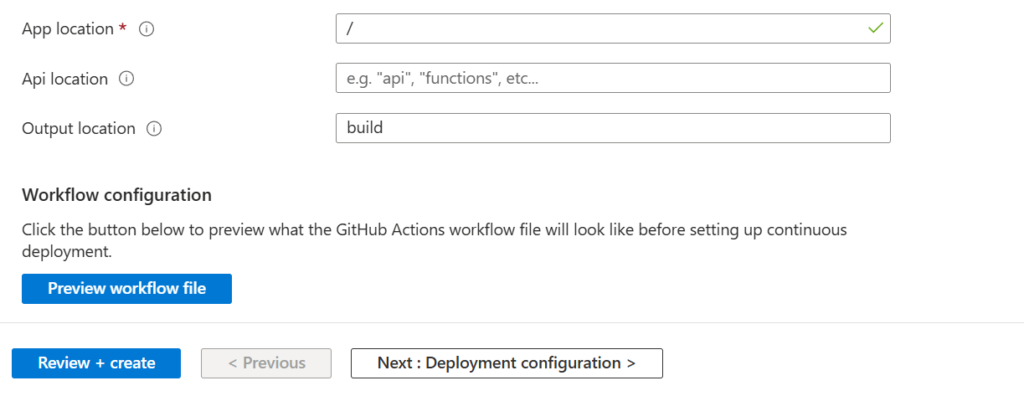
- Build Presets: Choose React
- Branch:
main
- Click “Review + Create,” then “Create.“.
Once you created the static web app, then you can see a workflow is already created on this pointing to GitHub Actions.
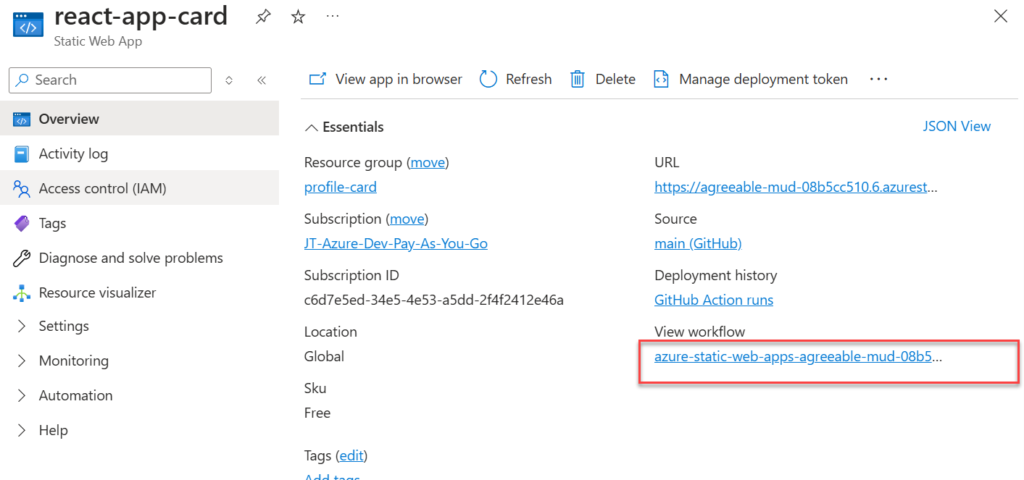
Azure Static Web Apps has already created the workflow What does that mean?
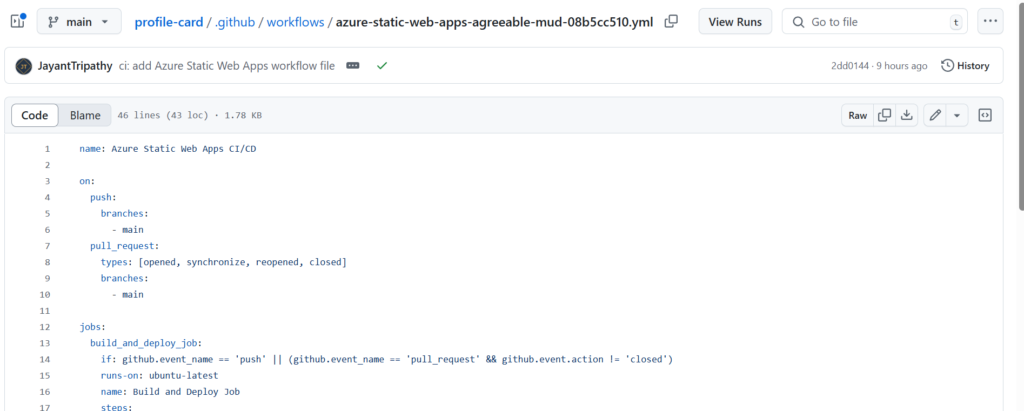
If Azure Static Web Apps has already created the workflow file (e.g.,),
azure-static-web-apps-agreeable-mud-08b5cc510.ymlthen you do not need to manually create another GitHub Actions workflow.What This Means:
✅ Your project is already linked to Azure Static Web Apps.
✅ Any changes you push to the configured branch (e.g.,main) will automatically trigger a deployment.
✅ You only need to commit and push your changes, and Azure will handle the deployment.
CI/CD with GitHub Actions & Azure Static Web Apps
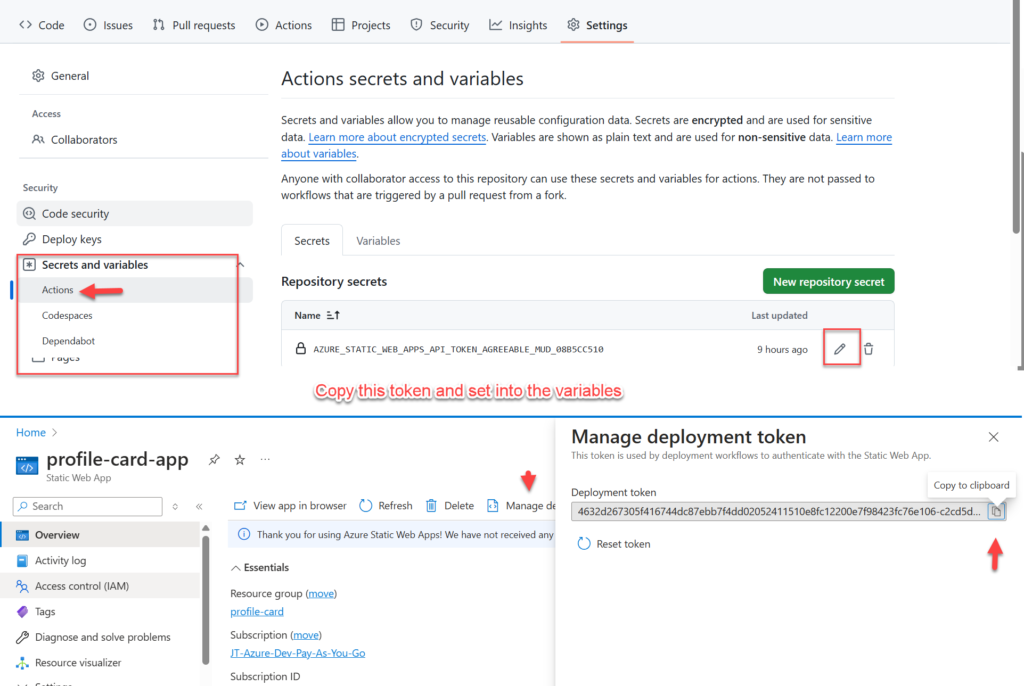
The yml file expect a token here,
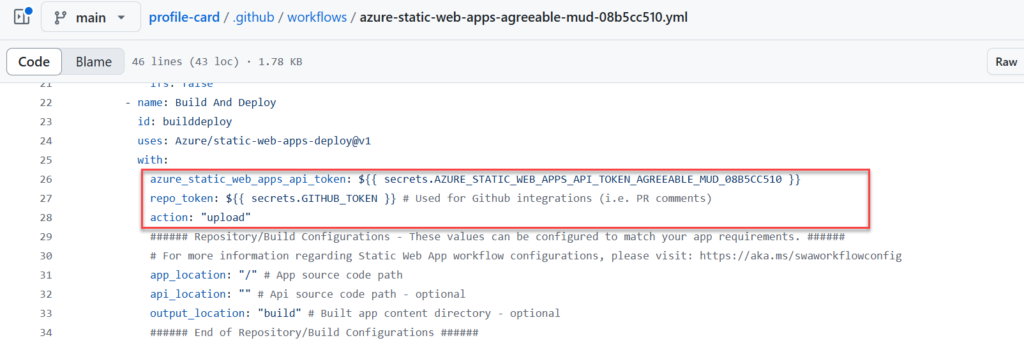
The token can be gotten from the Manage deployment token on the Azure static web app and into the GitHub repo. To add the token go to GitHub repository secrets under: GitHub → Settings → Secrets and Variables → Actions
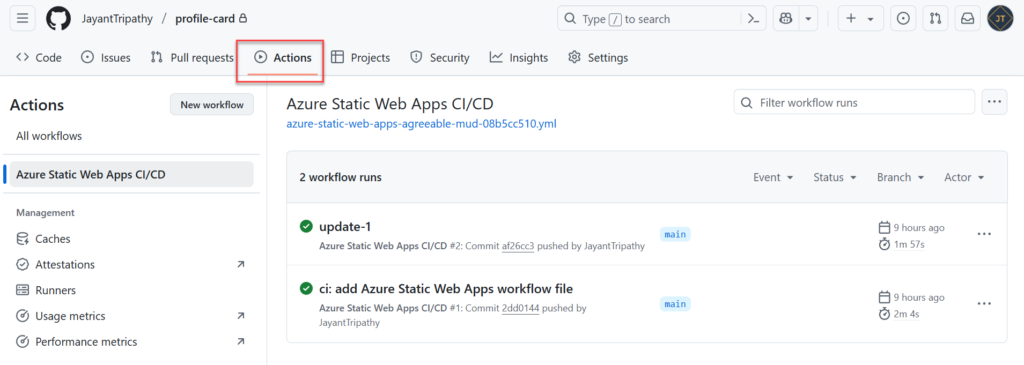
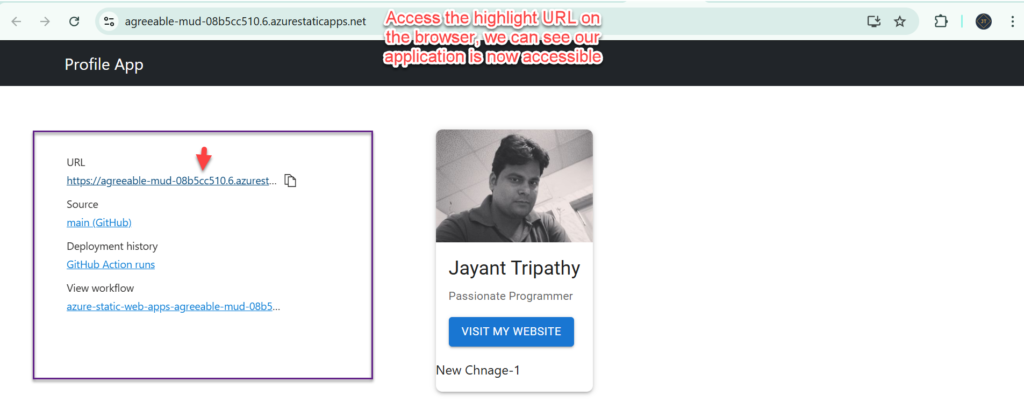
Now we can see the GitHub workflow automatically trigger when the new update will push into the repo. This workflow CICD process is completed.
That’s it for this article.
On forward of this article we may work on below two topics
- Managing Dev, QA, and Prod Environments with Azure Static Web Apps.
- How to add Unit testing and Liniting process
Conclusion
In this article, we discussed Effortless React Deployment 🚀: CI/CD with GitHub Actions & Azure Static Web Apps. By setting up CI/CD with GitHub Actions and Azure Static Web Apps, you can automate your React deployment process and ensure a smooth, hassle-free experience for both developers and users.
Start automating today and streamline your deployment process! 🚀
Leave behind your valuable queries and suggestions in the comment section below. Also, if you think this article helps you, do not forget to share this with your developer community. Happy Coding 🙂
Latest Articles
- How to Secure React.js application with Azure AD Authentication Using MSAL Library
- 🔐 Securing .NET Core Web Apps with Azure AD/Intra and MSAL
- Step-by-Step Guide to Using Azure Redis Cache in ASP.NET Core 9 Web API
- 🤖 Build a Full-Stack AI App with React, Node.js & Azure OpenAI
- Effortless React Deployment 🚀: CI/CD with GitHub Actions & Azure Static Web Apps
- Deploying Angular apps in Azure Blob Storage with CI/CD Integration 🚀
- How to Build a serverless CRUD app with Azure function and Cosmos DB
- How to resolve Function App Cannot Create within Azure Portal
- Create a responsive sidebar with Angular Material- Angular 18 Example Series
- How to Deploy Angular 17/18 App in GitHub Pages
- How to convert Text To Speech With Azure Cognitive Services using Angular and .Net Core
- Building CI/CD Pipeline(YAML) using Azure DevOps – GitHub to Azure Web App (PaaS)
- Upload Download and Delete files in Azure Blob Storage using ASP.NET Core and Angular
- How to upload files to Azure Blob Storage using Asp.Net Core Web API
- Introduction to Azure Cosmos DB
SUPPORT ME