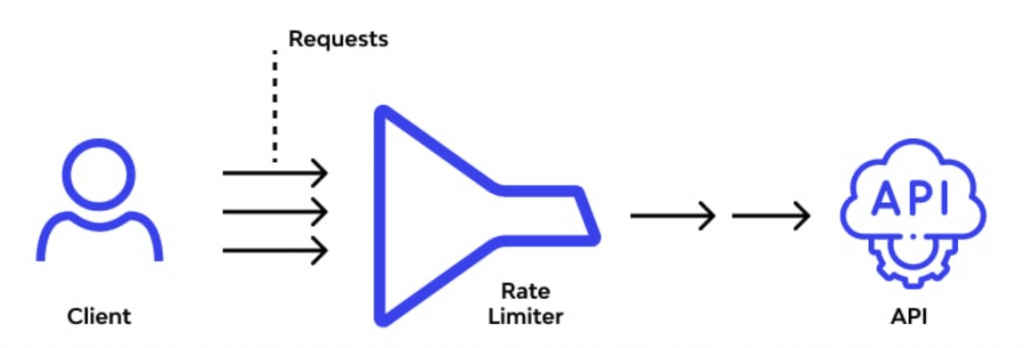
In this article we will learn about Implement Rate Limiting in ASP.Net Core Web API. Rate Limiting is the process of controlling the number of requests for a resource within a specific time window. Please read my previous article Microservices Architecture in ASP.NET Core-6.
When building APIs, regardless of the framework and language you are using, you may want to limit the number of requests an API accepts within a window of time. This is done by rate-limiting strategy which helps to limit the network traffic. Here we will see how we can restrict the call.

What is Rate Limiting?
Rate Limiting is the process of controlling the number of requests for a resource within a specific time window. Each unique user/IP address/client will have a limitation on the number of requests to an API endpoint.
If you are creating the API, it can be used by many clients. Sometimes some of the clients consume the API frequently without any limit. But if you want to limit consuming the API for a particular client within a certain time, then you can achieve it by Rate Limiting.
For example, you know that a database your application accesses can handle 1000 requests per minute safely, but are not confident that it can handle much more than that. You can put a rate limiter in your application that allows 1000 requests every minute and rejects any more requests before they can access the database. Thus, rate limiting your database and allowing your application to handle a safe number of requests without potentially having bad failures from your database.
Why do we need Rate Limiting?
- Rate Limiting helps protect against malicious bot attacks. For example, a hacker can use bots to make repeated calls to an API endpoint. Hence, rendering the service unavailable for anyone else. This is known as the Denial of Service (DoS) attack.
- Public APIs use rate-limiting for commercial purposes to generate revenue. A common business model is to pay a certain subscription amount for leveraging the API. So, they can only make so many API calls before paying more for an upgraded plan.
- Another purpose of rate limiting is to regulate traffic to the API according to infrastructure availability. Such usage is more relevant to the cloud-based API services that utilize a “pay as you go” IaaS strategy with cloud providers.
Implement Rate Limiting in the ASP.NET Core using NuGet Package
Let’s create an ASP.NET Core project in Visual Studio. Follow the steps outlined below to create a new ASP.NET Core project in Visual Studio.
- Click on “Create new project” and select “ASP.NET Core Web API Application” from the list of templates displayed
- Choose .NET 6.0 and click Next.
- You can make check boxes enabled for “Enable Docker Support” and “Configure for HTTPS” if you want to use it further else you can make unchecked it.
- Ensure that Authentication is set as “No Authentication” as we won’t be using authentication either.
Adding AspNetCoreRateLimit Nuget Package
Install the NuGet named as – AspNetCoreRateLimit to implement Rate limiting on the API.

Adding the Rate Limiting Configuration in Appsettinngs.json
Here we have added related configuration of rate limiting of a particular IP. We provided what end-point we want to restrict the rate limiting and no. of attempts.
{
  "Logging": {
    "LogLevel": {
      "Default": "Information",
      "Microsoft.AspNetCore": "Warning"
    }
  },
  "AllowedHosts": "*",
  "IpRateLimiting": {
    "EnableEndpointRateLimiting": true,
    "StackBlockedRequests": false,
    "RealIPHeader": "X-Real-IP",
    "ClientIdHeader": "X-ClientId",
    "HttpStatusCode": 429,
    "GeneralRules": [
      {
        "Endpoint": "GET:/WeatherForecast",
        "Period": "50s",
        "Limit": 2
      }
    ]
  }
}
Adding/Registering the service to implement rate limiting
Open the program.cs file and insert the following lines to add the services to implement rate limiting.
- We registered the service to get all the configuration values that are set up in appsettings.json file.
- Others are rate limiting services that are used to manage rate limiting.
- The service middleware is added to enable rate limiting.
using AspNetCoreRateLimit;

var builder = WebApplication.CreateBuilder(args);

// Add services to the container.

builder.Services.AddControllers();
// Learn more about configuring Swagger/OpenAPI at https://aka.ms/aspnetcore/swashbuckle
builder.Services.AddEndpointsApiExplorer();
builder.Services.AddSwaggerGen();

//// Services add for rate limiting
builder.Services.AddDistributedMemoryCache();

builder.Services.AddMemoryCache();

//// Services add for rate limiting
builder.Services.Configure<IpRateLimitOptions>(builder.Configuration.GetSection("IpRateLimiting"));
builder.Services.AddSingleton<IIpPolicyStore, MemoryCacheIpPolicyStore>();
builder.Services.AddSingleton<IRateLimitCounterStore, MemoryCacheRateLimitCounterStore>();
builder.Services.AddSingleton<IRateLimitConfiguration, RateLimitConfiguration>();
builder.Services.AddSingleton<IProcessingStrategy, AsyncKeyLockProcessingStrategy>();
builder.Services.AddInMemoryRateLimiting();

var app = builder.Build();

// Configure the HTTP request pipeline.
if (app.Environment.IsDevelopment())
{
    app.UseSwagger();
    app.UseSwaggerUI();
}

app.UseHttpsRedirection();

app.UseAuthorization();

//// Middleware Services use for rate limiting
app.UseIpRateLimiting();

app.MapControllers();

app.Run();
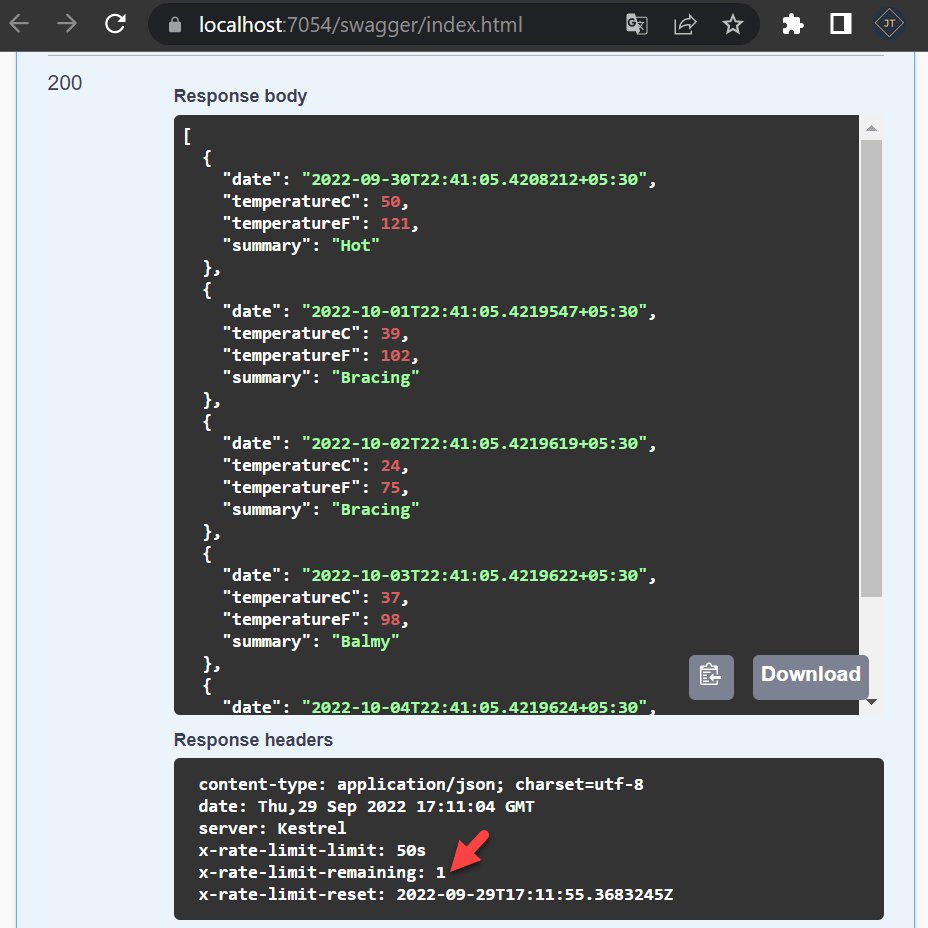
Run the application in swagger and execute the GET method url https://localhost:7054/WeatherForecast.
You can see now the rate limit is 1.

Execute the API from swagger for the second time. If you see the below screenshot, the quota for API calls for that particular API has been decreased by one, i.e. 0 -.

Execute the API from swagger for the third time, and if you see the below screenshot, the quota for API calls for that particular API has been exceeded.

This is how we implemented rate limiting with the AspNetCoreRateLimit Nuget Package; however, the second approach will be covered in the following article on implementing rate limiting with custom middleware.
Conclusion
Here we discussed about Implement Rate Limiting in ASP.Net Core Web API. Rate Limiting is the process of controlling the number of requests for a resource within a specific time window.
Leave behind your valuable queries and suggestions in the comment section below. Also, if you think this article helps you, do not forget to share this with your developer community. Happy Coding 🙂
Related Articles
- Step-by-Step Guide to Using Azure Redis Cache in ASP.NET Core 9 Web API
- .NET 8 Authentication with Identity in a Web API using Bearer Tokens and Cookies
- How to convert Text To Speech With Azure Cognitive Services using Angular and .Net Core
- CRUD operation using the repository pattern with .Net 8, Ef-Core, and MySQL
- How to use Response Compression in .NET Core
- How to Integrate GraphQL in .Net Core
- Upload Download and Delete files in Azure Blob Storage using ASP.NET Core and Angular
- How to upload files to Azure Blob Storage using Asp.Net Core Web API
- How to store app secrets in ASP.NET Core using Secret Manager
- Logging into Azure App Service with ASP.Net Core
Jayant Tripathy
Coder, Blogger, YouTuberA passionate developer keep focus on learning and working on new technology.
