
In this article we will learn about 🤖 Build a Full-Stack AI App with React, Node.js & Azure OpenAI. We are developing an intelligent web application that blends a dynamic user interface with a smart conversational backend. It takes advantage of Azure’s GPT models to provide real-time AI-driven features like chatbot responses, summaries, and even code suggestions, all while preserving scalability and speedy development via GitHub Copilot CLI and DevOps workflows. Please read my previous article on Building Real-Time Messaging with Kafka and .NET Core.
Artificial intelligence has advanced from a buzzword to a backend. Developers can now use cutting-edge GPT models via Azure OpenAI Service, and they can also improve their DevOps pipelines using the GitHub Copilot CLI. In this post, we’ll lead you through creating a full-stack AI-powered web app with React (TypeScript) on the frontend and Node.js on the backend, incorporating Azure OpenAI for AI logic and Copilot CLI for DevOps automation.
I had planned to integrate GitHub Copilot with Azure DevOps, however during the implementation phase, I discovered that it needed the GitHub Copilot CLI in GitHub Actions, as well as a GitHub Copilot Business or Enterprise license. I don’t have with the GitHub Copilot Business or Enterprise License, thus I would omit this section of the blog’s implementation. I’ll keep updating it as it comes in handy.
What is OpenAI and why with GitHub Copilot CLI in DevOps
OpenAI is an artificial intelligence research and deployment company that builds powerful AI models such as GPT-4, Codex, DALL·E, and others. These models can:
- Understand and generate human-like text
- Write and explain code
- Generate images, summaries, and more
- Answer complex questions conversationally
Azure OpenAI Service is Microsoft’s cloud-based offering that brings OpenAI’s models (like GPT-4) into the Azure ecosystem, allowing secure, scalable, enterprise-grade AI integration via REST APIs and SDKs.
What is GitHub Copilot CLI?
GitHub Copilot CLI is a command-line interface tool powered by OpenAI’s Codex model. It brings GitHub Copilot’s code suggestion superpowers into your terminal and DevOps pipelines.
With it, you can:
- Run
copilot explainto get a natural language explanation of your code - Use
copilot suggestto get code suggestions - Integrate AI into your CI/CD pipelines to auto-generate docs, explanations, commit messages, and more
Why Combine Them in DevOps?
Using Azure OpenAI and GitHub Copilot CLI together enables you to:
| Capability | Tool |
|---|---|
| Embed GPT into your app | ✅ Azure OpenAI |
| Automate AI help in CI/CD | ✅ GitHub Copilot CLI |
| Improve code quality during build | ✅ Copilot CLI |
| Provide intelligent features to end users | ✅ Azure OpenAI |
For example, you can have Copilot CLI generate a summary of changes in a PR while your app answers user inquiries in real time using Azure OpenAI.
- OpenAI (via Azure) helps your apps become intelligent.
- GitHub Copilot CLI helps your DevOps pipeline become smarter.
- Together, they bring AI to both code execution and delivery.
What We Build Here?
We’ll build a simple AI Assistant Web App:
- Users can enter a prompt (e.g., “Summarize this paragraph”).
- The app sends it to the backend.
- Backend calls Azure OpenAI and sends the AI’s reply back to the frontend.
- DevOps pipeline uses GitHub Copilot CLI to explain code and auto-suggest docs during CI.
Tech Stack Overview for this Content
| Frontend | React + TypeScript |
| Backend | Node.js + Express |
| AI Service | Azure OpenAI via @azure/openai SDK |
| DevOps | Azure DevOps Pipelines |
| CLI Assistant | GitHub Copilot CLI |
| Deployment | Azure App Service / Static Web Apps |
Creating Project on React, Node.js & Azure OpenAI
The below project structure that i have used for this project.
PromptPilot/
├── README.md
├── client/
│   ├── .env
│   ├── .gitignore
│   ├── package.json
│   ├── README.md
│   ├── tsconfig.json
│   ├── public/
│   │   ├── favicon.ico
│   │   ├── index.html
│   │   ├── manifest.json
│   │   └── robots.txt
│   └── src/
│       ├── App.css
│       ├── App.test.tsx
│       ├── App.tsx
│       ├── index.css
│       ├── index.tsx
│       ├── logo.svg
│       ├── react-app-env.d.ts
│       ├── reportWebVitals.ts
│       ├── setupTests.ts
│       └── components/
│           ├── ChatBox.css
│           └── ChatBox.tsx
├── server/
│   ├── .env
│   ├── .gitignore
│   ├── package.json
│   ├── tsconfig.json
│   └── src/
│ └── index.ts- client/
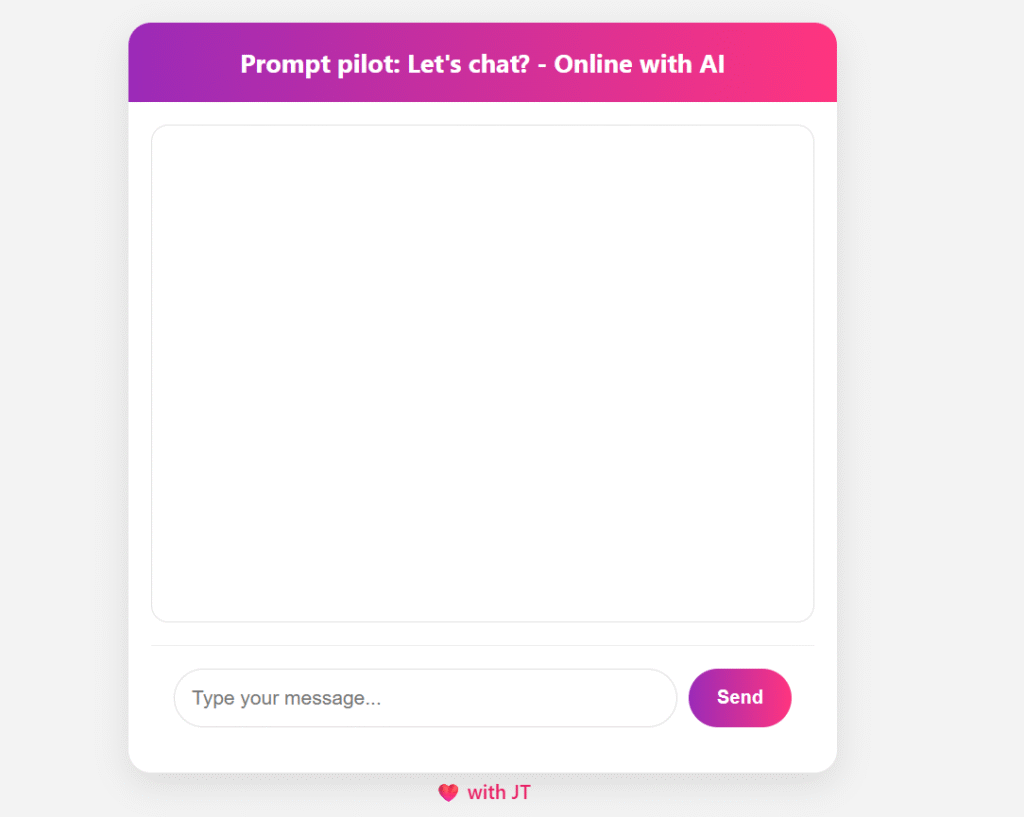
The React frontend. It provides a chat UI for users to interact with Azure OpenAI.ChatBox.tsx: Main chat component, handles user input, displays messages, and communicates with the backend.App.tsx: Loads the chat box component.- Styling is managed with CSS files for a modern, responsive look.
import React, { useState, useEffect, useRef } from 'react';
import './ChatBox.css';
import axios from "axios";

const apiBaseUrl = process.env.REACT_APP_API_URL;

interface Message {
  role: "user" | "assistant";
  content: string;
}

const ChatBox: React.FC = () => {
  const [input, setInput] = useState("");
  const [messages, setMessages] = useState<Message[]>([]);
  const [isTyping, setIsTyping] = useState(false);
  const chatLogRef = useRef<HTMLDivElement>(null);

  useEffect(() => {
    if (chatLogRef.current) {
      chatLogRef.current.scrollTop = chatLogRef.current.scrollHeight;
    }
  }, [messages]);

  const handleSend = async () => {
    if (!input.trim()) return;

    const userMessage: Message = { role: "user", content: input };
    const updatedMessages = [...messages, userMessage];
    setMessages([...updatedMessages, { role: "assistant", content: "Analyzing..." }]);
    setInput("");
    setIsTyping(true);

    try {
      const response = await axios.post(`${apiBaseUrl}/chat`, {
        messages: updatedMessages,
      });

      const assistantReply: Message = {
        role: "assistant",
        content: response.data.content,
      };

      setMessages((prev) => [...prev.slice(0, -1), assistantReply]);
    } catch (err) {
      console.error("Error:", err);
      setMessages((prev) => [...prev.slice(0, -1), { role: "assistant", content: "Something went wrong." }]);
    } finally {
      setIsTyping(false);
    }
  };

  return (
    <div className="chat-form-container">
      <div className="chat-form-card">
        <div className="chat-form-header">
          Prompt pilot: Let's chat? - Online with AI
        </div>
        <div className="chat-form">
          <div className="chat-log" ref={chatLogRef}>
            {messages.map((msg, i) => (
              <div key={i} className={`chat-bubble ${msg.role === "user" ? "chat-user" : "chat-assistant"}`}>
                <b>{msg.role === "user" ? "You" : "AI"}:</b> {msg.content}
              </div>
            ))}
            {isTyping && <div className="typing-indicator">AI is typing...</div>}
          </div>

          <div className="input-area">
            <input
              type="text"
              value={input}
              onChange={(e) => setInput(e.target.value)}
              onKeyDown={(e) => e.key === "Enter" && handleSend()}
              placeholder="Type your message..."
            />
            <button onClick={handleSend}>Send</button>
          </div>
        </div>
      </div>
      <div className="love-label">❤️ with JT</div>
    </div>
  );
};

export default ChatBox;
REACT_APP_API_URL=http://localhost:3000- server/
The Node.js Express backend. It acts as a bridge between the React client and Azure OpenAI.index.ts: Sets up Express server, handles/chatPOST requests, forwards messages to Azure OpenAI, and returns responses to the client.
import express from "express";
import cors from "cors";
import dotenv from "dotenv";
import axios from "axios";

dotenv.config();

const app = express();
app.use(cors());
app.use(express.json());

const AZURE_OPENAI_ENDPOINT = process.env.AZURE_OPENAI_ENDPOINT;
const AZURE_OPENAI_API_KEY = process.env.AZURE_OPENAI_API_KEY;
const AZURE_DEPLOYMENT_NAME = process.env.AZURE_OPENAI_DEPLOYMENT || "gpt-35-turbo";

// ✅ GET endpoint for health check
app.get("/", (req, res) => {
  res.send("👋 Welcome to the Azure OpenAI Chat Server!");
});

// ✅ POST /chat for chat requests
app.post("/chat", async (req, res) => {
  const { messages } = req.body;

  try {
    const response = await axios.post(
      `${AZURE_OPENAI_ENDPOINT}/openai/deployments/${AZURE_DEPLOYMENT_NAME}/chat/completions?api-version=2024-02-15-preview`,
      {
        messages: messages || [{ role: "user", content: "Hello!" }],
        temperature: 0.7,
        max_tokens: 1000,
        top_p: 0.95,
        frequency_penalty: 0,
        presence_penalty: 0
      },
      {
        headers: {
          "api-key": AZURE_OPENAI_API_KEY || "",
          "Content-Type": "application/json"
        }
      }
    );

    const reply = response.data.choices[0].message;
    res.json(reply);
  } catch (error: any) {
    console.error("Azure OpenAI error:", error?.response?.data || error.message);
    res.status(500).json({ error: "Failed to get response from Azure OpenAI" });
  }
});

const PORT = process.env.PORT || 3000;
app.listen(PORT, () => {
  console.log(`🚀 Azure OpenAI Server running at http://localhost:${PORT}`);
});
AZURE_OPENAI_ENDPOINT=<Your Azure Open AI End Point> //https://xyz.openai.azure.com
AZURE_OPENAI_API_KEY= <Your Azure Open API Key>
AZURE_OPENAI_DEPLOYMENT=gpt-4
PORT=3000AZURE_OPENAI_ENDPOINT: Your Azure OpenAI resource URL (e.g.,https://xyz.openai.azure.com).AZURE_OPENAI_API_KEY: Secret key to access Azure OpenAI APIs.AZURE_OPENAI_DEPLOYMENT: The deployment name of your model (e.g.,gpt-4).PORT: Local server port your app runs on (e.g.,3000).
- public/
Contains static assets and configuration files for the React app (favicon, manifest, robots.txt, etc.). - Configuration
.envfiles in both client and server for environment variables (API keys, endpoints).- TypeScript is used for both client and server for type safety.
Source Code
Latest Post
- How to Secure React.js application with Azure AD Authentication Using MSAL Library
- 🔐 Securing .NET Core Web Apps with Azure AD/Intra and MSAL
- Step-by-Step Guide to Using Azure Redis Cache in ASP.NET Core 9 Web API
- 🤖 Build a Full-Stack AI App with React, Node.js & Azure OpenAI
- Effortless React Deployment 🚀: CI/CD with GitHub Actions & Azure Static Web Apps
- Deploying Angular apps in Azure Blob Storage with CI/CD Integration 🚀
- How to Build a serverless CRUD app with Azure function and Cosmos DB
- How to resolve Function App Cannot Create within Azure Portal
- How to convert Text To Speech With Azure Cognitive Services using Angular and .Net Core
- Building CI/CD Pipeline(YAML) using Azure DevOps – GitHub to Azure Web App (PaaS)
- Upload Download and Delete files in Azure Blob Storage using ASP.NET Core and Angular
- How to upload files to Azure Blob Storage using Asp.Net Core Web API
- Introduction to Azure Cosmos DB
- How to create Cosmos DB in Azure
- Logging into Azure App Service with ASP.Net Core
Conclusion
In this article we discussed about Build a Full-Stack AI App with React Node.js and Azure OpenAI. We developed an intelligent web application that blends a dynamic user interface with a smart conversational backend.
Leave behind your valuable queries and suggestions in the comment section below. Also, if you think this article helps you, do not forget to share this with your developer community. Happy Coding 🙂
SUPPORT ME