
In this article, we discuss How to convert Text To Speech With Azure Cognitive Services in Angular and .Net Core. We will cover here what is Azure Cognitive Service and the benefits of use. Azure Cognitive Services offers various tools and services for converting text to speech. One of the primary services for this purpose is the Azure Cognitive Services Text to Speech API. Please read the previous article on Logging into Azure App Service with ASP.Net Core.
</> Please find the Source Code on this link.
What is Azure Cognitive Service and why is it used?
Azure Cognitive Services is a comprehensive suite of cloud-based artificial intelligence (AI) and machine learning (ML) services offered by Microsoft. It empowers developers to add intelligent features to their applications without the need for extensive AI expertise.
Computer Vision, Speech, Language, Decision, and Search are just a few of the domains covered by Azure Cognitive Services. These services enable organizations to employ AI to improve their applications and give more natural and intuitive interactions to their users.
- Computer Vision: Azure Computer Vision allows applications to understand and interpret visual content. It can analyze images and videos, extract information from them, and perform tasks like image recognition, object detection, and content moderation.
- Speech: The Speech service provides capabilities for converting speech to text (Speech-to-Text), text-to-speech (Text-to-Speech), and speech translation, making it valuable for applications like transcription services, voice assistants, and multilingual communication.
- Language: Azure Cognitive Services offers a range of language-related tools, including Language Understanding (LUIS) for natural language understanding, Text Analytics for sentiment analysis and language detection, and Translator for language translation.
- Decision: The Decision service helps businesses make data-driven decisions with services like Anomaly Detectors for identifying anomalies in time-series data, Content Moderators for content filtering, and Personalizer for real-time personalization.
- Search: Azure Cognitive Search enables developers to build powerful search capabilities into their applications, making it easier for users to find information quickly. It supports features like faceted navigation, full-text search, and AI-powered recommendations.
Benefits of using Azure Cognitive Service
- Azure Cognitive Services also can build custom machine learning models using Azure Custom Vision, Form Recognizer, and other tools. It provides pre-trained models and APIs for simple integration with applications and services.
- Azure Cognitive Services prioritizes security and compliance, with data privacy and protection protections incorporated into the platform. Azure adheres to several industry standards and regulations to safeguard the security of sensitive data.
- Microsoft invests in research and development to increase accuracy, expand capabilities, and support more languages and regions through Azure Cognitive Services. This ensures that developers may stay at the forefront of AI and ML innovation without having to manage infrastructure continuously.
Azure Cognitive Services is a powerful and versatile set of AI and machine learning services that makes AI available to developers, enterprises, and organizations of all sizes, allowing them to create more intelligent, inventive, and user-friendly apps.
What is Azure Speech Service?
Azure Speech Services provides voice processing capability for your application. It allows the developer to simply incorporate the speech-processing functionality of your application with minimal coding work.
The Speech processing capability includes the following
- Speech to text: You can convert the speech to readable text with the help of the Azure Cognitive Speech API.
- Text to speech: We can convert the Text to audible speech easily with the help of the Azure Speech API.
- Speech translation: you can integrate speech translation easily into your apps using Azure cognitive services Speech API.
- Speaker recognition: Provides you the ability to recognize the people speaking based on the audio.
Prerequisites
- Azure subscription – Create one for free.
- Create a Speech resource in the Azure portal.
- You should have the speech service subscription along with the Azure Subscription.
- Visual Studio 2019 or higher version. ( I used VS 2022 )
Create the Azure Cognitive Services Speech API
Follow the below steps to Create the Azure Cognitive Services Speech API using Azure Portal.
- Go to Azure Portal and log in with your Azure credentials.
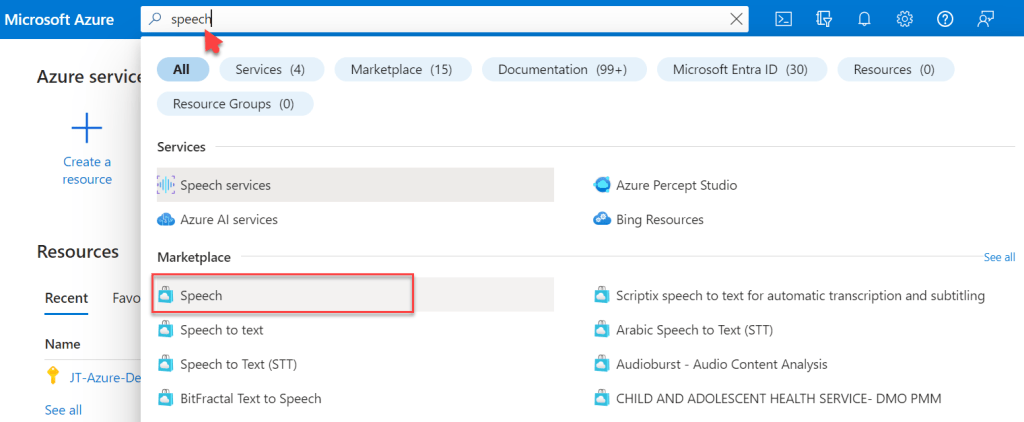
- Then, search for the Speech and click on the search result Speech under the Marketplace as highlighted below.
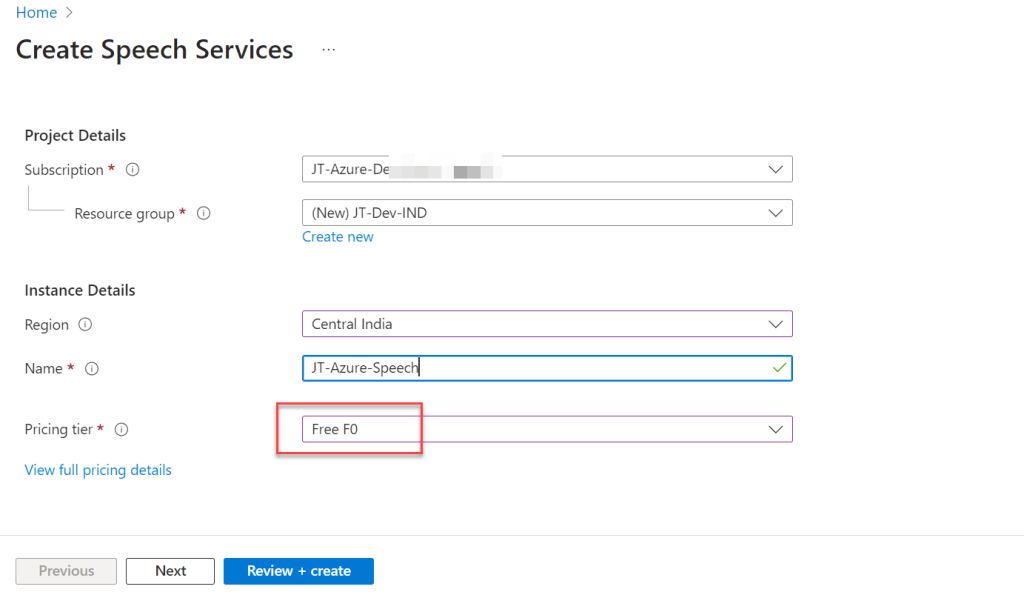
- After clicking on the Speech, it opens the below window where we need to create the below details and then click on Review & Create.
- Name: You must provide a name for the Azure Cognitive Services Speech API.
- Subscription: You need to provide a valid subscription that you want to use to create the Speech Azure Cognitive Services.
- Location: You must provide a location for the Speech Azure Cognitive Services like I used Central India
- Pricing tier: Choose the Pricing tier as Free F0. which is free and can be used for the demo. You can click the view full pricing details link to check out all the price details and select one based on your requirements.
- Resource group: You can select your existing resource group or create a new one by clicking on the Create new link if you don’t have any existing Resource Group.
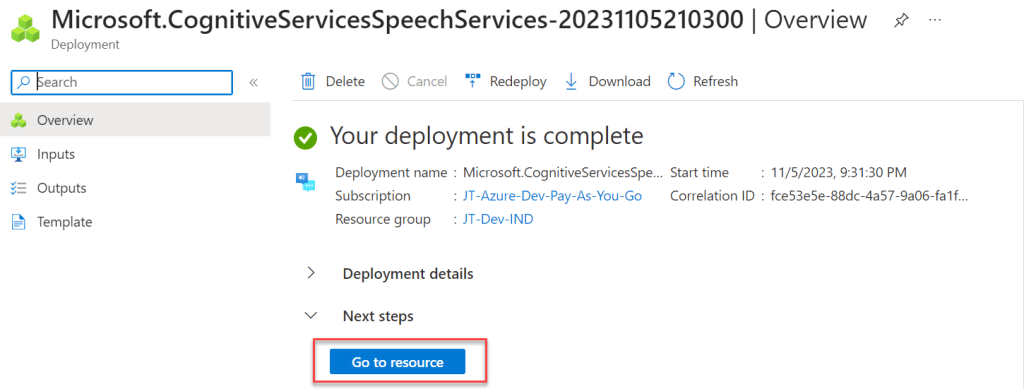
- On the below screen, click the Go to resource button to navigate to the Speech Azure Cognitive Service you created.
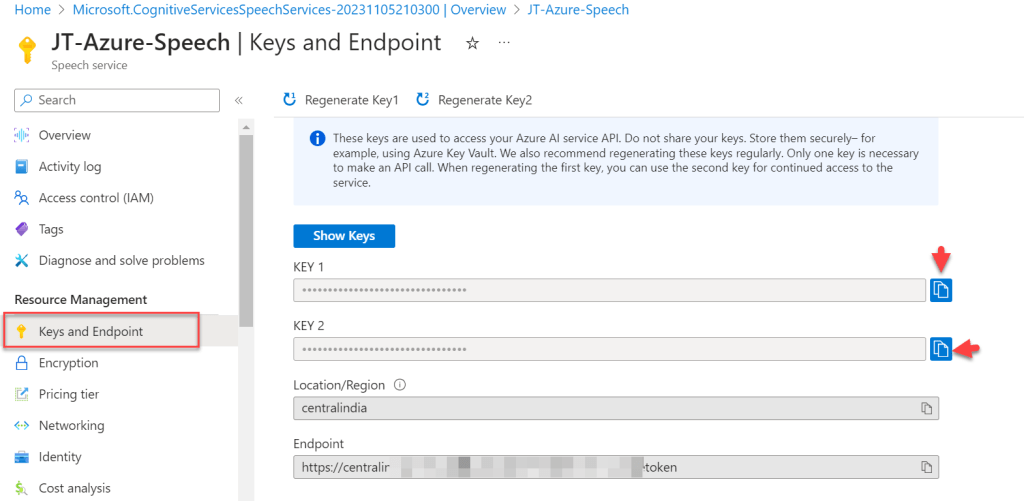
- We need the key for the Speech Cognitive Service to use in our code. On the Cognitive Service page, click on the Keys and Endpoint link from the left navigation. Now, you can see the Key 1 or Key 2 option. click the copy button to copy the KEY 1 to the clipboard as highlighted below. The key value we will have to use in the code.
If you don’t want the old key, click on the ReGenerate Key1 or ReGenerate Key2 button to generate a new key. If you want the Key values, click the Show Keys button.
We have completed the first step of the development activities. The next step is to create the .NET Core API to convert Speech to text and then create the Angular UI.
Create an ASP.Net Core API Project and Angular App
Creating .NET Core API Project
- Launch the Visual Studio IDE and click on “Create new project”.
- In the “Create new project” window, select “
ASP.NET Core Web API Project” from the list of templates displayed. - Click Next. In the “Configure your new project” window, specify the name and location for the new project and then click Create.
- In the “Create New ASP.NET Core API” window shown next, select .NET Core as the runtime and
.NET 8.0from the drop-down list at the top. Select “API” as the project template to create a new ASP.NET Core API application. - Ensure that the checkboxes “Enable Docker Support” are disabled s we won’t be using the default feature we will add it manually later and “Configure for HTTPS” are checked.
- Ensure that Authentication is set as “No Authentication” as we won’t be using authentication either and Click Create.
Creating Angular APP
We have created an Angular app named ng-cogntive, Please check this link on how to create an Angular App.
The API and UI structure is shown below, with our API and UI inserted accordingly. You can adjust the structure based on your preferences and usability.
.Cognitive-Speech
 ├── API
	── SpeechServiceAPI
        ├── Controllers
        ├── Helper
        ├── Models
 └── UI
    ├── ng-Cognitive
         ├── src
		     ├── app
			   ├── components
			   ├── models
			   ├── services
Modify the API and enable text-to-speech service
Add the AzureSetting Key to the appsettings.json File. To avoid any unplanned call I added the key with *, you can copy the Key from the Azure panel and paste it here.
 "AzureSettings": {
   "SubscriptionKey": "*************00f48a2896*******",
   "ServiceRegion": "centralindia"
 }
Creating a Synthesize Controller to convert Text to Speech
 [HttpPost("TextToSpeech")]
 [Consumes("application/json")]
 public async Task<IActionResult> SynthesizeSpeech([FromBody] TextModel request)
 {
     var SubscriptionKey = _configuration["AzureSettings:SubscriptionKey"];
     var ServiceRegion = _configuration["AzureSettings:ServiceRegion"];

     var speechConfig = SpeechConfig.FromSubscription(SubscriptionKey, ServiceRegion);
     speechConfig.SpeechSynthesisVoiceName = VoiceHelper.GetSpeechSynthesisVoice(request.Language, request.VoiceType);
     var synthesizer = new SpeechSynthesizer(speechConfig, null);

     var result = await synthesizer.SpeakTextAsync(request.Text);
     if (result.Reason == ResultReason.SynthesizingAudioCompleted)
     {
         var audioData = result.AudioData;
         return File(audioData, "audio/wav");
     }
     else if (result.Reason == ResultReason.Canceled)
     {
         var cancellation = SpeechSynthesisCancellationDetails.FromResult(result);
         return BadRequest(cancellation.ErrorDetails);
     }
     return BadRequest("Speech synthesis failed.");

}- Line #5-6: To get the azure key and region.
- It gets the data from TextModel that is user can provide to the API and using Azure Synthesize it converts Tet to Speech.
Modify the Angular Application and enable text-to-speech service
<div class="container">
    <div class="radio-button-group">
      <legend>Choose a Voice Gender :</legend>
      <label for="option1">
        <input type="radio" id="option1" name="options" [(ngModel)]="voiceGender" value="F">
        Female
      </label>
      <label for="option2">
        <input type="radio" id="option2" name="options" [(ngModel)]="voiceGender" value="M">
        Male
      </label>
    </div>
    <div class="row dropdown-container">
      <label for="myDropdown">Choose a Language :</label>
      <select [(ngModel)]="selectedLang" class="dropdown">
        <option value="1">--Choose Language--</option>
        <option *ngFor="let lang of languageOptions" [value]="lang.value">
          {{ lang.label }}
        </option>
      </select>
    </div>
    <p>Give the text for conversion:</p>
    <textarea [(ngModel)]="textToSynthesize" class="text-area"></textarea><br>
    <button (click)="synthesizeText()" class="custom-button">Convert Text to Speech</button>
</div>- On the Angular HTML, we have included a Gender section where we may specify whether we want to hear voices from males or females. Select Language and then convert the text to speech based on the configuration.
export class TexttospeechComponent {
  textToSynthesize: string = '';
  selectedLang!: string;
  voiceGender!: string;

  languageOptions = [
    { value: 'en-IN', label: 'English' },
    { value: 'hi-IN', label: 'Hindi' },
    { value: 'ml-IN', label: 'Malayalam' },
    { value: 'ta-IN', label: 'Tamil' },
    { value: 'te-IN', label: 'Telugu' },
    { value: 'kn-IN', label: 'Kannada' }
  ];

  constructor(private textToSpeechService: TextToSpeechService, private loadingService: LoadingService) {
    this.voiceGender = "F";
  }

  synthesizeText(): void {
    this.loadingService.showLoader();
    this.textToSpeechService.synthesizeText(new TextModel(this.textToSynthesize, this.selectedLang, this.voiceGender)).subscribe({
      next: (audioBlob) => {
        const audioUrl = URL.createObjectURL(audioBlob);
        const audio = new Audio(audioUrl);
        audio.play();
        this.loadingService.hideLoader();
      },
      error: (err) => {
        console.error('Error synthesizing text', err);
        this.loadingService.hideLoader();
      },
      complete: () => console.info('Request completed')
    }
    );
  }
}- By passing the text into service it generates the speech.
export class TextToSpeechService {
  private readonly apiUrl = 'https://localhost:7139/api/Synthesize/TextToSpeech';

  constructor(private http: HttpClient) {}

  synthesizeText(request: TextModel): Observable<Blob> {
    const headers = new HttpHeaders({ 'Content-Type': 'application/json' });
    return this.http.post<Blob>(this.apiUrl , request , { headers, responseType: 'blob' as 'json' });
  }
}
Complete the output on the below video:
Conclusion
That’s it for this article about How to convert Text To Speech With Azure Cognitive Services. We discussed How to convert Text To Speech With Azure Cognitive Services in Angular and .Net Core. We will cover here what is Azure Cognitive Service and the benefits of use. Azure Cognitive Services offers various tools and services for converting text to speech.
Leave behind your valuable queries and suggestions in the comment section below. Also, if you think this article helps you, do not forget to share this with your developer community. Happy Coding 🙂
Latest Articles
- How to Secure React.js application with Azure AD Authentication Using MSAL Library
- 🔐 Securing .NET Core Web Apps with Azure AD/Intra and MSAL
- Step-by-Step Guide to Using Azure Redis Cache in ASP.NET Core 9 Web API
- 🤖 Build a Full-Stack AI App with React, Node.js & Azure OpenAI
- Effortless React Deployment 🚀: CI/CD with GitHub Actions & Azure Static Web Apps
- Deploying Angular apps in Azure Blob Storage with CI/CD Integration 🚀
- How to Build a serverless CRUD app with Azure function and Cosmos DB
- How to resolve Function App Cannot Create within Azure Portal
- .NET 8 Authentication with Identity in a Web API using Bearer Tokens and Cookies
- How to convert Text To Speech With Azure Cognitive Services using Angular and .Net Core
SUPPORT ME