
In this article we will discuss about How to Implement AutoMapper in ASP.Net Core – Beginner’s Guide. In Nutshell, AutoMapper is an object-object mapper. It transforms the input object of one type into an output object of another type. Please read my previous article Building CRUD REST APIs in ASP.Net Core 7.0 with EF.
What is AutoMapper and why it required?
AutoMapper in C# is a library used to map data from one object to another. It acts as a mapper between two objects and transforms one object type into another. It converts the input object of one type to the output object of another type until the latter type follows or maintains the conventions of AutoMapper.
In real-time projects, entity layers may handle communication from services or DataLayers. To display the data in the application, we must divide the class into ViewModel and Model classes. UI Layers, on the other hand, may fail to sync with the entities. As a result, AutoMapper is required to map entities to model or viewModel.
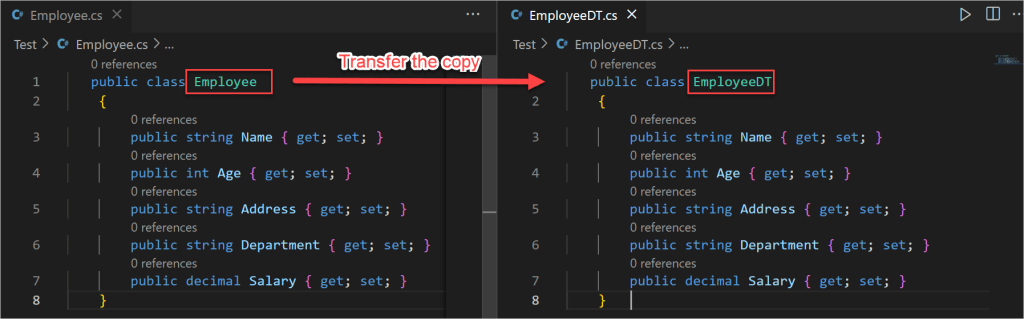
Now, if you want to copy the data or transfer the data from the Employee object to the EmployeeDT object, then in the traditional approach first you need to create and populate the Employee object and then assign the data from one to other,
Employee emp = new Employee();
emp.Name = "John";
emp.Age= 30;
emp.Address = "USA";
emp.Department = "IT";
emp.Salary= 30000;

EmployeeDT empDT = new EmployeeDT();
empDT.Name = emp.Name;
empDT.Age = emp.Age;
empDT.Address = emp.Address;
empDT.Department = emp.Department;
empDT.Salary= emp.Salary;
In real-time projects, many times we need to map the objects between the UI/Domain or Service/Domain layers. Mapping the objects between them is very hectic using the traditional approach that we discussed in the above example. So, is there any simplest solution by which we can map two objects? Yes, there is, and the solution is AutoMapper and we discuss more it on below.
Why do we need to Map Business Objects to DTOs?
When working on applications, you might typically want to map objects pertaining to similar or dissimilar types. Here’s why you often need this: The models (also called entities) in an application typically map with the database tables of the database in use. So, if you have a model class named Product, it will have properties that correspond to each of the fields of the Product table in the database. However, not all fields of the Product class might be needed in the presentation layer. You may just want to have three properties such as Id, Name, and Price in the product entity in the presentation layer of your application.
How to Implement AutoMapper in ASP.Net Core
Creating an ASP.Net Core API
- Launch the Visual Studio IDE and click on “Create new project”.
- In the “Create new project” window, select “
ASP.NET Core API” from the list of templates displayed. - Click Next. In the “Configure your new project” window, specify the name and location for the new project and then click Create.
- In the “Create New ASP.NET Core API” window shown next, select .NET Core as the runtime and
.NET 7.0from the drop-down list at the top. Select “API” as the project template to create a new ASP.NET Core API application. - Ensure that the check boxes “Enable Docker Support” is disabled s we won’t be using those features here and “Configure for HTTPS” are checked.
- Ensure that Authentication is set as “No Authentication” as we won’t be using authentication either and Click Create.
Adding the AutoMapper Packages
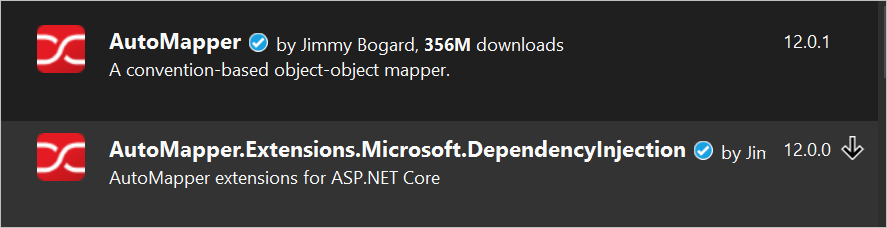
To use AutoMapper in an ASP.NET Core project, install AutoMapper.Extensions.Microsoft.DependencyInjection nuget package.
Register the AutoMapper Service
After installing the required package, the next step is to configure the services. Let’s do it in the Startup.cs class if you are using .NET 5 or before
public void ConfigureServices(IServiceCollection services)
{
    services.AddAutoMapper(typeof(Startup));
    services.AddControllers();
}
For .NET 6 and onwards, we have to modify the Program class like below:
builder.Services.AddAutoMapper(typeof(Program));
builder.Services.AddControllers();
Creating the User class and User Model class
public class User
    {
        public int Id { get; set; }
        public string Name { get; set; }
        public string Password { get; set; }
        public string Address { get; set; }
        public string Department { get; set; }
    }
public class UserDTO
{
public int Id { get; set; }
public string Name { get; set; }
public string Password { get; set; }
public string Address { get; set; }
public string Department { get; set; }
}Creating the MappingProfile.cs file
create the MappingProfile.cs file under the root project and write the below snippet. Here CreateMap method is used to map data between User and UserDTO.
  public class MappingProfile : Profile
    {
        public MappingProfile()
        {
            CreateMap<User, UserDTO>();
        }
    }
Though I have already discussed how to create the CRUD of Rest APIs in .NET Core please go through it.
Implementing the Auto Mapper functionality in Controller
- We inject the
IMapperon the controller and mapped theUserDTOcontext to return theGetUsers.
[Route("api/[controller]")]
    [ApiController]
    public class UsersController : ControllerBase
    {
        private readonly DataContext _context;
        private readonly IMapper _mapper;

        public UsersController(DataContext context, IMapper mapper)
        {
            _context = context;
            _mapper = mapper;
        }

        // GET: api/Users
        [HttpGet]
        public async Task<IEnumerable<UserDTO>> GetUsers()
        {
          var records = await _context.Users.ToListAsync();
          return _mapper.Map<IEnumerable<UserDTO>>(records);
        }
}
We can see the Auto Mapper is pointing to the destination UserDTO but here the problem is the password is shown to the end user as the UserDTO model is expose the properties of Password.
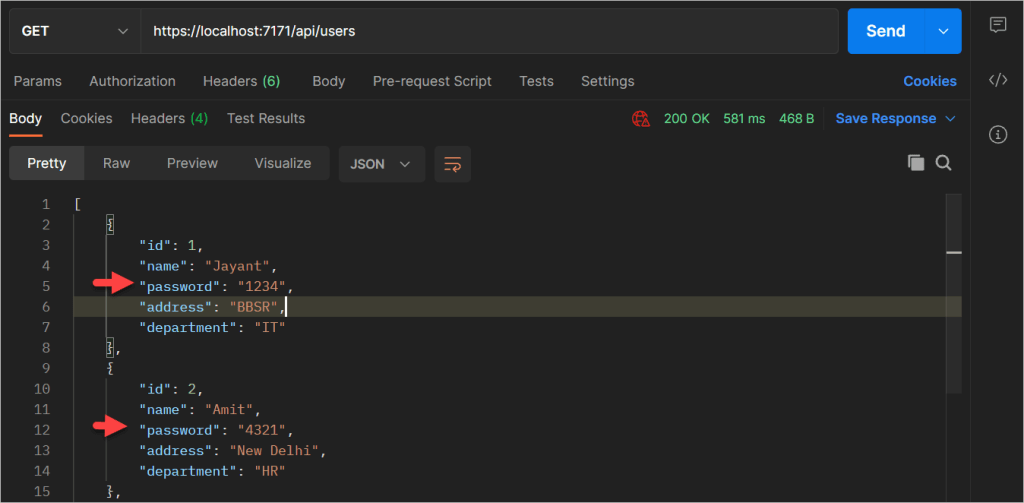
To overcome this, we may remove the password properties from UserDTO and pointing the mapper fields that need to expose to the client, that means whatever want to show to client that only need to expose. Let’s prove this.
How to expose the specific object using Auto mapper
To expose the specific object let’s change the UserDTO class and map the profile which object want to expose.
UserDTO
public class UserDTO
    {
        public string Name { get; set; }
        public string Address { get; set; }
        public string Department { get; set; }
    }
Mapping Profile
- On below we map the object that wants to expose to the end user.
We use the CreateMap() method to create a mapping by providing the source and destination properties.
If we want to customize the configuration for individual members, we can use the ForMember() method which has the parameters destinationMember.
public class MappingProfile : Profile
{
public MappingProfile()
{
CreateMap<User, UserDTO>()
.ForMember(name => name.Name,
opt => opt.MapFrom(src => src.Name))
.ForMember(address => address.Address,
opt => opt.MapFrom(src => src.Address))
.ForMember(department => department.Department,
opt => opt.MapFrom(src => src.Department));
CreateMap<User, UserDTO>();
}
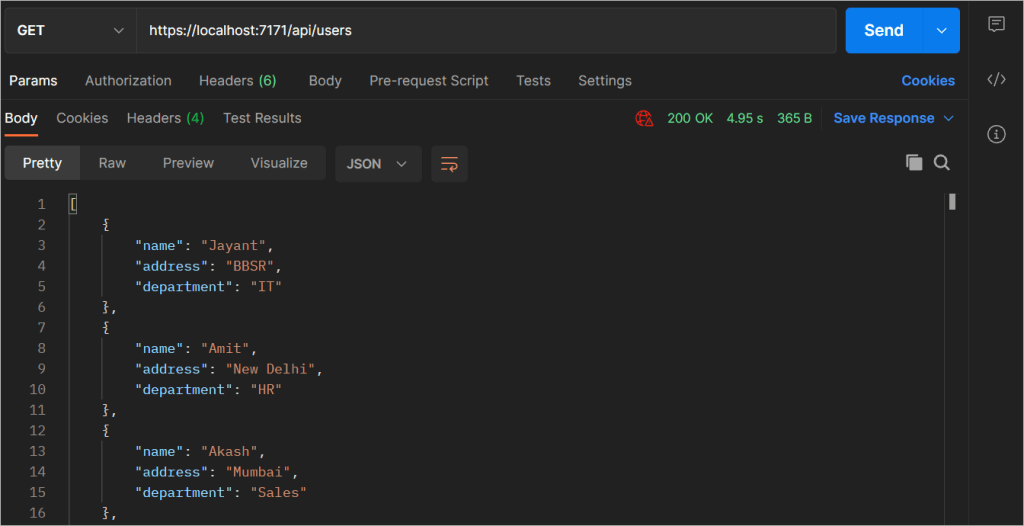
}Run the application and using postman we can see the response. We didn’t expose the Id and password here.
Reverse Mapping
So far, we have only looked at one-directional mapping, which means if we have two types Type A and Type B, then we only map Type A to Type B. But, by using Automapper’s Reverse mapping capability, it is possible to achieve bi-directional mapping:
 CreateMap<User, UserDTO>()
               .ForMember(name => name.Name,
                          opt => opt.MapFrom(src => src.Name))
               .ForMember(address => address.Address,
                          opt => opt.MapFrom(src => src.Address))
               .ForMember(department => department.Department,
                          opt => opt.MapFrom(src => src.Department))
               .ReverseMap();
Once Reverse Mapping is configured, we can map back from destination to source type:
var mappedUser = _mapper.Map<User>(UserDTO);This way, we can easily achieve bi-directional mapping between types using AutoMapper’s Reverse Mapping capabilities.
Guidelines of Auto Mapper
Do follow
- Always use the
AutoMapper.Extensions.Microsoft.DependencyInjectionpackage in ASP.NET Core withservices.AddAutoMapper(assembly[]). This package will perform all the scanning and dependency injection registration. We only need to declare the Profile configurations. - Always organize configuration into
Profiles. Profilesallow us to group a common configuration and organize mappings by usage. This lets us put mapping configuration closer to where it is used, instead of a single file of configuration that becomes difficult to edit/maintain. - Always use configuration options supported by LINQ over their counterparts as LINQ query extensions have the best performance of any mapping strategy.
Don’t follow
- Do not call
CreateMap()on each request. It is not a good practice to create the configuration for each mapping request. Mapping configuration should be done once at startup. - Do not use inline maps. Inline maps may seem easier for very simple scenarios, but we lose the ease of configuration.
- If we have to write a complex mapping behavior, it might be better to avoid using AutoMapper for that scenario.
- Do not put any logic that is not strictly mapping behavior into the configuration. AutoMapper should not perform any business logic, it should only handle the mapping.
Conclusion
In this article, we have learned about How to Implement AutoMapper in ASP.Net Core , what is it and when to use it. We discussed Installing, Configuring, and using the AutoMapper component in our ASP.NET Core application.
Leave behind your valuable queries and suggestions in the comment section below. Also, if you think this article helps you, do not forget to share this with your developer community. Happy Coding 🙂
Related Articles
- Step-by-Step Guide to Using Azure Redis Cache in ASP.NET Core 9 Web API
- .NET 8 Authentication with Identity in a Web API using Bearer Tokens and Cookies
- How to convert Text To Speech With Azure Cognitive Services using Angular and .Net Core
- CRUD operation using the repository pattern with .Net 8, Ef-Core, and MySQL
- How to use Response Compression in .NET Core
- How to Integrate GraphQL in .Net Core
- Upload Download and Delete files in Azure Blob Storage using ASP.NET Core and Angular
- How to upload files to Azure Blob Storage using Asp.Net Core Web API
- How to store app secrets in ASP.NET Core using Secret Manager
- Logging into Azure App Service with ASP.Net Core
Jayant Tripathy
Coder, Blogger, YouTuberA passionate developer keep focus on learning and working on new technology.
Support me