
In this article we will learn about How to Send Emails from ASP.Net Core using Azure. Azure provides a dedicated service for securely sending emails at scale. This tutorial will walk you through the entire process of setting this up in.NET. Please read my previous article of Send Emails from ASP.NET Core using Amazon SES.
Users can now send bulk emails directly from their app thanks to Azure Email Communication Service. It can be integrated with pre-made software development kits (SDKs) for Java, Python1, C#, JavaScript, and three other programming languages. It is a new primitive that enables Application-to-Person (A2P) use cases and big volume transactional, bulk, and marketing emails on the Azure Communication Services platform.
Please find source code here in this link.
Send emails using Azure Communication Service from Azure
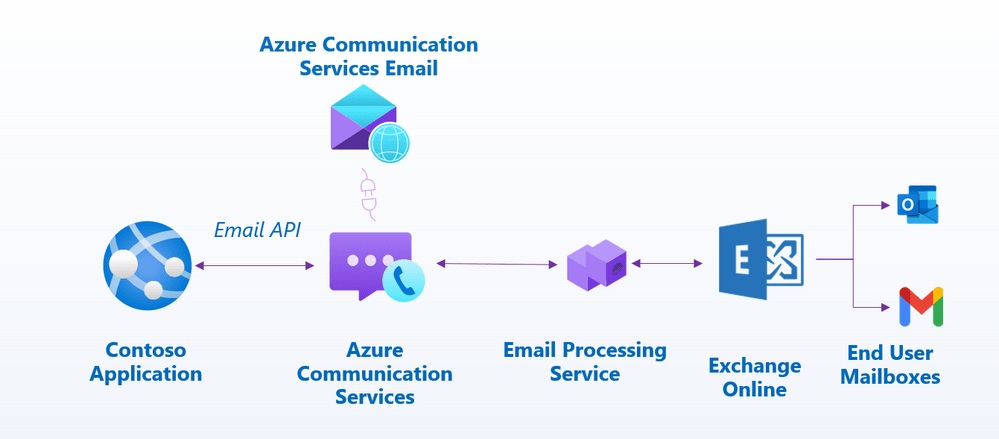
Azure Communication Service or Azure Email Email is a new function that allows customers to send large amounts of email directly from their app. It is compatible with pre-built software development kits (SDKs) for four programming languages: C#, JavaScript, Java, and Python. It makes use of an email processing service and sends emails to recipients using Exchange Online.
The Email communicated to Azure Communication Email Service with Azure Communiation Services and the email is processed before being delivered to the user’s inbox.
Azure Email Configurations
We need to configure to Create Email Communication Service and Communication Service resources to use the Azure Email Communication in .NET
Creating Email Communication Service
To start sending emails from Azure, first, we need to create an Email Communication Service resources using below steps.
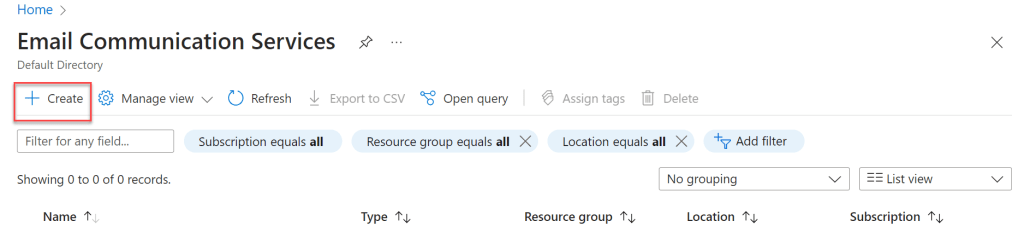
Step-1: To build the Email Communication Service, as shown below, search on the top bar for services and then click on the Email Configuration Services option.

Step-2: Click on the highlighted link to create the Email Configuration Services.
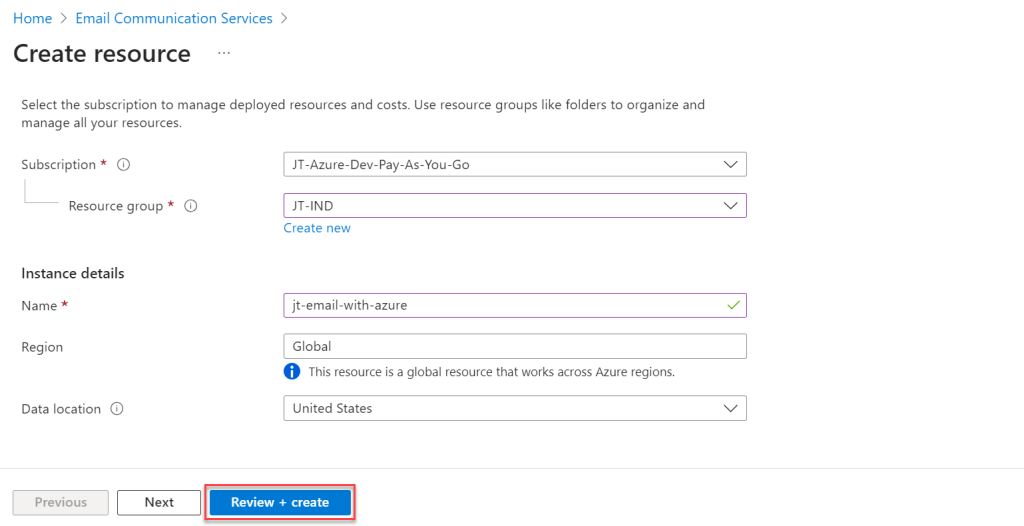
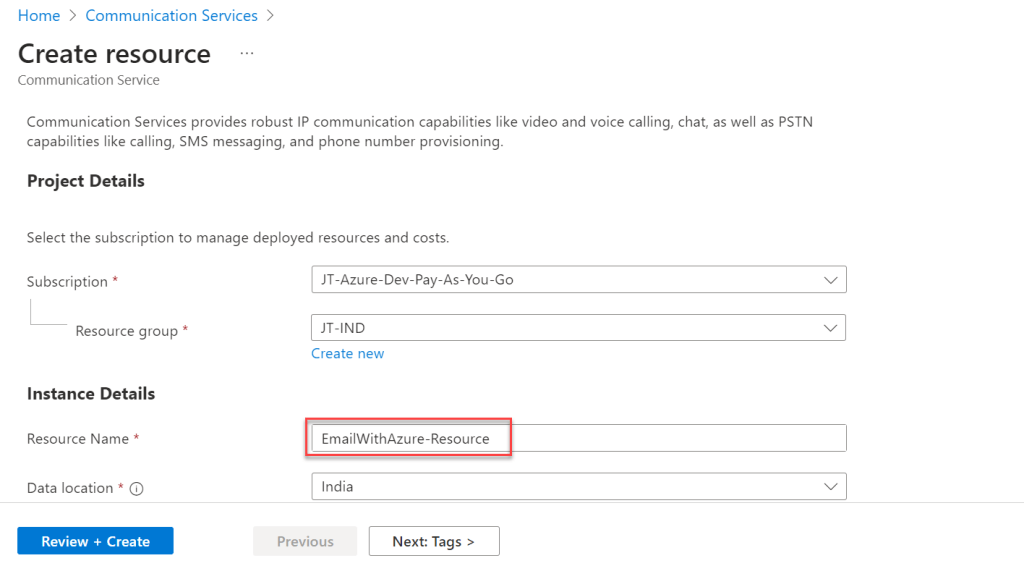
Step-3: On the following screen, we selected the Resource Group and entered the instance’s name, region, and location. Then click on create the Review + Create
Step-4: After clicking the Review and Create button we can see the deployment is progress for Email Communication Service, the configuration takes a few minutes to complete it.
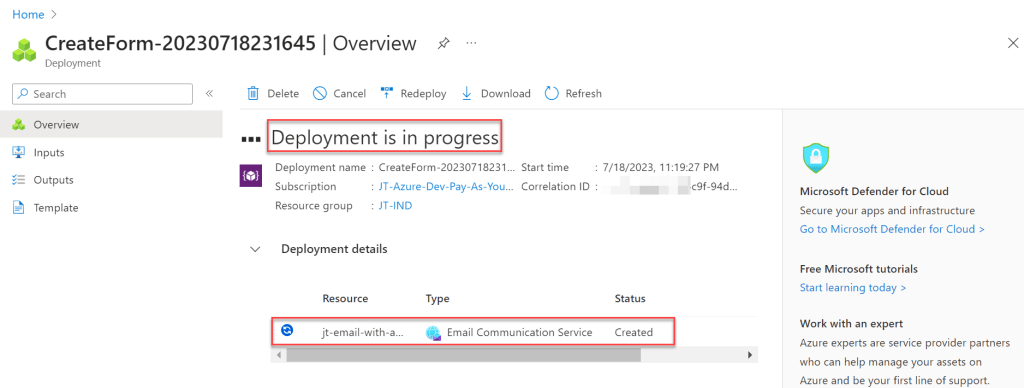
Step-5: After the deployment Go to the Resource that we have just created and click on the Provision domains, here we can see there is two option to add email domains into the Azure Subscription.
- Azure Free Subdomain:
- Setup Custom domain :
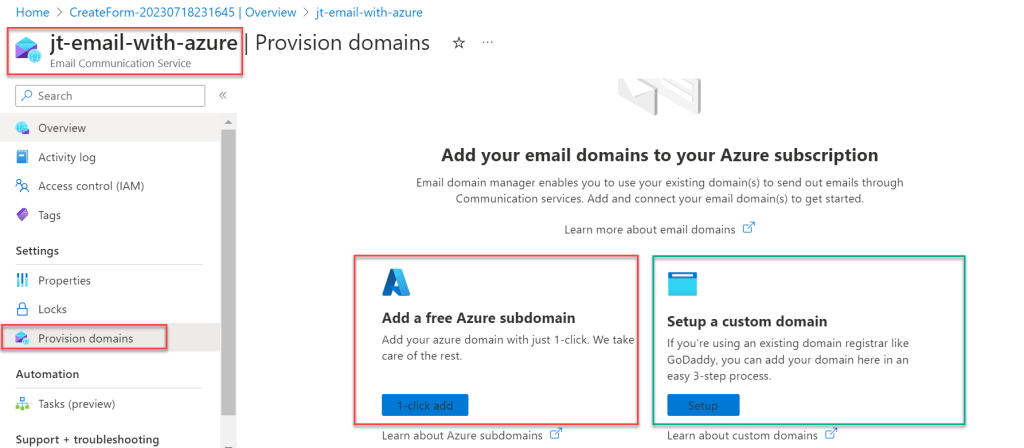
Please click the Add button to create free Azure subdomain.
Step-6: Add the subdomain
We can create two types of domain.
- Add a free Azure subdomian
- Setup a custom domain
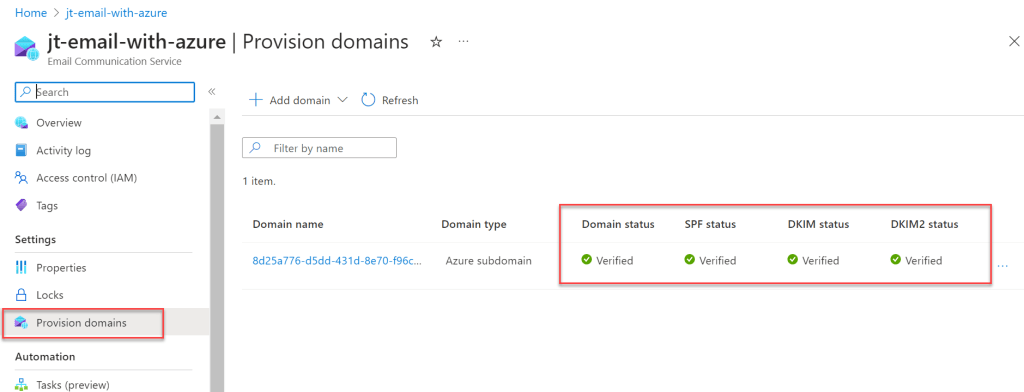
Add a free Azure subdomian
- When we select Add free Azure Subdomain, it will be deployed in minutes and all of the necessary domain information will be instantly confirmed.
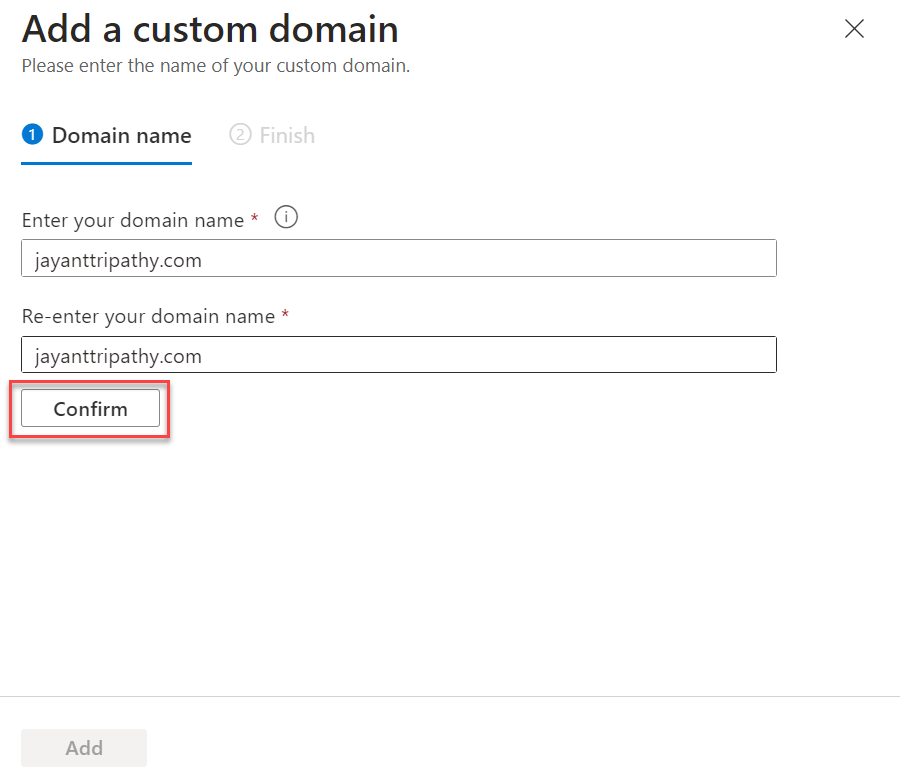
Setup a custom domain
- You can setup the custom domain according to your choice. Here on below we can add our custom domain then confirm it.
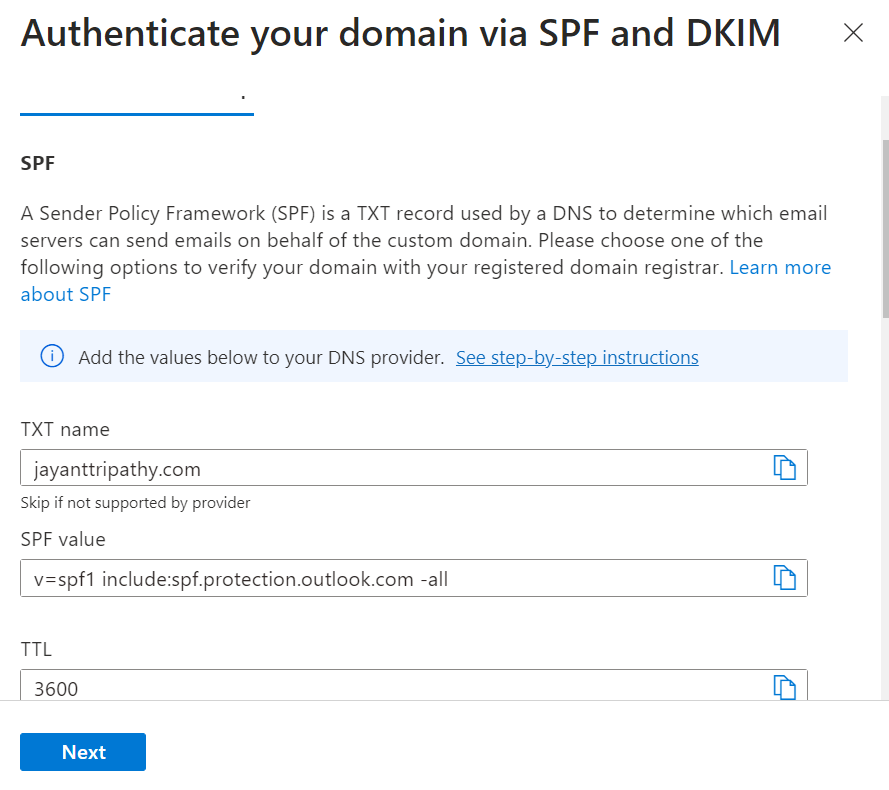
- After confirmation, the following window appears, in which we must connect the custom domain to our DNS information.
- We need to add the TXT, CNAME, SFM, and DKIM information into the DNS where the domain you purchased. Once this is done, we will need to wait some time for all of the processes to be confirmed. Only once all of the processes have been verified then is it elligible to use in Azure Email Service.
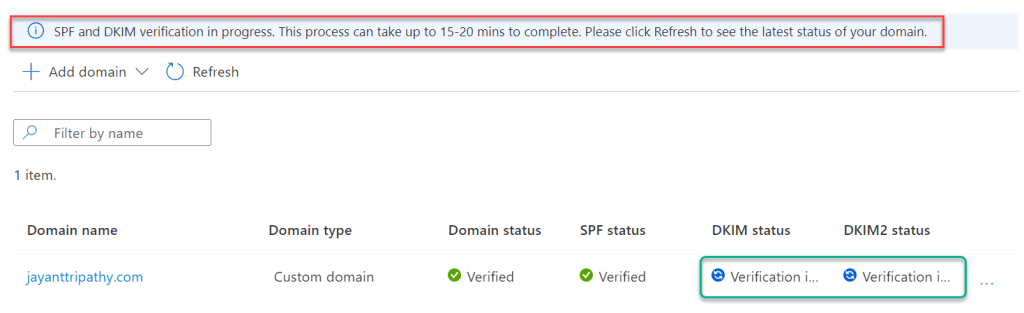
You can see the custom domian verfication is under progress, It will take sometime for verfication.
Note: In this demo I used free Azure subdomian for configurations.
- A sender address
DoNotReply@YOUR_DOMAIN>is generated by default. This can be altered by clicking on the domain name and changing the following properties: This can be found under the subdomain that you created.

Creating Azure Communication Service
To use this Email Communication Services domain, we must first set up an Azure Communication Service instance and connect it to the domain. So, let’s return to the Azure Marketplace, look for “Azure Communication Service,” and create a new instance:
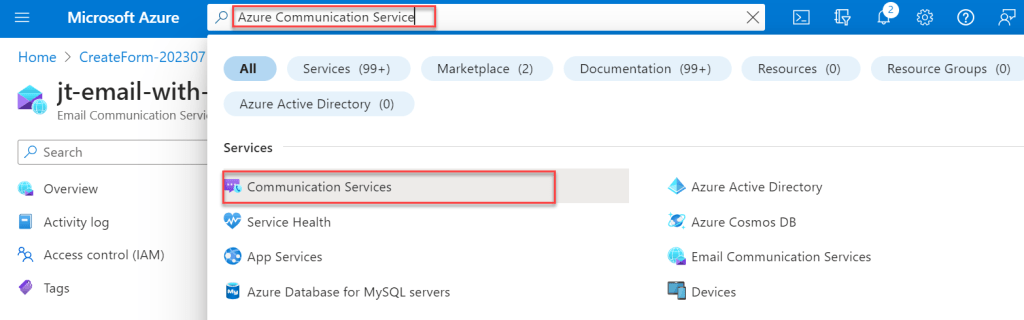
Step-1: Using below information we create the Communication Service.
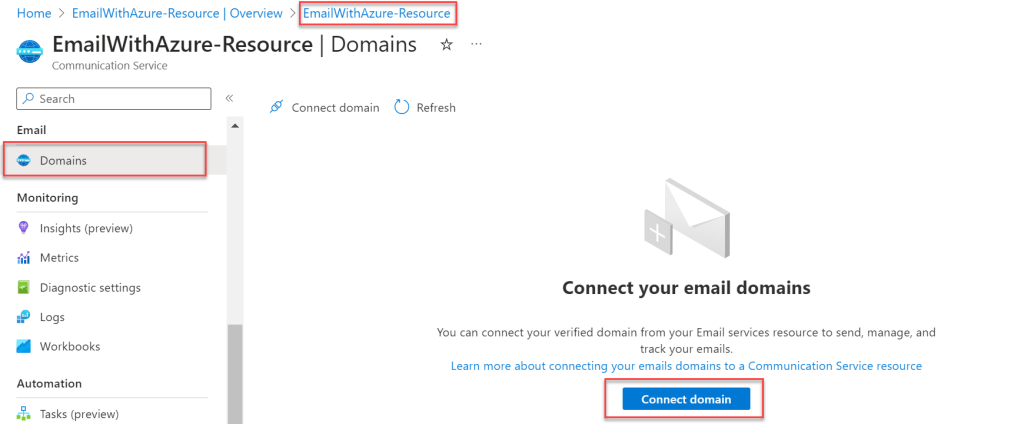
Step-2: After the service is created click on "Email" > "Domains" in the left pane and then on “Connect domain” and pick the previously created domain:
Step-3: Press ‘Connect domain’ and filter results by selecting a subscription, resource group, email service, and the verified domain you wish to connect.
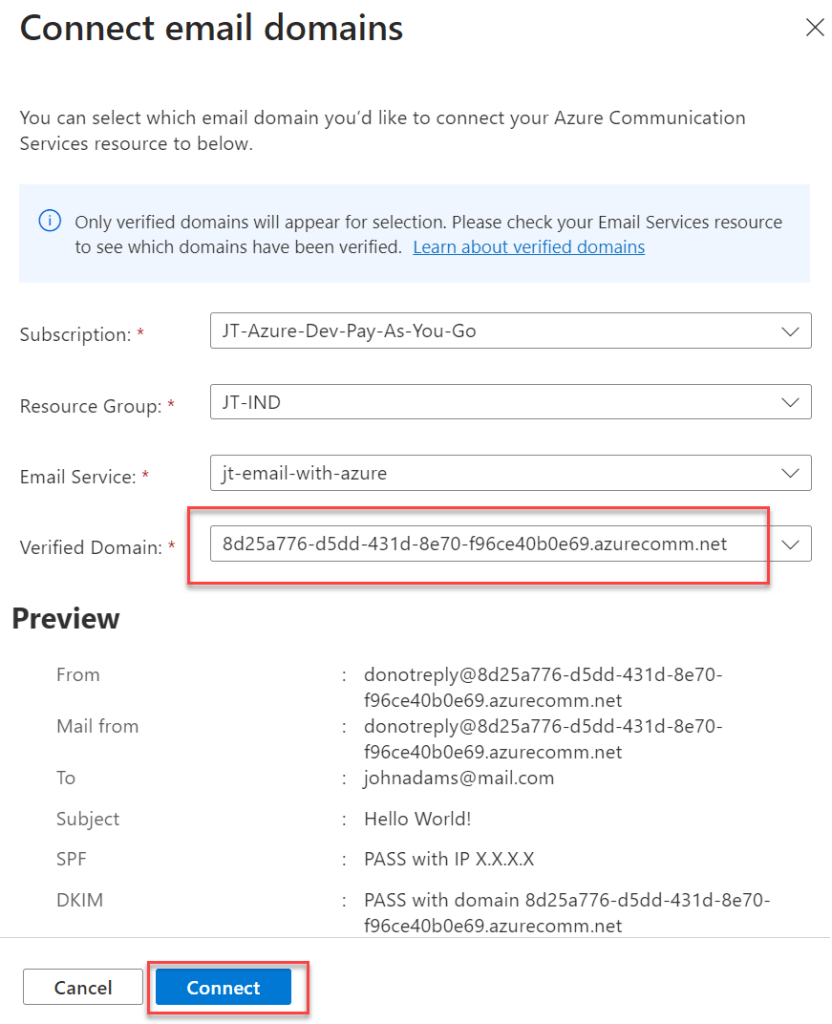
On the below screen we can see the domain is connected to Email Communication Services.

That’s it the configuration. Let us Create an ASP.Net Core API application and add the Azure Email Configuration Service to it.
Create an ASP.Net Core API Application
Using below steps we can create ASP.Net Core API applicattion.
- Launch the Visual Studio IDE and click on “Create new project”.
- In the “Create new project” window, select “
ASP.Net Core Web API Project” from the list of templates displayed. - Click Next. In the “Configure your new project” window, specify the name and location for the new project and then click Create.
- In the “ASP.Net Core Web API Project” window shown next, select .NET Core as the runtime and
.NET 7.0from the drop-down list at the top. Select “API” as the project template to create a new ASP.NET Core API application. - Ensure that the check boxes “Enable Docker Support” is disabled s we won’t be using the default feature we will add it manually later and “Configure for HTTPS” are checked.
- Make Authentication type as “None” as we are not using any authentication mode here.
- You can check the Open API support if you want to use Swagger
Sending Email using Azure Email Configuration Services in .NET
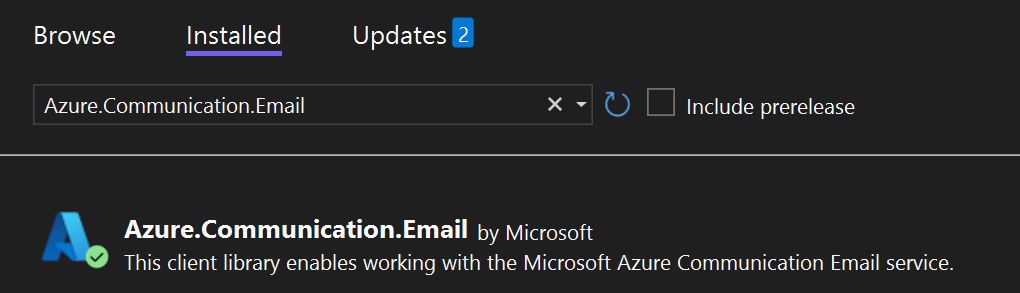
Step-1: Install the below Azure Package to use Azure Communication Email Service.
Step-2: Creating a Model with below properties.
 public class MailRequest
    {
        public string? ToEmail { get; set; }
        public string? Subject { get; set; }
        public string? Body { get; set; }
    }
Step-3: Create an Email Interface and class that able to send Email using Azure Email Configuration Service.
 public interface IMailService
  {
        Task SendEmailAsync(MailRequest mailRequest);
  }
public class MailService : IMailService
    {
        public async Task SendEmailAsync(MailRequest mailRequest)
        {
            // Copy the connection String Endpoint here
            var client = new EmailClient("####");

            // Fill the EmailMessage

            // Add the Mailfrom Address
            var sender = "#####";
            var subject = mailRequest.Subject;

            var emailContent = new EmailContent(subject)
            {
                PlainText = mailRequest.Body
            };

            var toRecipients = new List<EmailAddress>()
            {
                new EmailAddress(mailRequest.ToEmail)
            };

            var emailRecipients = new EmailRecipients(toRecipients);

            var emailMessage = new EmailMessage(sender, emailRecipients, emailContent);

            //await client.SendAsync(emailMessage);

            await client.SendAsync(WaitUntil.Completed, emailMessage);
            Console.WriteLine($"Email Sent. Status = {emailMessage}");
        }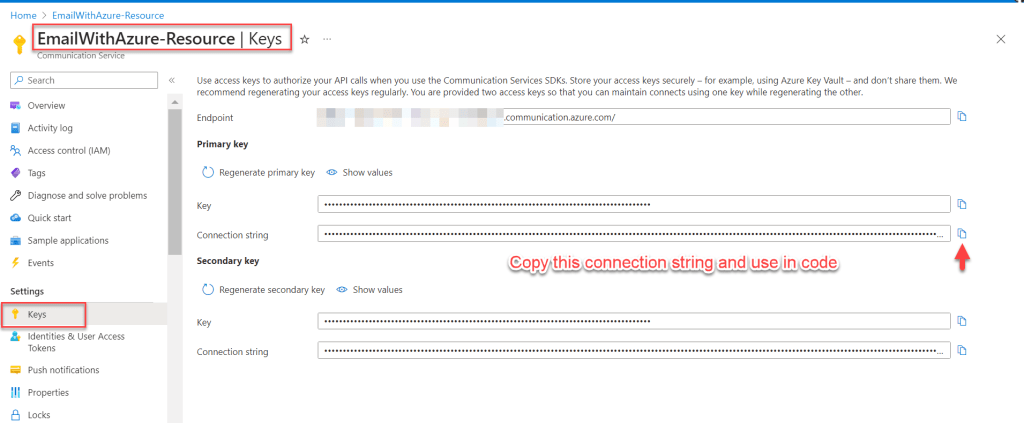
}- Line #34 is used to send the email, here we used
waitunitl.completedthis is basically used for the universal weapon if you want to wait on something. It expects a condition and waits until that condition is fulfilled with a truthy value to be returned. - To get the connection string follow the below image. Authenticate with the connection string that you’ll find in the communication service resource in the Azure portal. It’s located in the tab ‘Keys’
- To get the From email address follow this iamge and copy entire string and add into the string of Line #15

Step-4: Register the Interface for DI in Program.cs file like below.
builder.Services.AddTransient<IMailService, MailService>Step-5: Add the Controller named as EmailsController and we create the POST method to send an email
[Route("api/[controller]")]
[ApiController]
public class EmailsController : ControllerBase
{
private readonly IMailService _mailService;
public EmailsController(IMailService mailService)
{
this._mailService = mailService;
}
[HttpPost]
public async Task<IActionResult> SendMail(MailRequest request)
{
await _mailService.SendEmailAsync(request);
return Ok("Email Sent Successfully !");
}
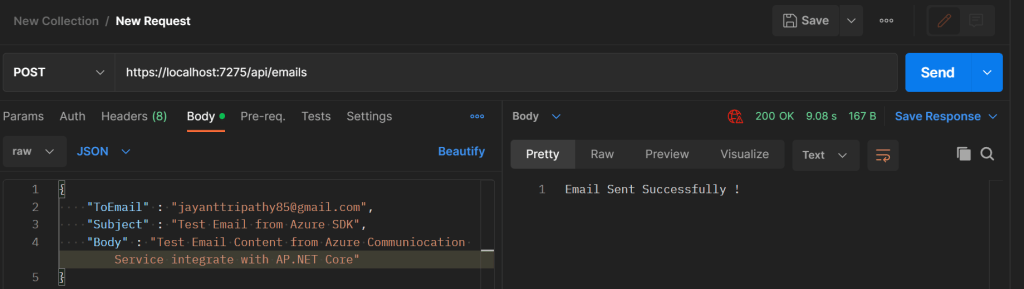
}That’s it the changes, let’s open the POSTMAN and test our Email Controller. We can pass the receipent email along with mail body and Subject like below. We can the POST method work successfully.
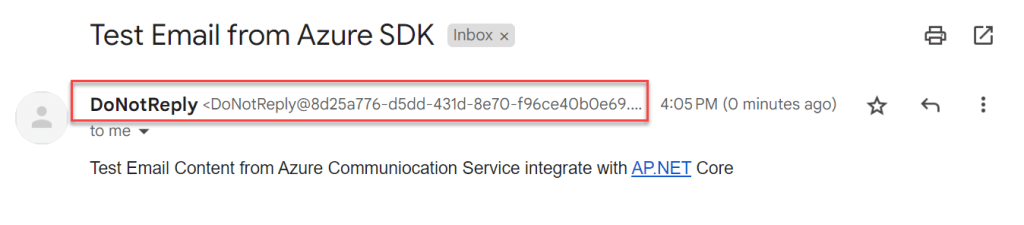
Let’s flip to Email Inbox and we can see the mail that we are tested using Postman.
This concludes the post; I hope it helped you understand the process of How to Send Emails from ASP.Net Core using Azure.
Please find source code here in this link.
Conclusion
In this article we discussed about How to Send Emails from ASP.NET Core using Azure. Azure provides a dedicated service for securely sending emails at scale. This tutorial will walk you through the entire process of setting this up in.NET.
Leave behind your valuable queries and suggestions in the comment section below. Also, if you think this article helps you, do not forget to share this with your developer community. Happy Coding 🙂
Related Articles
- Building an AI Knowledge Base Search with Azure AI Foundry: Step-by-Step Guide
- How to Secure React.js application with Azure AD Authentication Using MSAL Library
- 🔐 Securing .NET Core Web Apps with Azure AD/Intra and MSAL
- Step-by-Step Guide to Using Azure Redis Cache in ASP.NET Core 9 Web API
- 🤖 Build a Full-Stack AI App with React, Node.js & Azure OpenAI
- Effortless React Deployment 🚀: CI/CD with GitHub Actions & Azure Static Web Apps
- Deploying Angular apps in Azure Blob Storage with CI/CD Integration 🚀
- How to Build a serverless CRUD app with Azure function and Cosmos DB
- How to resolve Function App Cannot Create within Azure Portal
- .NET 8 Authentication with Identity in a Web API using Bearer Tokens and Cookies
SUPPORT ME